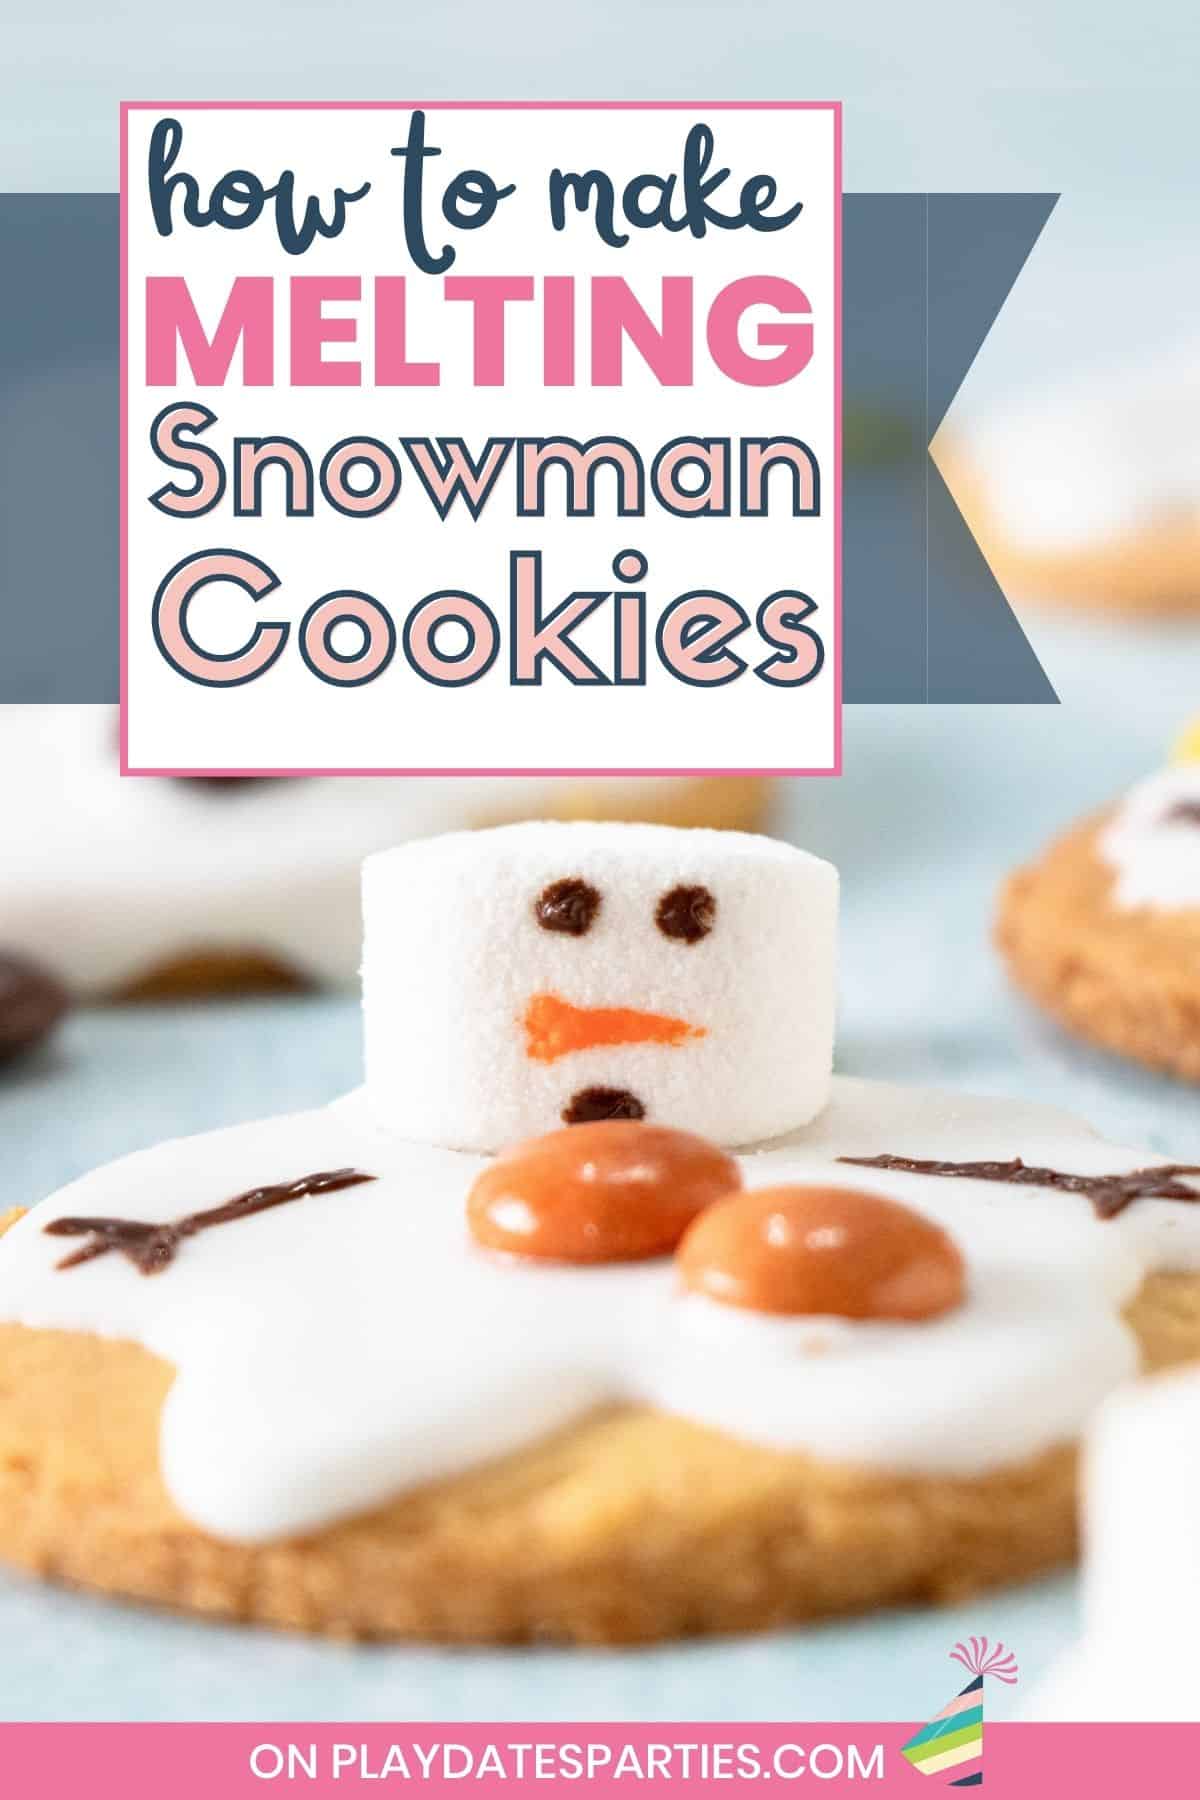
It’s officially cold outside. And cold weather is a lot less fun when there’s no snow on the ground. One awesome way to feel better about being stuck indoors is by baking a batch of these adorable melting snowman cookies! They’ll bring warmth and joy to your home…even when there are no flurries in sight.
Make a batch of these cute cookies for your holiday parties, for the office cookie tray, for winter birthday parties, or just because. Best of all, everyone will think you spent hours in the kitchen baking…even though these cookies easy enough for anyone to make.
Why we love Melting Snowman Cookies
- The colorful M&M buttons and marshmallow faces look extra festive on your party display
- You’ll look like a master baker, even though they’re simple enough for a novice.
- You can switch out the sugar cookie base for your favorite cookie recipe – maybe chocolate chip cookies, double chocolate chip cookies, gingersnaps, or shortbread cookies.
What You’ll Need:
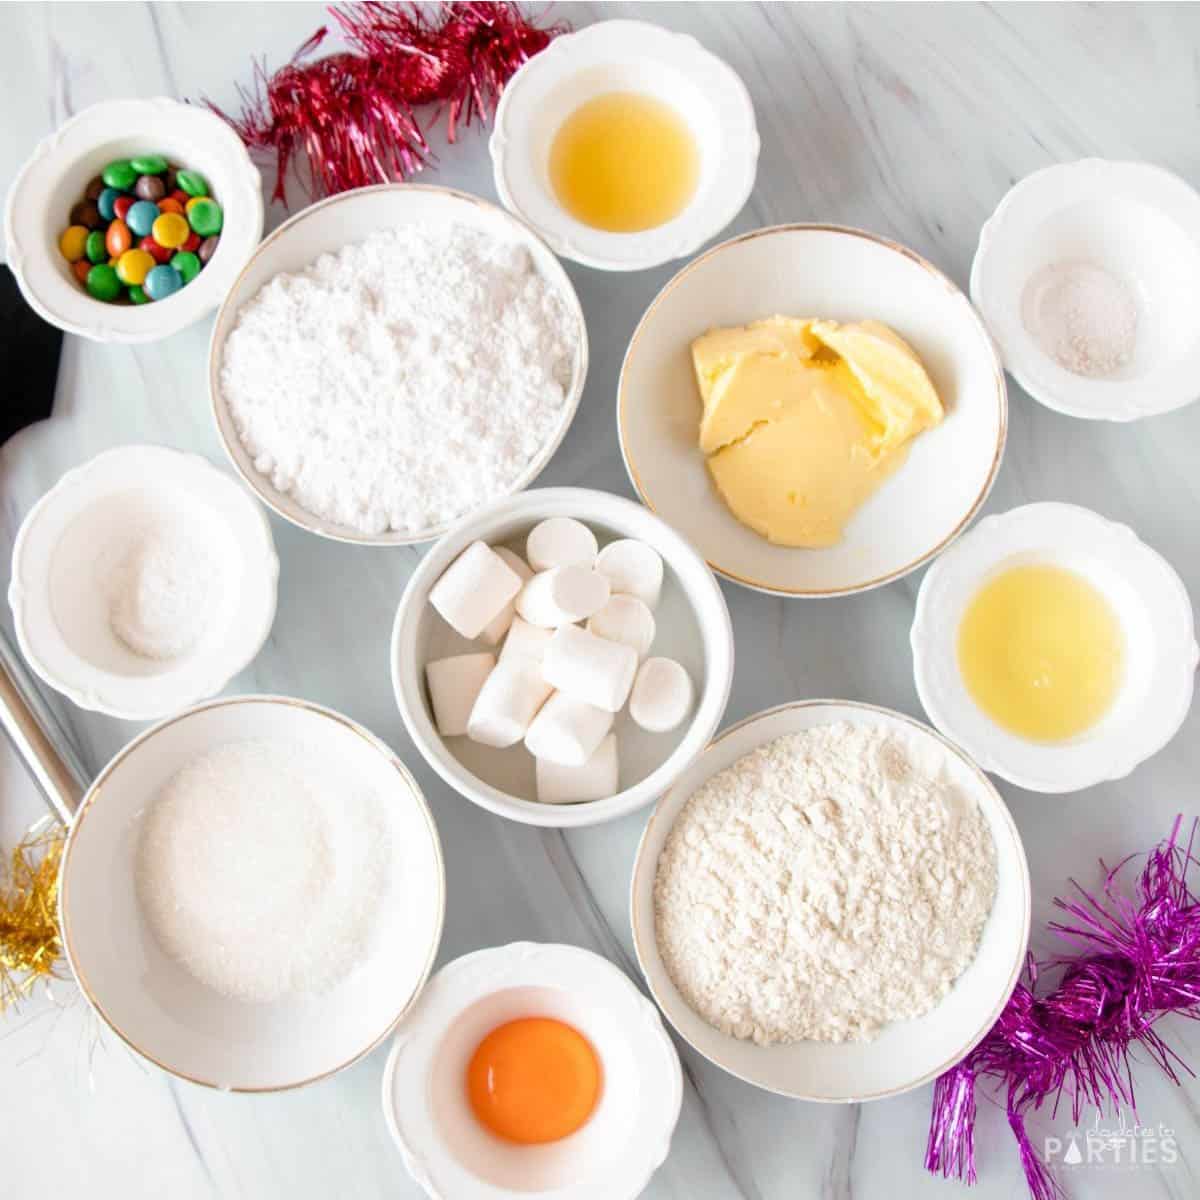
Ingredients:
Cookies:
- All purpose flour
- Baking powder
- Ground cloves
- Salt
- Butter, softened to room temperature and cubed
- Granulated sugar
- Egg
- Vanilla extract
- Almond extract (optional)
Icing:
- Powdered sugar
- Milk
- Light corn syrup
- Almond extract (optional)
Decorations:
- Marshmallows
- Orange Food coloring
- Semi-sweet chocolate chips
Supplies:
- 2-3 large mixing bowls
- Measuring cups and spoons
- Electric mixer or stand mixer
- Parchment paper
- Rolling pin
- Cookie sheet
- Round cookie cutters or wide mouth cup
- Kitchen scissors
- Clean, food-safe paintbrush
- 1 Small, microwave-safe bowl
- Piping bag and small round piping tip
- Spoon or small offset spatula
How to Make Melting Snowman Cookies:
To make things easy for you, I created a simple photo guide below. For all measurements and a more detailed guide, check out the recipe card at the bottom of this page.
Step 1 – Prepare Your Cookie Dough

For this recipe, I used my favorite cut out sugar cookie recipe. The ingredients and process are included in the recipe card below, but you may want to check the post for all my best cut out sugar cookie dough tips and tricks.
You could also just as easily use a different cookie base, or even store bought cookie dough. (I promise I won’t tell.)
Step 2 – Roll, Cut, and Bake the Cookie Dough
When the dough is ready, roll it out about 1/4 inch thick and chill for at least two hours. Then use a round cookie cutter or the opening of a wide cup to cut circles out of the chilled dough.
(For reference, I used a cookie cutter that is 3.2 inches wide. )
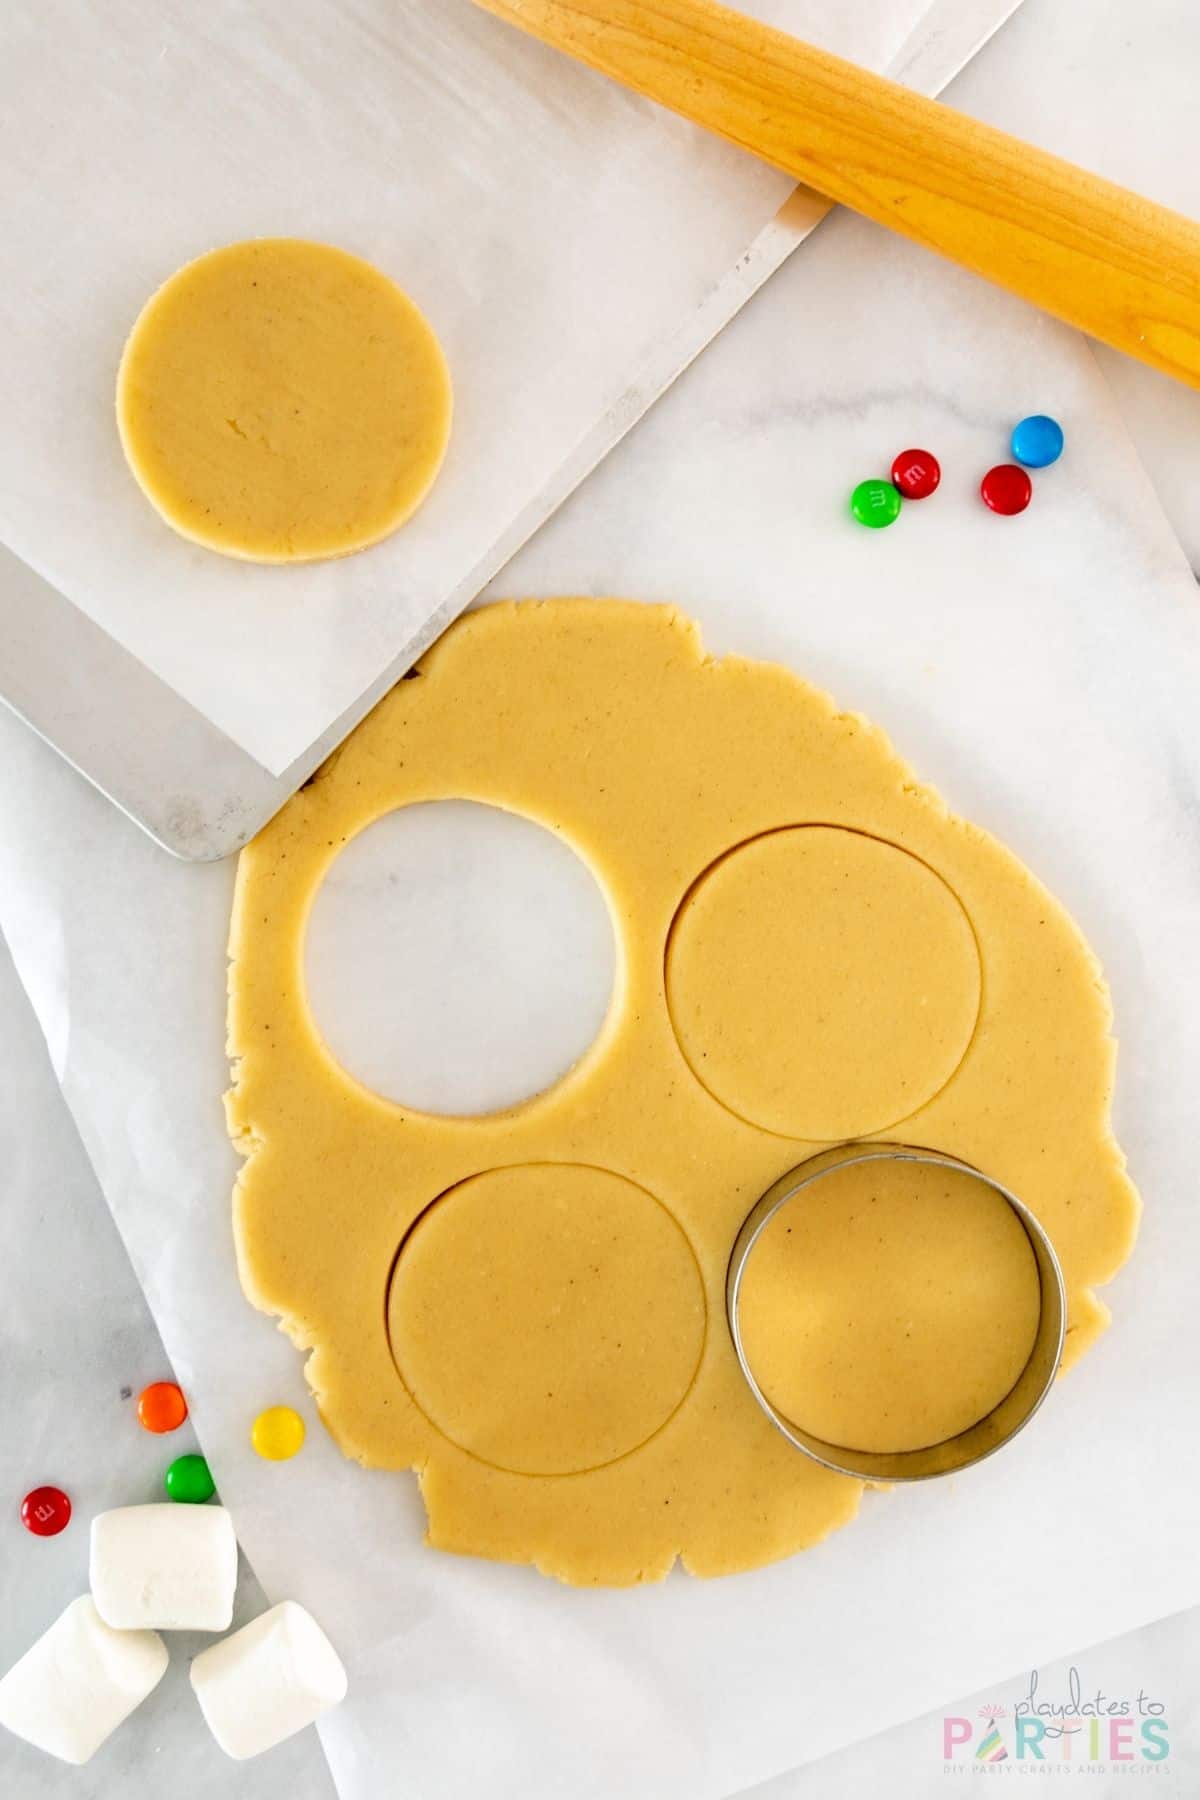
Bake your cookie circles for 8 to 12 minutes, or until the edges are just starting to turn golden brown.
Remove the cookies from the oven and allow to cool on the pan for 5 minutes. Then remove to a rack to cool completely.
Step 3- Make the Marshmallow Faces
Cut your marshmallows in half so you end up with two small marshmallow rounds.
How to Add the Snowman Nose to the Marshmallow:
Some people like to use orange sprinkles, which looks really cute. But, honestly, they’re not always easy to find, and who likes buying a whole $3 pack of sprinkles just to use 12?
So I had an idea…What about painting the nose on with food coloring?
Most of us have food coloring in our pantries, and a cheap, clean paintbrush is easy to find. It’s also not too difficult to paint an orange triangle.
What do you think?
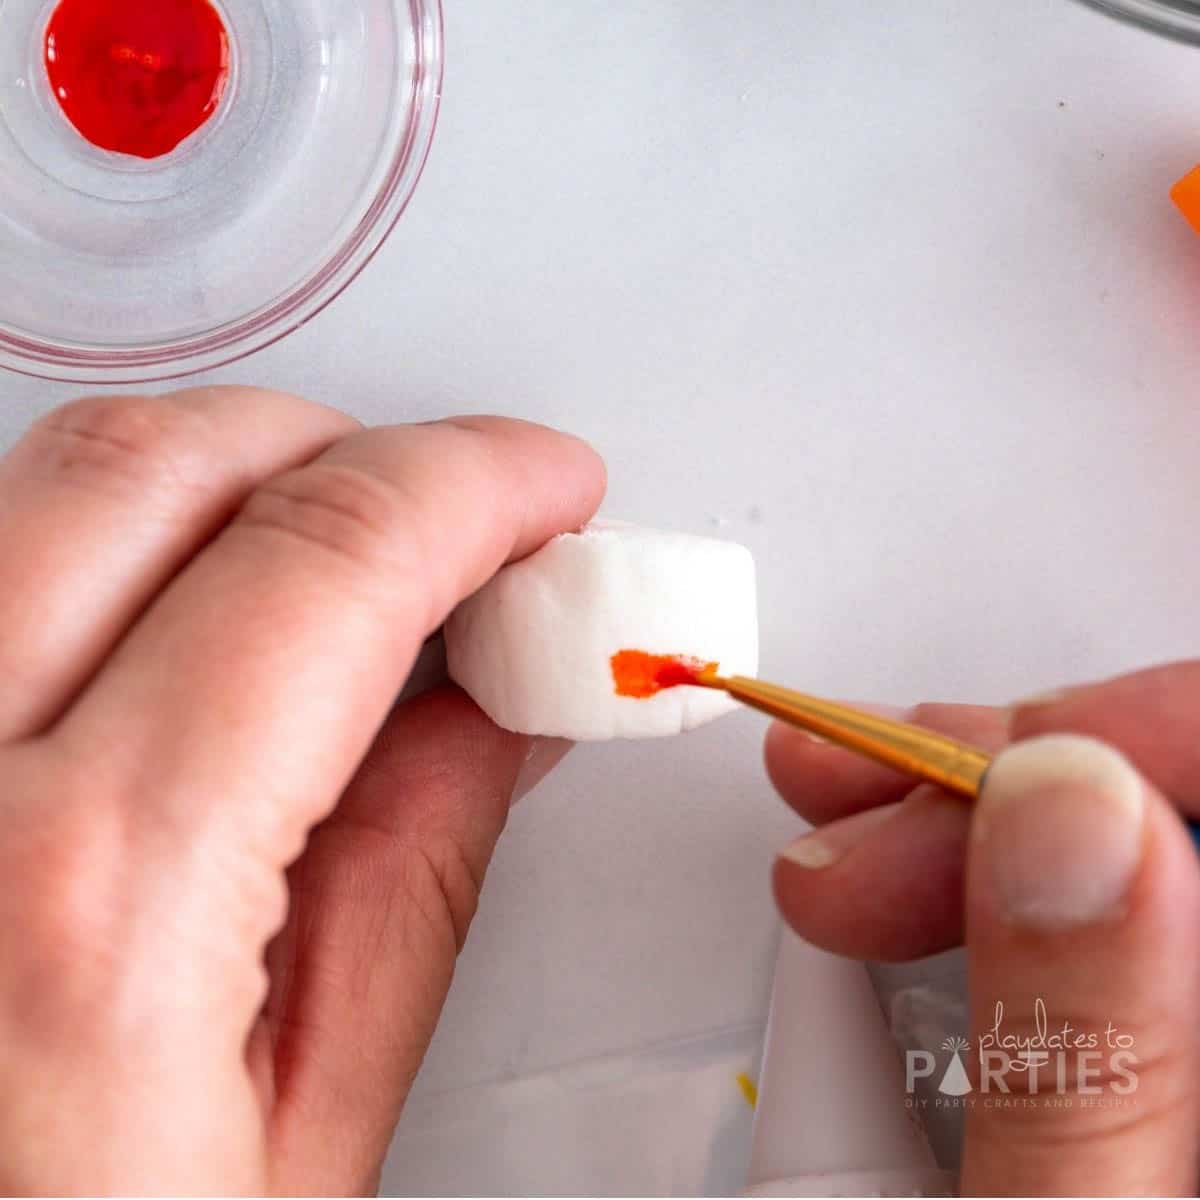
Make sure you paint the nose so the sticky side of the marshmallow will be against the cookie.
If you don’t want to bother with painting, you can also use an edible Food Writer.
For the Snowman Eyes
Heat 1/4 cup semi-sweet chocolate chips in the microwave until just melted. Add the melted chocolate chips to a piping bag fitted with a small round piping tip.
Pipe two small dots above the carrot nose to create eyes, and one slightly larger dot below the nose for the mouth.
Repeat for your remaining marshmallows
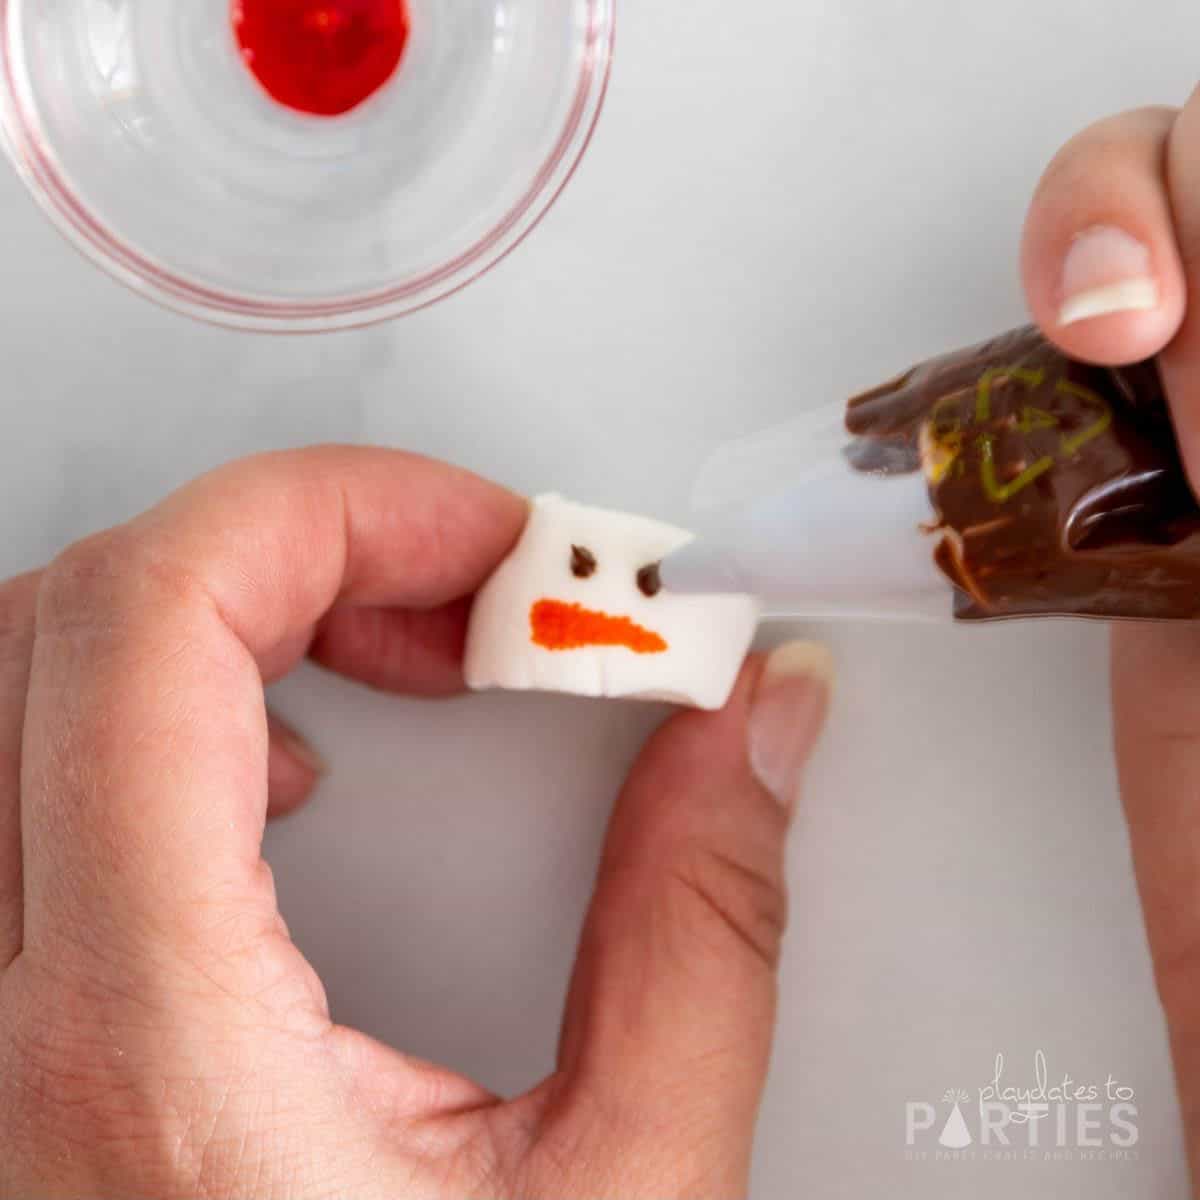
Tip: You may want to wait to start the chocolate until after you have iced your cookies so the chocolate doesn’t harden.
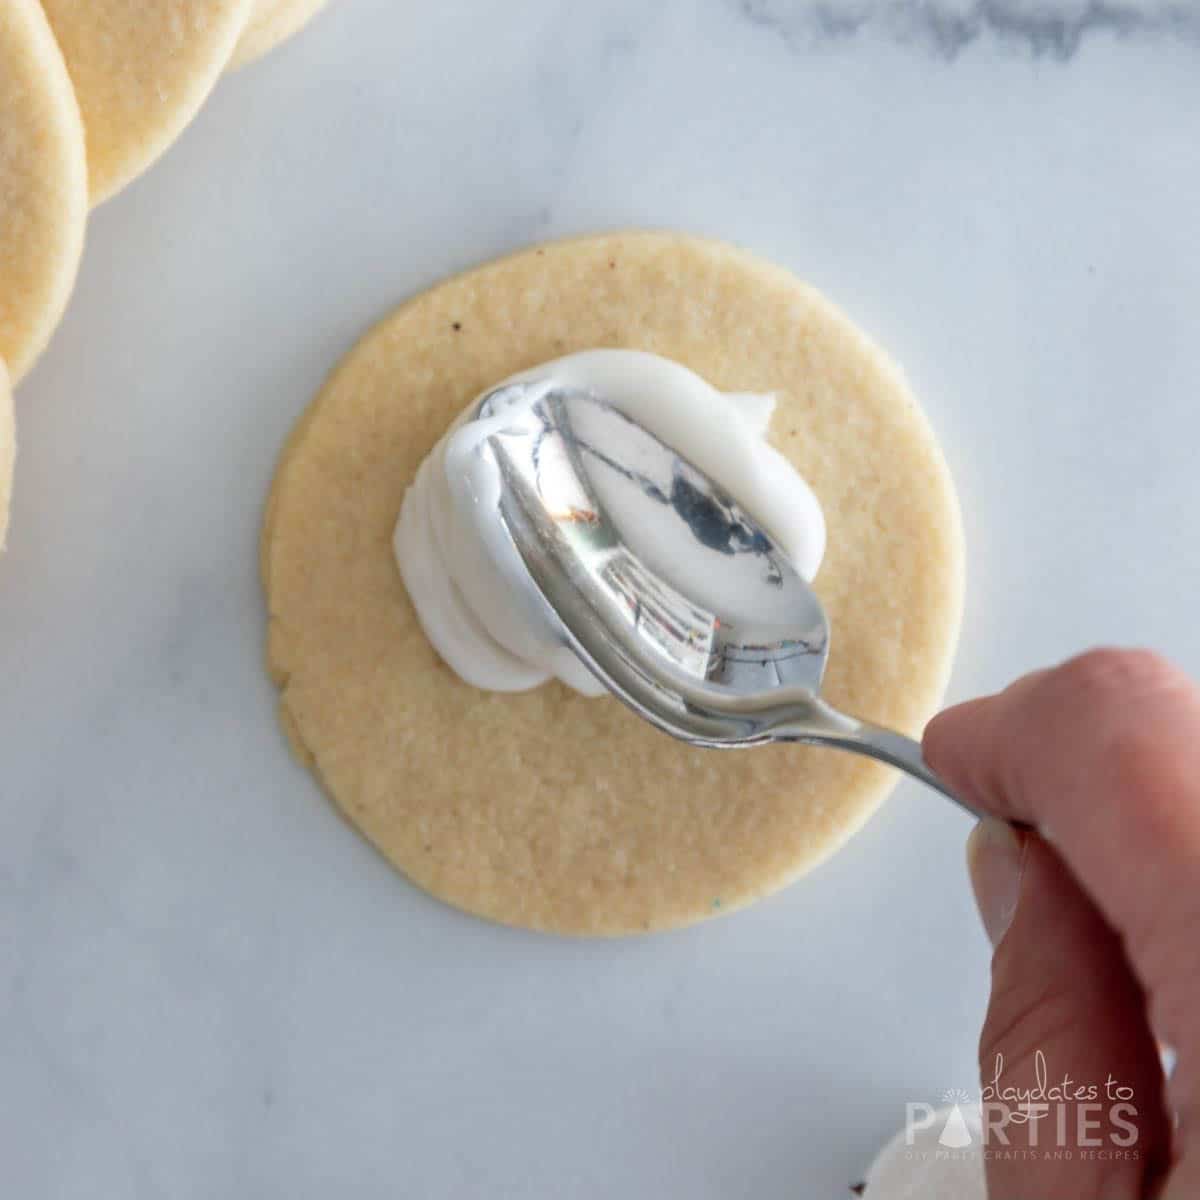
Step 4 – Add the ‘melted snow’ icing to your cookies.
I love that you don’t have to worry about being precise with your icing for these cookies. In fact, it looks better when they’re a bit messy and uneven.
We used this easy sugar cookie icing to create our ‘melted snow’ base for our cookies. It was the perfect topping that dries solid with a glossy sheen…just like melting snow!
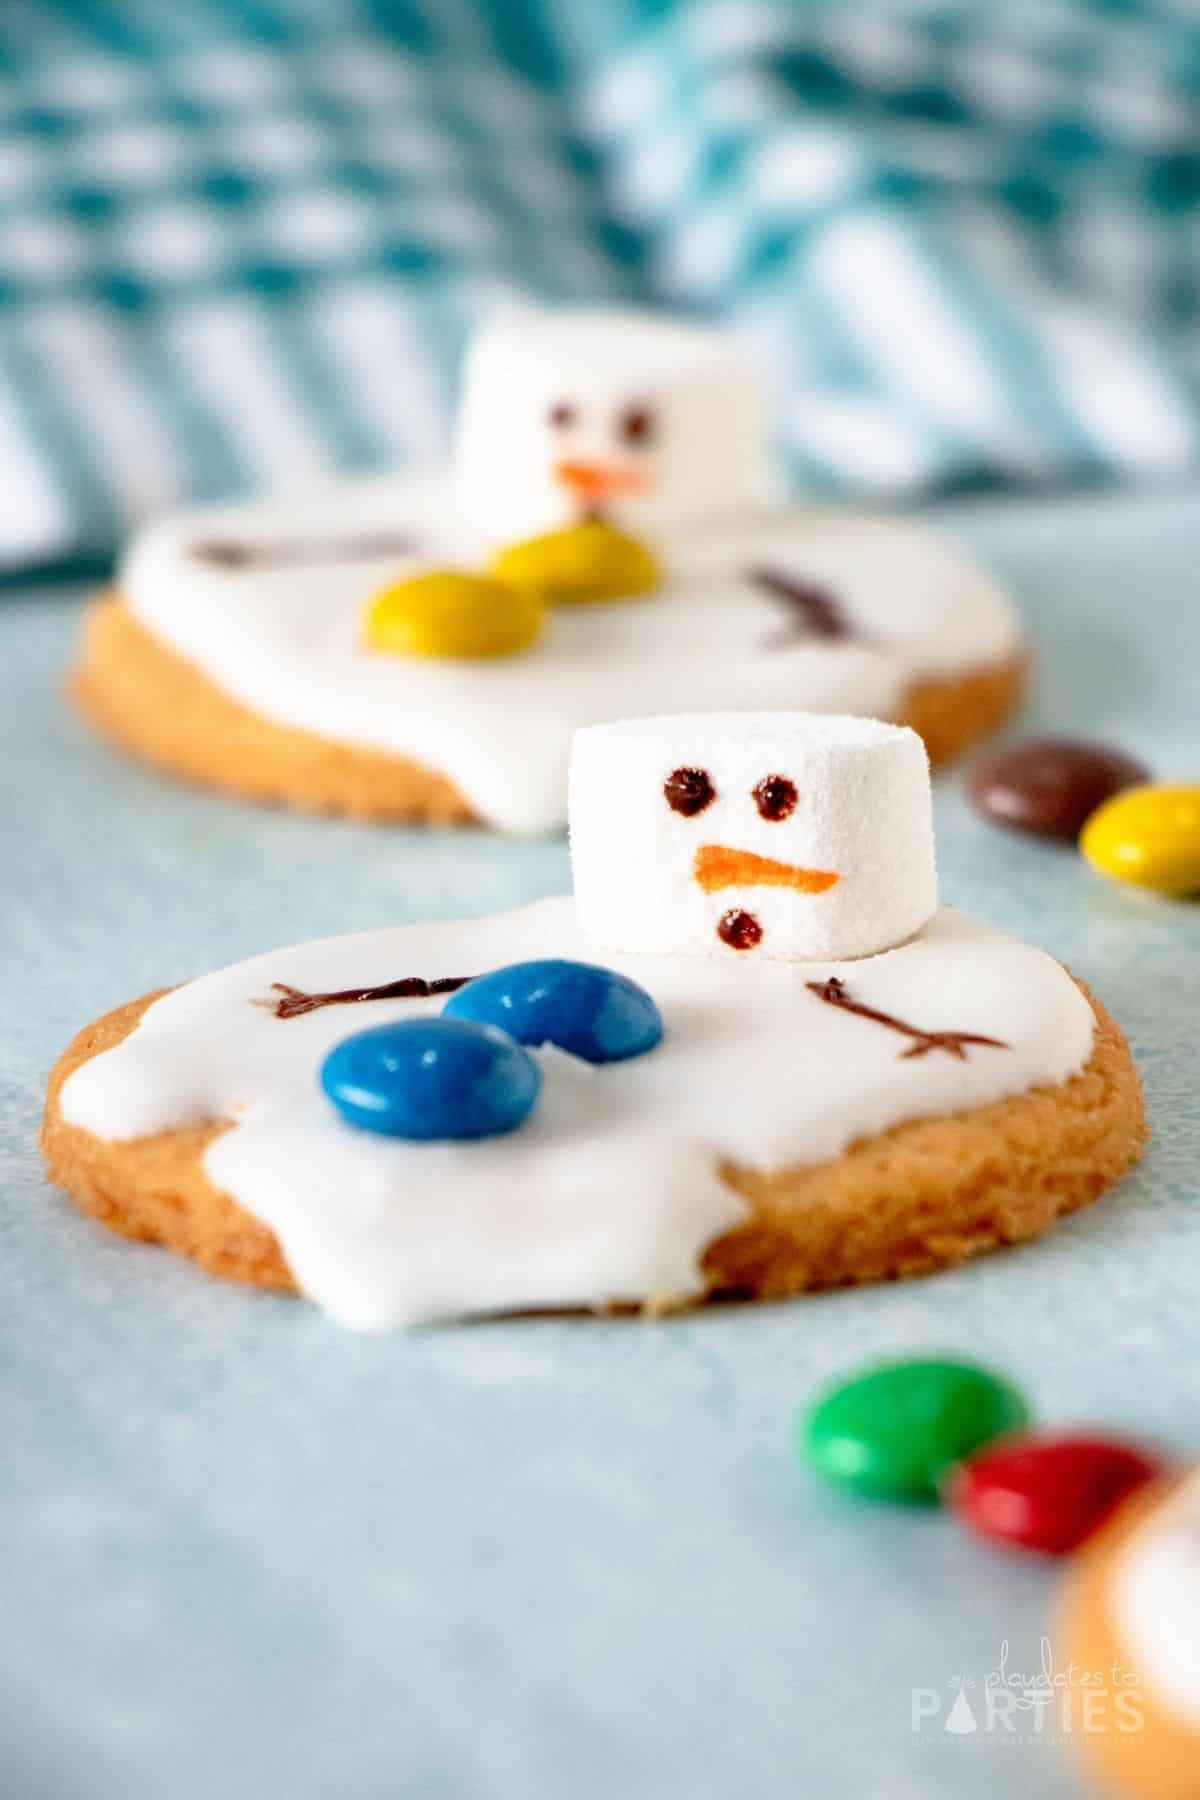
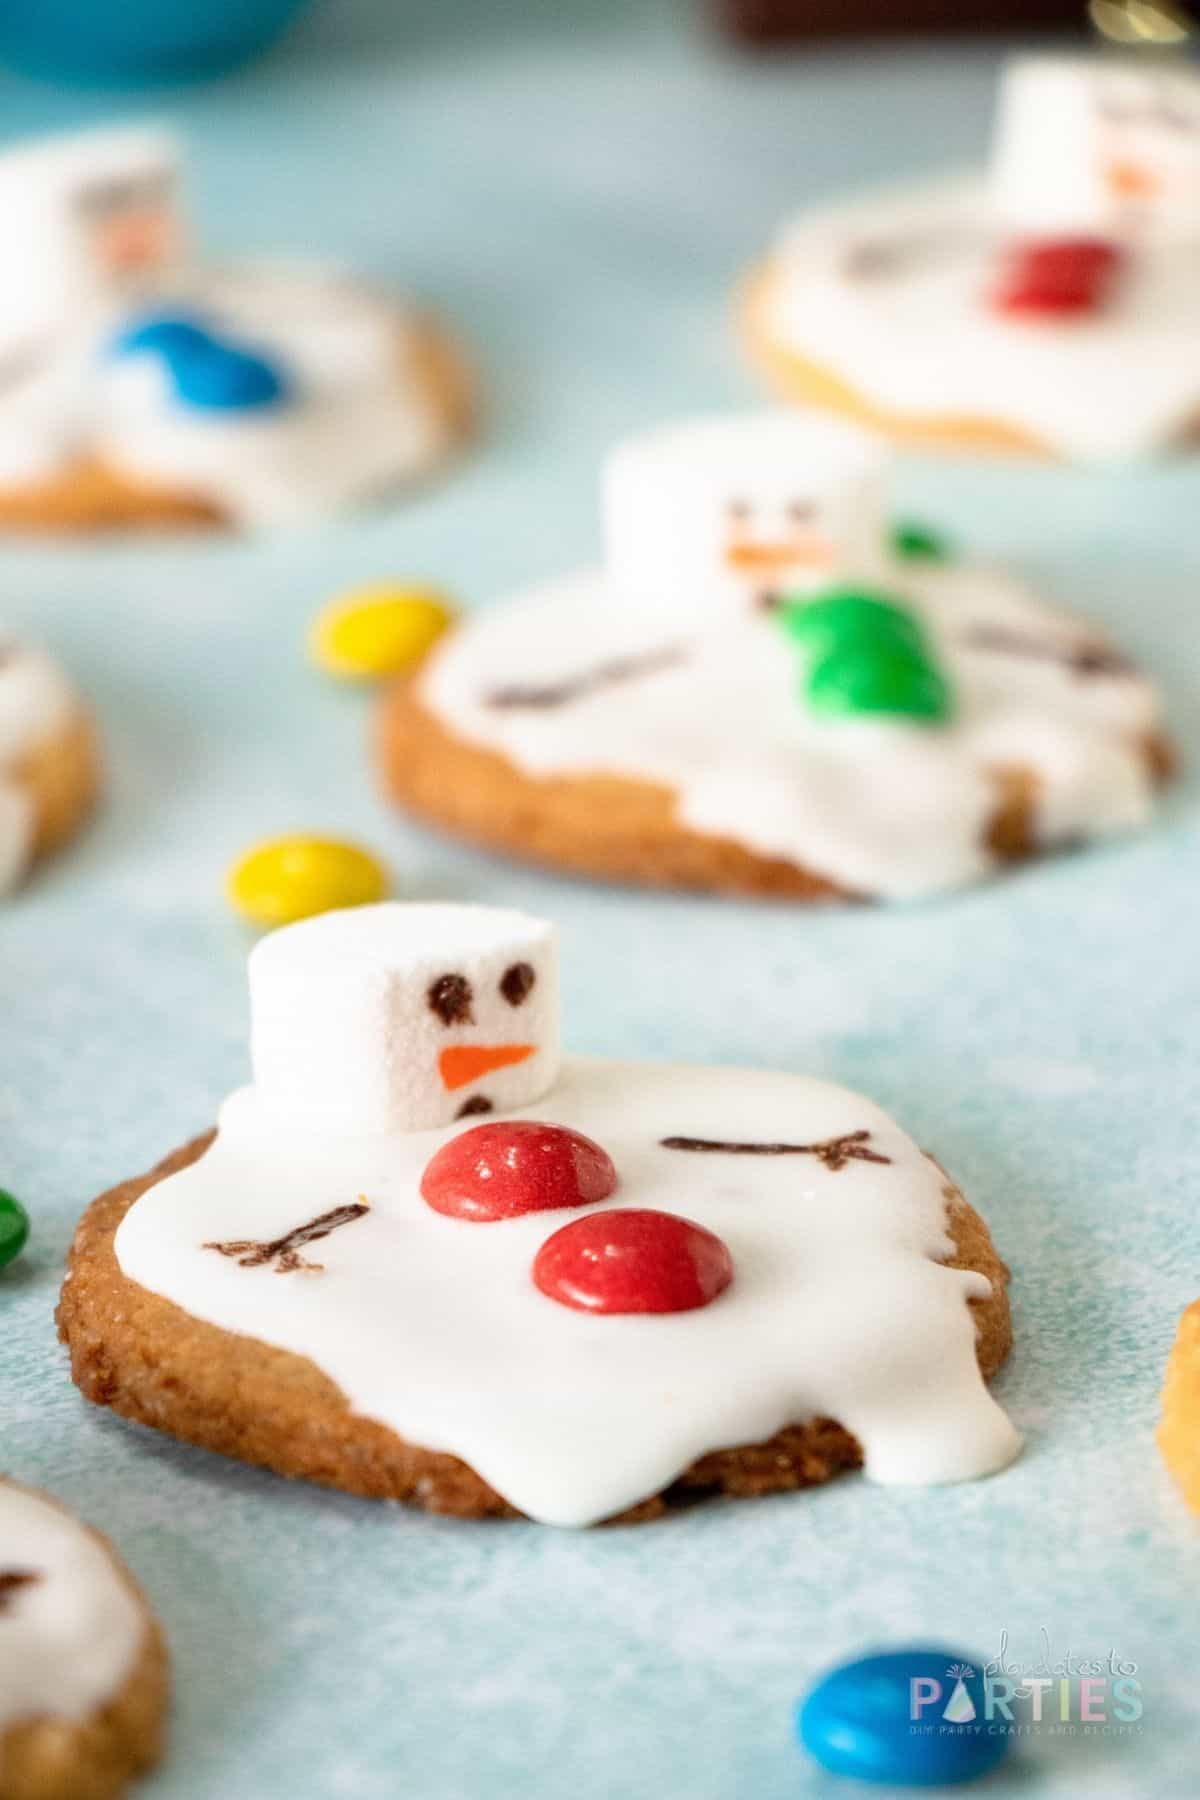
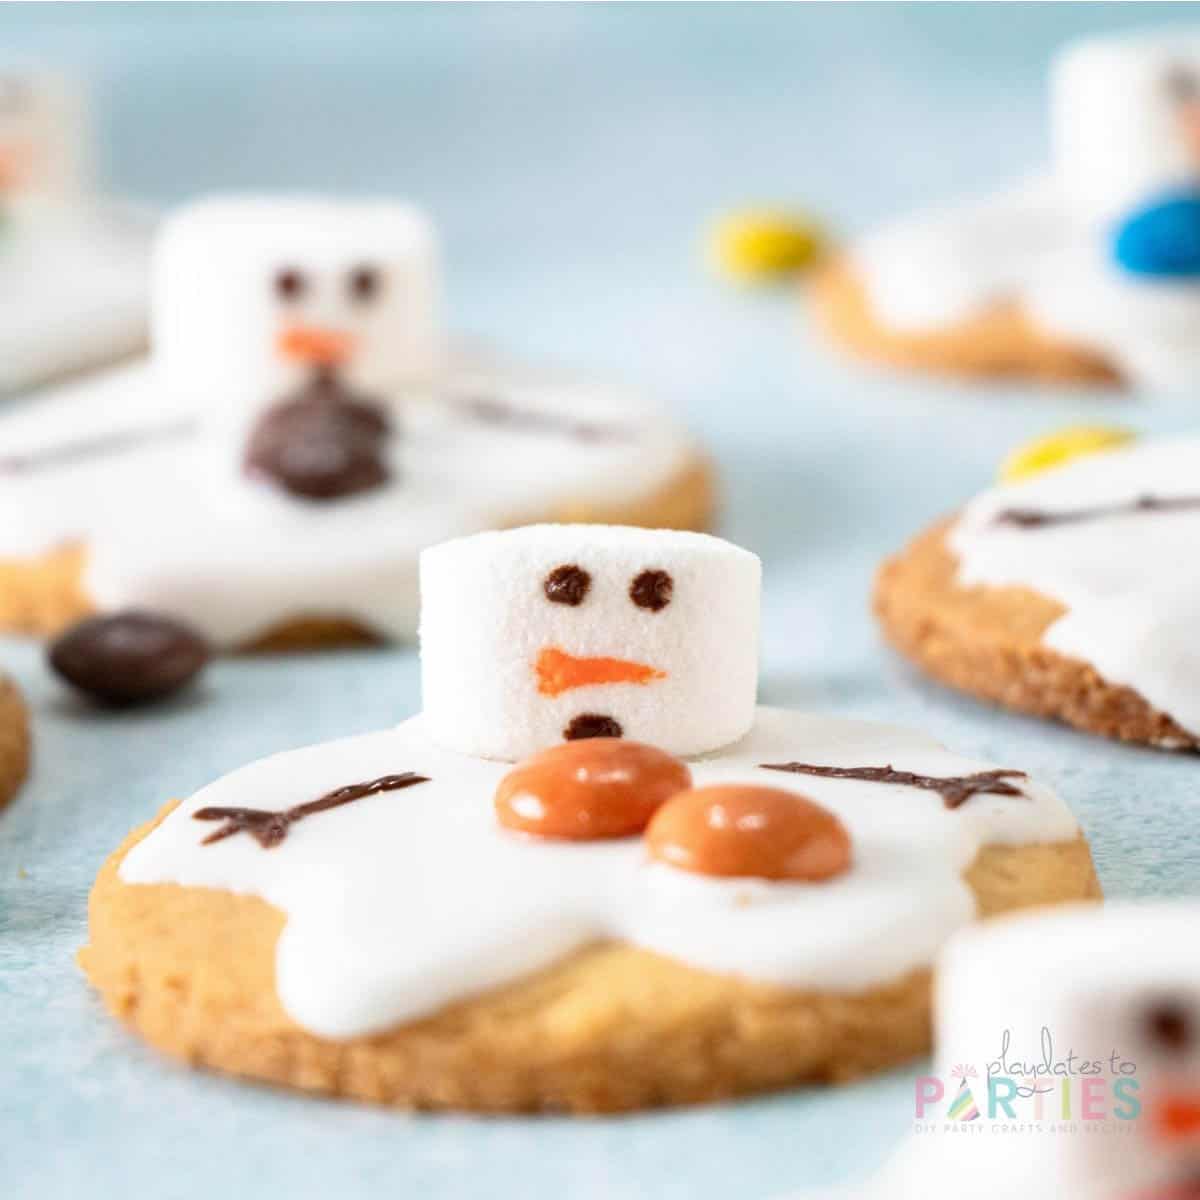
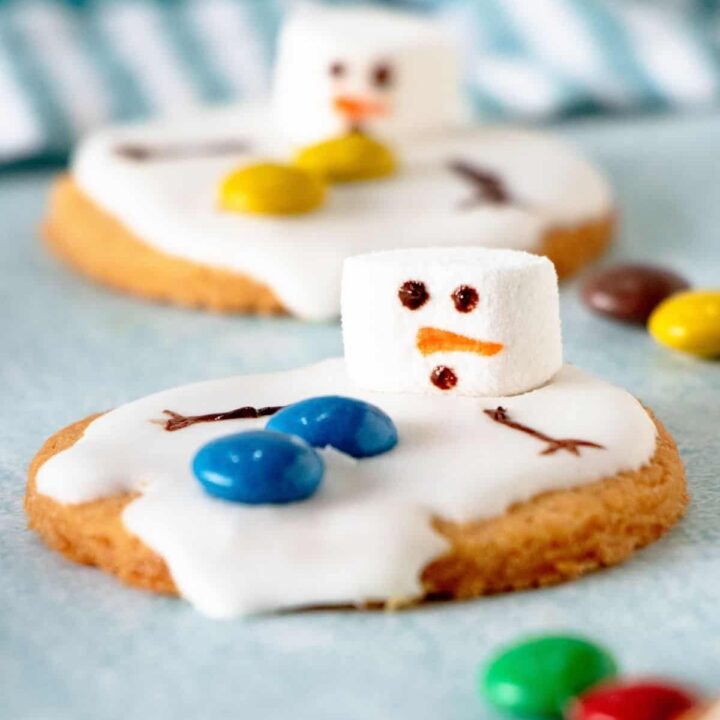
Step 5 – Build Your Snowman!
Place the prepared marshmallow face on your cookie. Make sure to place it off center so you have plenty of room for the other snowman parts.
Add two M&Ms to the icing right in front of the face.
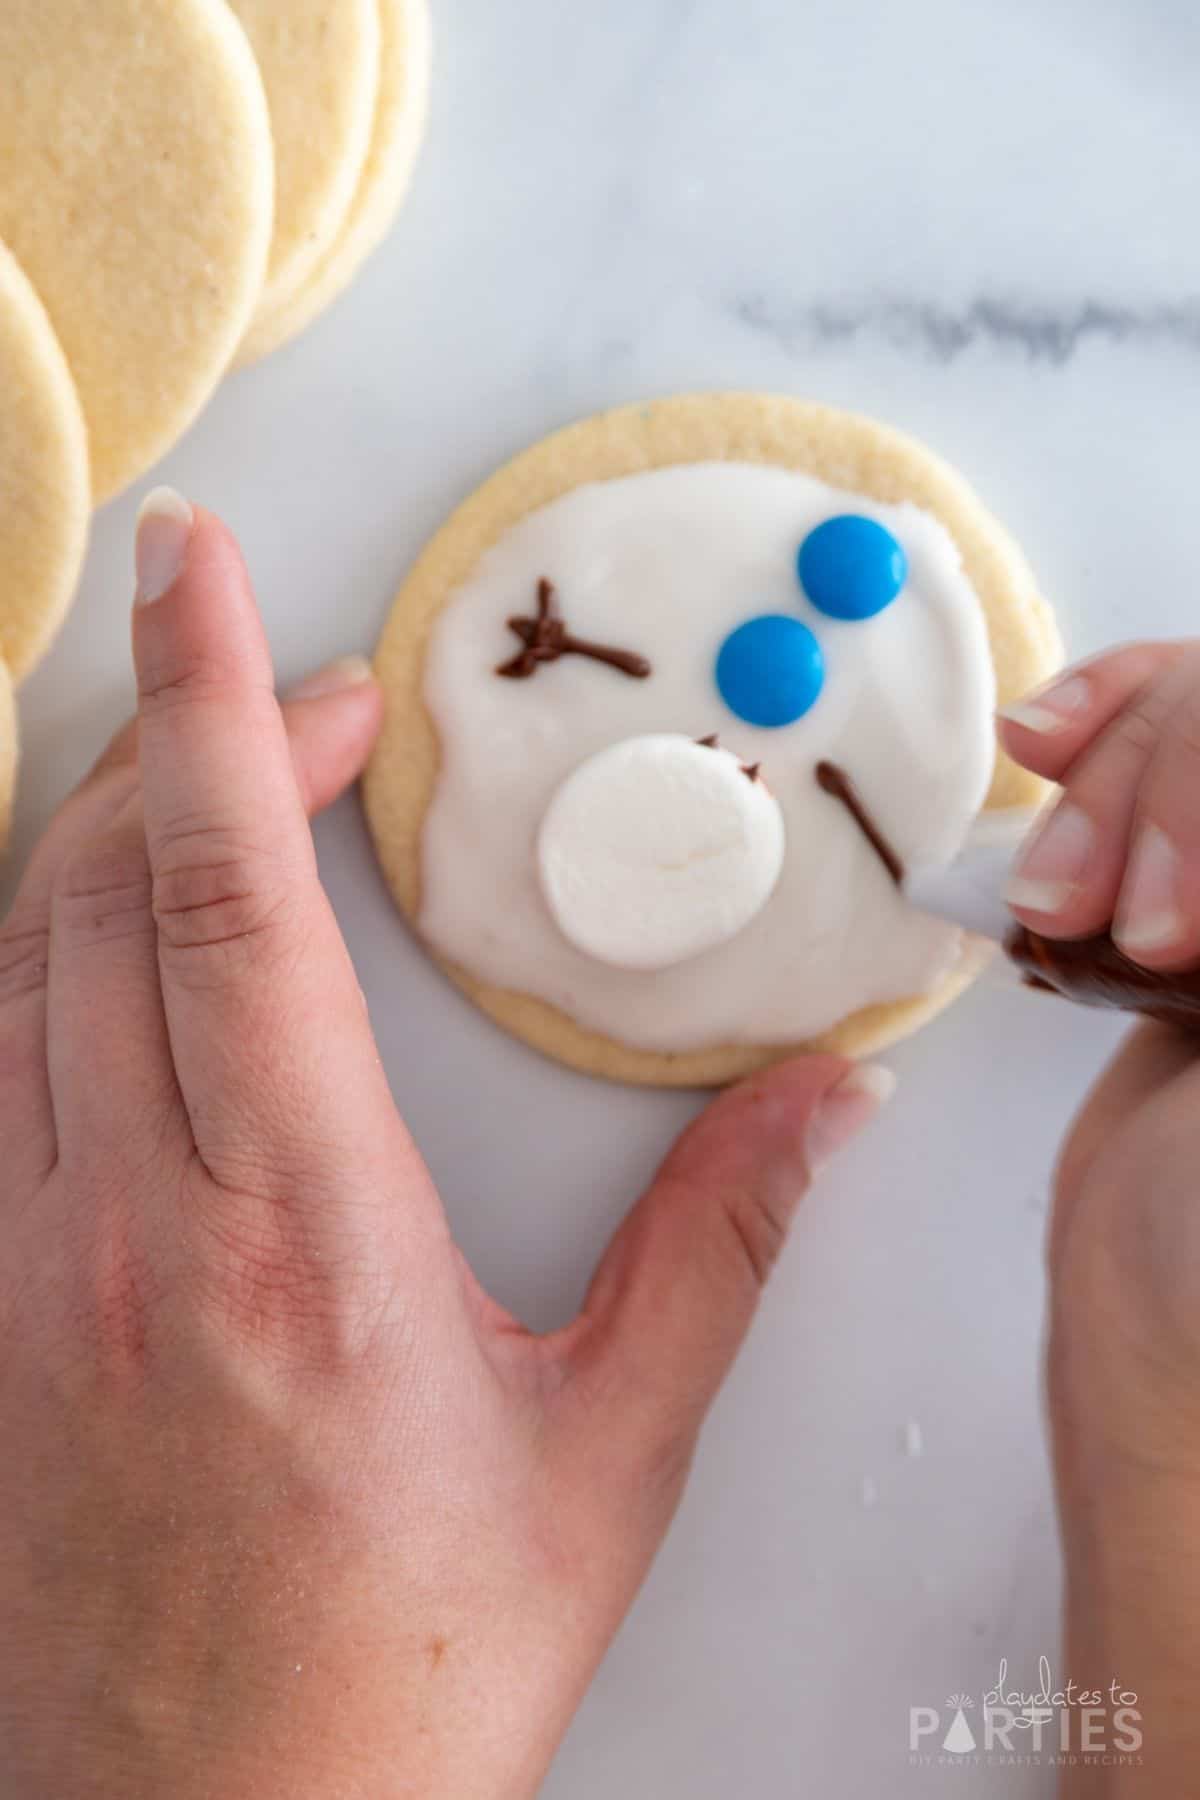
Then pipe two branch shaped arms on the side of the M&Ms with the melted chocolate.
When you’re done, you have a set of adorable melted snowman cookies!
My kids went completely nuts for these cookies – and I just know yours will too.
Serve Melted Snowman Cookies at these Parties
- Christmas parties (of course!)
- Winter birthday parties
- Frozen themed parties
Giving these away as gifts?
The icing will hold the marshmallows to the cookies, but they’re still pretty fragile. Pack your cookies in a single layer in a cookie tin or other protective container and then add a cute printable tag so everyone will know that you made these adorable cookies.
If you liked these melting snowman cookies, you’re going to love my lumps of coal treats. They’re a cute no-bake snack that’s a perfect Christmas party favor or stocking stuffer.
Or you can check out my other Christmas cookie recipes right here.
Melting Snowman Cookies
Melting snowman cookies are an adorable winter treat that kids and adults are both sure to love. Best of all, they're easier than they look!
Ingredients
Cookies
- 3 cups all purpose flour
- 1/2 teaspoon baking powder
- 1/8 teaspoon ground cloves
- 1/2 teaspoon salt
- 1 cup butter, softened to room temperature and cubed
- 1 cup granulated sugar
- 1 egg
- 2.25 teaspoon vanilla extract
- 3/4 teaspoon almond extract
Icing
- 1 cup powdered sugar
- 2-4 teaspoon milk
- 2 teaspoon light corn syrup
- 1/4 teaspoon almond extract
Decorations:
- 10 large marshmallows
- 1 teaspoon orange Food coloring
- 20 M&Ms
- 1/2 cup semi-sweet chocolate chips
Instructions
Make the Cookies:
- Whisk together 3 cups all purpose flour, baking powder, cloves, and salt. Set aside.
- Cream 1 cup softened butter cubes and 1 cup granulated sugar on high speed until completely smooth and creamy. About 2-5 minutes.
- Add 1 egg, 2.25 teaspoons vanilla extract, and 3/4 teaspoon almond extract (if using) and beat on high speed until combined, about one minute.
- Add half dry ingredients to the wet ingredients and mix on low until combined. Repeat with remaining dry ingredients. Dough may be crumbly. If necessary, you can knead the dough with your hands a bit to help it stick together.
- Separate the dough into two medium sized balls. Place each dough ball between two sheets of parchment paper. Press down gently to create disks of dough between the sheets.
- Roll the dough balls into 1/4 inch sheets. Place the dough sheets on a cookie pan and chill in the refrigerator for at least 2 hours.
- Preheat your oven to 375˚F (190˚C) and prepare cookie sheets with parchment paper. Use round cookie cutters or a wide mouth cup to cut your chilled sugar cookie dough into circles.
- Place sugar cookie circles on a prepared lined baking sheet about 1-2 inches apart. Bake until the edges are golden in color, about 5-10 minutes.
- Remove the cookies from the oven and allow to cool on the baking sheet for 5 minutes. Move the cookies to a cooling rack to completely cool before decorating.
Make the Icing:
- Place 4 teaspoons milk, 2 teaspoons light corn syrup, 1/4 teaspoon almond extract (if using), and 2 tablespoons powdered sugar in a large bowl.
- Use a fork or an electric mixer to combine the ingredients. Add a tablespoon of powdered sugar to the mixture, combining well. Repeat until your icing drizzles smoothly off the spoon but isn't runny.
- Spread icing onto the cooled cookies in an irregular pattern to look like melted snow.
Decorate the Cookies
- Cut your marshmallows in half so you end up with two small marshmallow rounds. Then use a small food-safe paintbrush to add a carrot nose to the marshmallow with orange food coloring.
- Heat 1/4 cup semi-sweet chocolate chips in the microwave for 30 seconds. Stir, then heat in 15-second intervals until the chocolate chips are melted and smooth. Add the melted chocolate chips to a piping bag fitted with a small round piping tip.
- Pipe two dots of chocolate on the marshmallow, just above the nose you painted, and a mouth below the nose.
- Place a marshmallow half, sticky side down, and slightly off center on the iced cookie.
- Add two M&Ms to the icing just in front of the face.
- Use the remaining melted chocolate to pipe a branch shaped arm on each side of the M&M's.
- Allow your cookies to set, then serve and enjoy!
Notes
Remember, the step-by-step photos and tips in the recipe post are there to help you if you feel stuck at any point.
- I used our favorite cut out sugar cookies recipe and easy sugar cookie icing for these cookies. You may want to check those posts for all my best tips and tricks.
- Or, you can feel free to substitute your favorite sugar cookie dough, or even store bought cookie dough for this recipe.
- I cut out our cookies with a 3.25 inch wide round cutter
- You may want to wait until after you've iced the cookies to melt your chocolate and add the eyes to your marshmallow.
- Make sure you paint the nose so the sticky side of the marshmallow will be against the cookie.
- You can also make your snoman nose with an orange jimmy sprinkle or with an orange edible food writer.
Recommended Products
As an Amazon Associate and member of other affiliate programs, I earn from qualifying purchases.


Kate says
These are SO cute – what a great idea. I have to make cookies for the school Christmas fair next week and these will be just perfect!
Liz says
These are the cutest little cookies!! So fun and festive, I’m going to make them for a cookie exchange!
Toni says
These are so fun to make and eat!! My kids really enjoyed it!
Chenée says
These are so cute! I love making creative cookies with the family and these are definitely at the top of our list!
Michele Morin says
These are adorable and your directions are so clear!