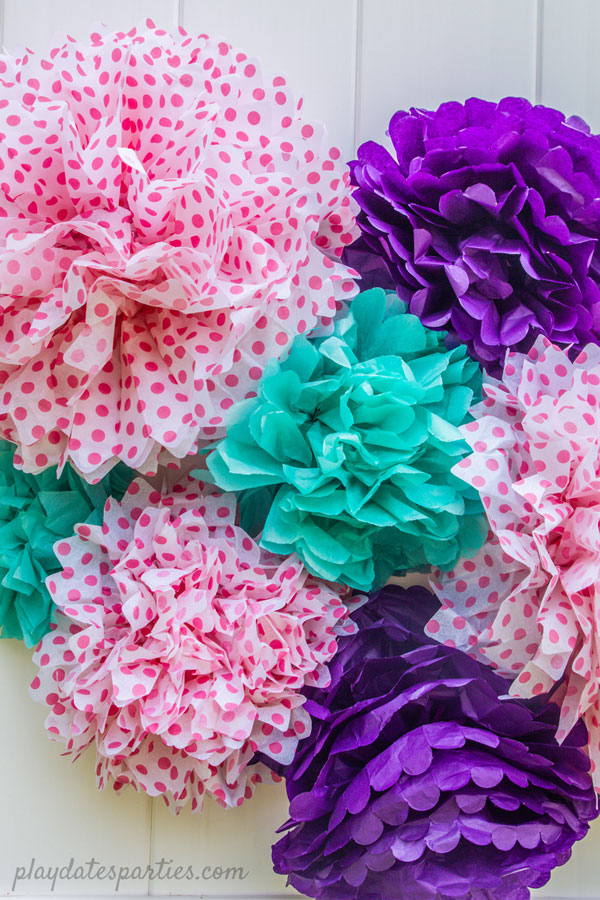
In this tutorial, learn how to make tissue paper pom poms (also known as tissue paper flowers) and how they stack up against store-bought versions too!
Whether you DIY or buy them, tissue paper pom poms are a great way to add big impact to your party decor for very little money.
We’ll go through how to make 4 tissue paper pom poms from one stack of tissue paper, how long it took to make them, and we’ll compare it all to using purchased pom poms.
This way you can decide if this craft fits into your party planning timeline.
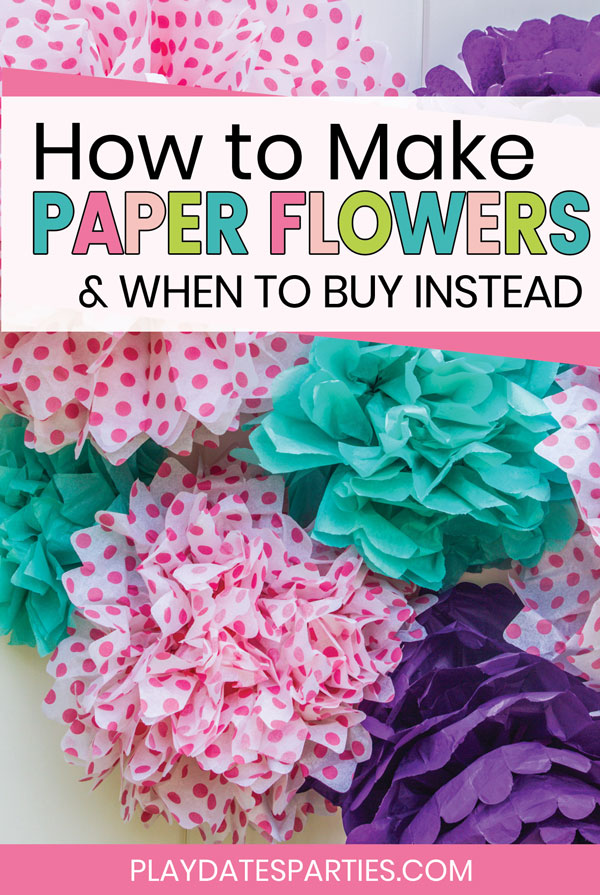
Purchased Tissue Paper Pom Poms
Before we learn how to make tissue paper pom poms, let’s look at what it’s like to buy them.
(Because, sometimes it’s totally worth it to purchase a kit in order to save some time.)
When you buy store-bought pom poms, they arrive folded and tied together, ready for you to open, and removing about half of the effort.
Plus, the cuts on purchased pom poms tend to be cleaner and more uniform, which can create a better end result.
Make Life Easier
Start planning your parties like a pro with these FREE party planner sheets. Click the button below to get your planner sheets delivered straight to your inbox.
How Much do they Cost?
Tissue paper pom poms kits vary widely, and range from $0.50 a piece (at the Dollar Tree) to over $2.00 each in stores and online.
Prices are also going to vary based on the size and coloring of your pom poms.
With the DIY method I show below, you can make your own for as little as 25 cents a piece if you use a $1 stack of tissue paper from the Dollar Tree. But honestly, I recommend using a stronger tissue paper that is less likely to tear as you separate the sheets.
Where to Find Tissue Paper Pom Poms
There are dozens of places to find ready-made tissue paper pom poms. Here are some of the easiest places to buy from:
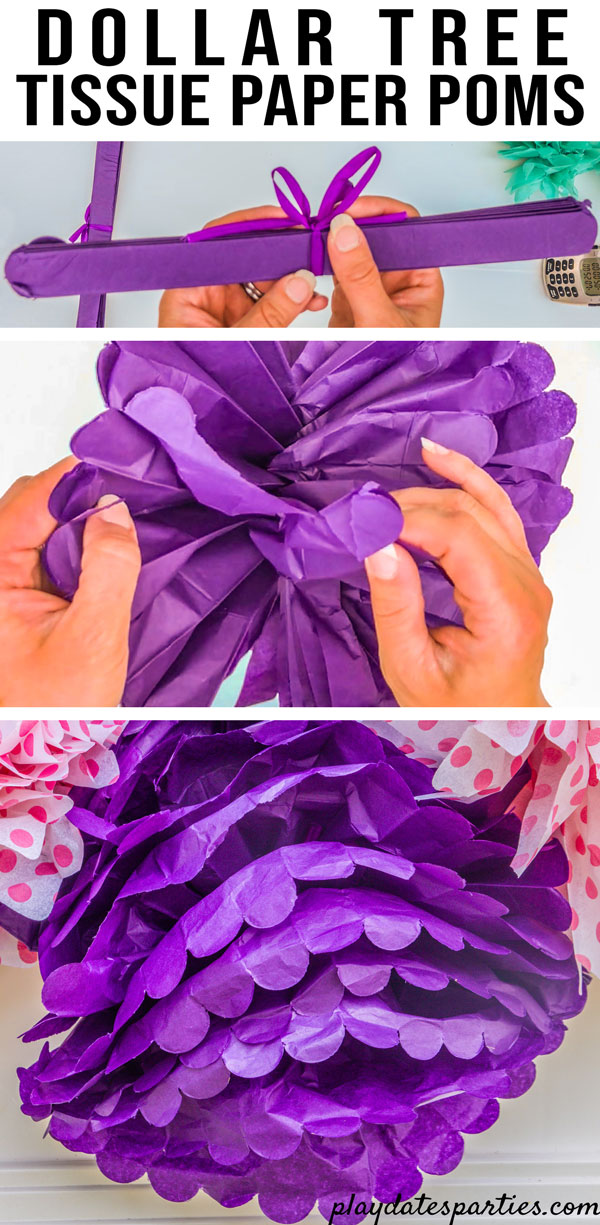
Testing Dollar Tree Tissue Paper Pom Poms
This was the first of two store-bought versions we tested. Here’s a quick run down of the result:
- You get 2 pom poms per pack (both 12-inches in diameter)
- Each pom pom has 8 layers of tissue
- The tissue is thin, tears easily, and isn’t very stiff
- They are only available in a limited variety of solid colors
This is definitely a case of you get what you pay for.
I found that because the tissue paper was flimsy, no amount of fluffing made these pom poms look good as a full sphere. Though they looked just fine if they were only opened with one flat side.
In short, Dollar Tree pom poms are fine if you:
- have a limited color palette,
- plan to have the pom poms flat against a wall or on a table, and
- don’t plan to hang them from a ceiling.
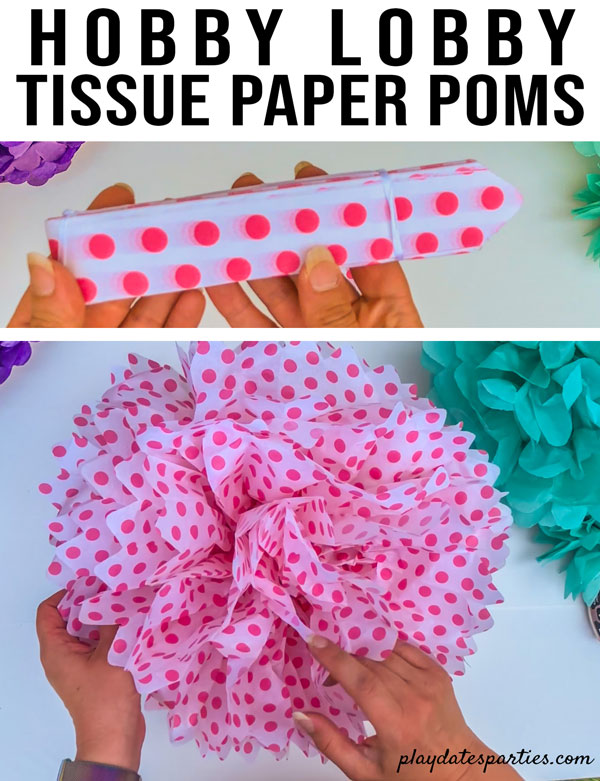
Testing Hobby Lobby Tissue Paper Pom Poms
I happened upon a set of cute polka dot tissue paper pom poms one day at Hobby Lobby, and figured I’d give them a try too.
Here’s what you need to know:
- Each package comes with one large (16-inch) and 2 medium (12-inch) pom poms
- Each pom pom has 8 layers of tissue
- The tissue is fairly sturdy
- Colors and styles change throughout the year based on season.
I was much more pleased with the Brother Sister Design Studio pom poms.
Even though they have the same number of layers, the thicker tissue paper made a big difference in the end result. I even got a little too rough and made a huge rip in one of the pom poms, but you can barely tell once it’s fluffed.
How Much Time Do You Need?
Making 4 tissue paper pom poms from start to finish took about 50 minutes. Now, that may be a bit longer than you. I was stopping and starting a lot to take pictures. But that averages 12.5 minutes per DIY pom pom.
On the other hand, it took 32 minutes to open up 5 store-bought pom poms, averaging 6.5 minutes per store-bought pom pom.
Which means, buying store-bought pom poms saves about 50% of your project time.
So, Should you DIY or Buy?
Whether it’s worth it to make your own or to buy pre-folded pom poms is totally up to you and your situation, but here are some guidelines to consider:
You Might Want to Buy Them If You:
- Are running short on time
- Have to make a whole lot of pom poms for your event, and don’t have a group to help
- Don’t mind working with a limited color palette, and
- Can afford the extra expense (anywhere between $0.60 and $1.50 more per pom pom, depending on where you buy them)
You Might Prefer to Make Your Own If You:
- Want a very specific set of colors, or multicolored pom poms
- Are working with a tight budget,
- Only need a few (10 or less) for your event, or
- Have a group of friends available to help make the pom poms if you need a lot for your event.
How to Make Tissue Paper Pom Poms:
Are you convinced that DIY is the way to go and ready to learn how to make them yourself? Awesome!
A printable tutorial is down at the bottom of this page, but first let’s go through some important basics.
What You’ll Need:
- 8-10 sheets of tissue paper
- Floral wire
- Ribbon or string (to hang your finished pom pom)
- Scissors
Tissue Paper Flower Shapes:
- Round the ends for a peony-shaped tissue paper flower
- Make pointed ends will for a chrysanthemum-shaped tissue paper flower
- Cut slits in the ends to create a frilly pom pom
Tips & Tricks:
- Open the tissue paper very carefully. The paper can rip even when you’re being gentle
- The quality of tissue paper you use makes a difference. While you can use cheap paper, it is more likely to rip, and doesn’t look as nice
- For giant tissue paper flowers, use more sheets of tissue paper
- For small tissue paper flowers, use no more than 8 sheets. At that size, it gets difficult to open the flowers when the tissue paper is too crowded.
- This isn’t the project for the living room floor. You’ll want a sturdy table or hardwood floor while folding.
- It’s not a big deal if the sheets aren’t perfectly even.
- Make sure you have sharp crafting scissors to cut through all those layers.
More Fun Party Crafts
- Decorating with Balloons without Helium
- Pot of Gold Rainbow Centerpiece
- How to Make Customized Kids Chef Hats
- Wild & Crazy Easter Grass Garland
- Rainbow Cupcake Toppers
How to Make Tissue Paper Pom Poms
Learn how to make 4 tissue paper pom poms from one stack of tissue paper, the three diffferent types of flower shapes you can make, and when to consider buying pom poms instead of DIYing.
Materials
- 8-10 sheets of tissue paper
- Floral wire
- Ribbon or string (to hang your finished pom pom)
Tools
- Scissors
Instructions
Cutting the sets of Tissue Paper
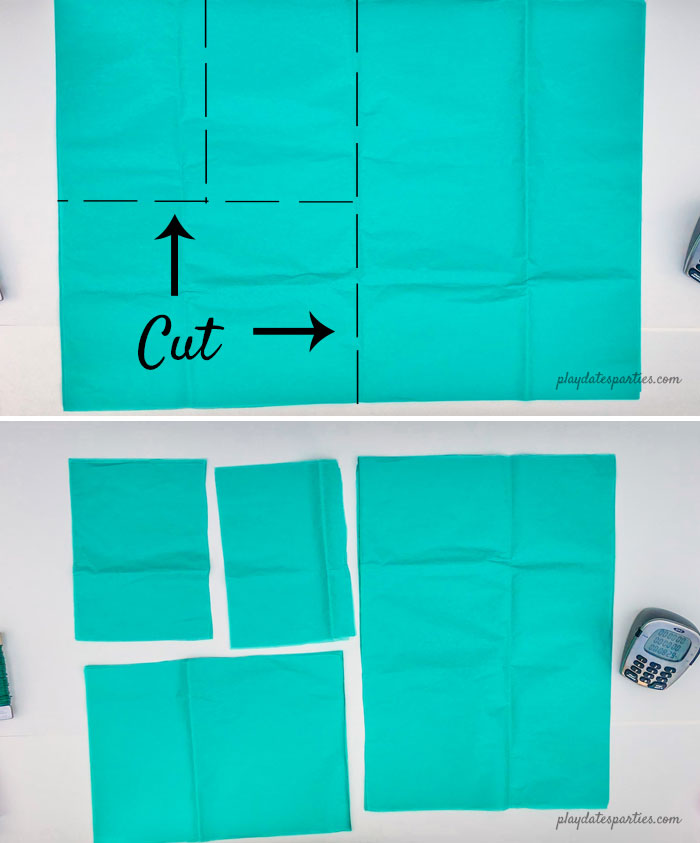
- Lay a stack of 8-10 sheets of tissue paper on a sturdy, flat surface. Do your best to get the sheets lined up evenly (but don’t stress over it)
- Cut the stack of tissue paper in half, horizontally. Set aside one stack for later.
- Fold the other stack in half and cut the tissue paper along the fold line.
- Set aside one of the medium stacks of tissue paper.
- Fold the second small stack of tissue paper in half, and cut that stack along the fold line. If you used more than 8 sheets of tissue paper, remove any extras from the smaller sets.
- You should now have four stacks of tissue: One large, one medium, and two small.
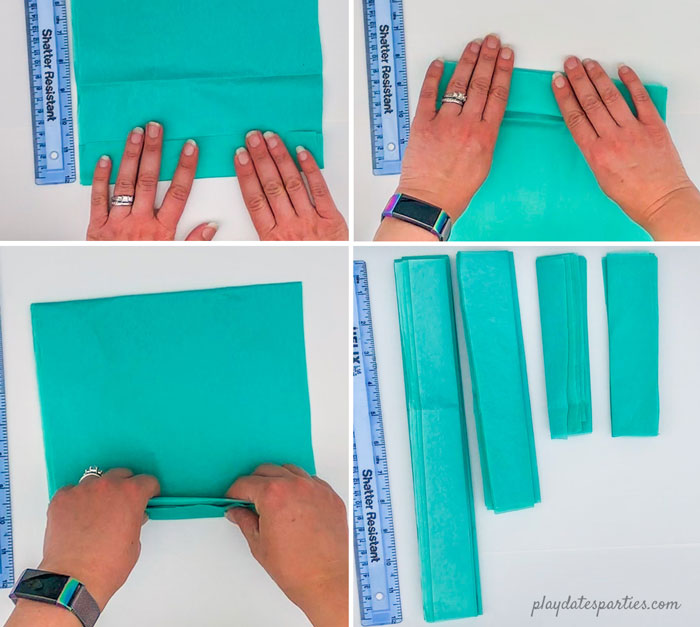
Accordion Fold the Tissue Paper Stacks Along the Short Edge:
- Start by folding up the bottom edge of the tissue paper about an inch. Make a sharp crease.
- Flip the tissue paper over and fold the tissue paper in the opposite direction.
- Keep flipping and folding until you don’t have any more paper to fold.
- Don’t be afraid to trim a little bit of excess paper if you need to.
- Now you should have four sets of folded tissue paper as shown above.
Binding the Center of the Pom Pom:
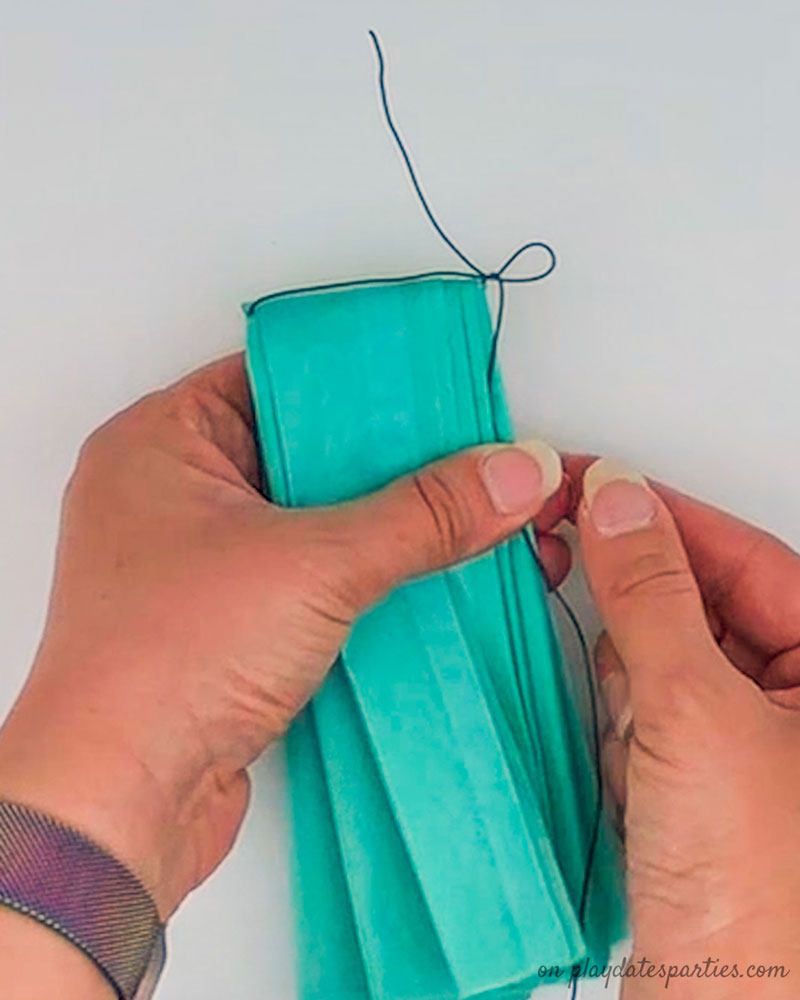
- Cut a strip of floral wire about 12 inches long.
- Fold your tissue paper stack in half lengthwise to find the center.
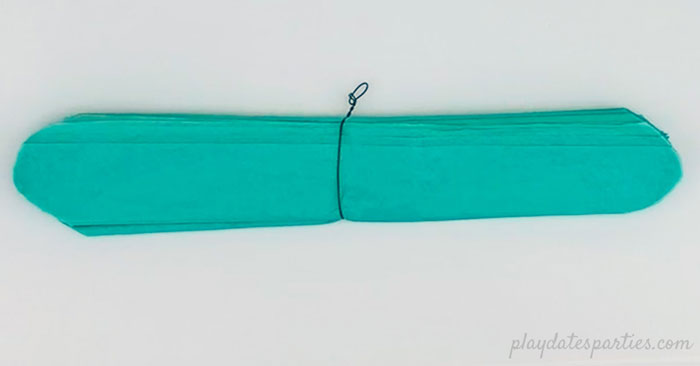
- Insert the floral wire in the fold and then wrap it around the stack of tissue paper, twisting the ends together to secure the floral wire in place.
- You may want to take some of the excess floral wire at this point and create a small loop that can be used to hang your tissue paper pom pom later.
- Repeat with the remaining stacks of tissue paper.
Trimming the Ends of the Tissue Paper
This is the fun part! You can create so many different types of tissue paper pom poms just based on how you trim the ends. Be as fun and creative as you want, but here are some of the basic shapes:
- Round the ends for a peony-shaped tissue paper flower
- Make pointed ends for a chrysanthemum-shaped tissue paper flower
- Cut slits in the ends to create a frilly pom pom
Opening Up Your Tissue Paper Pom Pom:
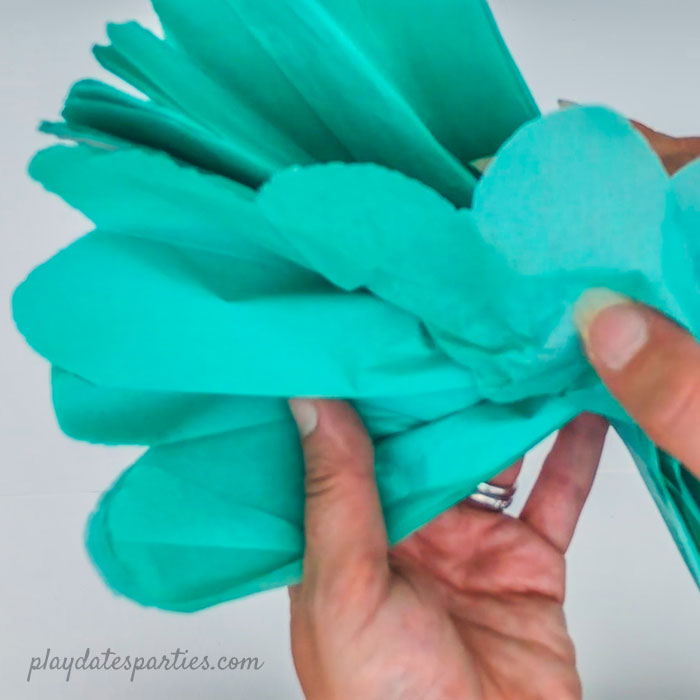
Now let's turn these little folded strips into pretty paper pom poms.
- Fan out one side of the tissue paper stack from the center.
- Then, very gently separate each layer of tissue paper. I recommend separating the tissue paper from the center of the pom pom and not from the edges.
- You might want to be sure you have a bottle of water or even some fingertip moistener on hand if you’re going to be making a lot of them
Tip: It’s important to be very gentle as you open up the pom poms. Tissue paper tears so easily! That said, don’t freak out if you get a few tears. Most small tears blend into the layers of the pom pom and won’t be noticeable.
Notes
Tips to Remember:
- Open the tissue paper very carefully. The paper can rip even when you’re being gentle
- The type of tissue paper you buy does make a difference. While you can use cheap paper, it is more likely to rip, and doesn’t look as nice
- For giant tissue paper flowers, use more sheets of tissue paper
- For small tissue paper flowers, use no more than 8 sheets. At that size, it gets difficult to open the flowers when the tissue paper is too crowded.
- This isn’t the project for the living room floor. You’ll want a sturdy table or hardwood floor while folding.
- It’s not a big deal if the sheets aren’t perfectly even.
- Make sure you have sharp crafting scissors to cut through all those layers.
You May Want to Opt for Store Bought Pom Poms if you:
- Are running short on time
- Have to make a whole lot of pom poms for your event, and don’t have a group to help
- Don’t mind working with a limited color palette, and
- Can afford the extra money (anywhere between $0.60 and $1.50 more per pom pom, depending on where you buy them)
Have any other questions about how to make tissue paper pom poms or where to buy them? Let me know in the comments!




JC's Loft says
OMG I love that wreath! Sooooo cute! YES I totally reuse previous crafts. I am using some framed purple fabric from a shower I decorated a couple of months ago as a backdrop in my entryway for my Easter decor : )
Paula
Morgan @ PepperDesignBlog.com says
Wow! So thrilled to check out your blog today and see my paper flowers – your wreath is beautiful and I'm glad you found the tutorial useful!! It's perfect for Easter. Come to think of it, maybe I'll pull my flowers out of hiding, too!