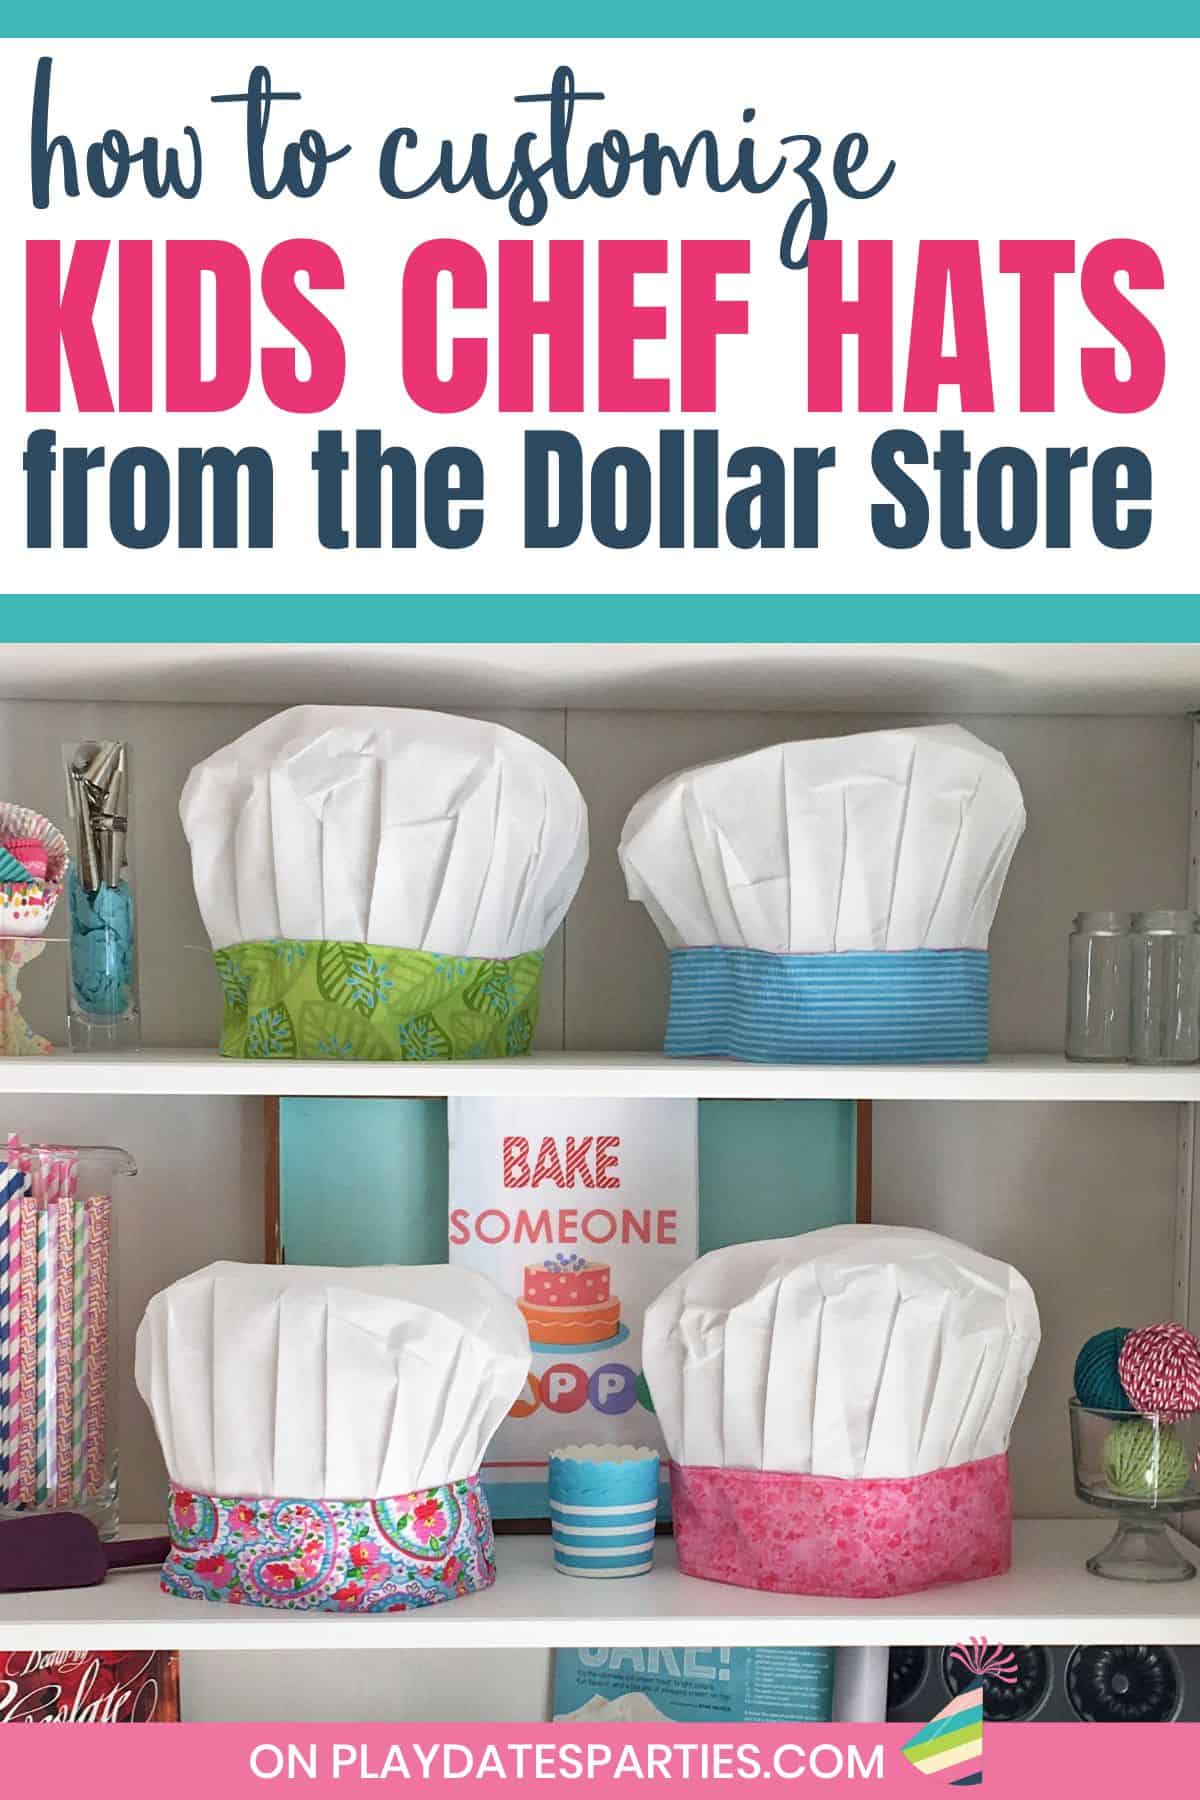
Find out how to make a personalized kids chef hat with a store-bought hat and fabric scraps. It’s super easy and only takes a few minutes!
You want your party to be unique and coordinated, but you don’t feel like spending hours upon hours creating custom items from scratch.
Same here.
One of my favorite hacks for creating custom party props and party decor is to take something store-bought and then to tweak it just a little bit to make it appear completely custom made.
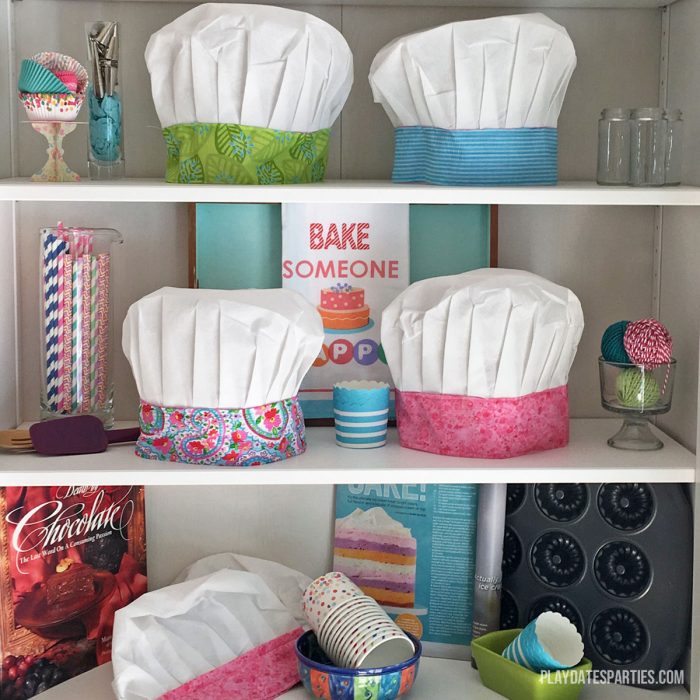
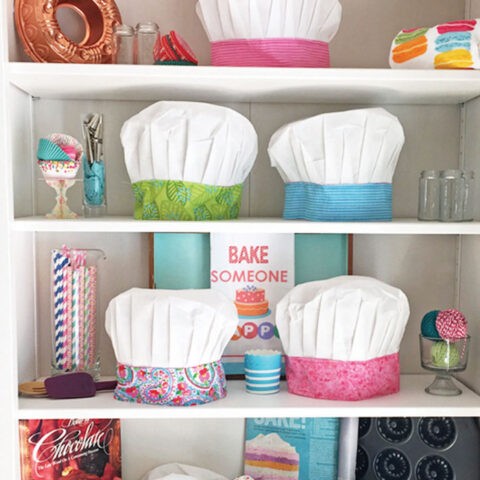
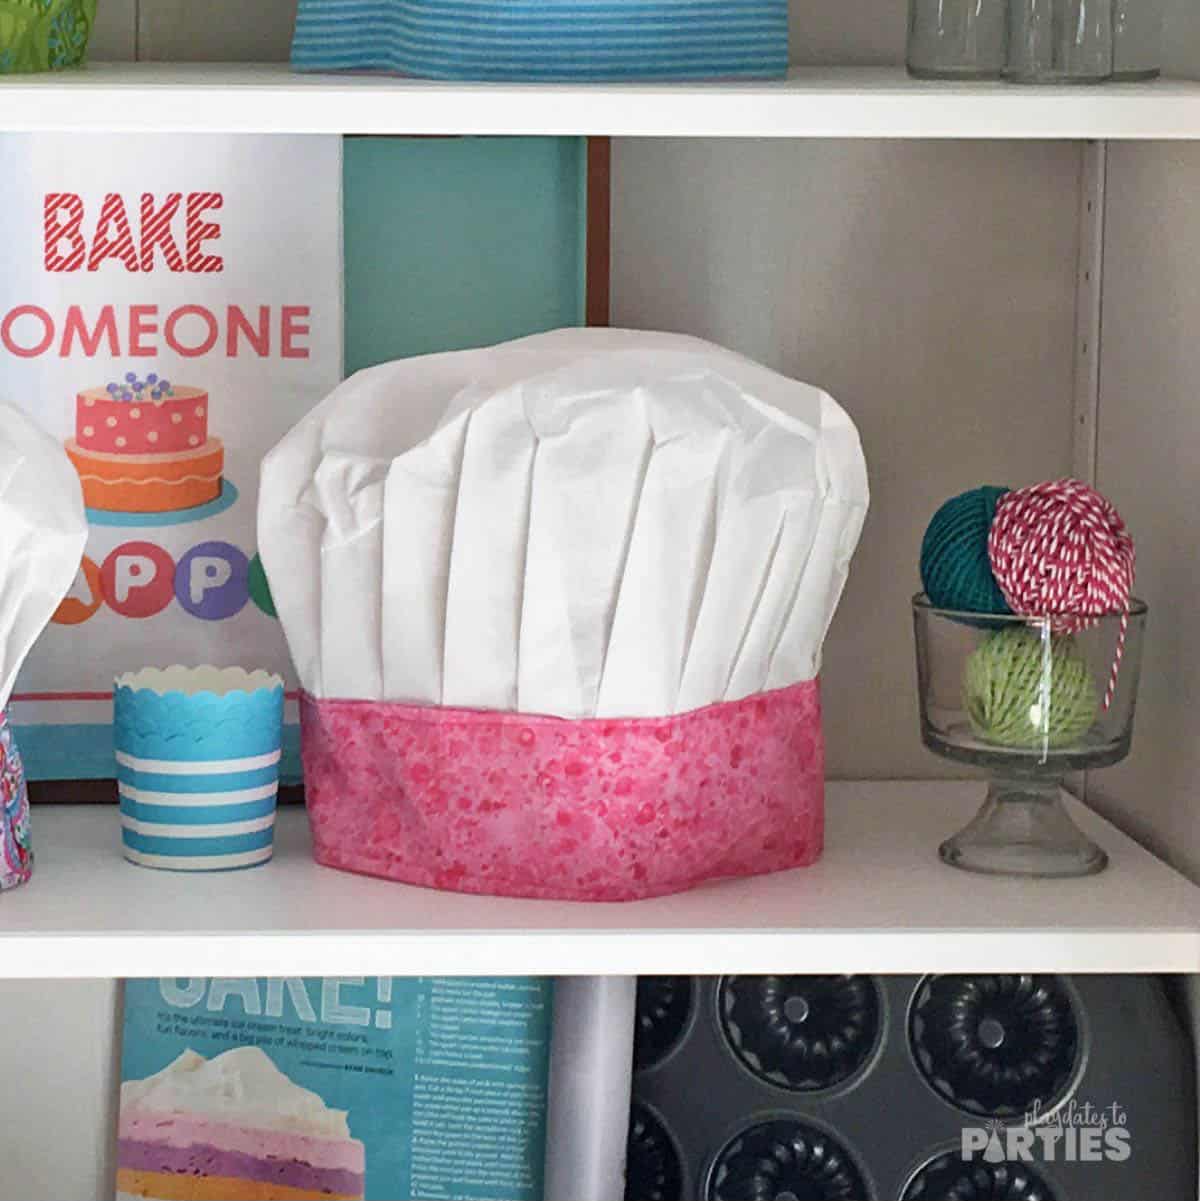
For my daughters baking party, one of the store-bought items that I customized was inexpensive kid-sized chefs hats.
At first I wasn’t sure how I was going to customize the band around the bottom of the hat, but once I figured out a system, the rest worked pretty easily.
The concept is simple: Add fabric scraps (preferably from coordinating homemade aprons) over top of the existing headbands.
But how? Ideally, all the seams and original fabric will be covered, which can feel a bit daunting.
The truth is that if I can customize kids chefs hats, then anyone can.
Thankfully, I borrowed my mother-in-law’s sewing machine. BUT, if sewing machines aren’t your thing, you can easily re-create this craft using an iron-on fusing ribbon.
Don’t forget: You can grab a printable copy of the instructions at the bottom of this post. Happy crafting!
Make Life Easier
Start planning your parties like a pro with these FREE party planner sheets. Click the button below to get your planner sheets delivered straight to your inbox.
How to Customize a Kids Chef Hat
What You Need:
- Inexpensive chefs hats. (mine were Dollar Tree, but these are similar)
- Fabric scraps.
- Coordinating thread or invisible thread.
- Needle or sewing machine.
- Scissors
- Fusible tape (if following the no-sew directions)
Directions:
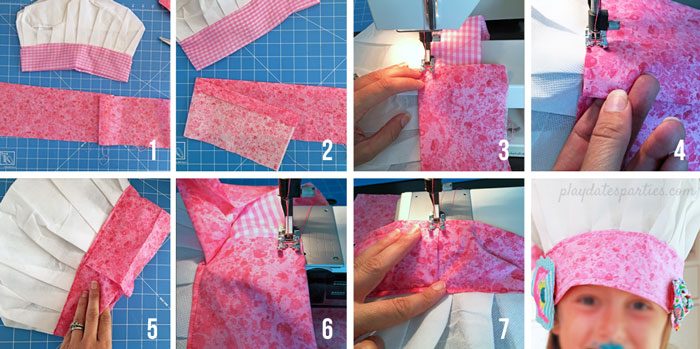
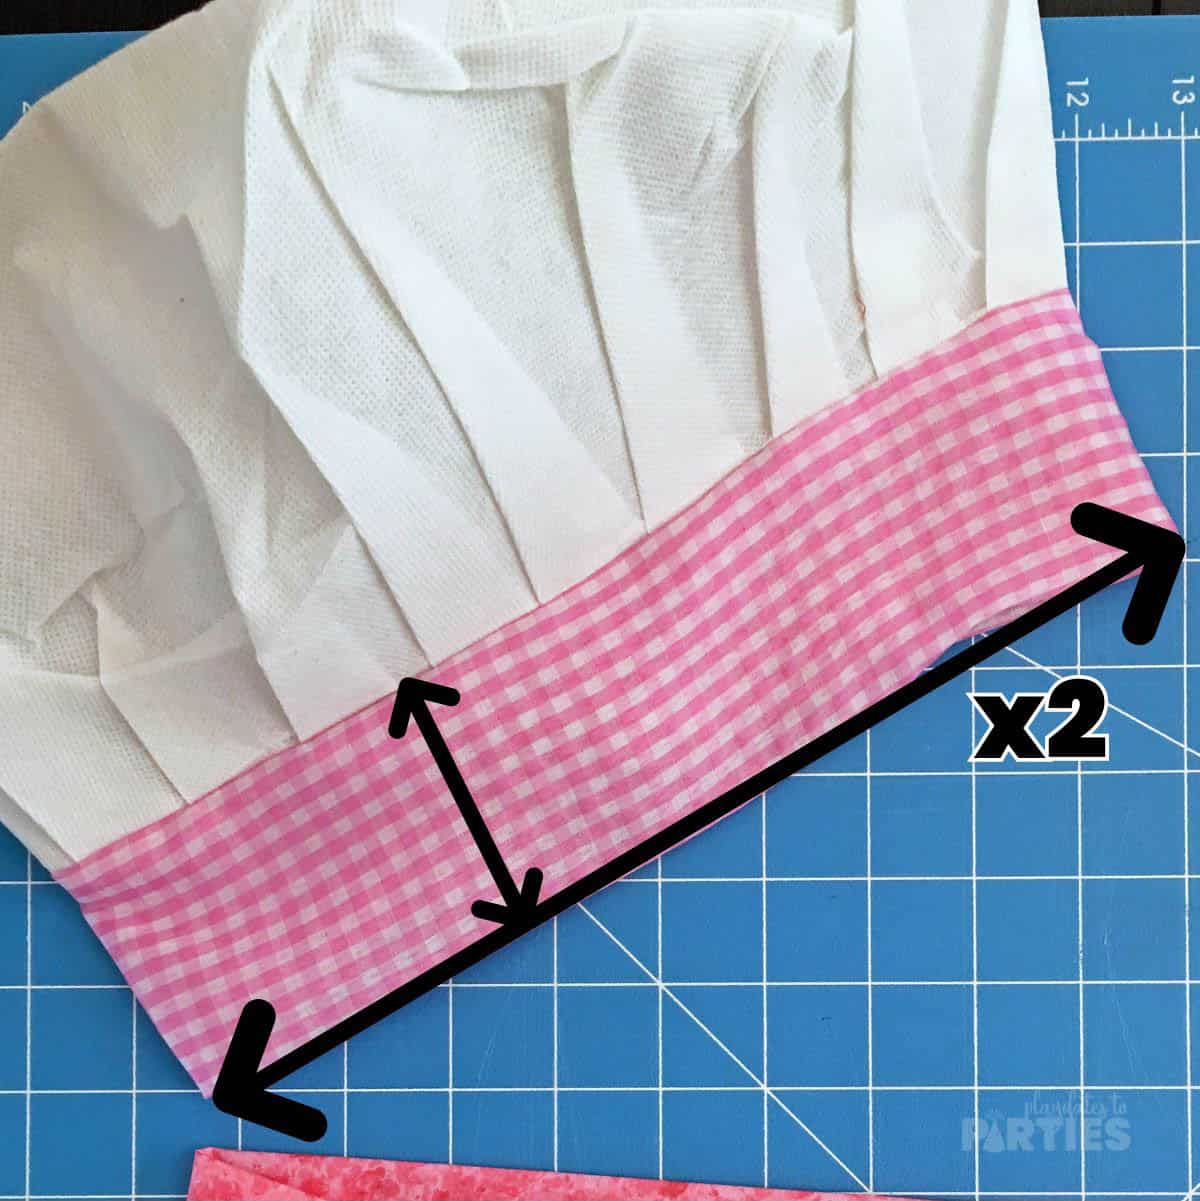
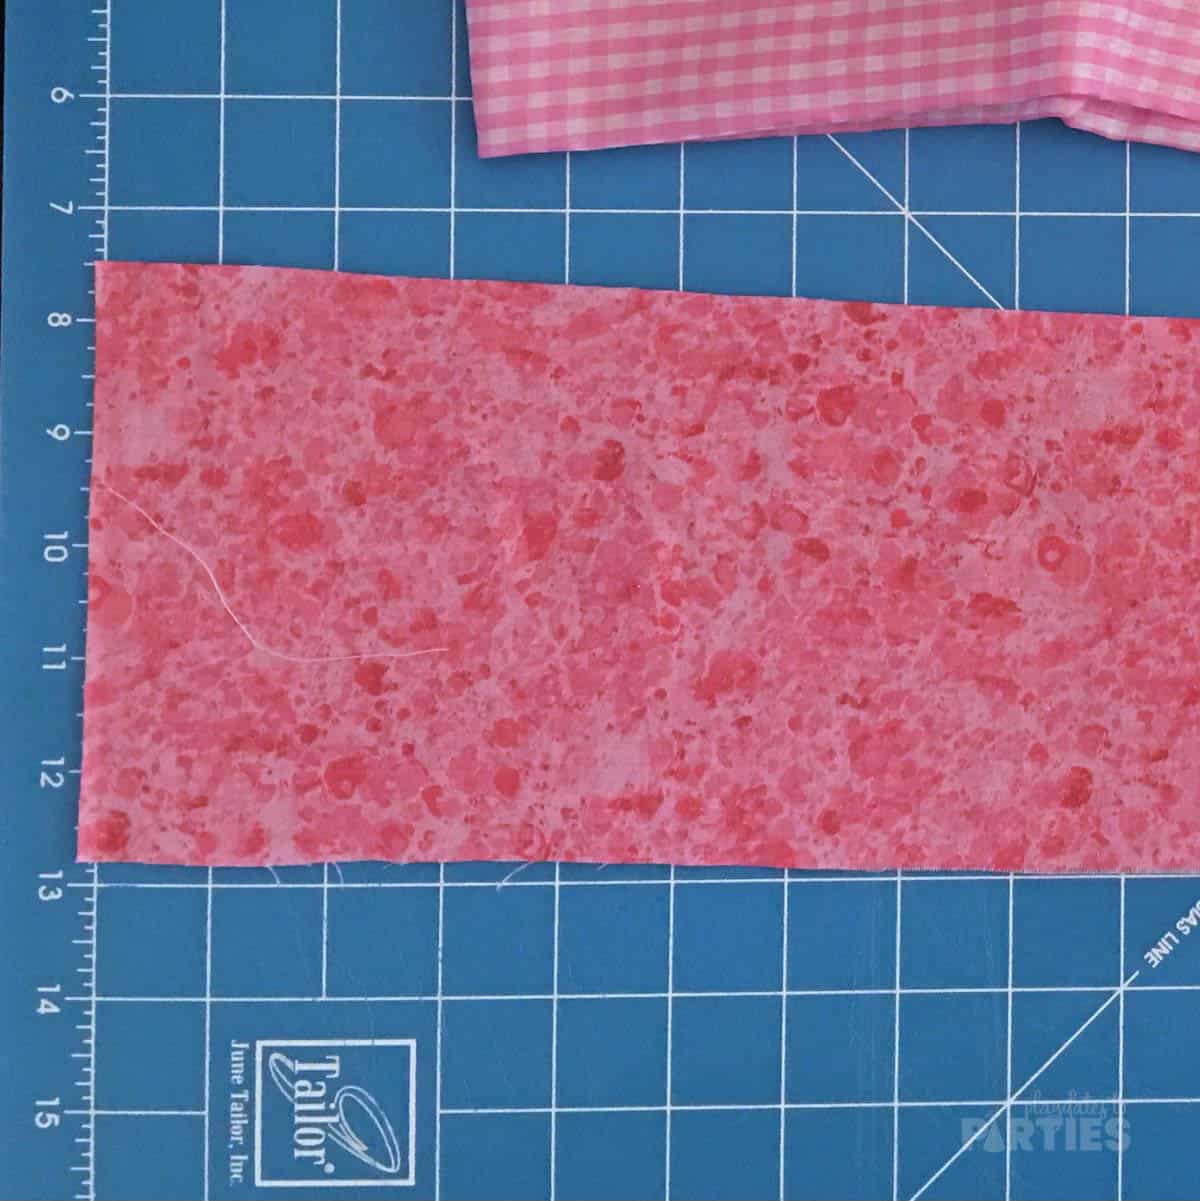
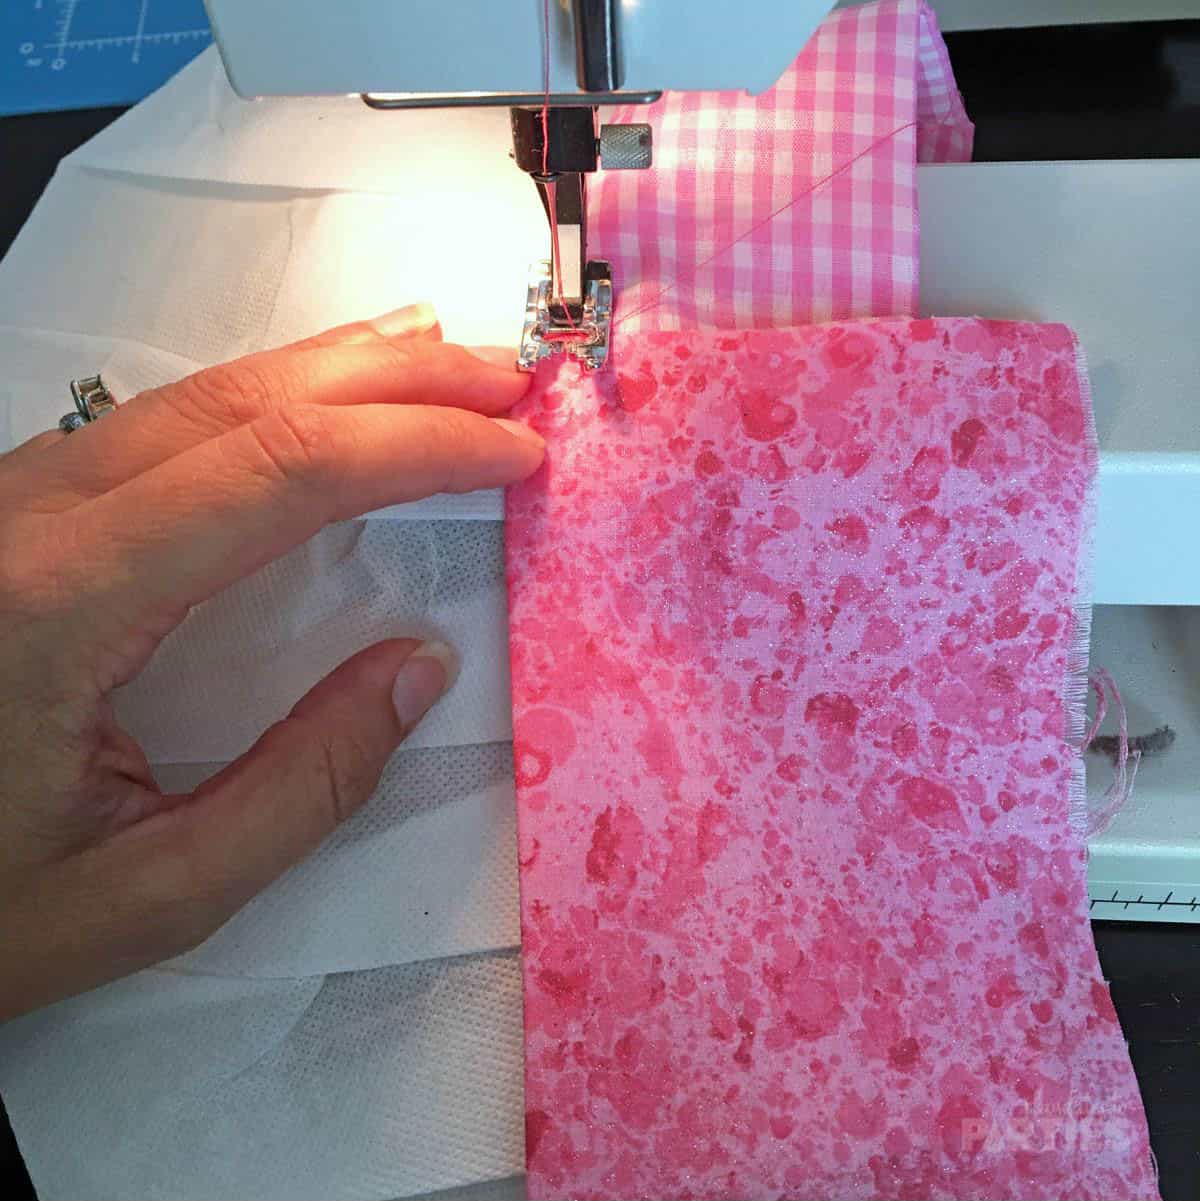
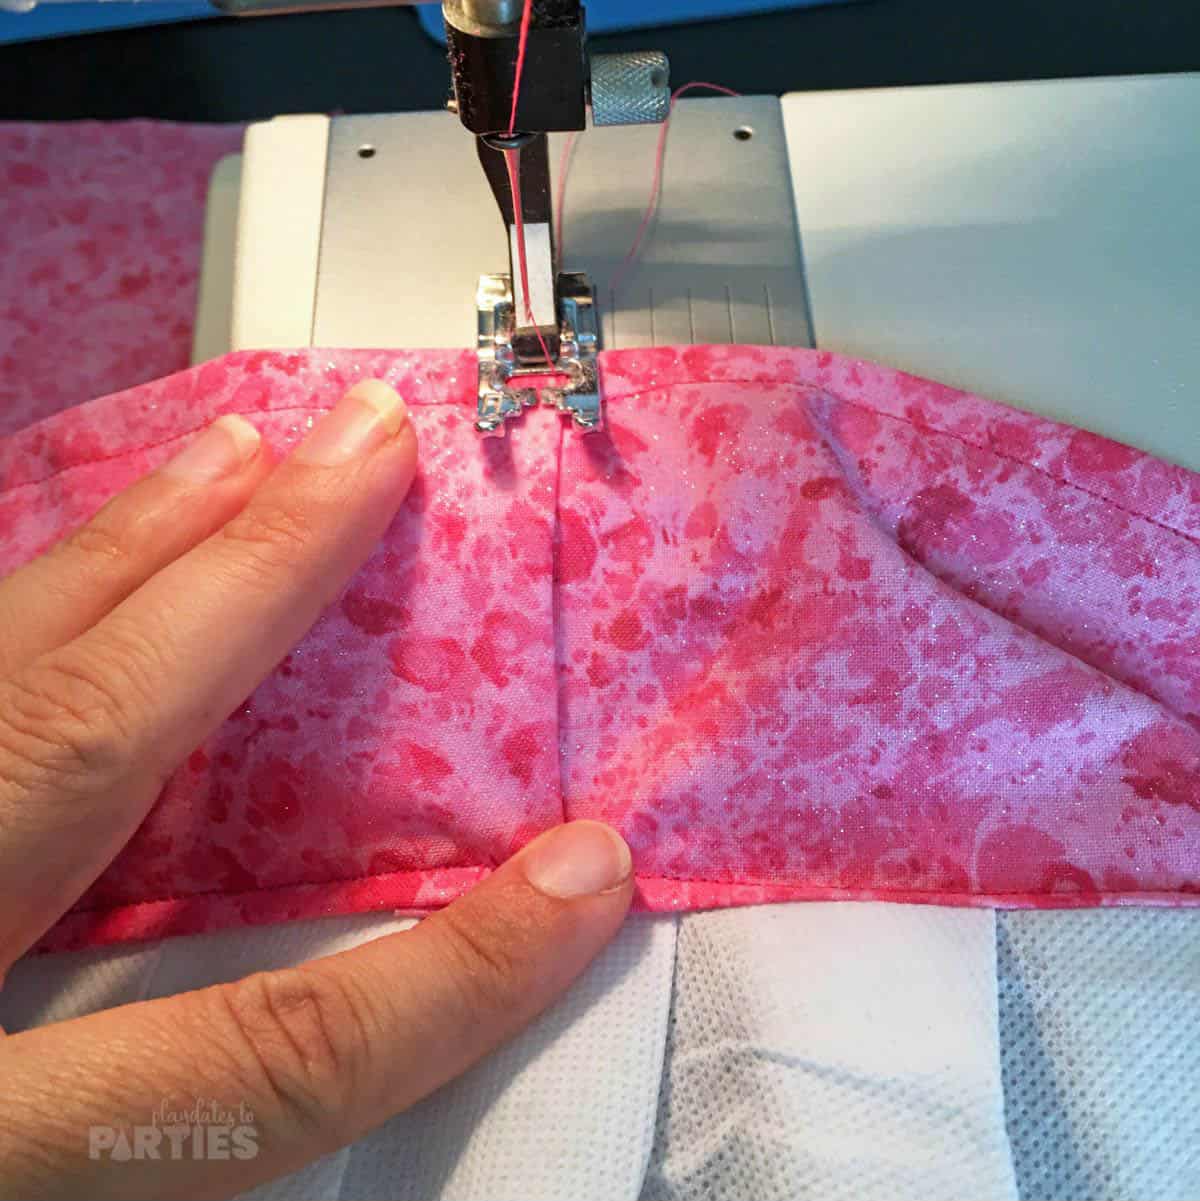
- Measure the height of the headband and the circumference around the opening of the hat band. Add 2 inches to each of these measurements and cut your fabric strips accordingly.
- Fold over the top inch of the fabric strip and iron it to create a crease.
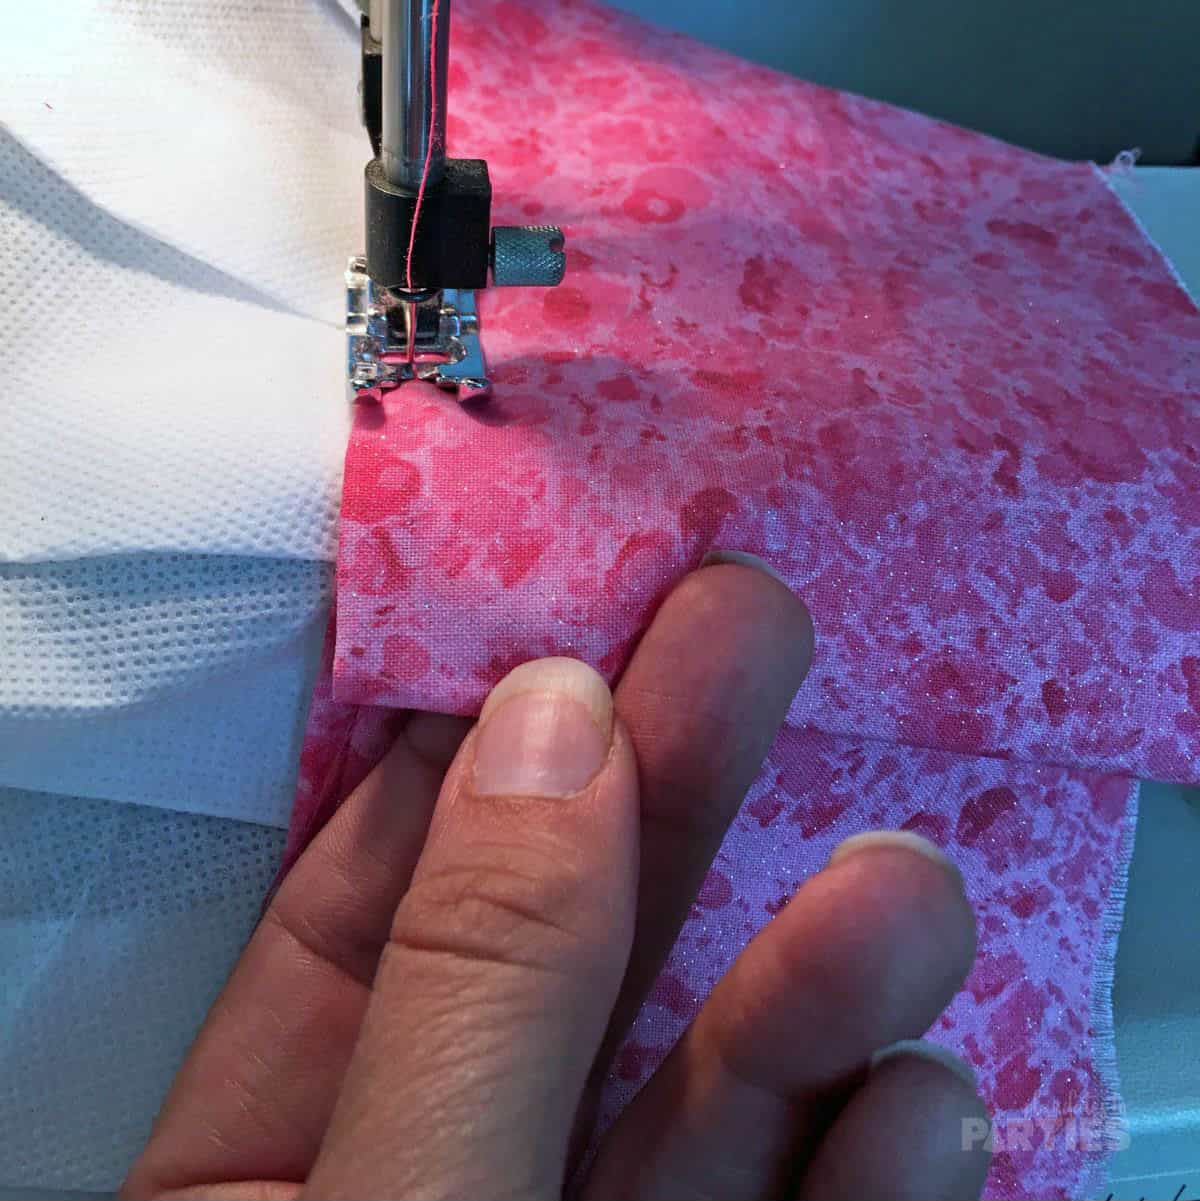
- Sew the fabric strip over top of the original hat band, following your ironed crease. Remember to keep the fabric straight so that it completely covers the original hat band.
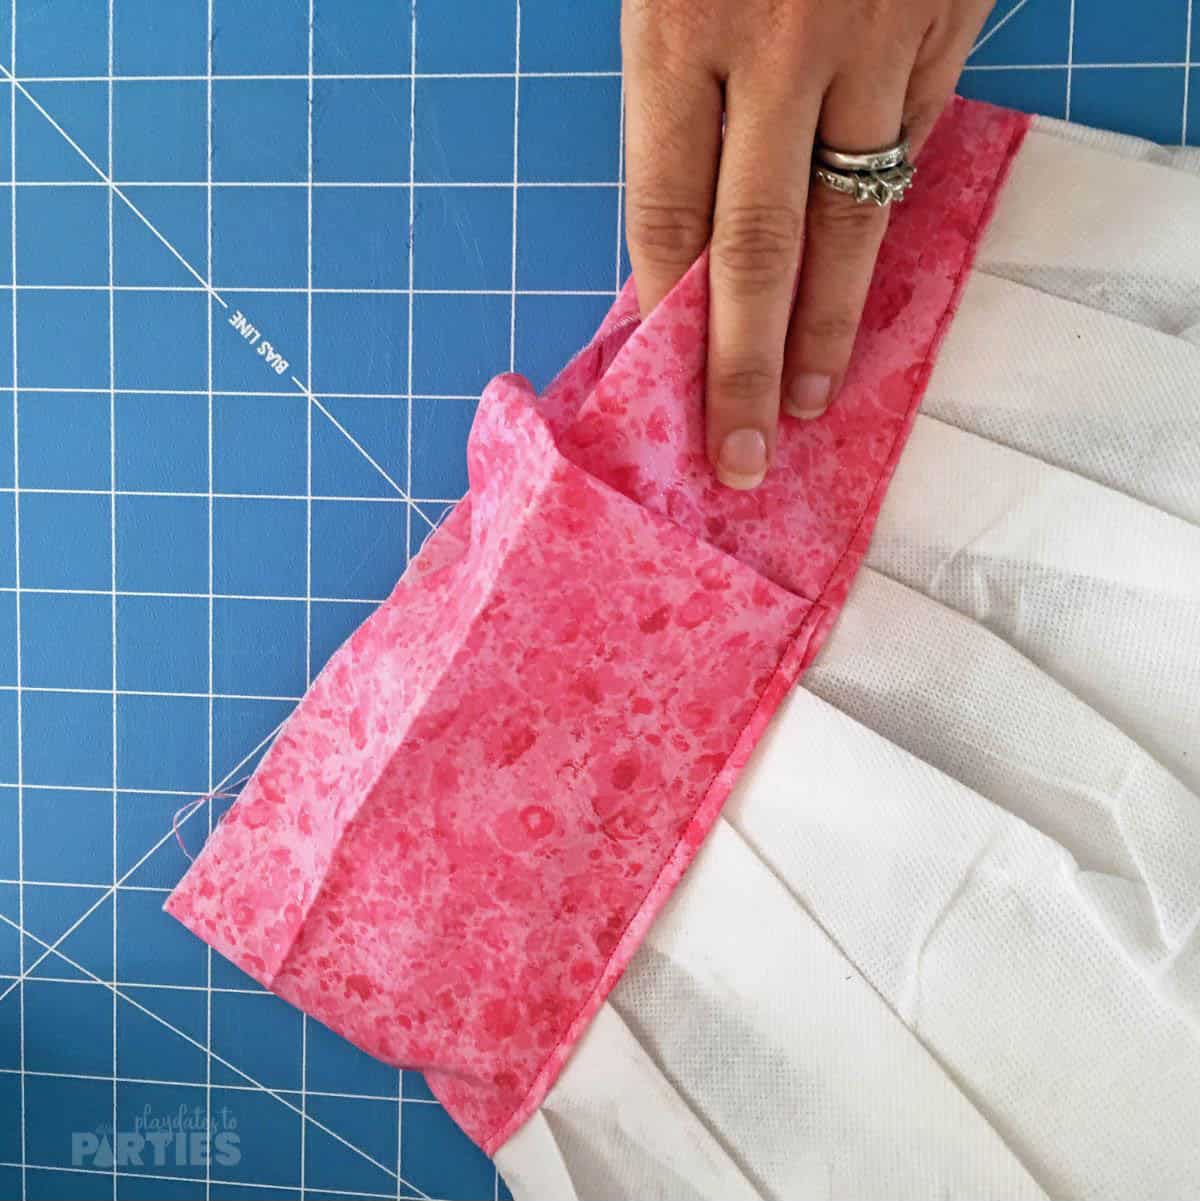
- As you come to the end of the strip, fold the short side over, to hide the raw edge of the end of your fabric.
- Fold your fabric over the bottom of the original hat band and iron to create the bottom crease.
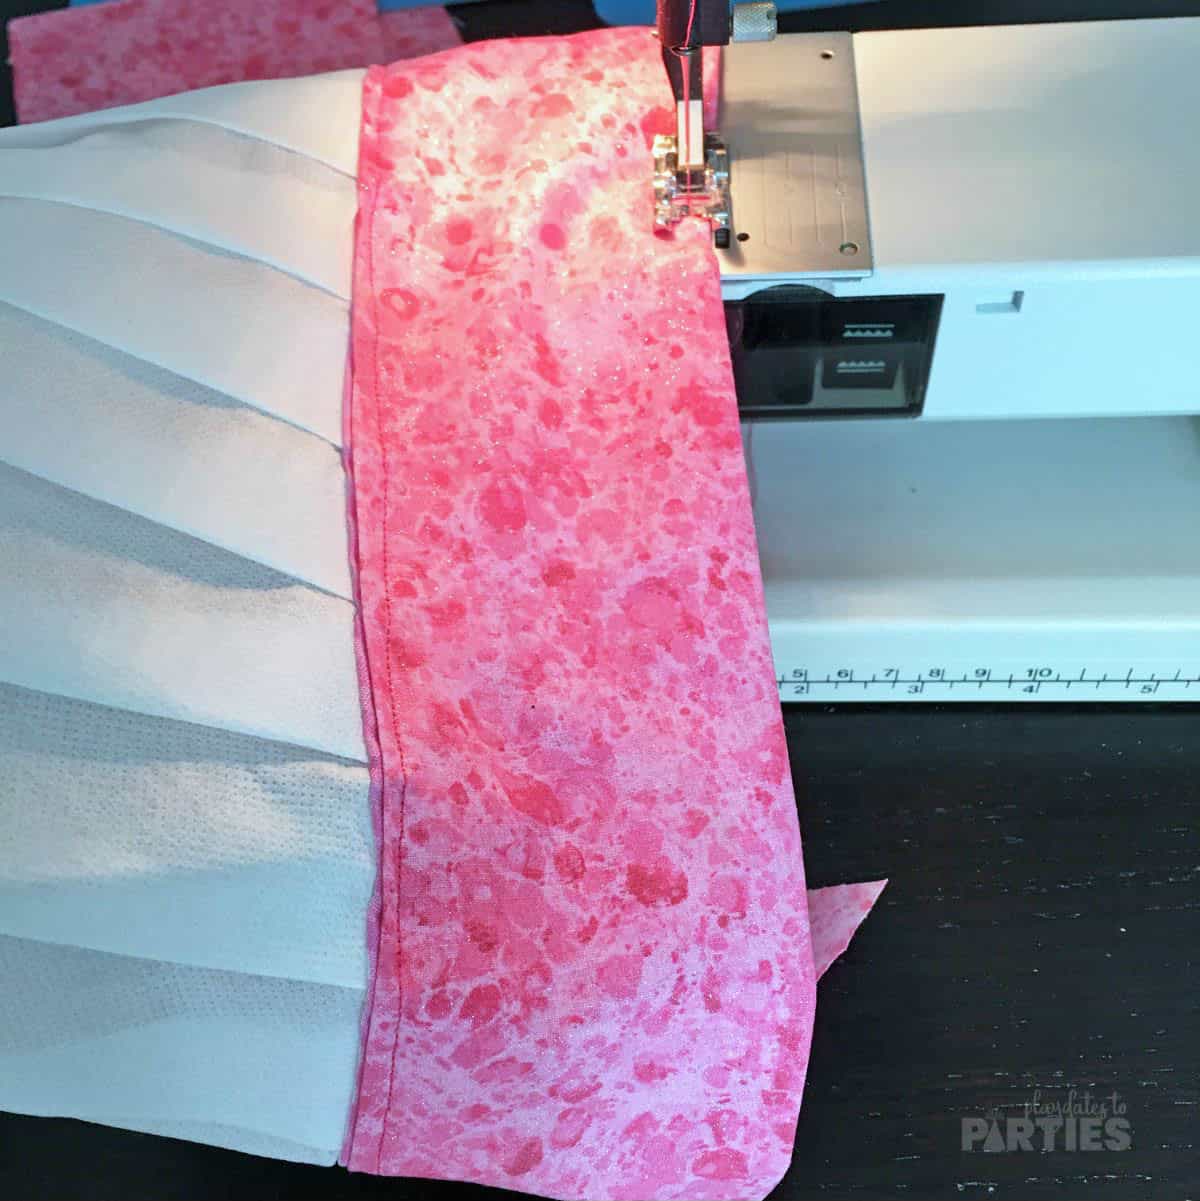
- Sew the bottom of the hat band in place.
- Once the top and bottom of the headband are attached to the chefs hat sew down the folded crease to hold it in place.
- Trim off any loose threads with scissors.
No-Sew Kids Chef Hat Directions:
- Measure the height of the headband and the circumference around the opening of the hat band. Add 2 inches to each of these measurements and cut your fabric strips accordingly.
- Fold over the top inch of the fabric strip and iron it to create a crease.
- Cut two pieces of fusible tape slightly longer than your fabric strip, and one piece of fusible tape about the same height as the original hat band.
- Place one piece of fusible tape on top of the original hat band, and place your ironed fabric on top, with the right side up. Carefully iron the two pieces together.
- As you come to the end of the strip, fold the short side over, to hide the raw edge of the end of your fabric and trim your fusible tape accordingly.
- Fold your fabric over the bottom of the original hat band and iron to create the bottom crease.
- On the inside of the hat, slip the second piece of fusible tape between the original hat band and the ironed fabric. Carefully iron the two pieces together.
- Once the top and bottom of the headband are attached to the chefs hat, slip the fusible tape in the folded ‘seam’ along the back of the hat band and carefully iron the seam in place.
- Trim off any loose threads with scissors.
FAQs:
How long did it take?
Each hat took about 14 minutes from start to finish.
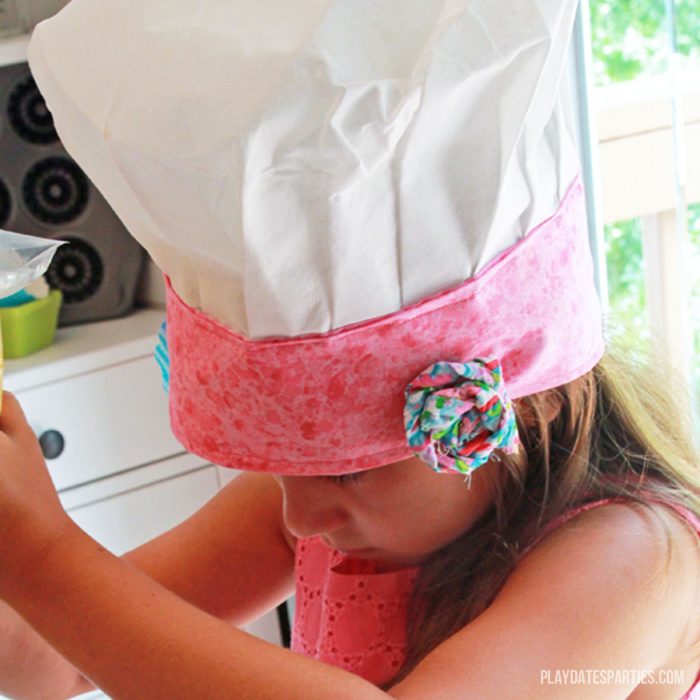
What else can you do with your kids chef hat?
While we used them as part of our baking party activities and as party favors, these kids chef hats would be perfect as gifts for little ones who already love to play kitchen. Or make a matching apron and chef hat set for your child to wear when you cook together.
Would I make them again?
Even though making 14 kids chef hats quickly became tedious, they made such a big impact that I would definitely make them again. That said, I would make sure to get started more than one week before the party.
Grab Your Printable Instructions Here:
Personalized Dollar Tree Kids Chef Hat
Find out how to make a personalized kids chef hat with a store-bought hat and fabric scraps. It's super easy and only takes a few minutes!
Materials
- Inexpensive chefs hats. (mine were Dollar Tree)
- Fabric scraps
- Coordinating thread or invisible thread
- Fusible Tape (if following the no-sew directions)
Tools
- Needle or sewing machine.
- Scissors
Instructions
- Measure the height of the headband and the circumference around the opening of the hat band.

- Add 2 inches to each of these measurements and cut your fabric strips accordingly.
- Fold over the top inch of the fabric strip and iron it to create a crease.
- Sew the fabric strip over top of the original hat band, following your ironed crease. Remember to keep the fabric straight so that it completely covers the original hat band.
- As you come to the end of the strip, fold the short side over, to hide the raw edge of the end of your fabric.
- Fold your fabric over the bottom of the original hat band and iron to create the bottom crease.
- Sew the bottom of the hat band in place.
- Once the top and bottom of the headband are attached to the chefs hat sew down the folded crease to hold it in place.
- Trim off any loose threads with scissors, and enjoy!

Notes
No Sew Directions:
- Measure the height of the headband and the circumference around the opening of the hat band. Add 2 inches to each of these measurements and cut your fabric strips accordingly.
- Fold over the top inch of the fabric strip and iron it to create a crease.
- Cut two pieces of fusible tape slightly longer than your fabric strip, and one piece of fusible tape about the same height as the original hat band.
- Place one piece of fusible tape on top of the original hat band, and place your ironed fabric on top, with the right side up. Carefully iron the two pieces together.
- As you come to the end of the strip, fold the short side over, to hide the raw edge of the end of your fabric and trim your fusible tape accordingly.
- Fold your fabric over the bottom of the original hat band and iron to create the bottom crease.
- On the inside of the hat, slip the second piece of fusible tape between the original hat band and the ironed fabric. Carefully iron the two pieces together.
- Once the top and bottom of the headband are attached to the chefs hat, slip the fusible tape in the folded ‘seam’ along the back of the hat band and carefully iron the seam in place.
- Trim off any loose threads with scissors.
More Party Crafts You’ll Love
- How to Make Tissue Paper Pom Poms ( & When to Buy Instead)
- Jaw-Droppingg Luau Party Ideas to Steal from a Professional Event Planner
- Printable Pot of Gold Rainbow Party Centerpiece
- Fabric Scrap Flower Clips – 7 Adorable Ways
Now, It’s Your Turn
There’s nothing like custom party crafts that pull your whole theme together. And matching aprons and chef’s hats are a great way to get three things finished for your kids’ baking or cooking party because they work perfectly as decor, activities, and as party favors!
Best of all, the matching aprons and chef’s hats will pull your party together in a beautiful and coordinated way.


Felicity Frankish says
What a gorgeous craft idea! I just love this idea and so will my toddler.
Julie says
These are super cute, 14 minutes each doesn’t sound like long does it? Until you have to make a whole load!!
Worth it though, I would have LOVED soemthing like this when I was a kid!
Marie moody says
Awwwwww How terribly clever! I have a dozen grandchildren & 2 1/2 great-grandchildren & I’m always looking for things to do with them when they come over. Plus Spring is a great time around here cuz when they do come over I live across the street from a playground… one for small children & another for bigger ones. Is that the most perfect place for a NaNa to live or what! hehehehehe!
Honest Mum says
Love these so much. I have two little chefs here who would adore personalised hats, thank you x
Gail says
What a cute idea! So adorable, but not just for kids – I’d like to make one for myself, too!
Gail says
Please send me the children’s chef hat pdf
Leslie says
Thanks for stopping by! It seems that the printable form disappeared at some point, but I’ve updated the post with a printable tutorial that you can print right from your browser without needing to wait for an email. Have a great day!