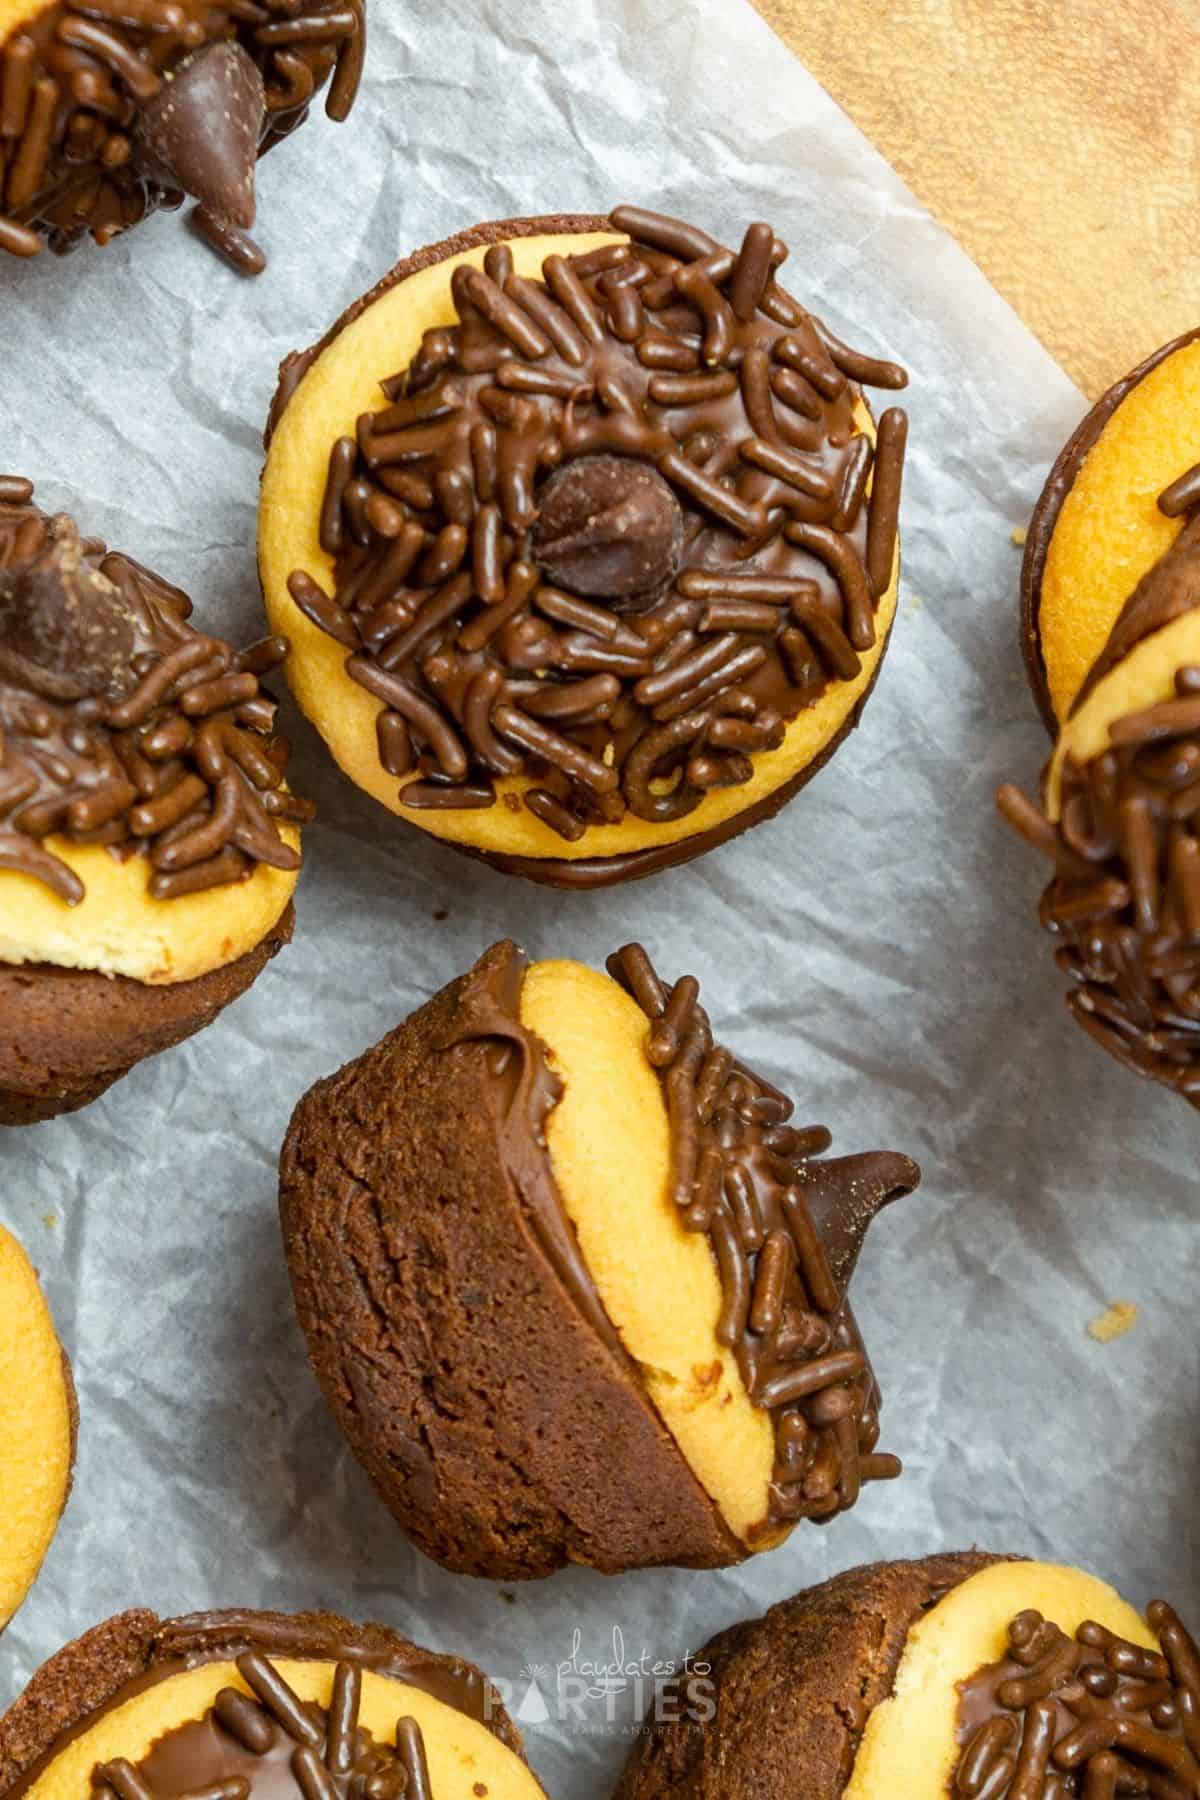
It’s getting cooler outside and the leaves are starting to change colors, which means it’s the perfect time to make adorable acorn treats with Nilla wafers!
These tasty treats are perfect for class parties, Thanksgiving dessert, or as a fun fall snack. Best of all they’re so easy, too. You’ll be able to whip up a batch in no time at all.

Why Acorn Treats with Nilla Wafers and Brownie Bites?
There are many acorn treats recipes out there. But I like this one the best because it is different and uses something other than kisses and Nutter Butters:
- The cute acorn shape makes them an adorable make-ahead snack for fall.
- There’s no peanut butter, so these are better for parties or school. (Please still check allergen information of your ingredients first.)
- Brownie bites stand neatly on your party platter, which gives you more options to display your edible acorns.
- These are bigger than the candies made with kisses. Which means you don’t need to unwrap a dozen or more candies, and they stand out better on your table. That makes these a huge time saver. (now, that’s a BIG win)
What You’ll Need:
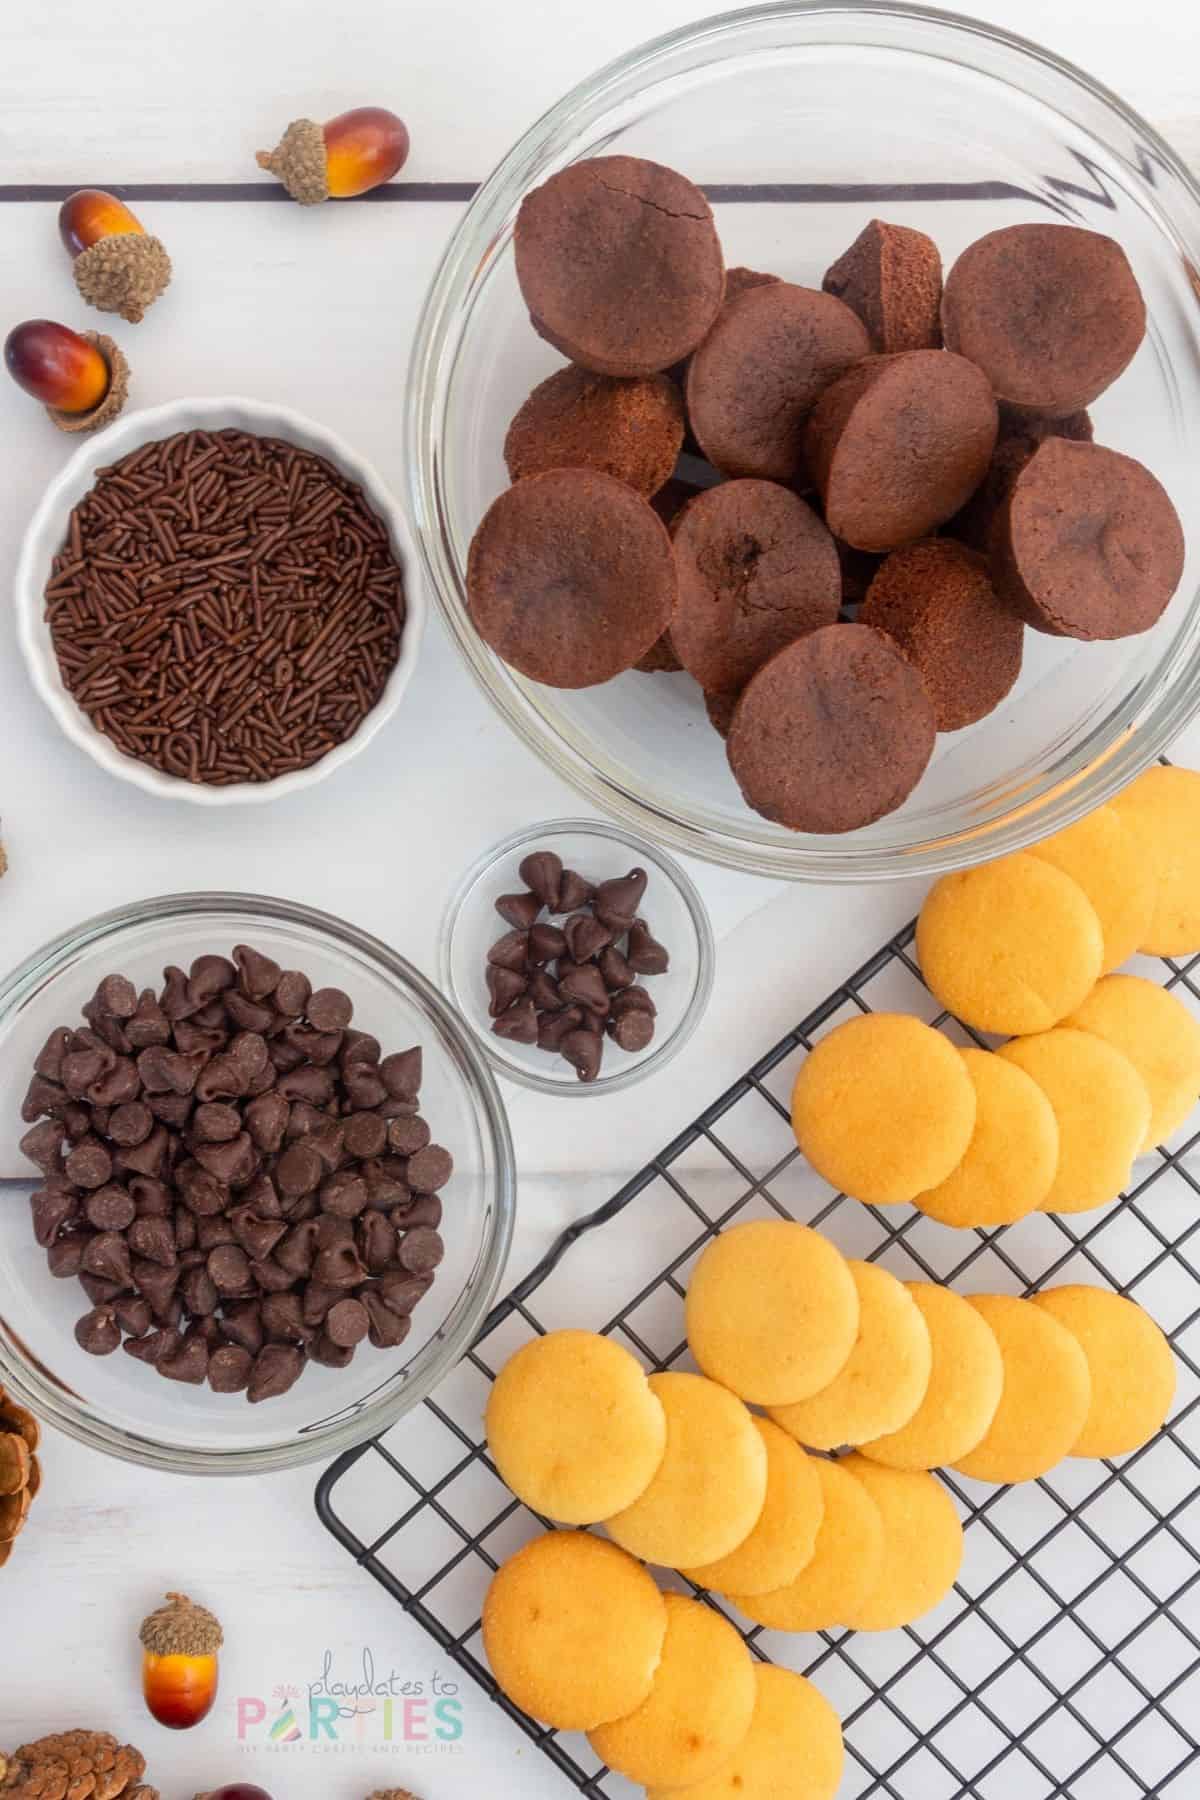
Ingredients:
- Small brownie bites (I used Entenmann’s Little Bites)
- Nilla wafers (original size)
- Semi-sweet chocolate chips
- Chocolate sprinkles
Supplies:
- 2 small bowls
- Cooling rack or parchment covered tray
- Spoon
- Measuring cups
How to make acorn treats:
To make things even easier for you, I created a simple photo guide below. For all measurements and a more detailed process, check out the recipe card at the bottom of this page.
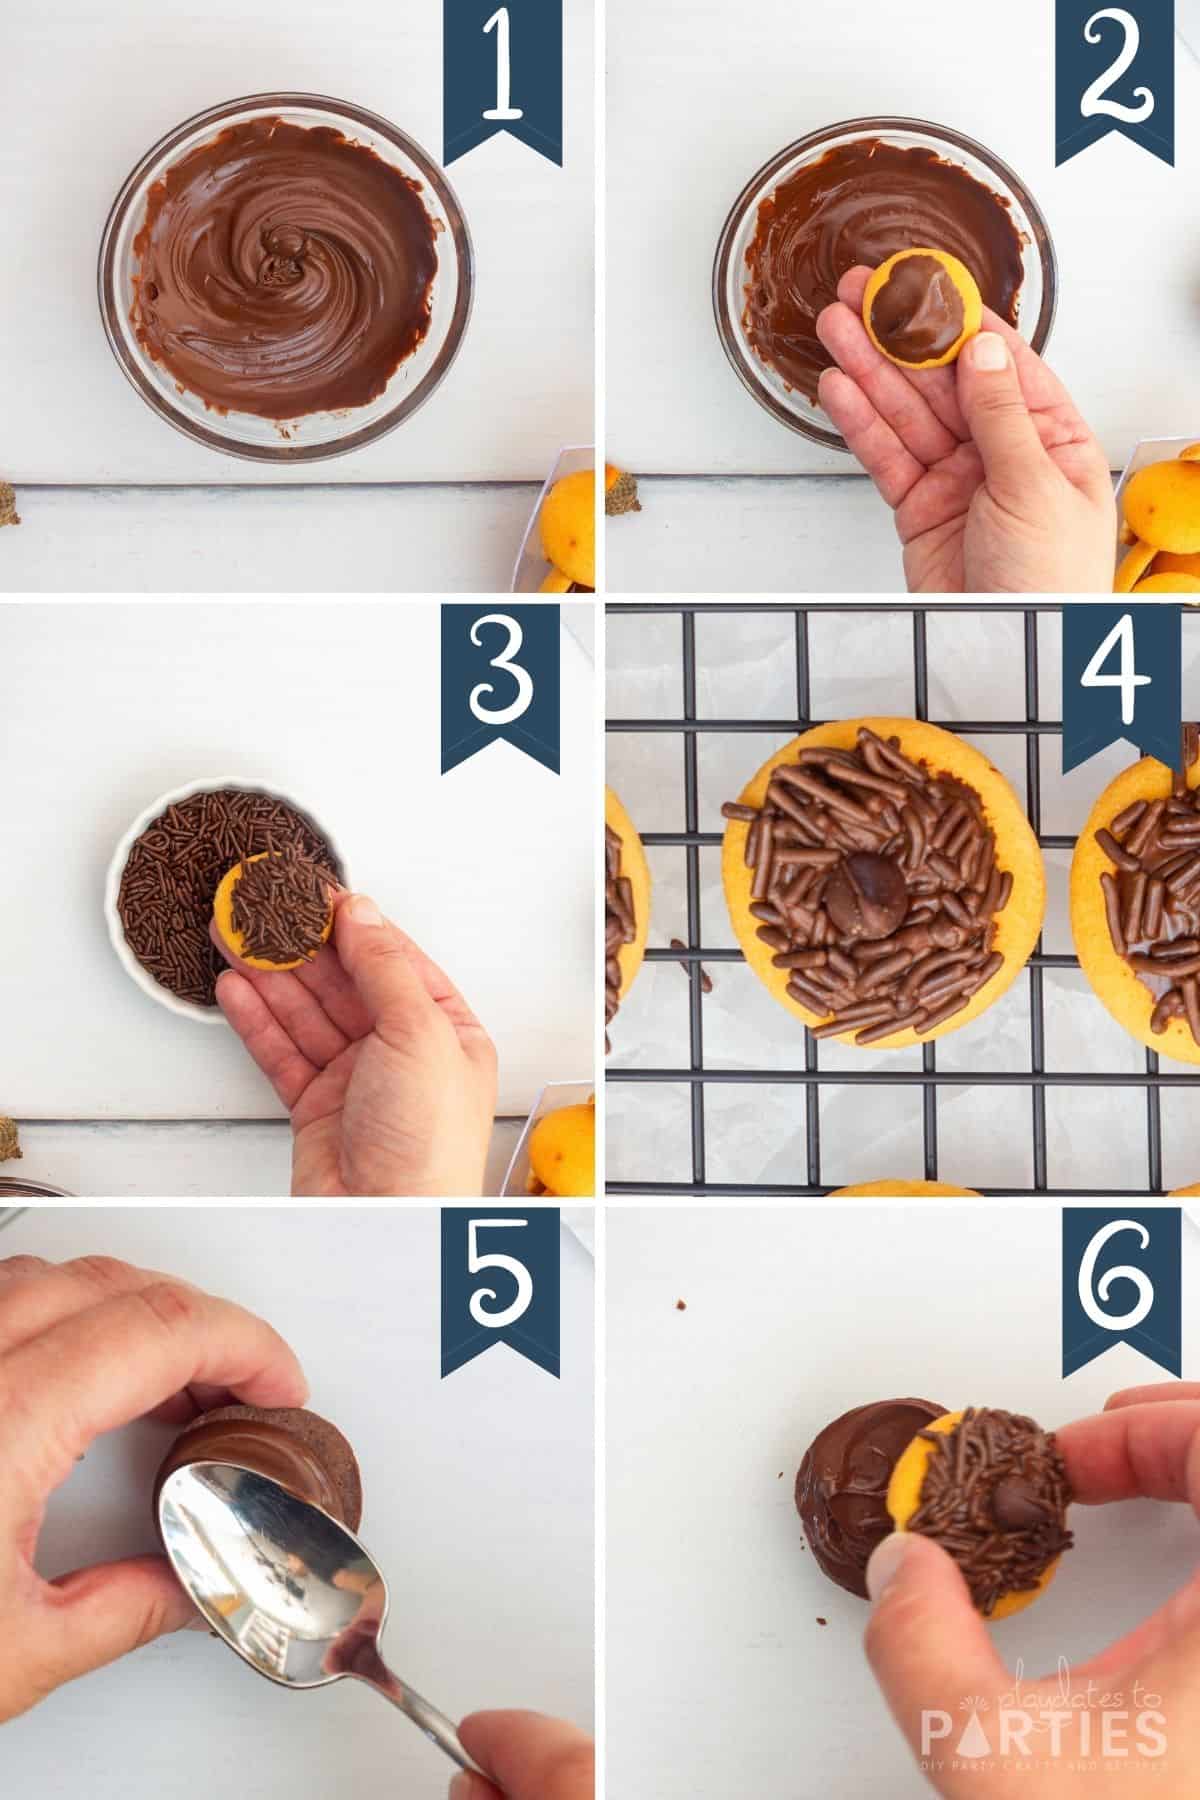
- Step 1 – Melt chocolate chips until smooth. (Learn all you need to know about how to melt chocolate)
- Step 2 – Dip the top of the Nilla wafer into the melted chocolate.
- Step 3 – Dip the chocolate coated Nilla wafer into the chocolate sprinkles.
- Step 4 – Press a single chocolate chip into the center of the melted chocolate. Set aside to cool.
- Step 5 – Swipe a thin layer of melted chocolate onto the top of the brownie bite.
- Step 6 – Place an acorn top onto the brownie bite. Set aside until chocolate has hardened.

Essential Tips:
Don’t skip these tips – read them before baking to avoid any potential mistakes.
Make sure your brownie bites have flat tops
Most of the time, I’m perfectly fine making substitutions with lower cost alternatives, but this is one case when I can’t advocate for that.
When testing this recipe, I tried making the acorn treats with Aldi’s brownie bites, but was sadly disappointed. Why?
- The brownies had a rounded top. That makes which makes it more difficult to ‘glue’ the acorn tops to them.
- They were tougher than Entenmann’s, which meant that they couldn’t be molded into a rounder, more acorn-like shape. (see below)
- Less expensive brands didn’t have consistent numbers of brownie bites in each bag, which meant that I was left short of the quantity I needed. (Not good!)
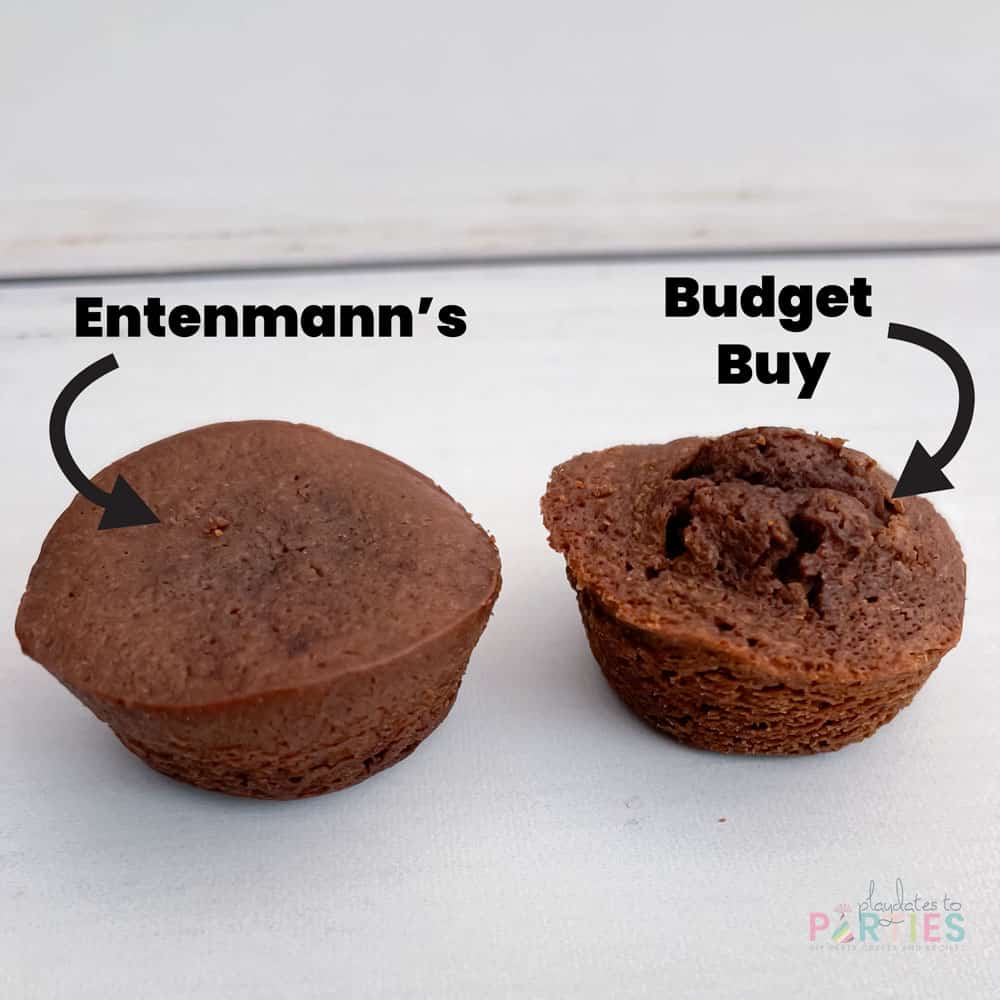
Thankfully, Entenmann’s Little Bites Brownies were perfect. As you can see from the photo above, they had a nice flat top, and an even shape that is perfect for this project. (No, they’re not paying me to say that or even to make this post. I just don’t want you to end up wasting money.)
Note: I haven’t yet tested these with in-store, or Costco made brownie bites, but plan to at some point. If you’ve used other brands, let us know how it went in the comments section.
Turn the Nilla wafer as you remove it from the melted chocolate.
Ironically, I learned this from pouring wine. (Ha!)
As you lift the Nila wafer out of the melted chocolate, give it a quarter to a half turn. This will reduce the amount of chocolate that drips off the Nilla wafer.
Alternatively, you can use a small spoon to swipe the melted chocolate on top.
Allow the chocolate to set at room temperature
It’s tempting to pop these in the fridge or freezer to help the chocolate cool faster, but I don’t recommend it.
First off, refrigerators are very humid, which can make your brownies and Nilla wafers soggy.
Second, Refrigerating and freezing chocolate also increases the chances that it will ‘bloom’, which makes your chocolate look grainy and chalky.
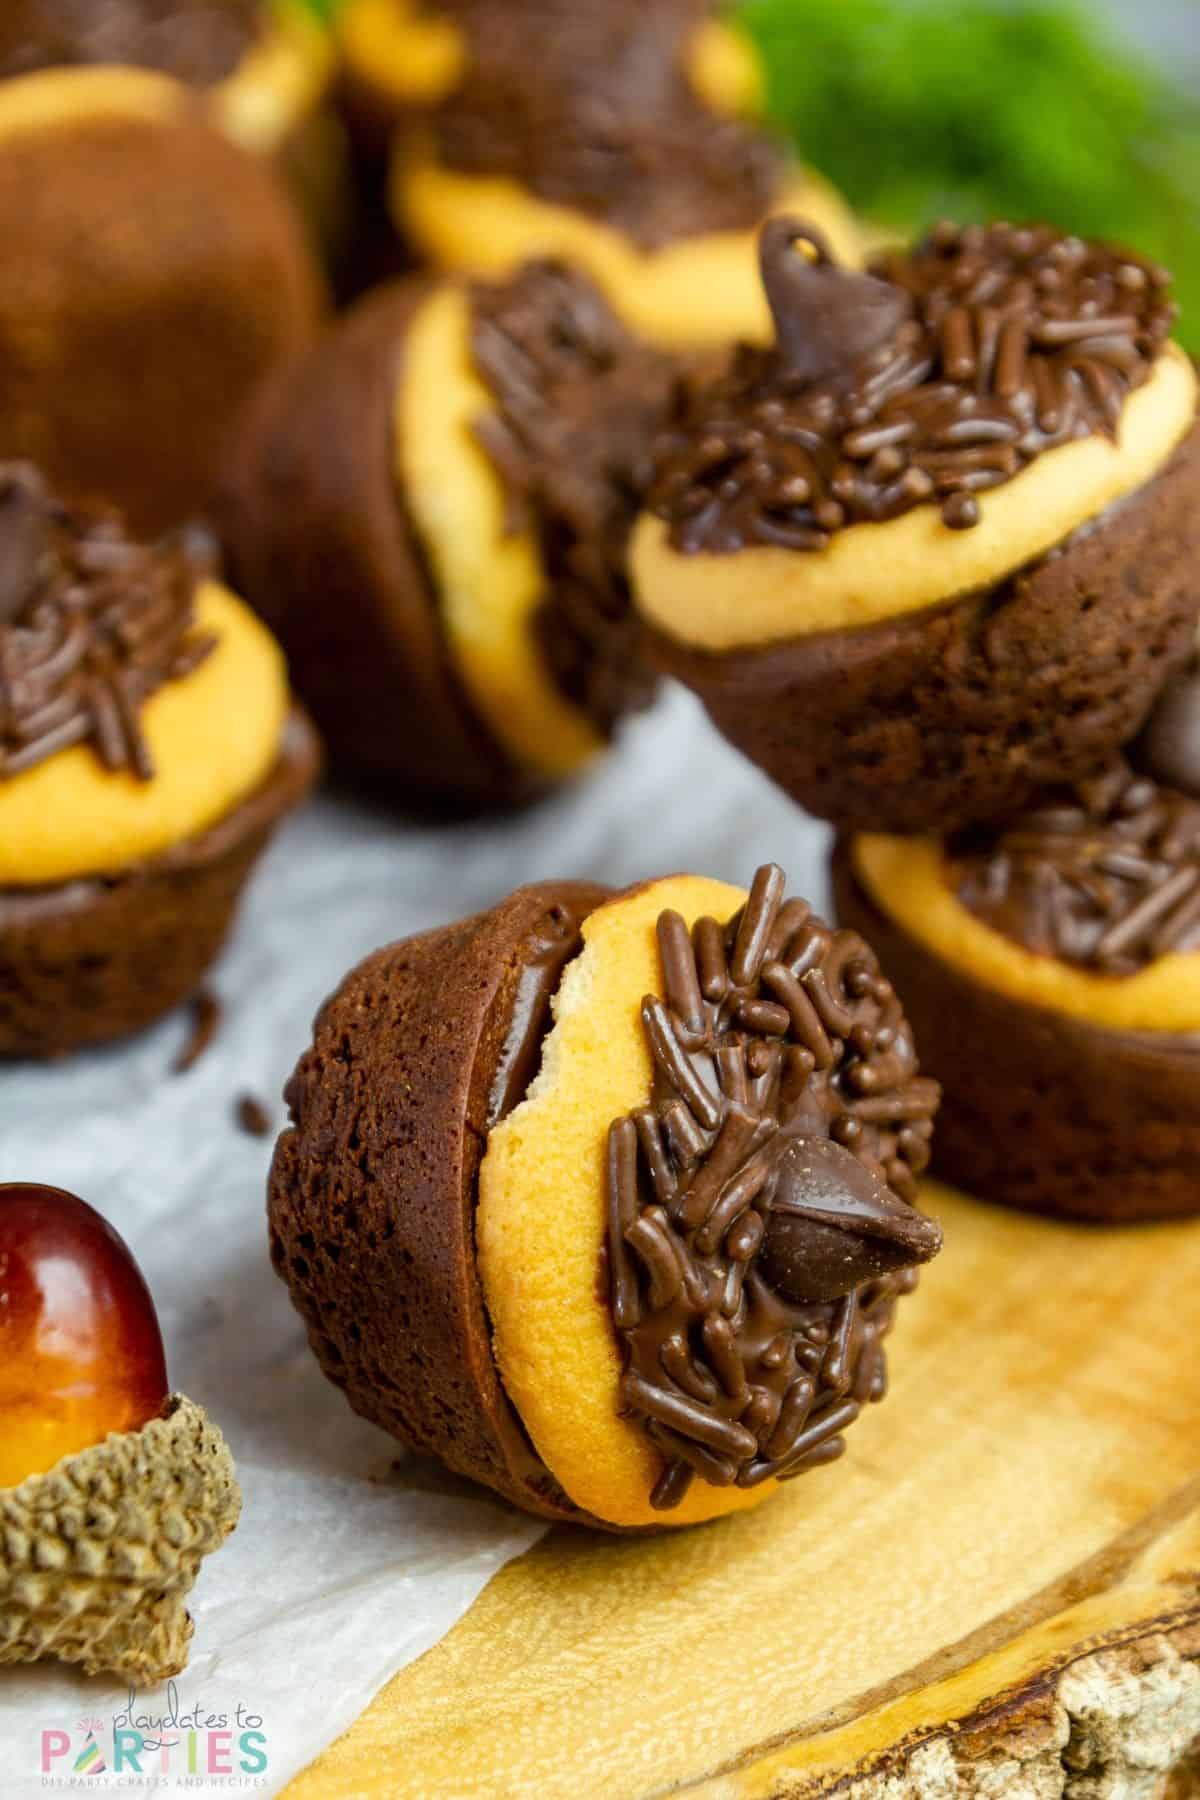
Optional: Mold the brownie bite to create a more acorn like shape.
One of the things I like about using brownie bites is that the flat bottoms make them easy to display for a party.
But if you want to make them more acorn-like, you can use your fingertips to gently mold the bottom of the brownie into a rounder shape.
FAQs:
How far in advance can I make acorn treats?
Prepare your brownie bites up to 3 days in advance.
How do I store them?
Store your acorn treats at room temperature in an airtight container or on a plate wrapped tightly with plastic.
What are some creative ways to Display Acorn Treats?
This is the fun part! You have a lot of options:
- Fill up a clear apothecary jar or cookie jar (the easiest option)
- Arrange them neatly on a tiered party platter
- Use a long rectangular platter and arrange them in neat rows.
- Mix them in on a large Thanksgiving dessert tray with other fall treats like apple roses and mini pumpkin pies.
You can garnish acorn treats with other sweets like candy corn and candy pumpkins. Or you can make a more forest-like design using a natural edge wood party platter sitting on top of fern leaves.
There are so many fun options! (Don’t forget to add a printable label if it’s on a buffet)
If you liked these acorn treats with nilla wafers and brownie bites, you’re going to love my easy Thanksgiving turkey pudding cups. With the printable feathers and face, it’s a fun craft that even your kids can help make.
Or you can check out my other Thanksgiving ideas right here.
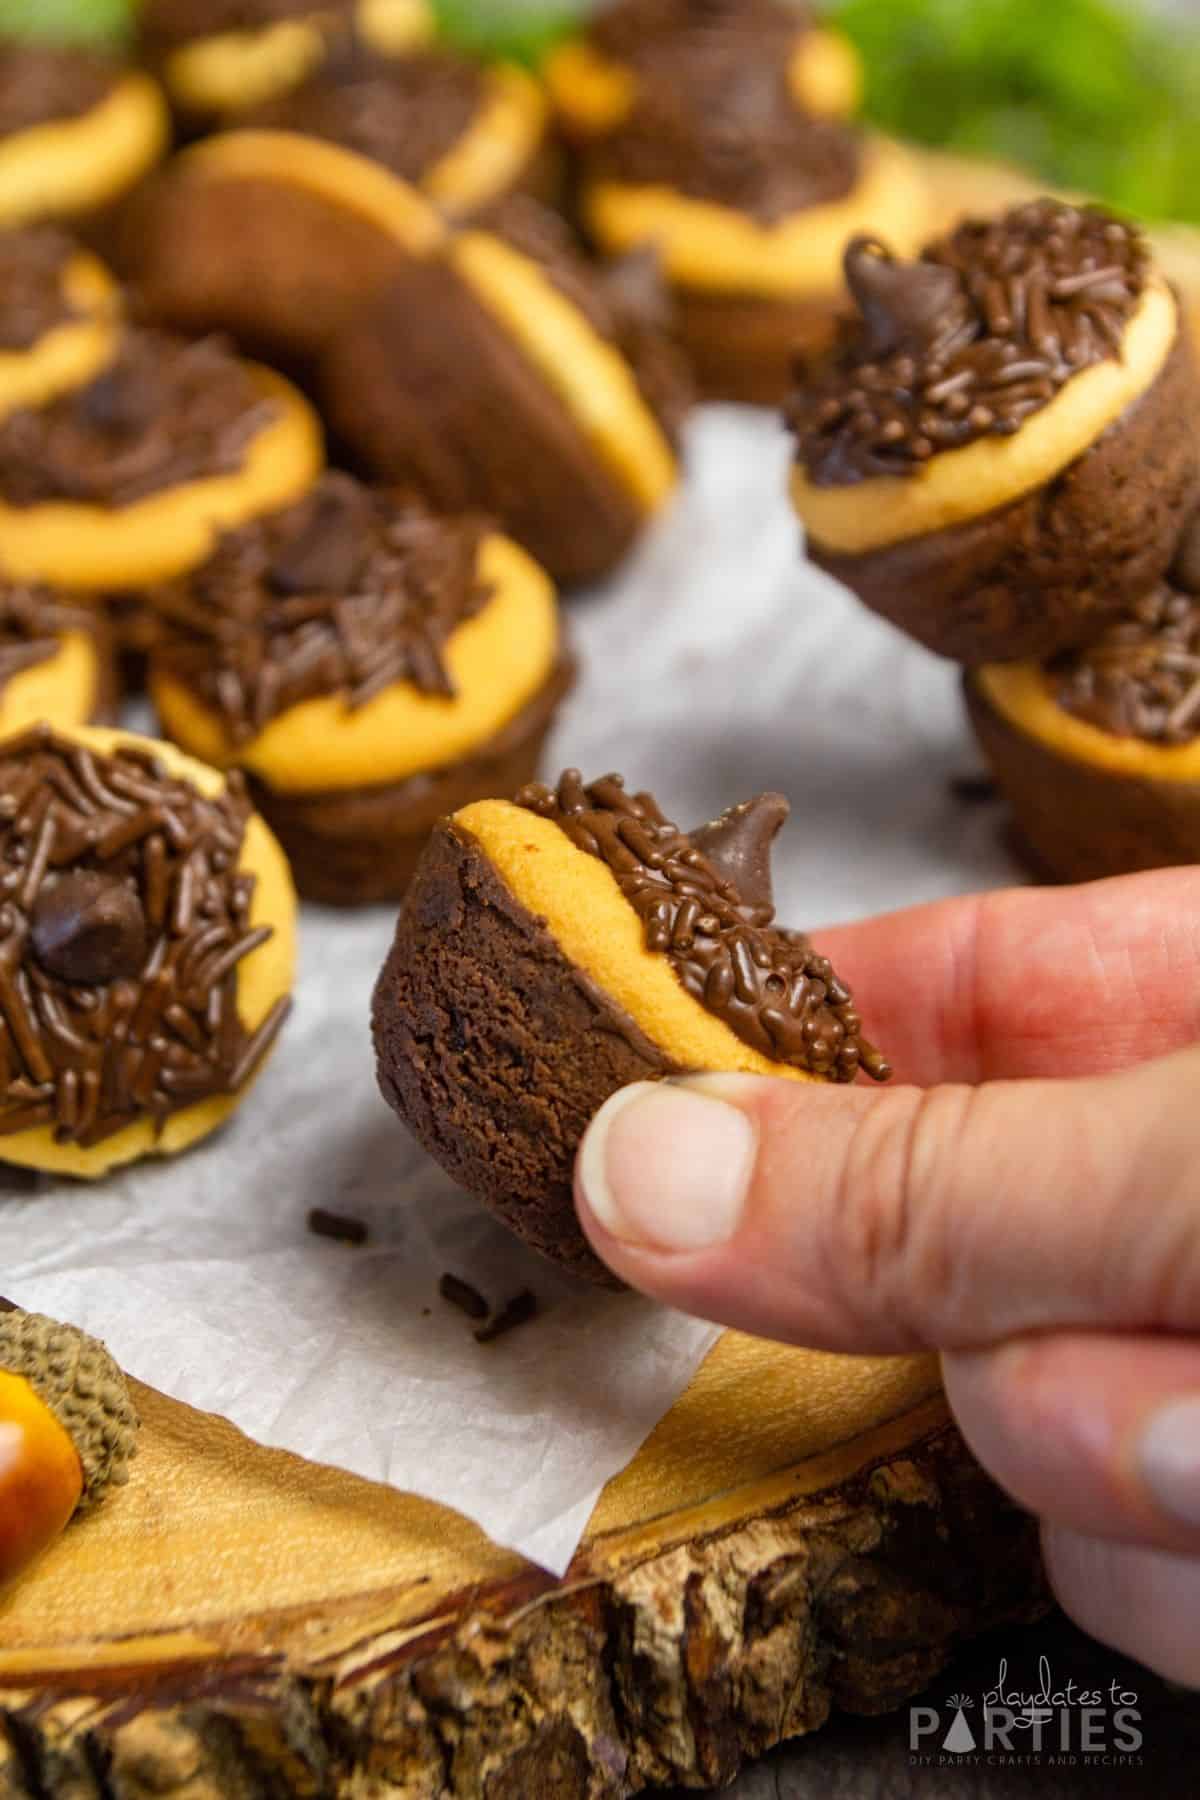
Acorn Treats Brownies

Acorn treats made with Nilla wafers and brownie bites are too cute to pass up, and just as much fun to eat for Thanksgiving class parties.
Ingredients
- 20 brownie bites (see notes)
- 20 Nilla wafers
- 1/2 cup semi-sweet chocolate chips, plus 20 chocolate chips for topping
- 1/3 cup chocolate sprinkles
Instructions
- Place chocolate sprinkles in a shallow bowl or ramekin. Place 1/2 cup chocolate chips in a microwave safe bowl. Heat the chocolate chips in the microwave, stirring at 30 second intervals just until smooth.
- Holding the edges of the Nilla wafer, dip the top of the Nilla wafer into the melted chocolate.
- Immediately dip the chocolate coated Nilla wafer into the chocolate sprinkles.
- Press a single chocolate chip into the center of the melted chocolate and set aside to cool.
- Repeat steps 2-3 with remaining Nilla wafers. When finished, set aside the melted chocolate until the acorn caps are set, about 10-20 minutes.
- Once the chocolate on the acorn tops has hardened, carefully microwave the melted chocolate chips at 15 second intervals until melted and smooth. Then, use the back of a spoon to swipe a thin layer of melted chocolate onto the top of a brownie bite.
- Place a prepared acorn top onto the brownie bite and set aside until the chocolate has hardened, about 20 more minutes.
Notes
Remember, the step-by-step photos and FAQ in the recipe post are there to help you if you feel stuck at any point.
- I used Entenmann’s Little Bites brownies for this recipe. If you make your own brownie bites or use a different brand, make sure that the top is flat enough to add the Nilla wafer on top.
- For best results, allow the chocolate to set at room temperature.
- Acorn brownie bites can be prepared up to 3 days in advance.
- Store your acorn treats at room temperature in an airtight container or on a plate wrapped tightly with plastic.
Recommended Products
As an Amazon Associate and member of other affiliate programs, I earn from qualifying purchases.


Nutrition Information:
Yield:
20Serving Size:
1Amount Per Serving: Calories: 321Total Fat: 20gSaturated Fat: 10gTrans Fat: 0gUnsaturated Fat: 9gCholesterol: 10mgSodium: 69mgCarbohydrates: 42gFiber: 3gSugar: 28gProtein: 3g
__________________________________ The nutrition information provided above is estimated using an automated calculation system. Actual nutrition will vary depending on brand and measurements used in your recipe. To obtain the most accurate representation of the nutrition information for any given recipe, you should calculate the nutritional information using the actual ingredients you used in your recipe.


Nina Paul says
Thanks for sharing this great recipe. I’m sure everyone in my family will like it.