If you’re looking for a fun, simple Christmas project for the whole family, sugar cookie ornaments are the perfect option. These sweet treats are fun to make, fun to eat, and look adorable hanging from a tree on your table.
Follow these essential tips to make sure you get your dough just right so that your sugar cookie ornaments taste good, look pretty, and don’t fall apart.
This recipe has been a long time coming. The first time we served edible ornament cookies was when my oldest was barely 18 months old. (She’s now pushing 13!)
Back then I hired a local baker to make them for our Christmas party…and I could see the look of panic on her face. It was clear she was trying to figure out how on earth she could turn sugar cookies into edible ornaments.
We put our heads together, and came up with a plan…and it worked!
And now I’m sharing how you can make cookie ornaments for the tree that are also 100% edible. They’re such a cute addition to any holiday party.
Though, they would also be completely adorable as a way to display party favors for a baby shower or birthday party if you have the right tree. (Seriously, if you do that, will you send me a picture. I’d love to see it!)
Until then, here’s what the cookies looked like at our party so many years ago…
What You’ll Need:
Ingredients:
Cookies:
- All purpose flour
- Baking powder
- Ground cloves
- Salt
- Butter, softened to room temperature and cubed
- Granulated sugar
- Egg
- Vanilla extract
- Almond extract (optional)
Decorations:
- Powdered sugar
- Milk
- Light corn syrup
- Almond extract (optional)
- Christmas Sprinkles
- Food coloring (optional)
Supplies:
- 2-3 large mixing bowls
- Measuring cups and spoons
- Electric mixer or stand mixer
- Parchment paper
- Rolling pin
- Cookie sheet(s)
- Holiday cookie cutters
- Ribbon
- Scissors
- Piping bag and small round piping tip
- Spoon or small offset spatula
- Straw
How to Make Sugar Cookie Ornaments:
To make things even easier for you, I created a simple photo guide below. For all measurements and a more detailed guide, check out the recipe card at the bottom of this page.
Step 1 – Prepare Your Cookie Dough
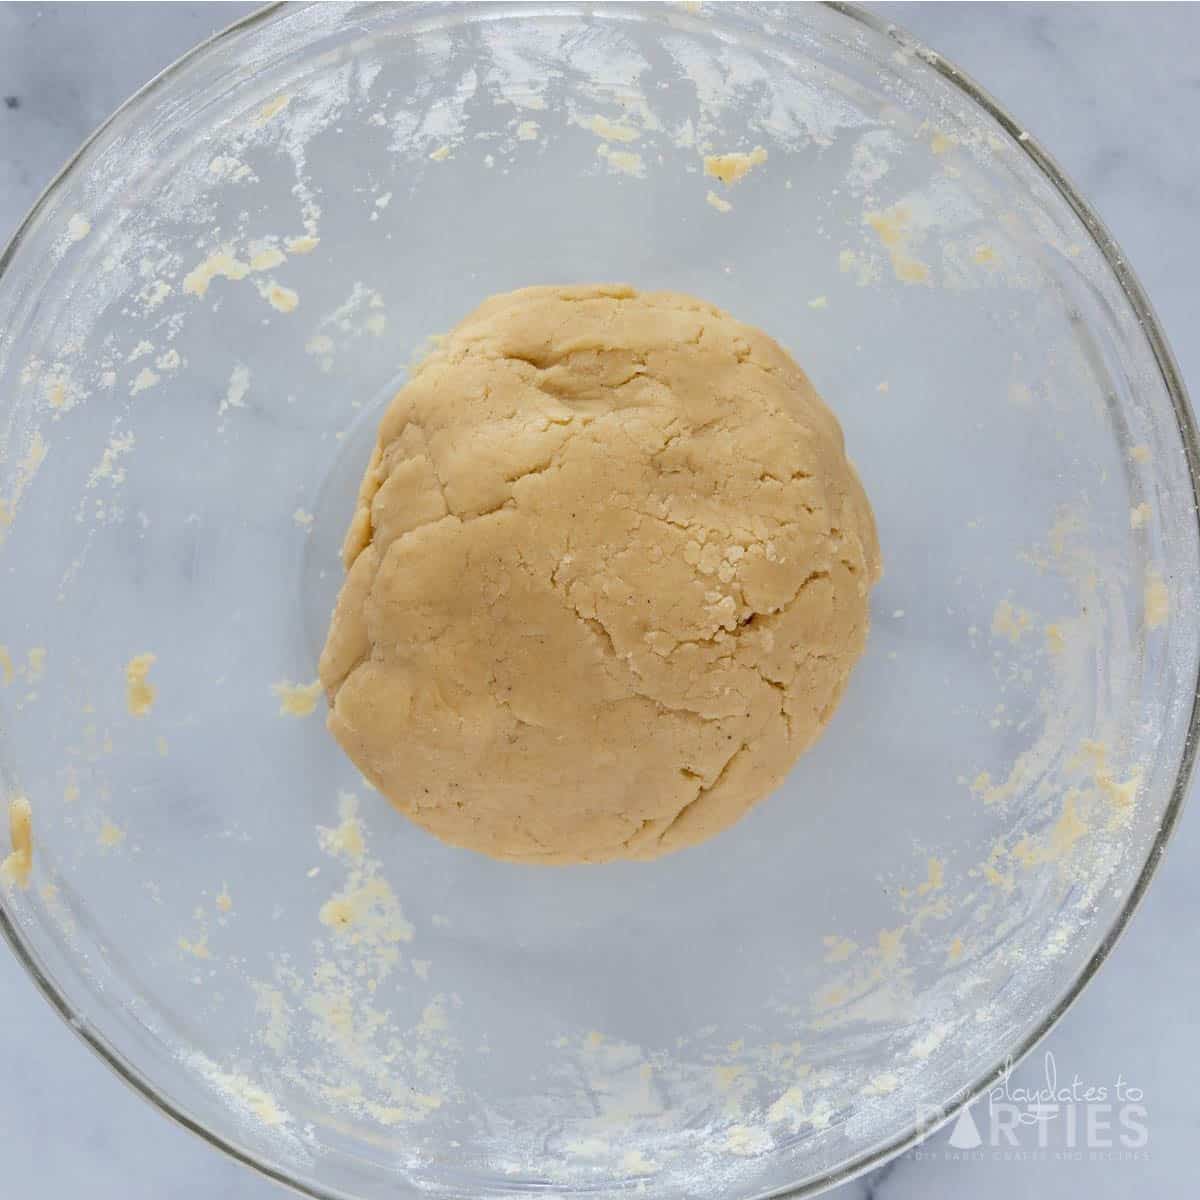
For this recipe, I doubled my favorite cut out sugar cookies recipe. The ingredients and process are included in the recipe card below, but you may want to check the post for all my best cut out sugar cookie dough tips and tricks.
You could also use a shortbread cookie or another favorite sugar cookie recipe of yours. Just be sure that whatever recipe you use doesn’t spread too much and is firm enough to handle hanging by a ribbon.
Step 2 – Roll, Cut, and Bake the Cookie Dough
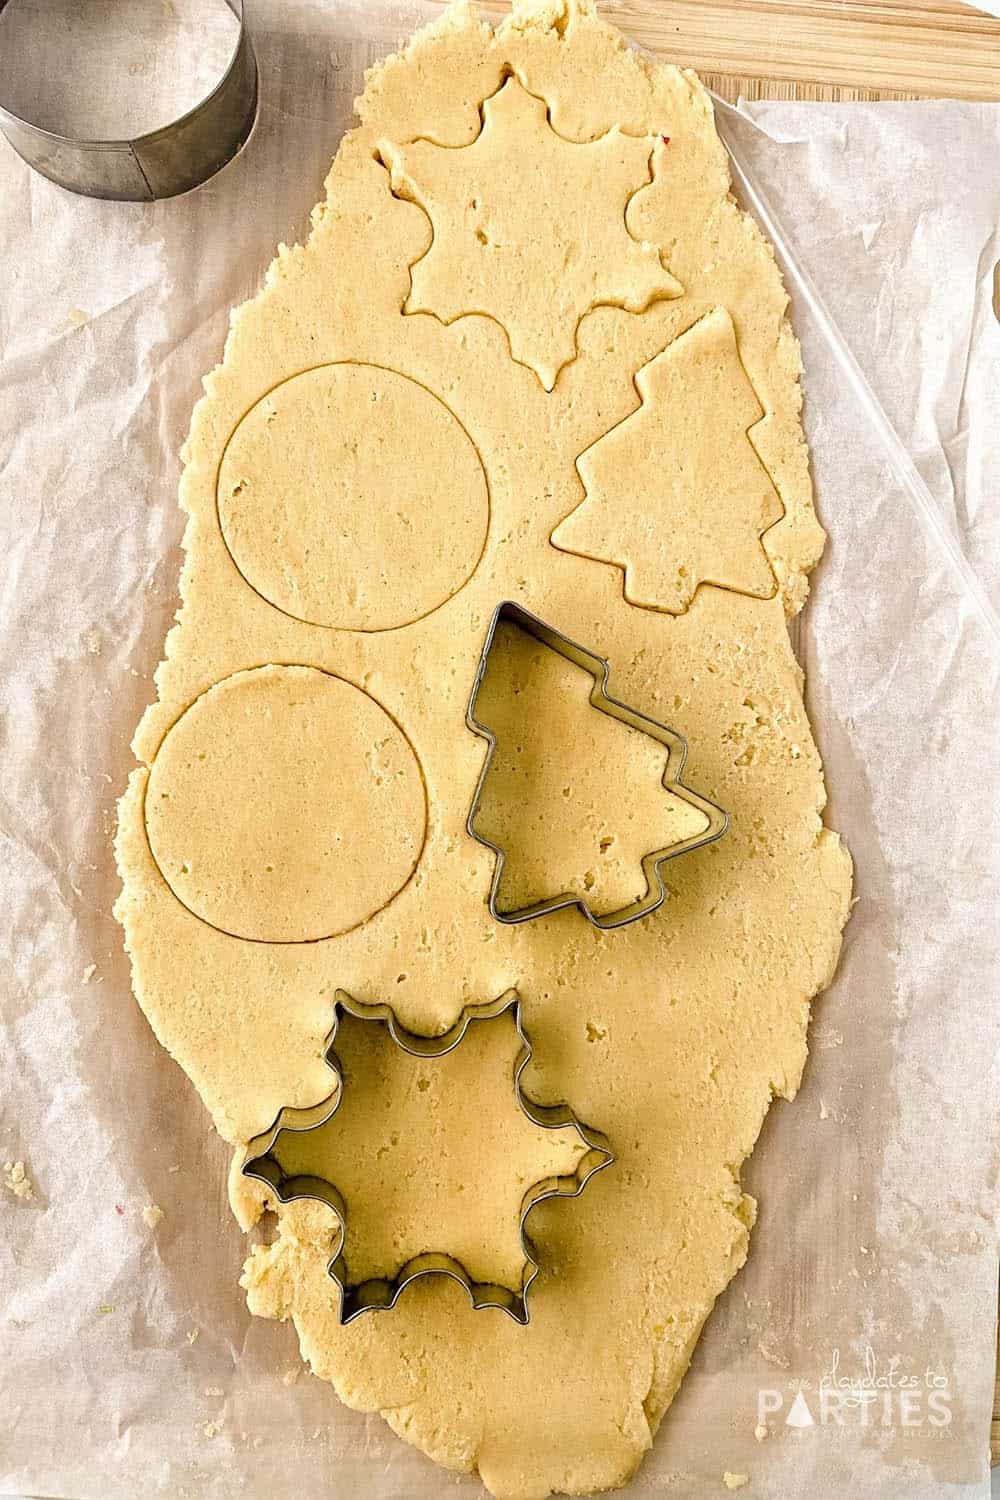
When the dough is ready, roll it out at least 1/4 inch thick and chill for at least two hours. Then use your cookie cutters to create your desired shapes. Move the cookie cutouts to a parchment covered baking sheet.
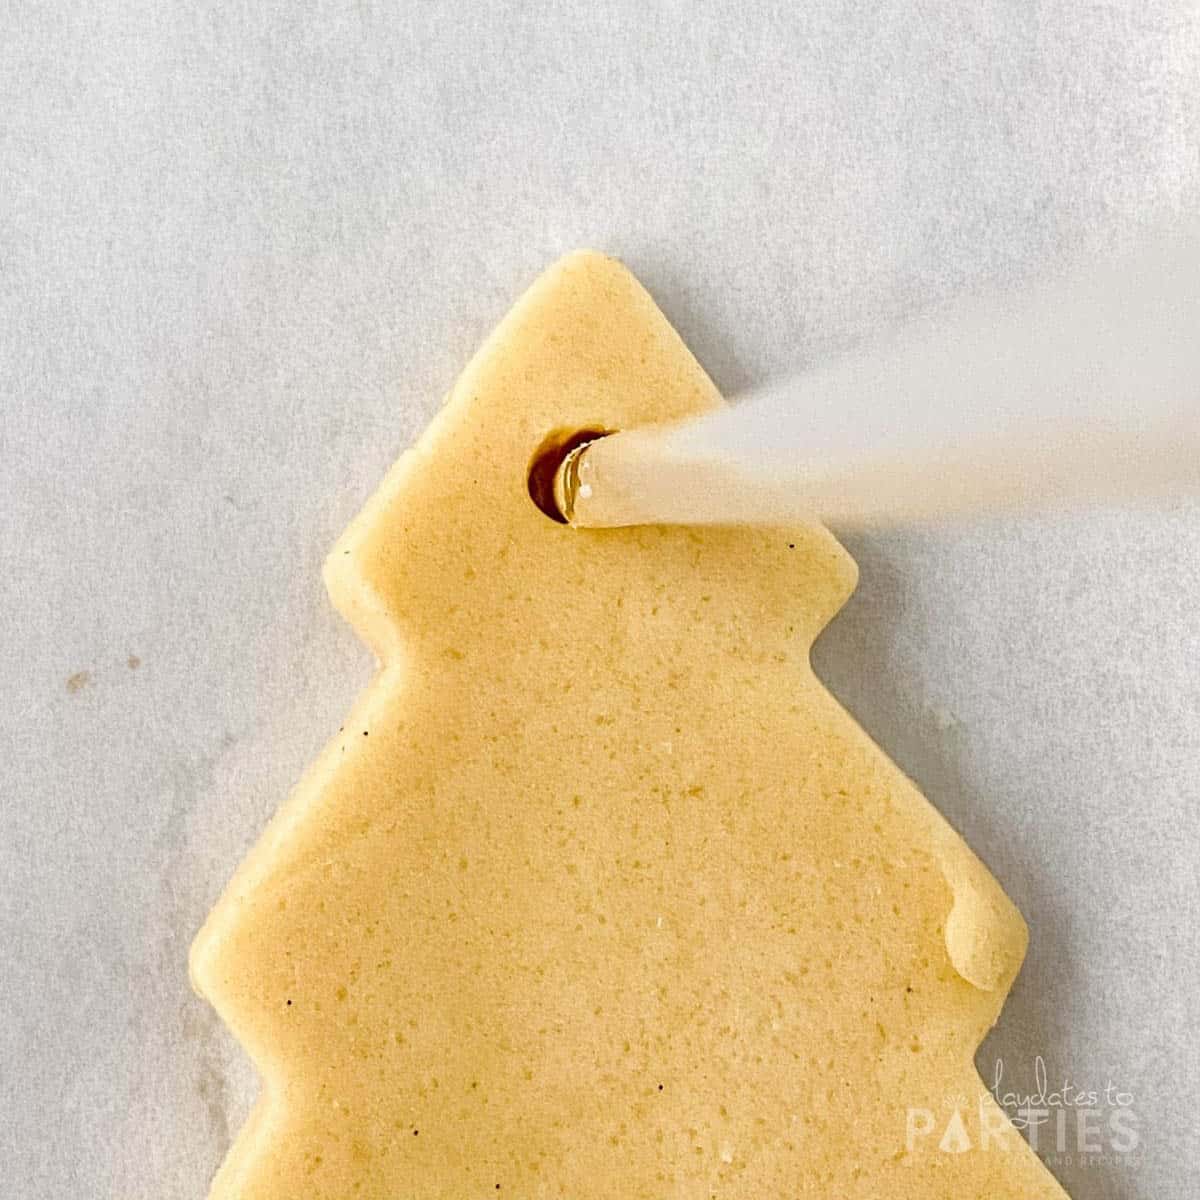
Before baking, use a straw to poke a hole in the top of the cookie. Carefully wiggle the straw around to increase the size of the hole.
Bake your cookies for 10 to 12 minutes, or until the edges are golden brown.
Remove the cookies from the oven and immediately use your straw to open up the hole again.
Allow the cookies to cool on the baking sheet for 10 minutes. Move the cookies to a cooling rack to completely cool before decorating.
Baking Tips:
- Resist the urge to roll the dough thinner than 1/4 inch. The extra thickness helps to make the cookies nice and sturdy.
- You can use a paper straw, but the opening may be too narrow. I found that a plastic water bottle straw was the perfect width.
- Make sure your hole isn’t too close to the top of the cookie. I recommend between 1/4 inch and 1/2 inch from the edges. You may want to practice with a couple cookies first to get a feel for how close is ‘too close’ to the edges.
- I bake sugar cookie ornaments longer than my normal sugar cookies. This helps to reduce their softness so they are sturdy enough to hang.
Step 3- Decorate Your Cookies
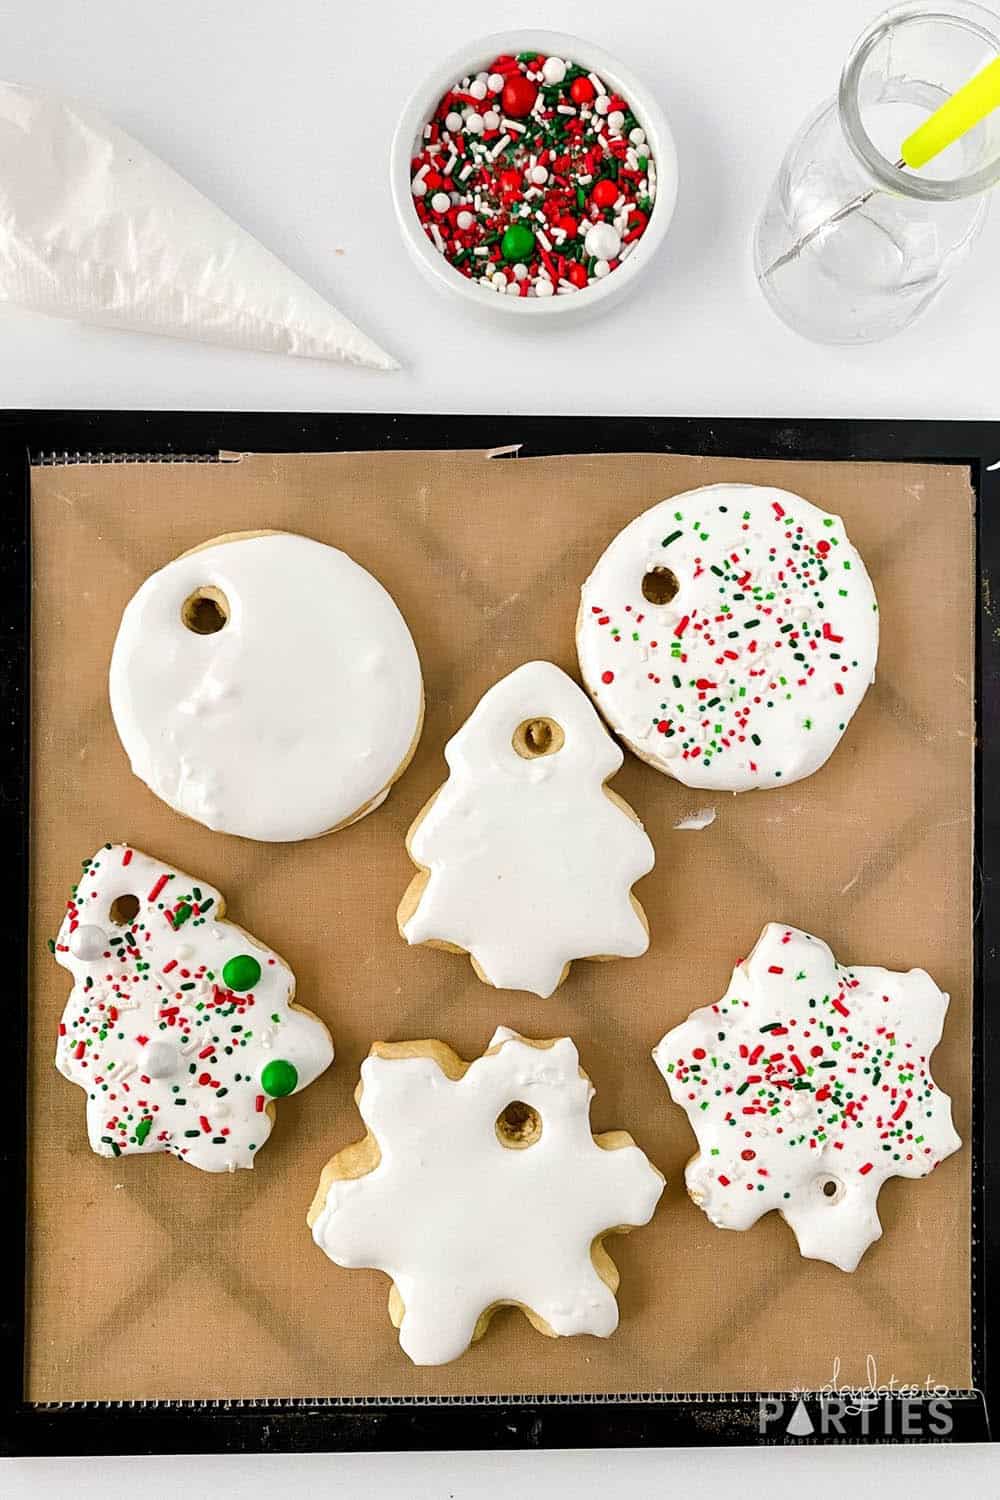
Prepare your favorite icing (we used this easy sugar cookie icing), and add it to a piping bag fitted with a small round tip.
Pipe your icing onto the cooled cookies, making sure the surface is well covered.
Add holiday colored sprinkles to the icing and allow your cookies to set. (At least 2 hours, but up to overnight)
Thread a ribbon through the opening in the cookie and hang it on your tree – or anywhere else you’d like!
Decorating Tips:
- Have fun with the icing. You can make a thinner icing and let it run over the edges of your cookies, Or you can make a thicker icing and pipe a clean edge around your cookies before filling it in.
- While you can hang your cookies with baker’s twine, I recommend using ribbon. Ribbon adds less pressure to the delicate cookies which means they’re less likely to break.
- Decorate your cookies on parchment paper or a baker’s mat to help contain the mess and protect your counters.
- Display your sugar cookie ornaments on an ornament tree or twig tree so everyone can see your creativity!
Ready to Take Your Holidays to the Next Level?
Stay focused on what really matters this holiday season with our printable Christmas planner.
It has everything you need to have an organized and stress-free holiday season…from setting your goals all the way to packing up your decorations at the end of the season. Click here to grab your copy today.
If you liked these sugar cookie ornaments, you’re going to love my candy cane hearts with chocolate. Loaded with semi sweet and white chocolate, it’s an easy peppermint bark recipe that’s perfect as a homemade gift for kids during the holidays.
Or you can check out all my dessert recipes right here.
Sugar Cookie Ornaments

Learn out how to make edible sugar cookie ornaments that you can hang on the tree! It's a fun afternoon activity with the kids and a creative way to display treats for a Christmas party.
Ingredients
Cookies:
- 3 cups all purpose flour
- 1/2 teaspoon baking powder
- 1/8 teaspoon ground cloves
- 1/2 teaspoon salt
- 1 cup butter, softened to room temperature and cubed
- 1 cup granulated sugar
- 1 eggs
- 2.25 teaspoons vanilla extract
- 3/4 teaspoon almond extract
Icing and Decorations:
- 2 cups powdered sugar
- 2.5 tablespoons milk
- 1 1/3 tablespoons light corn syrup
- 1/2 teaspoon almond extract
- Sprinkles
- Food coloring
Instructions
Cookies:
- Whisk together 3 cups all purpose flour, baking powder, cloves, and salt. Set aside.
- Cream 1 cup softened butter cubes and 1 cup granulated sugar on high speed until completely smooth and creamy. About 2-5 minutes.
- Add 1 egg, 2.25 teaspoons vanilla extract, and 3/4 teaspoon almond extract (if using) and beat on high speed until combined, about one minute.
- Add half dry ingredients to the wet ingredients and mix on low until combined. Repeat with remaining dry ingredients. Dough may be crumbly. If necessary, you can knead the dough with your hands a bit to help it stick together.
- Separate the dough into two medium sized balls. Place each dough ball between two sheets of parchment paper. Press down gently to create disks of dough between the sheets.
- Roll the dough balls into 1/4 inch sheets. Place the dough sheets on a cookie pan and chill in the refrigerator for at least 2 hours.
- Preheat your oven to 375˚F (190˚C) and prepare cookie sheets with parchment paper. Use cookie cutters to cut the dough into your desired shapes.
- Place sugar cookies on a prepared lined baking sheet about 1-2 inches apart.
- Use a straw to poke a hole in the top of the cookie. Wiggle the straw around to increase the size of the hole, being careful not to break your cookie. Then bake until the edges are golden in color, about 10-12 minutes.
- Remove the cookies from the oven and immediately use your straw to gently open up the hole again. Allow to the cookies to cool on the baking sheet for 10 minutes. Move the cookies to a cooling rack to completely cool before decorating.
Make the Icing & Decorate Your Cookies:
- Place 2.5 tablespoons of milk, 1 1/3 tablespoons light corn syrup, 1/2 teaspoon almond extract (if using), and 2 tablespoons powdered sugar in a large bowl.
- Use a fork or an electric mixer to combine the ingredients. Add a tablespoon or two of powdered sugar to the mixture, combining well. Repeat until your icing is thick, but drizzles smoothly off the back of a spoon.
- Use a piping bag to pipe your icing onto the cooled cookies, making sure the surface is well covered.
- Add holiday colored sprinkles to the icing and allow your cookies to set. (At least 2 hours, but up to overnight)
- Thread a ribbon through the opening in the cookie and hang it on your tree - or anywhere else you'd like!
Notes
Remember, the step-by-step photos and tips in the recipe post are there to help you if you feel stuck at any point.
- I used our favorite cut out sugar cookies recipe and easy sugar cookie icing for these cookies. You may want to check those posts for all my best tips and tricks.
- Resist the urge to roll the dough thinner than 1/4 inch. The extra thickness helps to make the cookies nice and sturdy.
- I found that a plastic water bottle straw was the perfect width to create your ornament holes.
- Make sure your hole isn't too close to the top of the cookie. I recommend between 1/4 inch and 1/2 inch from the edges. You may want to practice with a couple cookies first to get a feel for how close is 'too close' to the edges.
- Have fun with the icing. You can make a thinner icing and let it run over the edges of your cookies, Or you can make a thicker icing and pipe a clean edge around your cookies before filling it in.
- While you can hang your cookies with baker's twine, I recommend using ribbon. Ribbon adds less pressure to the delicate cookies which means they're less likely to break.
Recommended Products
As an Amazon Associate and member of other affiliate programs, I earn from qualifying purchases.






Leave a Reply