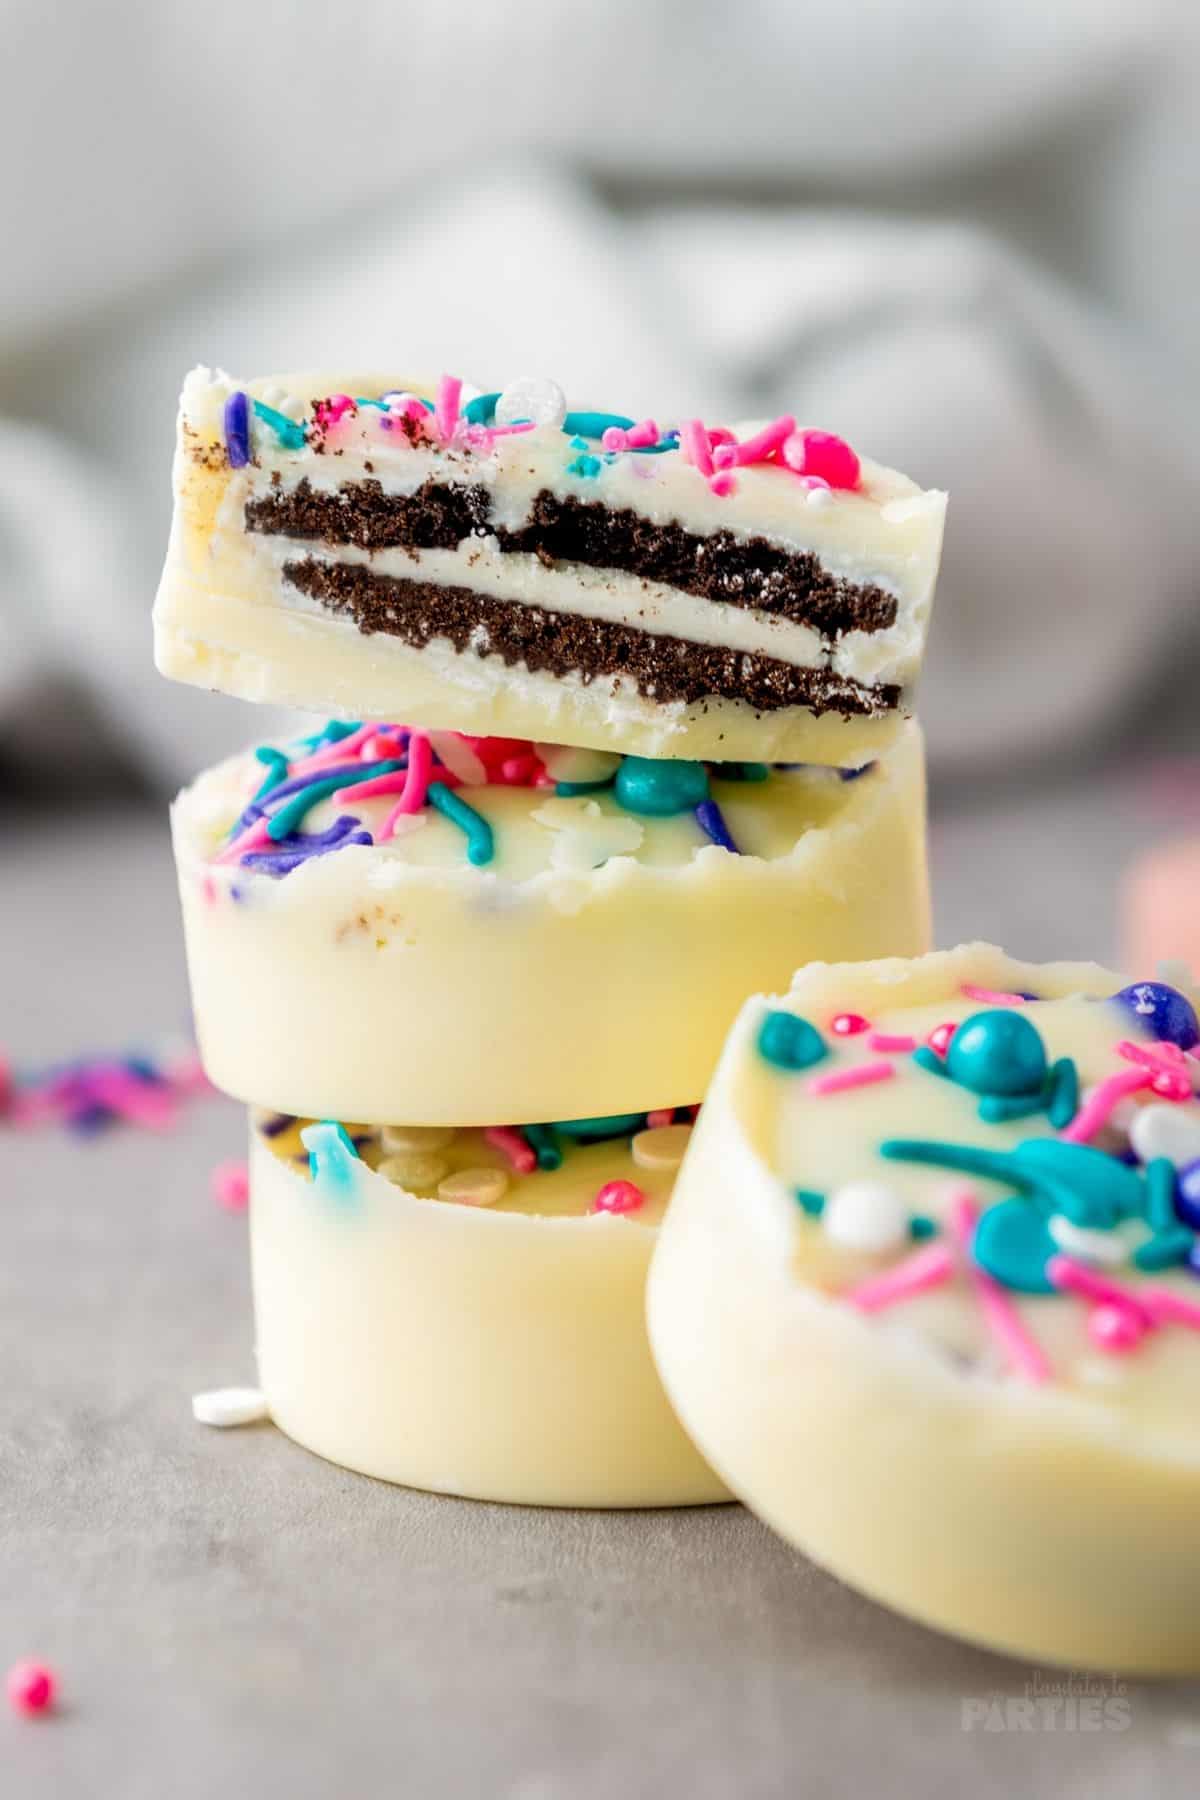
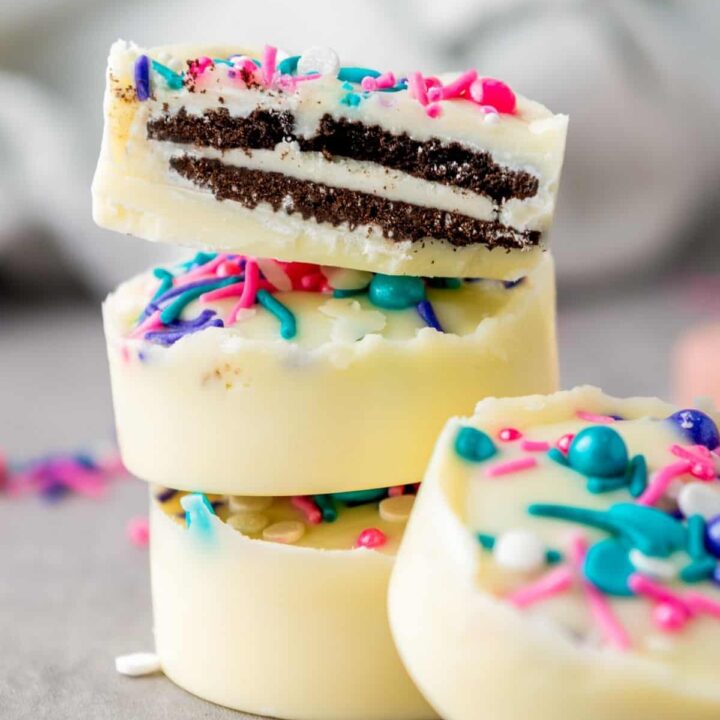
Roll up your sleeves and get ready to dive into a world of scrumptious delight – we’re making Chocolate Covered Oreos! Who could resist the magical combo of America’s favorite cookie cloaked in a lush robe of a velvety robe of luxuriously smooth chocolate?
Perfect for holidays, parties, potlucks, or just because—it’s just too scrumptious to pass up! Get ready to channel your inner chocolatier, folks! Grab your apron and roll up your sleeves, it’s time to dip, chill, and thrill your taste buds.

Why you’ll love these Chocolate Covered Oreos
- They are so simple to make yet look visually appealing and delicious.
- The cookies are really kid-friendly. Perfect to elevate a cookie and turn it into something pretty unique for your kids as a sweet snack or for a party.
- You only need three ingredients to make this simple no-bake sweet snack.
What you’ll need:
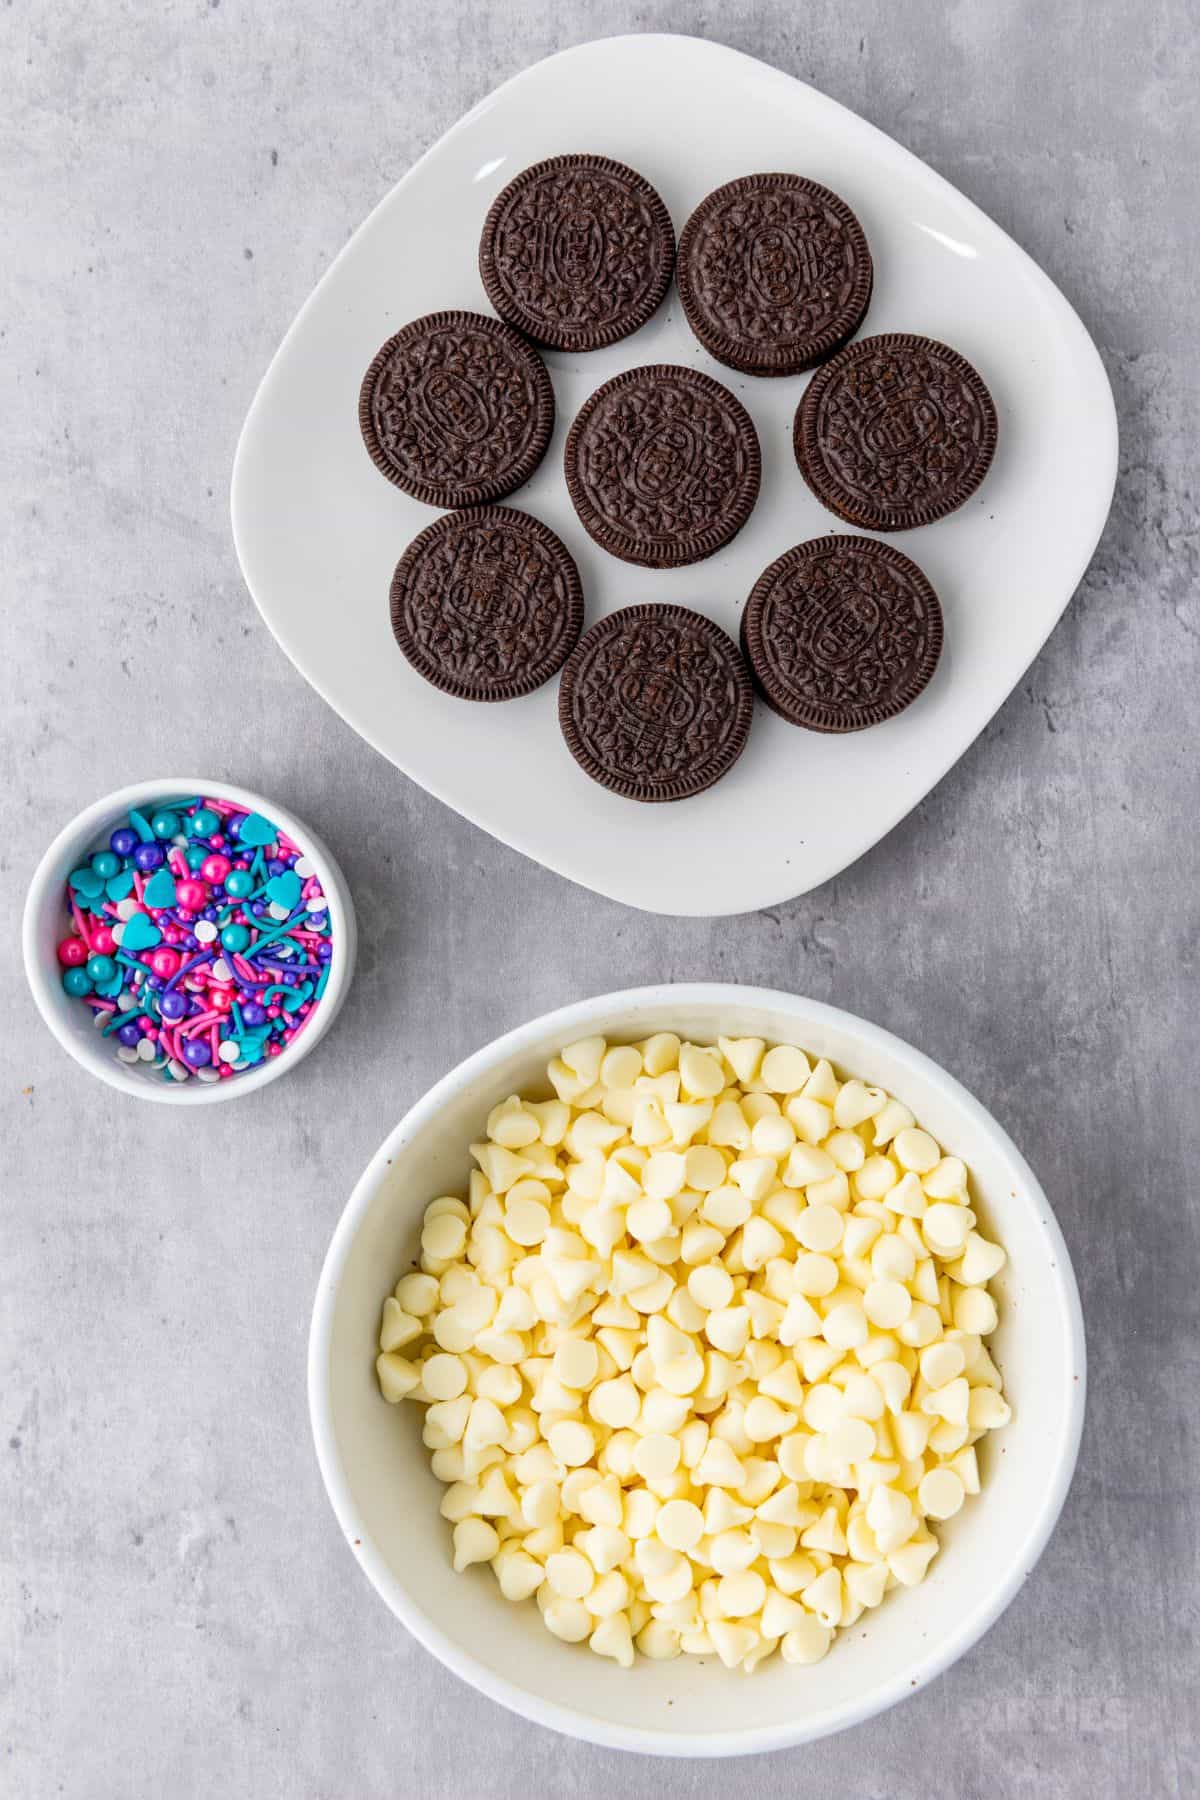
Ingredients:
- Oreos
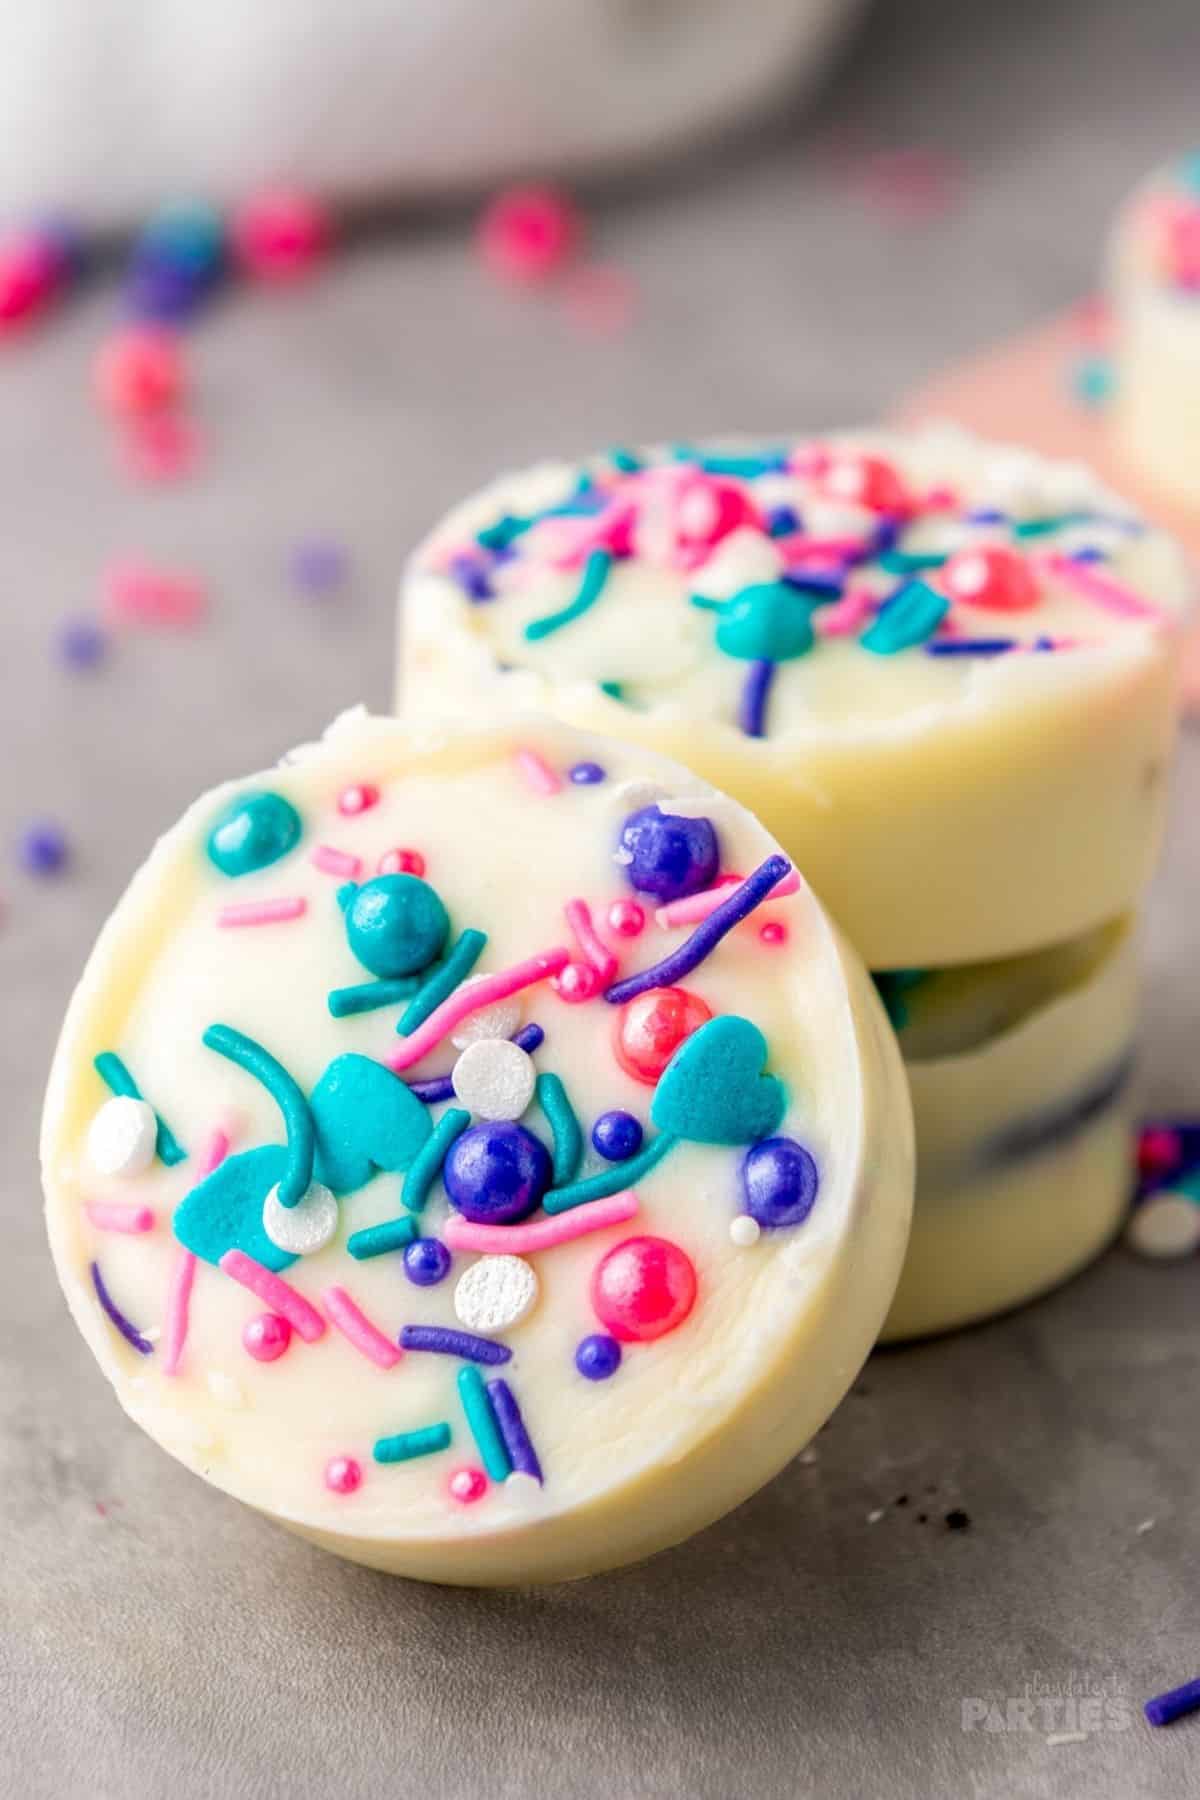
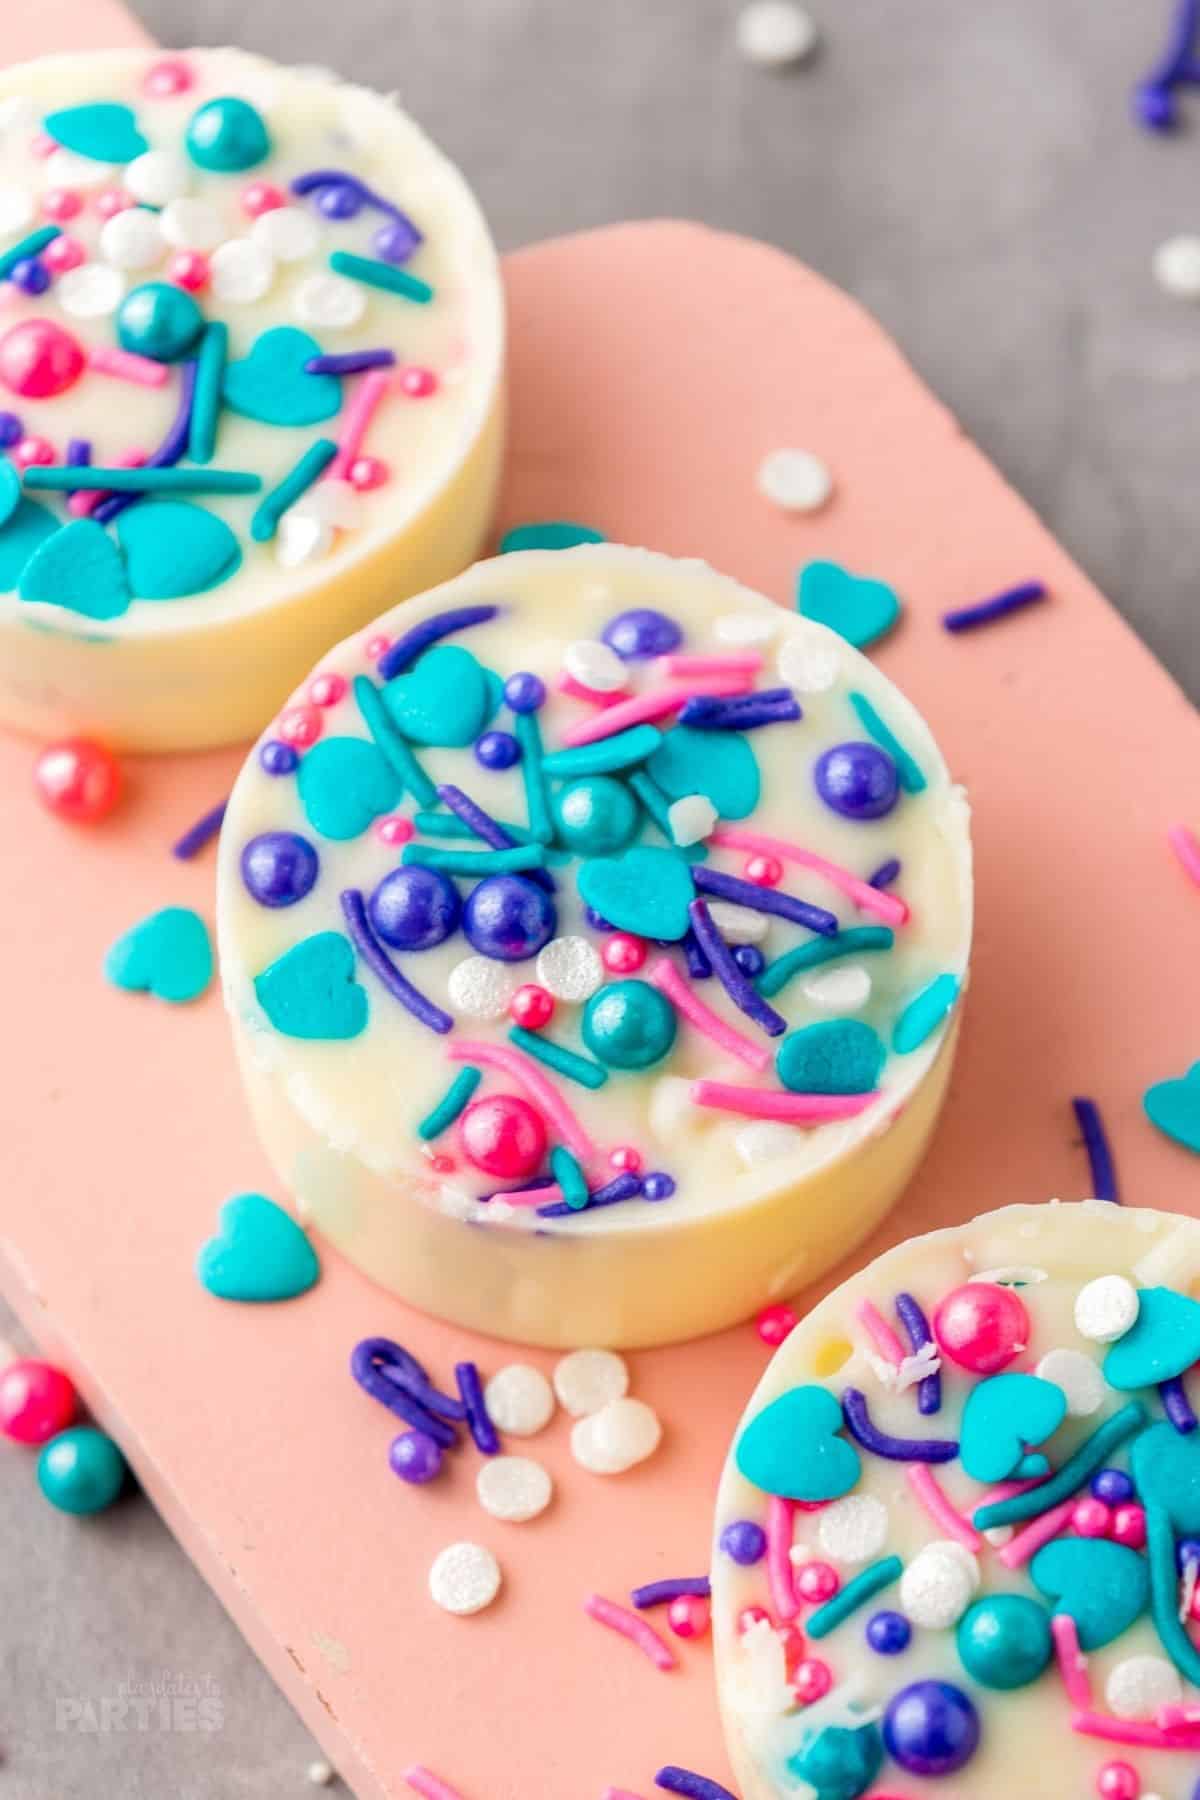
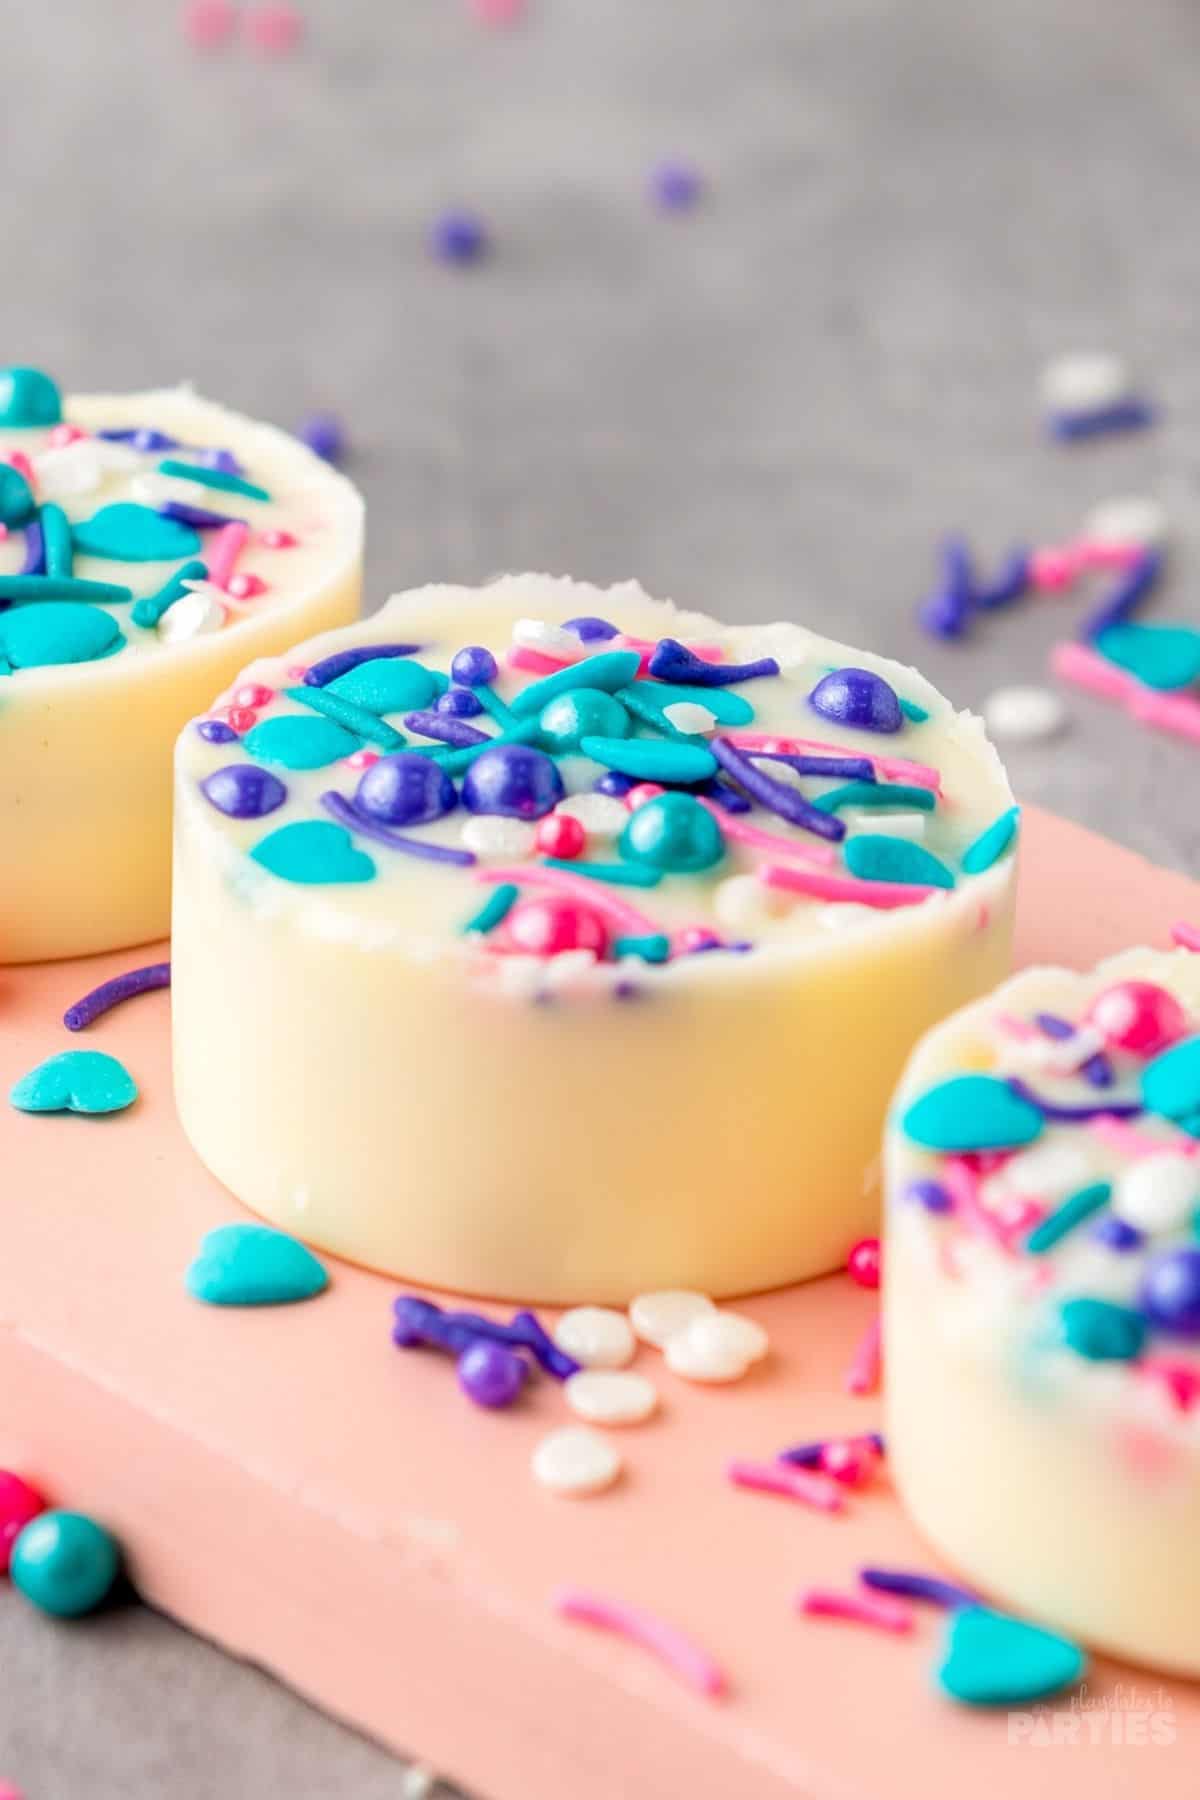
- Chocolate chips – we used white chocolate, but you can use your preferred chocolate
- Sprinkles or other decorations
Equipment:
- Microwave-safe bowl
- Oreo mold
- Silicone spatula
How to Make Chocolate Covered Oreos
To make things even easier for you, I created a simple step by step guide below. For all measurements and a more detailed guide, check out the recipe card at the bottom of this page.
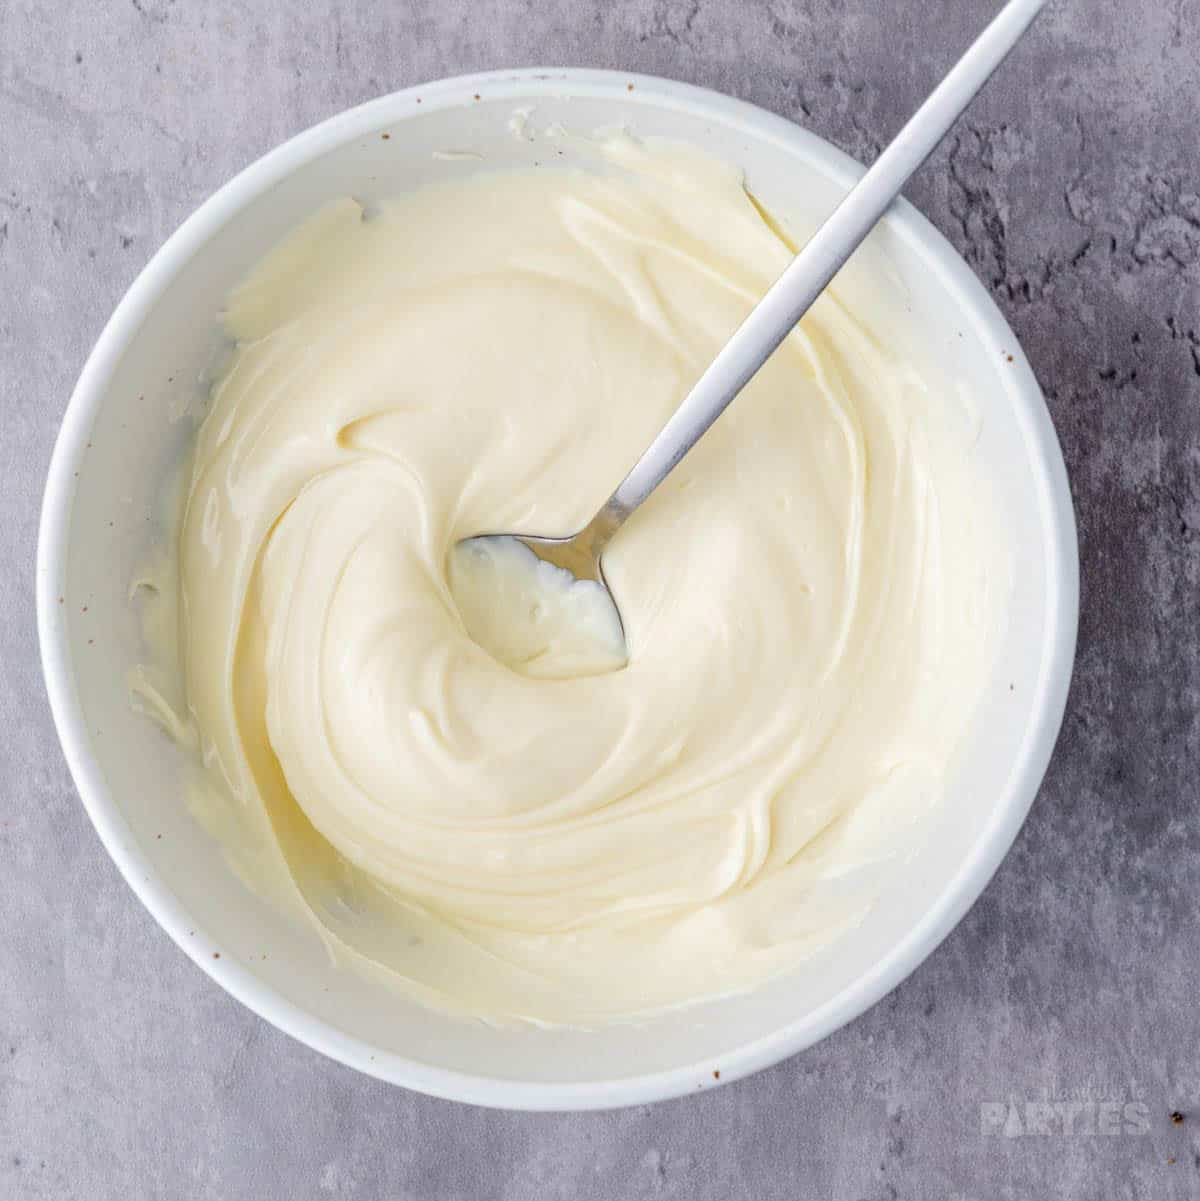
Step 1 – Place the white chocolate chips in a microwave safe bowl. Heat in the microwave on high heat in 30 second increments until almost fully melted. Make sure to stir the chocolate chips between each interval so they don’t burn.
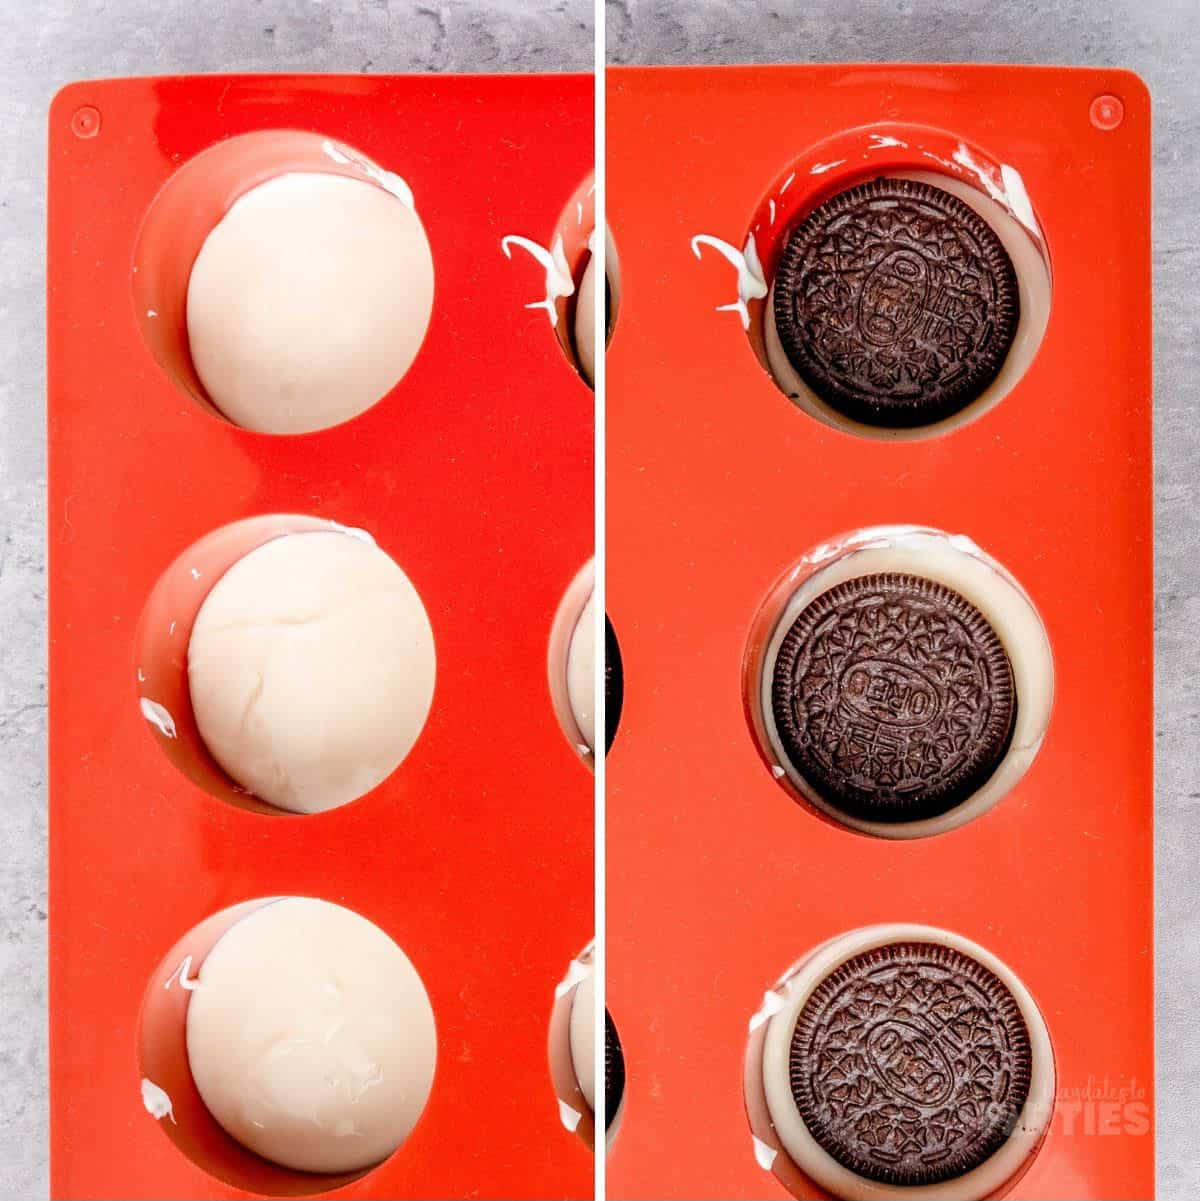
Step two – Spoon a small amount of melted chocolate into each well of the Oreo mold, making sure the entire bottom of each well is covered. Gently press an Oreo cookie into the chocolate. Don’t press too far, just enough to keep the cookie in place.

Step three – Scoop additional melted chocolate on top of the Oreo. Gently tap the mold against your counter to help the chocolate even out.
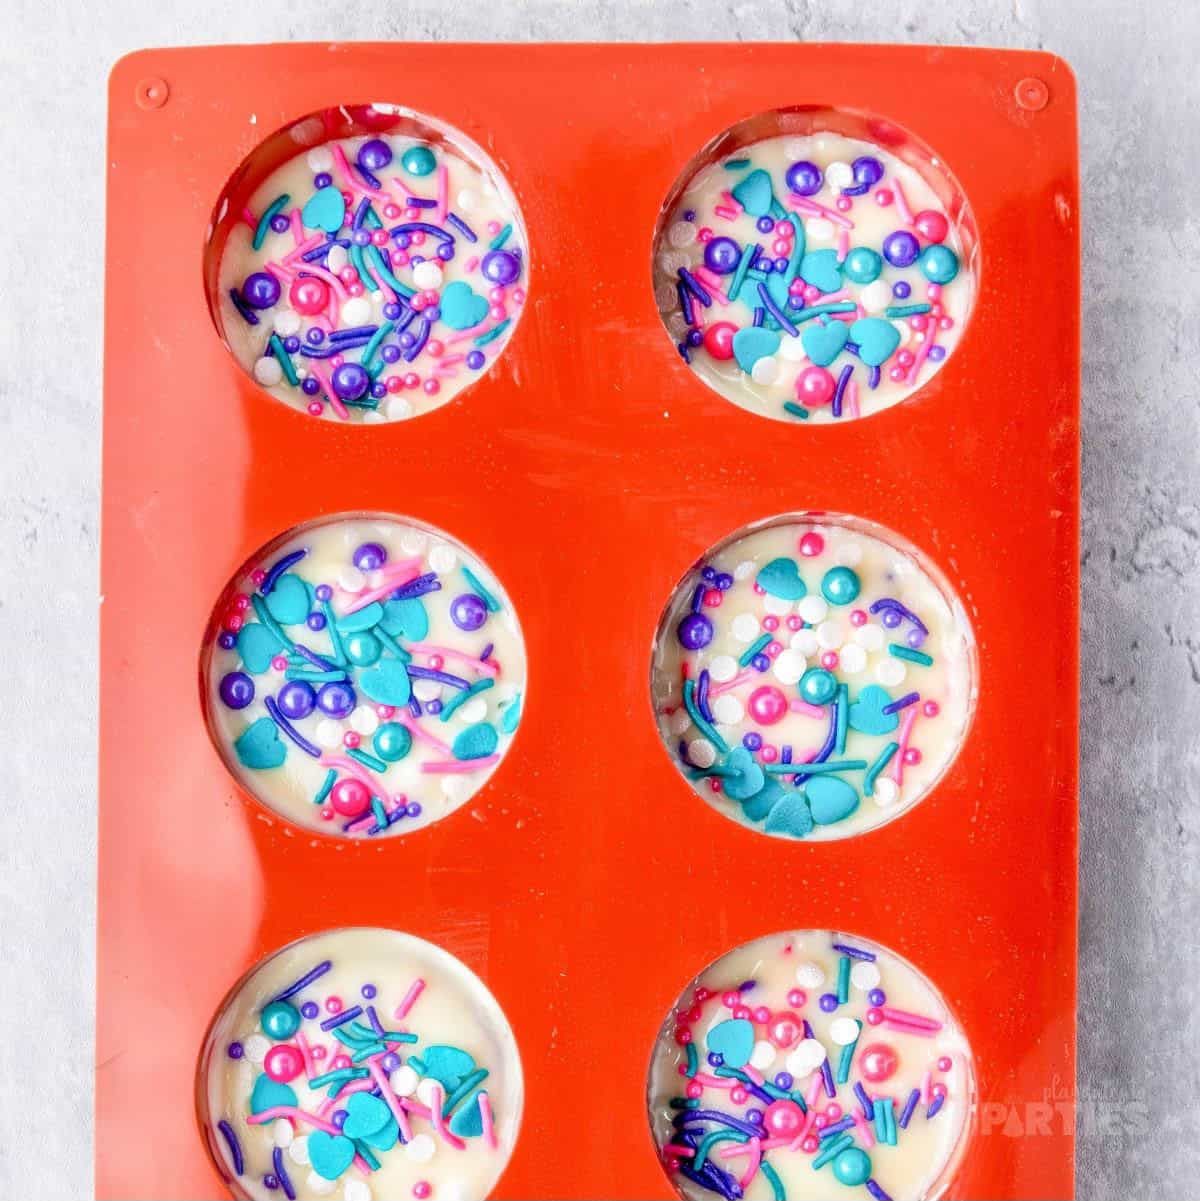
Step four – Immediately garnish with sprinkles, if using. Let the chocolate set for 10 minutes and then transfer to the refrigerator to set, at least 30 minutes.
Choosing the Right Chocolate
Choosing the right chocolate can make all the difference in your chocolate-covered Oreos, and the good news is that there’s a chocolate out there for everyone! Let’s embark on a chocolate extravaganza!
- Milk chocolate, the sweet, creamy classic that melts in your mouth and pairs wonderfully with Oreos.
- Dark chocolate, the sophisticated cousin with a rich, robust flavor that adds a touch of elegance to your cookies.
- White chocolate, on the other hand, offers a delicate, creamy sweetness that is a dream come true for those with a serious sweet tooth.
Now, let’s talk quality. When choosing your chocolate, look for one that has cocoa butter listed among the top ingredients—that’s how you know you’ve got the good stuff! Avoid chocolates with a long list of unpronounceable ingredients; after all, we’re making a treat, not a science experiment!
Oh, and one more thing: always taste your chocolate before using it. If it doesn’t make your taste buds dance with joy, choose another one. Remember, the taste of your final product is only as good as the quality of your ingredients!
Essential tips:
Don’t skip these tips – read them before starting to avoid any potential mistakes.
- Don’t skip the stirring. Stirring the chocolate is crucial, whether it’s melted or not. This ensures even heat distribution and prevents the chips from burning.
- Stop heating the chocolate before it’s all melted. When you see some small pieces of chocolate left, simply stir them in until the residual heat melts it all together. This way you’re less likely to overheat the chocolate which can make it seize up and become unusable. Learn more about melting chocolate.
- Use a room temperature mold. Cold or chilled molds can cause the chocolate to seize and become grainy.
- Use quality chocolate – as mentioned before, the better the quality of your chocolate, the better your final product will taste
- Be patient – it can be tempting to rush the chilling process, but trust us, it’s worth the wait for that perfect texture and flavor.
Get creative with decorations!
Unleash your creativity and turn each Oreo into a miniature canvas! Here are a few fun and creative ideas for decorating your Oreos
- Sprinkles in a rainbow of colors can add a festive touch, perfect for birthday parties or celebrations.
- For a sophisticated twist, try melted white chocolate drizzles over your dark chocolate-coated Oreos—simple yet elegant! Fancy a dash of glamour?
- A spray of edible gold can transform your Oreos from tasty treat to a decadent dessert, fit for the most extravagant soirée!
- And don’t forget about crushed candies. Peppermint candy canes are perfect for the holiday season, while M&Ms add a burst of color and chocolatey crunch. The possibilities are endless! which add a pop of color and a refreshing minty kick, making them perfect for the holiday season.
- Color coordinate the chocolate or the decorations for each holiday. Think green and red for the holidays, red for Valentine’s Day, or pastels for spring and Easter.
Remember, the only limit is your imagination, so go ahead and add that personal touch to make your cookies as unique as you are.
Frequently asked questions:
You can make chocolate-covered Oreos without a mold, but it is significantly more difficult. Dipping with a fork is messy, and most cupcake pans are too big (yes, we tried it). Using a mold ensures that the chocolate is evenly distributed and creates a smooth finish. Thankfully molds aren’t expensive and can also be used for other projects like mini pizzas, small cupcakes and homemade candy.
Absolutely! These alternatives melt easily and smoothly, which can make the coating process a breeze.
However, just a little heads-up: Almond Bark and Melting Wafers tend to be on the sweeter side compared to chocolate chips. So, if you are using these, try to keep the coating on the thinner side to avoid an overly sweet treat. Happy dipping!
Sure! Once the chocolate is set, add them to an airtight container and keep them at room temperature until you need them. Don’t forget to check out the full storage tips down below.
You can use any Oreos you like – Golden Oreos, peppermint, or birthday cake Oreos are all fun options. You could also use other round cookies, like Chocolate Chip Cookies, or shortbread cookies, too. Just make sure they fit the mold, and then follow the same method.
Making The Perfect Gift
Chocolate covered Oreos make for the perfect personalized gift for any occasion – birthday party favors, teacher appreciation gifts, holidays, hostess gifts, or just a sweet surprise for that special someone.
Don’t forget, presentation is key, so let’s talk about packaging!
- Cookie Tins or Boxes: These are available in craft stores and online. Choose a festive or thematic design to match the occasion. Line the box with colorful tissue paper, add the cookies, and voila!
- Mason Jars: For a more casual or rustic look, stack your Oreos in a mason jar, tie a ribbon around the neck of the jar, and finish with a pretty label gift tag.
- Cellophane Bags: Individually package each Oreo in a clear cellophane bag, tie with a ribbon, and maybe attach a small charm or trinket for an extra personal touch. This way, your recipients can admire your cookie decorating efforts before they take a bite!
- Don’t forget the Gift Tags: Personalize your packaging with a pretty printable gift tag, chosen especially for the occasion.
With these tips and tricks, you’ll have the perfect gift that’s sure to bring a smile to anyone’s face! Gift-giving is all about thoughtfulness and personal touch, so don’t be afraid to be creative and let your personality shine through in your packaging.
How to Store Chocolate Covered Oreos:
The best thing about these cookies is that store so easily and last for weeks! Here are a few helpful tips to ensure your chocolate covered Oreos stay fresh and delicious:
- Store in an airtight container at room temperature. Avoid putting them in the fridge as humidity can cause the chocolate to sweat and lose its shine.
- Keep away from direct sunlight or heat sources, as this can cause the chocolate to melt or discolor.
- If you want to store them for longer periods, freeze them. Lay the chocolate coated cookies in a single layer on a baking sheet place in the freezer. Once solid, transfer to a freezer bag or storage container for up to 3 months. Let them thaw on the counter for at least 30 minutes before enjoying.
If you liked my Chocolate Covered Oreos, you’re going to love my White Chocolate Dipped Strawberries. They’re a perfect addition to any party or celebration and will work perfectly served alongside this recipe.
Or you can check out all my other desserts recipes right here.
Chocolate Covered Oreos
Rich, smooth, and creamy, making Chocolate Covered Oreos at home is a delicious way to celebrate any holiday or special occasion.
Ingredients
- 8 Oreos
- 8 ounces White chocolate chips
- 2 tablespoons sprinkles, of your choice.
Instructions
- Place the white chocolate chips in a microwave safe bowl. Heat in the microwave on high heat in 30 second increments until almost fully melted. Make sure to stir the chocolate chips between each interval so they don't burn.
- Spoon a small amount of melted chocolate into each well of the Oreo mold, making sure the entire bottom of each well is covered.
- Gently press an Oreo cookie into the chocolate. Don't press too far, just enough to keep the cookie in place.
- Scoop additional melted chocolate on top of the Oreo. Gently tap the mold against your counter to help the chocolate even out.
- Immediately garnish with sprinkles, if using. Let the chocolate set for 10 minutes and then transfer to the refrigerator to set, at least 30 minutes.
Notes
Remember, the step-by-step photos and FAQ in the recipe post are there to help you if you feel stuck at any point.
- Don't skip the stirring. Stirring the chocolate is crucial, whether it's melted or not. This ensures even heat distribution and prevents the chips from burning.
- Stop heating the chocolate before it's all melted. When you see some small pieces of chocolate left, simply stir them in until the residual heat melts it all together. This way you're less likely to overheat the chocolate which can make it seize up and become unusable. Learn more about melting chocolate.
- Use a room temperature mold. Cold or chilled molds can cause the chocolate to seize and become grainy.
- Use quality chocolate - as mentioned before, the better the quality of your chocolate, the better your final product will taste
- Be patient - it can be tempting to rush the chilling process, but trust us, it's worth the wait for that perfect texture and flavor.
Recommended Products
As an Amazon Associate and member of other affiliate programs, I earn from qualifying purchases.


Esme Slabbert says
Great idea and thanks for sharing. Never seen the oreo mold before but will check it out.
I visited you via JENerally Informed: The Happy Now Blog Link- Up #408
My links: 93+94. We will be honored if you share your links with us at SeniorSalonPitStop. Link under BLOGGING.