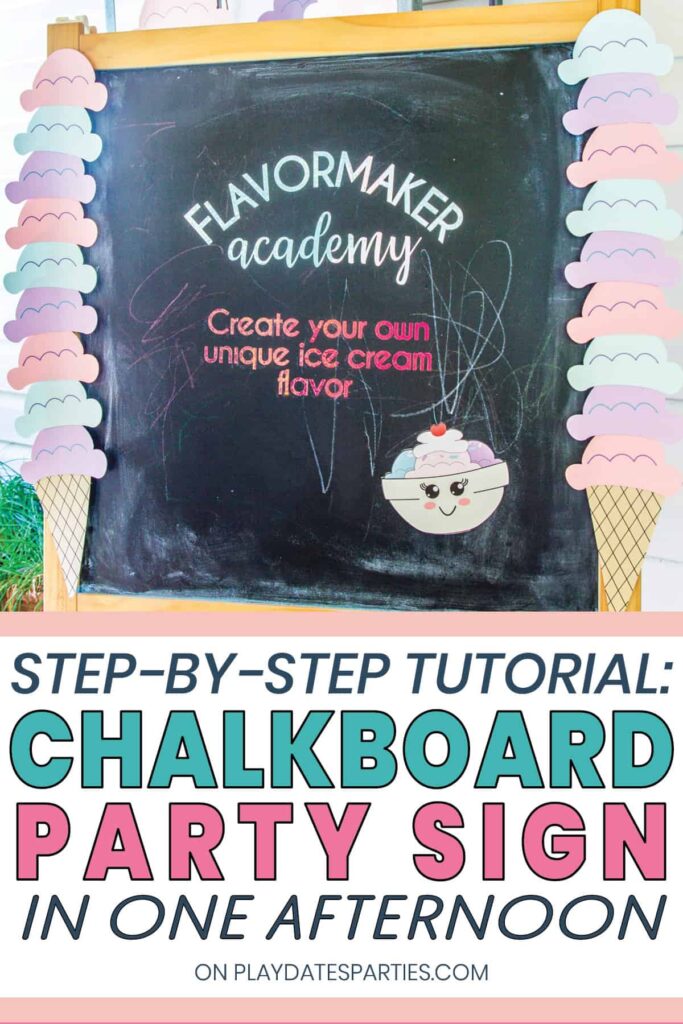
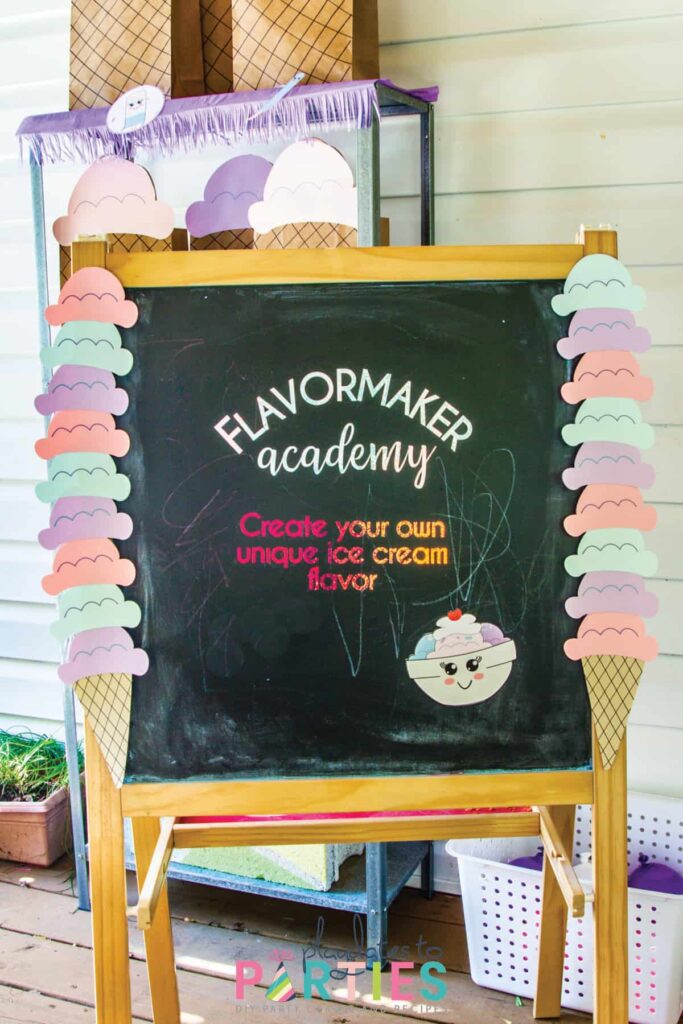
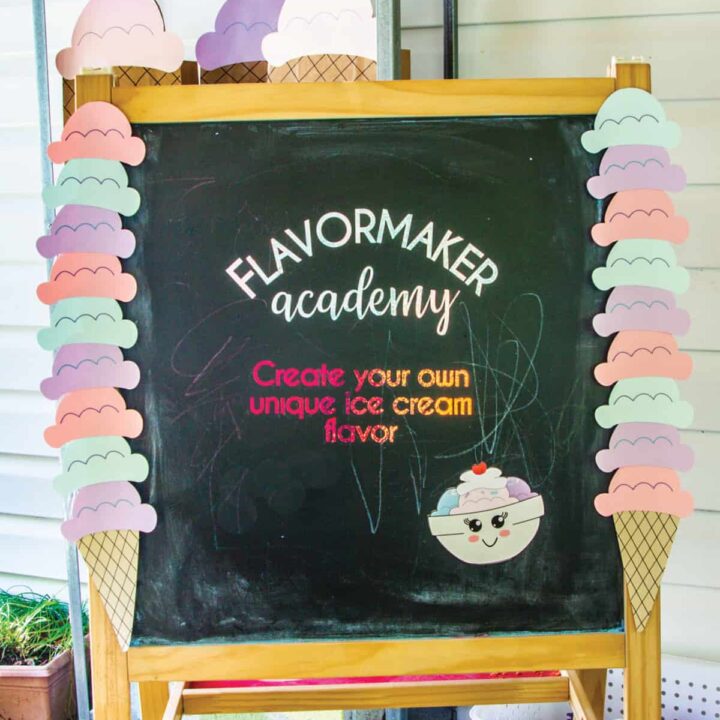
Want to make a chalkboard party sign to welcome your guests or share a special message? We transformed an Ikea chalkboard easel into a “Flavormaker Academy” bistro style sign.
And now you can see exactly how we did it.
Make the same sign for your kids party, or use the inspiration to create a different phrase. Either way, a DIY party sign sets the tone for a fantastic party.
Sometimes, the best inspiration comes straight from the birthday kids themselves. That was definitely the case with this chalkboard party sign.
You see, my daughter was saying that she wants to become a “flavor maker” when she grows up. I’m not entirely sure what that means, but it was the perfect inspiration to create an ice cream party activity around it.
And it was this “Flavormaker Academy” sign that made it extra special.
Full Disclosure: This project takes a couple hours, so it’s definitely a labor of love.
I think it’s worth every minute, but if you want something quick and easy, you can also grab a printable version right here.
What You’ll Need:
- This SVG pattern
- Pink card stock (2 sheets of 8.5” x 11” or 1 sheet of 12”x12”)
- Purple card stock (2 sheets of 8.5” x 11” or 1 sheet of 12”x12”)
- Blue card stock (2 sheets of 8.5” x 11” or 1 sheet of 12”x12”)
- Light Grip Mats
- Tan or light brown card stock (1 sheet)
- Cricut Black Marker – size 0.4
- Cricut cutting machine (I used the Maker in Rose)
- Holographic vinyl in two colors (or solid colors of your choice)
- Weeding tool (this is the one I use)
- Transfer tape (I used Duck brand contact paper)
- Scraper tool or brayer
- White card stock
- Yardstick, ruler, or craft mat with a grid
Before You Get Started:
Measure your frame
You’ll need to know the width and height of your frame to make sure everything fits. For example, the Ikea chalkboard is about 24 inches tall by 23 inches wide.
If you don’t have a chalkboard: You can also use a cheap piece of 16×20 of black or colored foam core to get a similar effect.
Adjust the number of ice cream scoops or size of the cone to fit your sign.
If you’re using a small frame (like an 8”x10” frame) on your tabletop, you may want to use fewer ice cream scoops.
Don’t forget, the widest a 12 inch mat can cut is 11.5 inches. So, if you want your lettering wider than 11.5 inches, you may need a 12×24 inch mat and longer pieces of vinyl.
I used a 12-inch mat and 12×12 vinyl, and the proportions still worked well.
Print and Cut Designs
PNG files often upload much larger than the design size. It’s so frustrating, but I believe it’s because of the high print quality.
To ensure that they always cut at the proper size, I include corner marks in my designs. These match up to Cricut’s largest print and cut sizing.
The corner marks will cut your paper. But they are as small as possible to ensure the least wear and tear on your blades and mats.
Clean Your Chalkboard
You can see in the video that I didn’t clean off our chalkboard first. This meant that many of the vinyl letters didn’t want to stick to the sign.
I made it work, it would take less time if the sign is cleaned of old chalk dust.
What’s in the File
After you unzip the download, and open up the folder, you’ll see lots of files:
- A PDF file with the instructions,
- The lettering for the sign,
- The ice cream cone for the sides of the sign, and
- Several PNG files you can print and cut to add some more pizzazz to your sign. (Ice cream bowl, popsicle, triple scoop ice cream, and soft-serve ice cream)
Watch the Video:
More Ice Cream Party Ideas to Love:
- Ice Cream Party Ideas for the Sweetest Girl on the Block
- How to Make a Striped Jelly Bean Cake
- Easy DIY Ice Cream Cake Topper
- Make Your Own Ice Cream Party Activity
How to Make a Flavormaker Academy Bistro Sign
Want to make a chalkboard party sign to welcome your guests or share a special message? We transformed an Ikea chalkboard easel into a “Flavormaker Academy” bistro style sign. And now you can see exactly how we did it.
Make the same sign for your kids party, or use the concept for a different phrase. Either way, a DIY party sign sets the tone for a fantastic party.
Materials
- Flavormaker Academy SVG pattern
- Pink card stock (2 sheets of 8.5 x 11 or 1 sheet of 12x12)
- Purple card stock (2 sheets of 8.5 x 11 or 1 sheet of 12x12)
- Blue card stock (2 sheets of 8.5 x 11 or 1 sheet of 12x12)
- Tan or light brown card stock (1 sheet)
- Vinyl in two colors (My top color can be found here, and the bottom color can be found here)
- Transfer tape (I used Duck brand contact paper
- White card stock
Tools
Instructions
Preparation:

- Measure the width and height of your sign. This way you know exactly how many ice cream scoops you need and how wide your lettering needs to be.
- If you’re using a chalk board, you may want to wash it first, so the vinyl adheres better.
Creating the Stacked Ice Cream Cones:
- Start a new project in Cricut design space. Click on upload, and then upload image, browse, and then find the file in the folder where you’re keeping the project. Then select the stacked ice-cream cone SVG. Save and insert the image onto your canvas.
- When the design loads, go ahead and ungroup all the pieces of the file.

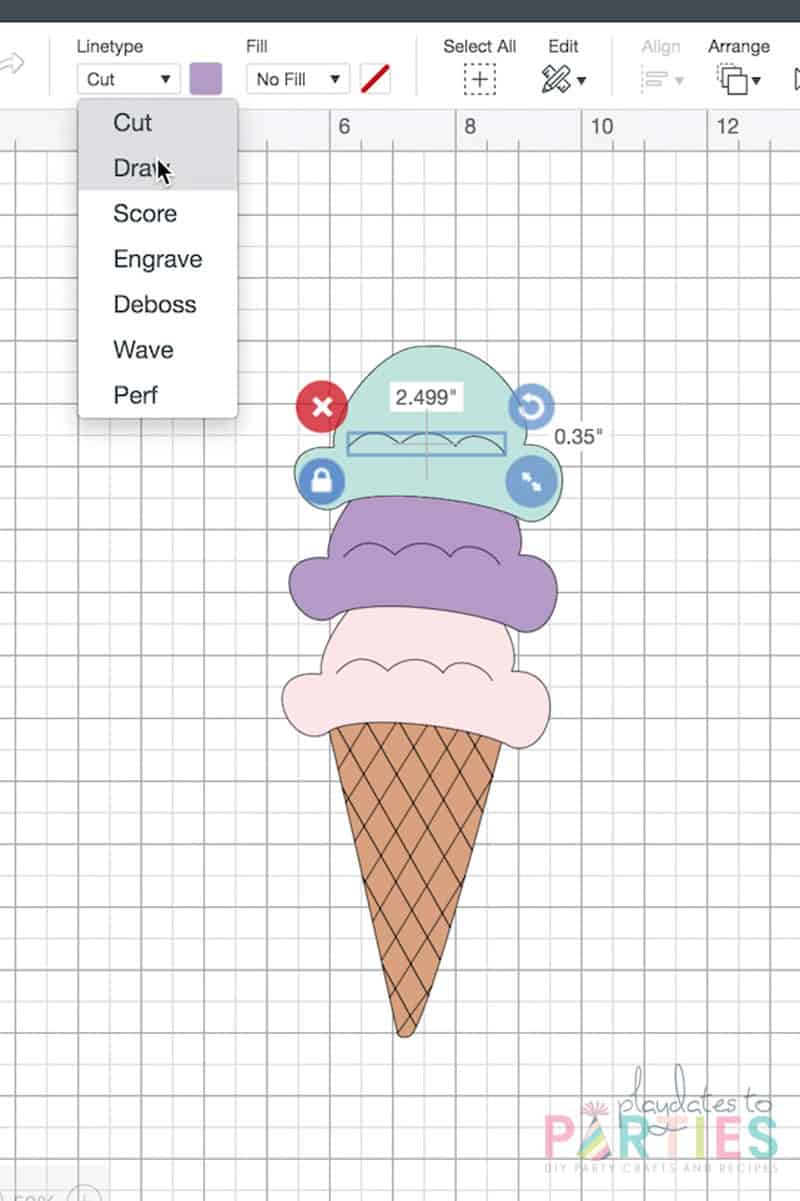
- Next, you're going to need to take all the little squiggly lines in the ice cream scoops and change them to “Draw”.
- Cricut Design space will automatically change the color to black. Don’t forget to change the color at this point if you’d like.
- Once you've changed it to draw, then select the ice cream scoop that goes with the line and then select “Attach.
- Repeat with all the other ice cream scoops.
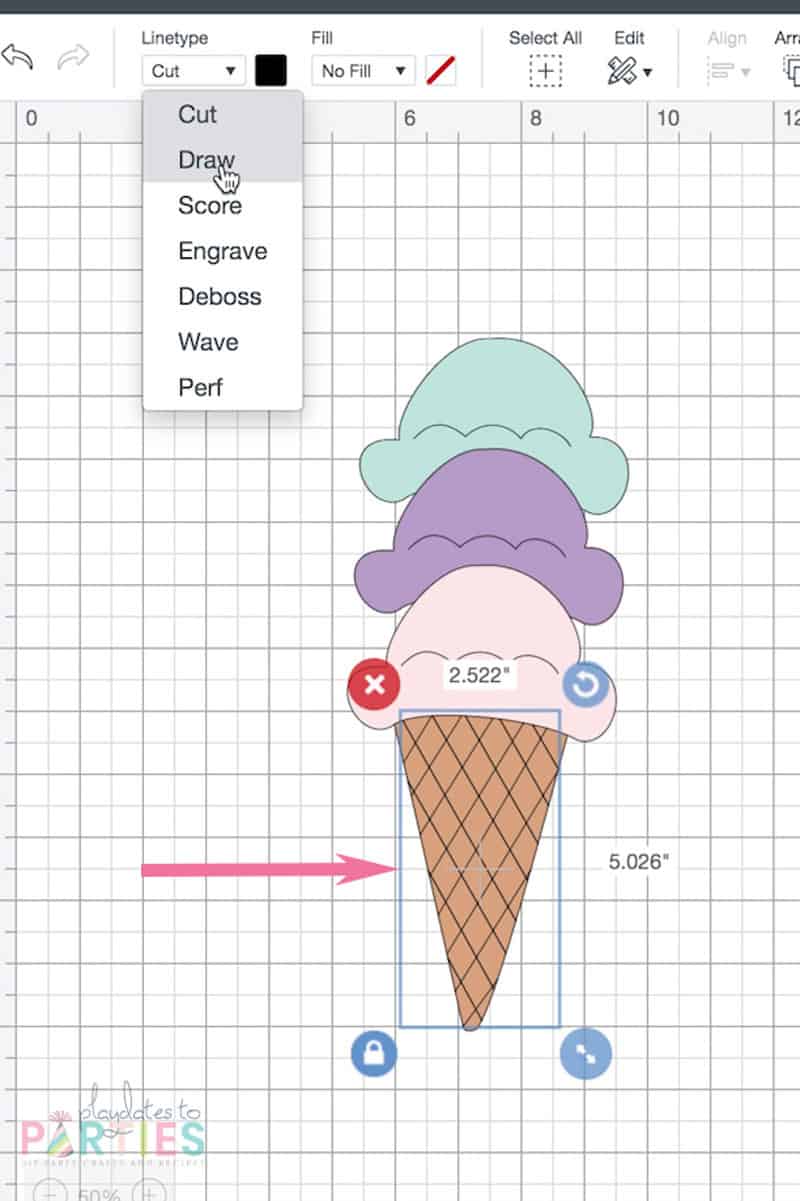
- Finally, select the hash marks on the cone and change those to “Draw” as well. Then attach the lines to the base of the cone.

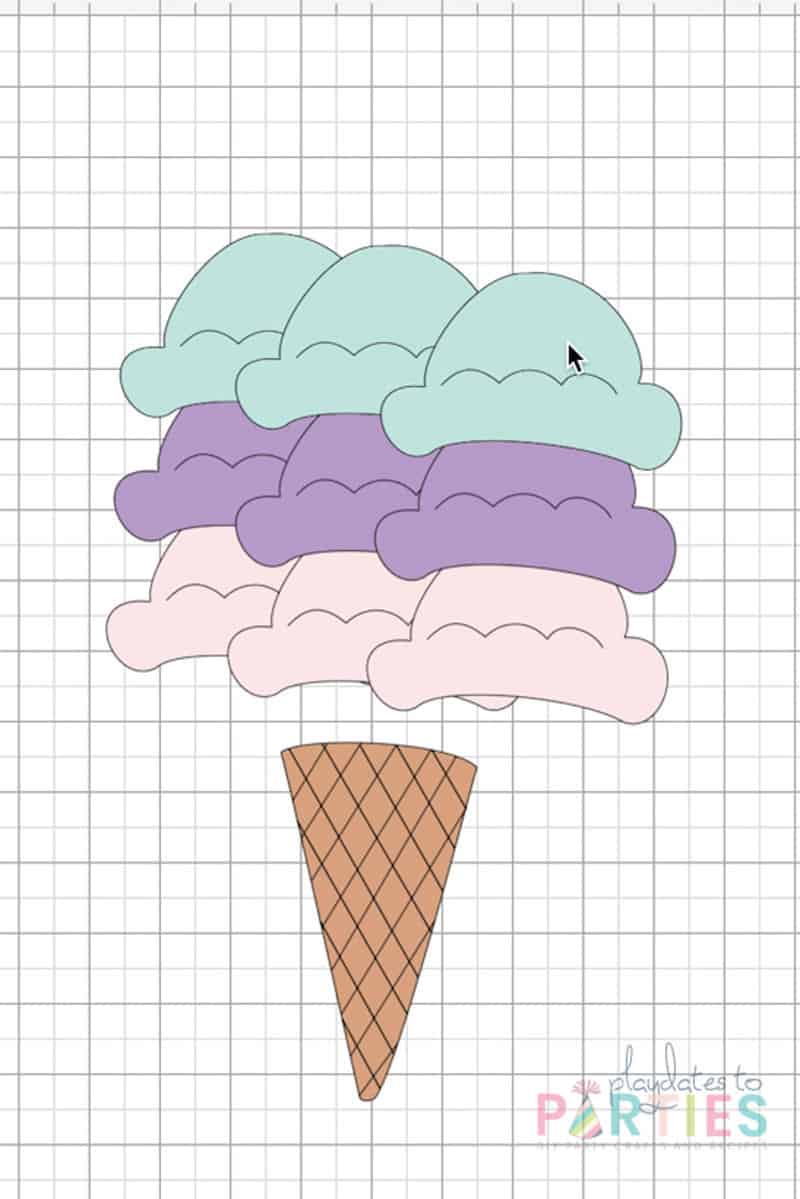
- Now it’s time to duplicate the ice cream scoops until you have enough for your sign. Since our sign is 24 inches tall, I know I’ll need 3 sets of ice cream scoops (9 total) to reach the top of the sign.
- Once you have all those duplicated, you’re ready to click “Make it”. Increase the copies of the project to 2 if you’re planning to make an ice cream scoop for both sides of your sign.

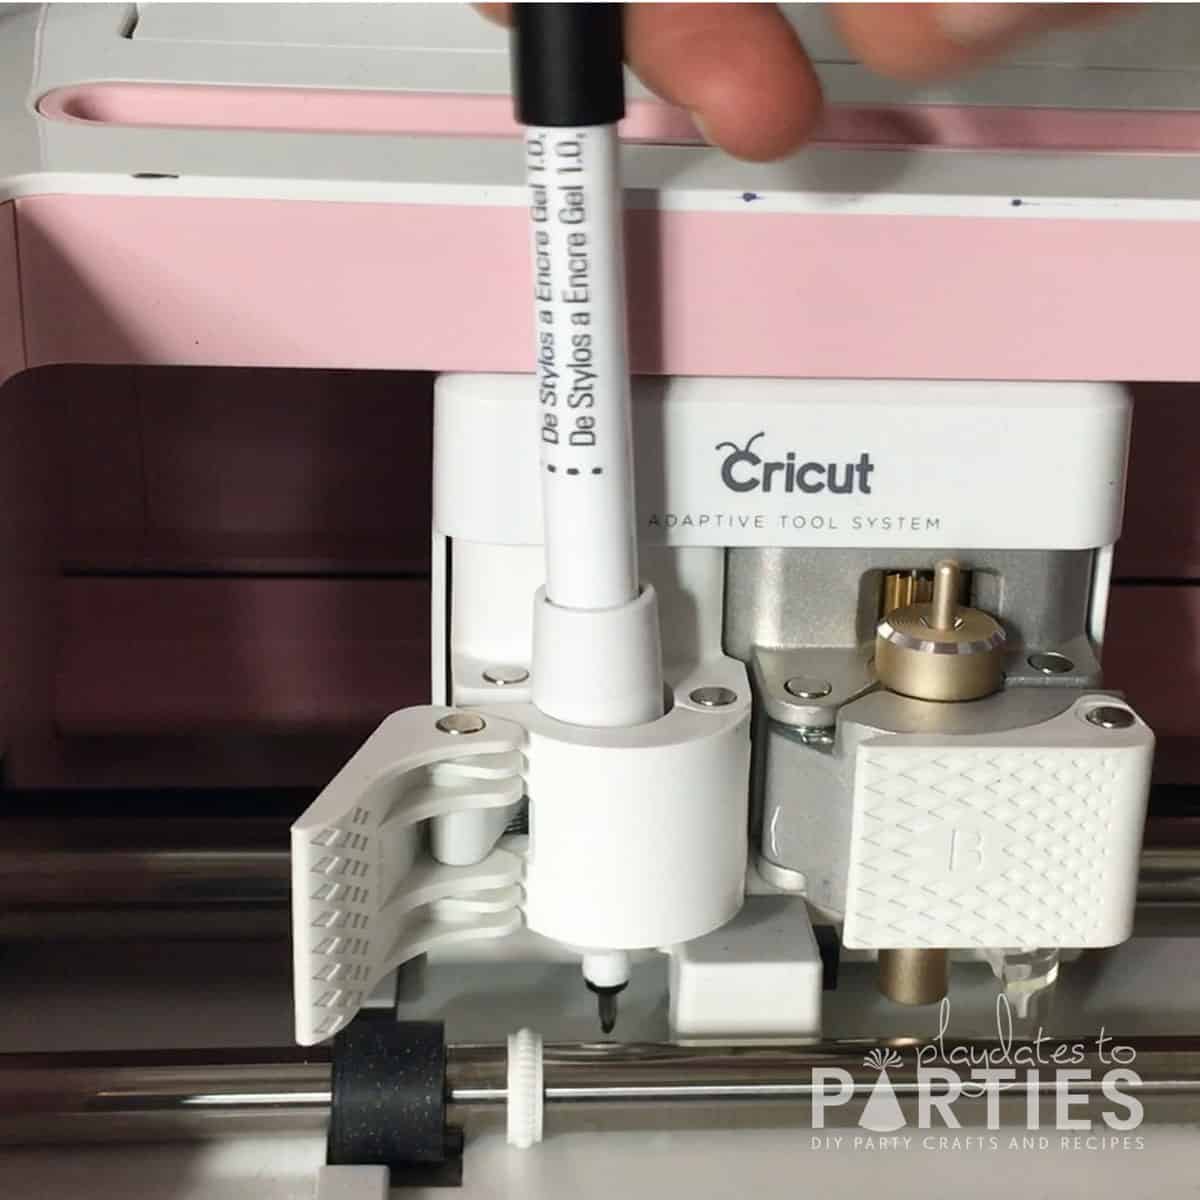
- Follow the directions in Cricut Design space to load your pen and your fine point blade. Load the mat and cut your pieces. (I’m using a Maker, so I'm going to load the pen in clamp A and the fine point blade in clamp B).
- After the pieces are cut out, you should give the ink a few minutes to dry before unloading the paper from the mat.
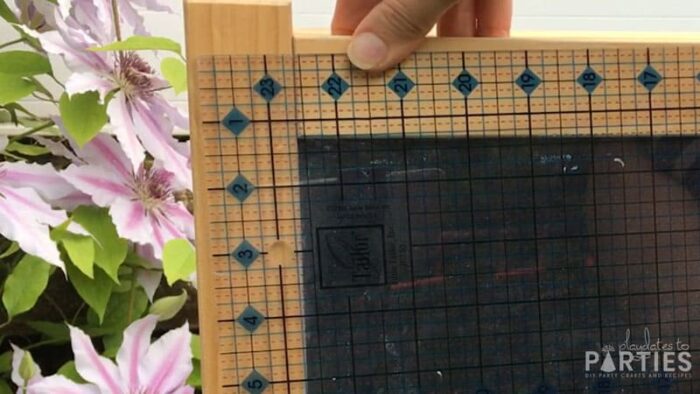
- Using measuring tape, a ruler, or a craft mat with measurements, arrange your pieces to fit the height of your frame.

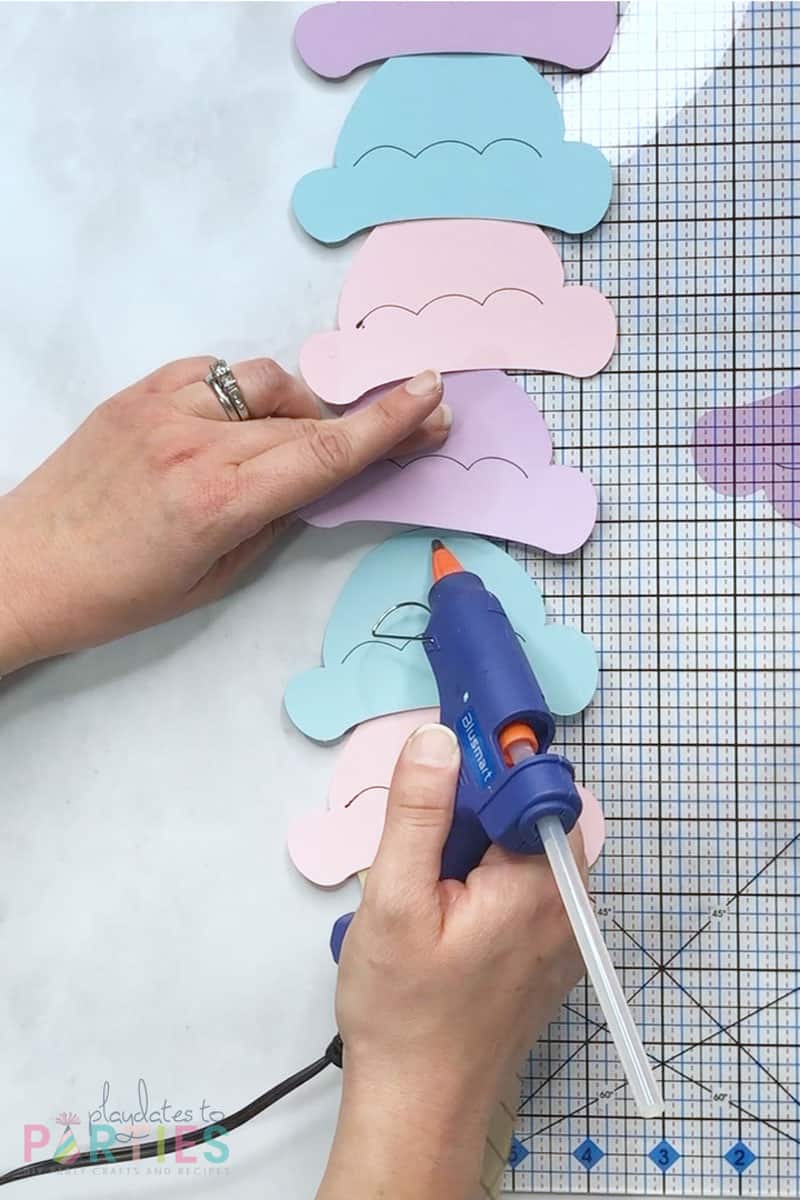
- When you're happy with the position of all the ice cream scoops, apply a small bead of hot glue to the very top of the ice cream cone. Attach the first ice cream scoop to the cone.
- From there use a little bit of hot glue to attach the rest of the ice cream scoops, creating one giant ice cream cone.
- Repeat with the second ice cream cone and set of ice cream scoops, then set aside until time for final assembly.
Cutting Out the Vinyl Lettering
- Upload the Flavormaker Academy lettering to Cricut Design Space. (Use the same procedure as steps 1-3 from the ice cream scoops above.)

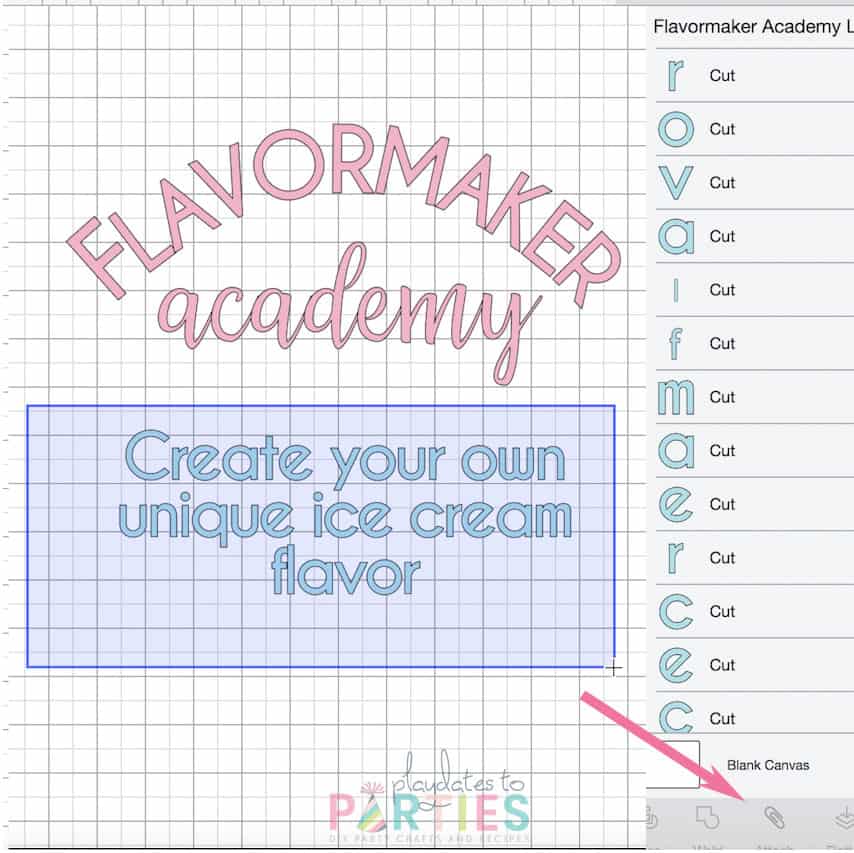
- Ungroup all the lettering and then select all the blue letters. Click “Attach” to make them cut out exactly as you see them.
- Select all the pink letters and click “Attach” again.
- At this point you can resize the project to fit your sign if you like. Remember, the widest a 12 inch mat can cut is 11.5 inches. If you want your lettering wider than 11.5 inches, you may need a 12x24 inch mat and longer pieces of vinyl.
For this bistro sign, we’ll be using 12-inch mats, so our lettering will stay within 11.5 inches. - Click “Make It” and double check on the following screens that everything looks the way it should.
- Select the type of vinyl you’re using before you start cutting. In this case I was using holographic vinyl.
- Carefully load your vinyl onto a standard grip mat. and follow the directions in Cricut Design Space to cut out the design.

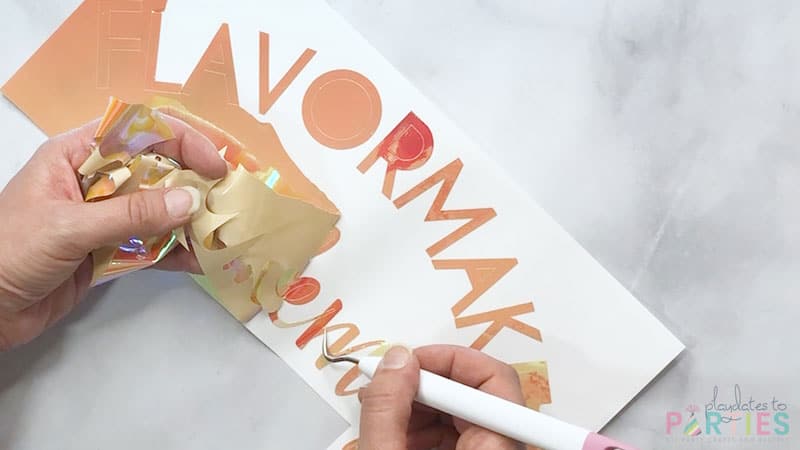
- After the design is finished cutting, you’ll need to weed the design. In other words, you’re going to remove any part of the vinyl that you don't want to be on your final project.
- Be careful around things like the script fonts and the small bits. The weeded lettering should look something like this: [weeded lettering]
- Next you'll need to cut a piece of transfer paper to fit your lettering. I used Duck brand contact paper, but you can use whatever works best for you.
- Remove the paper backing and place the sticky side of the transfer tape on top of your vinyl. Make sure you press the transfer paper to the vinyl so it adheres well. Set the vinyl lettering aside.
Adding extra elements
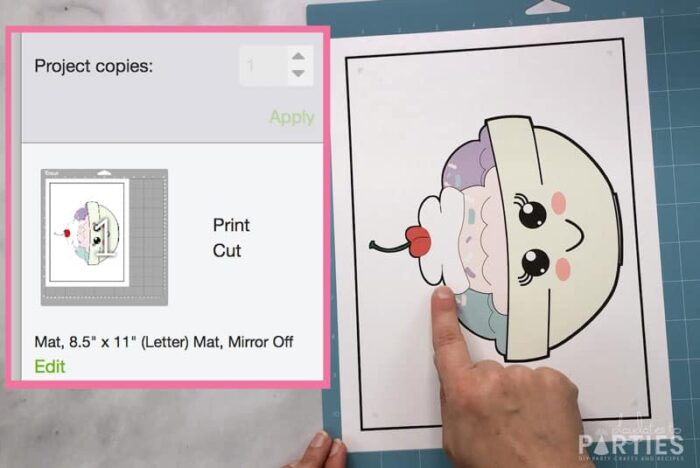
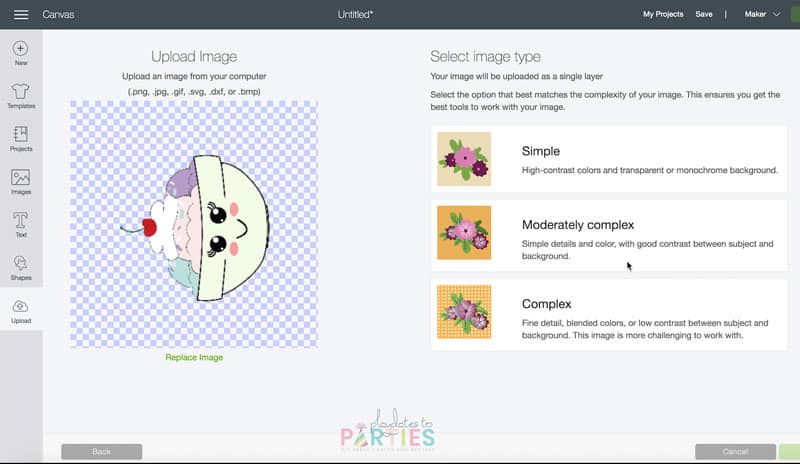
- Upload the PNG file(s) of your choice as a print then cut file. (I recommend using the “complex” setting. This helps ensure that it catches all the small parts, including the corner marks. (see notes)

- Lock the proportions of the design. Then change the width to 6.75 inches. The design should resize to fit within the largest print and cut size limit.
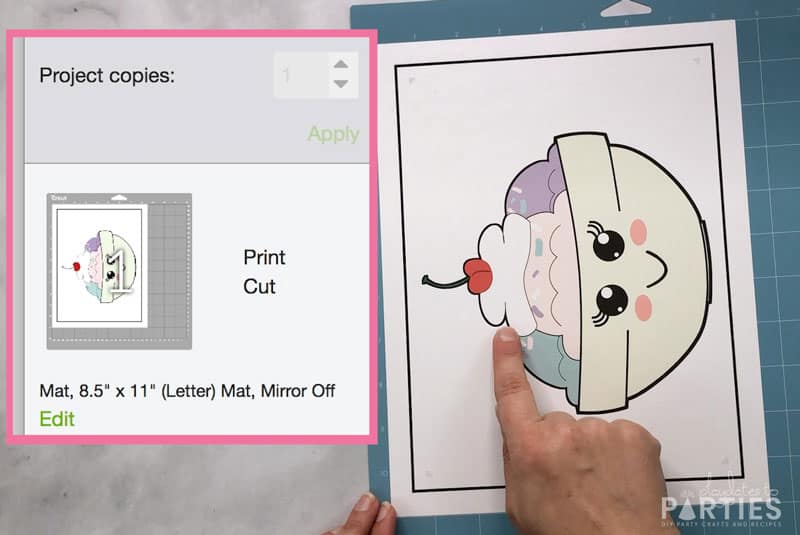
- Click on Make it, and continue. When you send the file to the printer, make sure you have the bleed selected. This will reduce any likelihood of white outlines where it should be black.

- Important: When loading your printed image onto your mat, make sure the printed image is facing the same direction as the mat preview in Cricut Design Space. If you don’t, your cuts will be all wrong.
- After the design is cut, carefully unload the design from the mat. If you’re unloading a design with a cherry stem, be extra careful, because the thin stem is very delicate.
Assembling The Sign
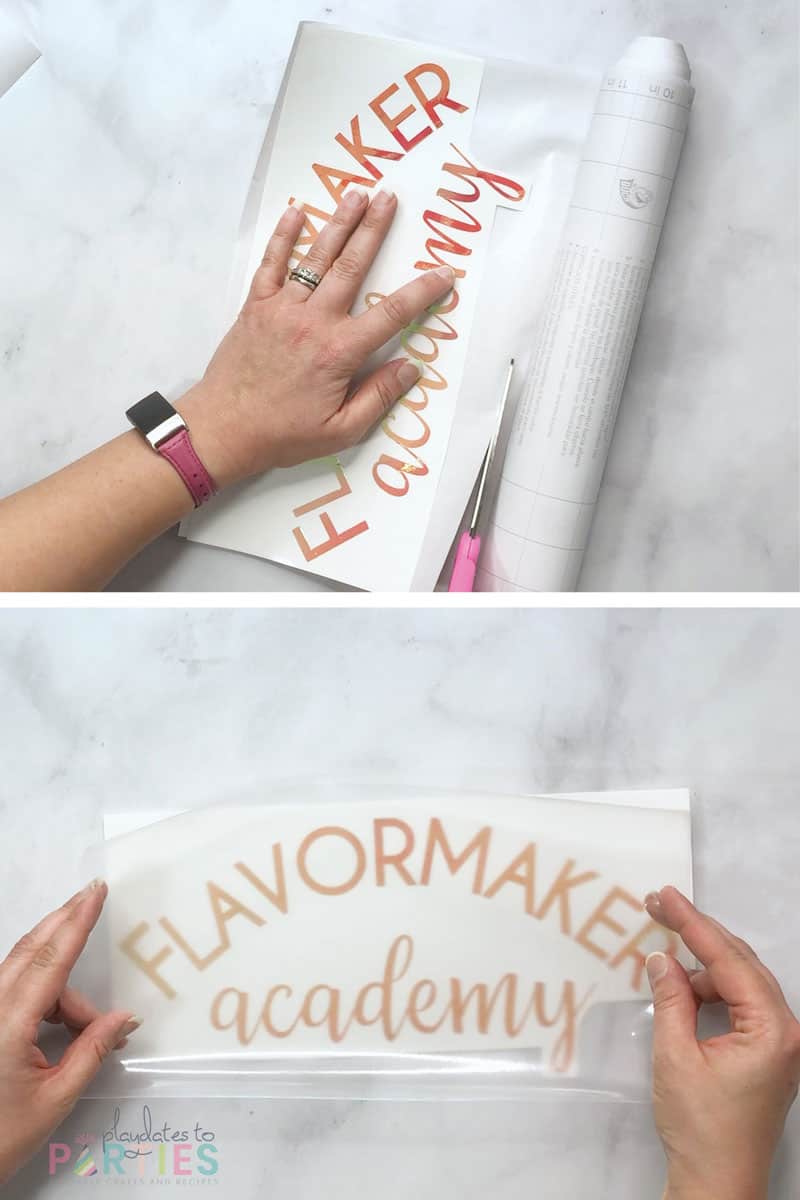
- Remove the paper backing from the “Flavormaker Academy” vinyl lettering. Make sure all the vinyl is on the transfer tape. Take your time doing this, especially with the script letters.

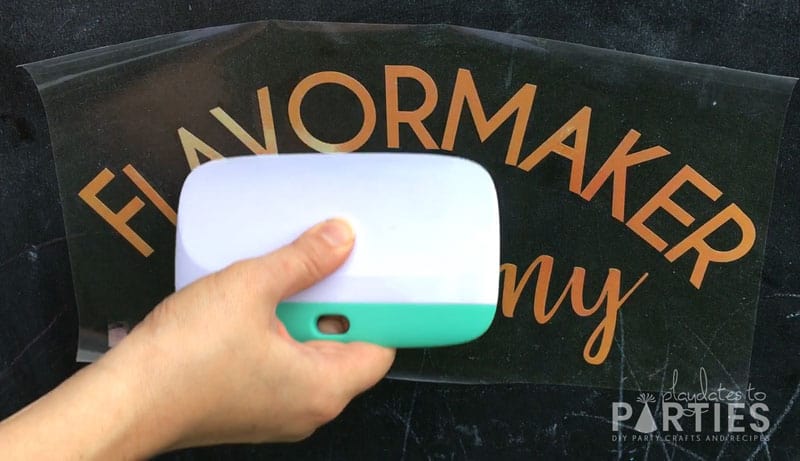
- Place the lettering in the upper center area of your sign and press the vinyl against your sign. You’ll need to press in all the corners and curves to make sure the vinyl is attached. Sometimes it helps to use your fingernail or a scraper tool to get in the small areas.
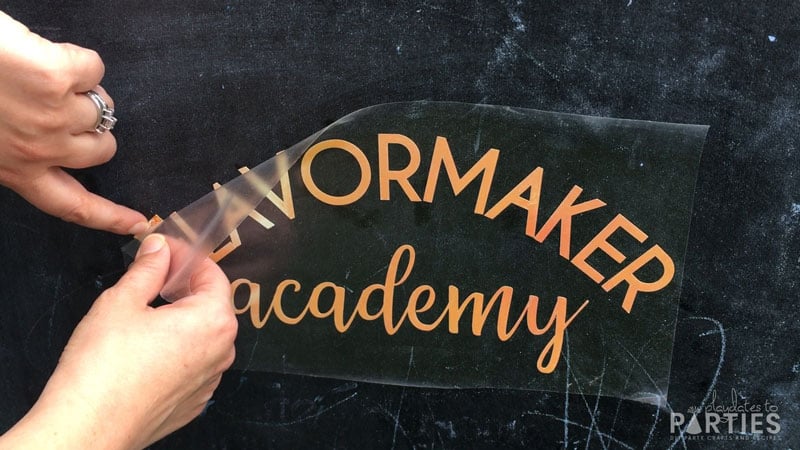
- Now, very slowly peel back the transfer tape off the vinyl. If the lettering wants to stick you the transfer tape, you can use a fingernail to hold the top of a letter to the frame while you peel back the rest of the tape.
- Repeat with the other set of vinyl wording.[tape loop]Now that we have all the lettering.
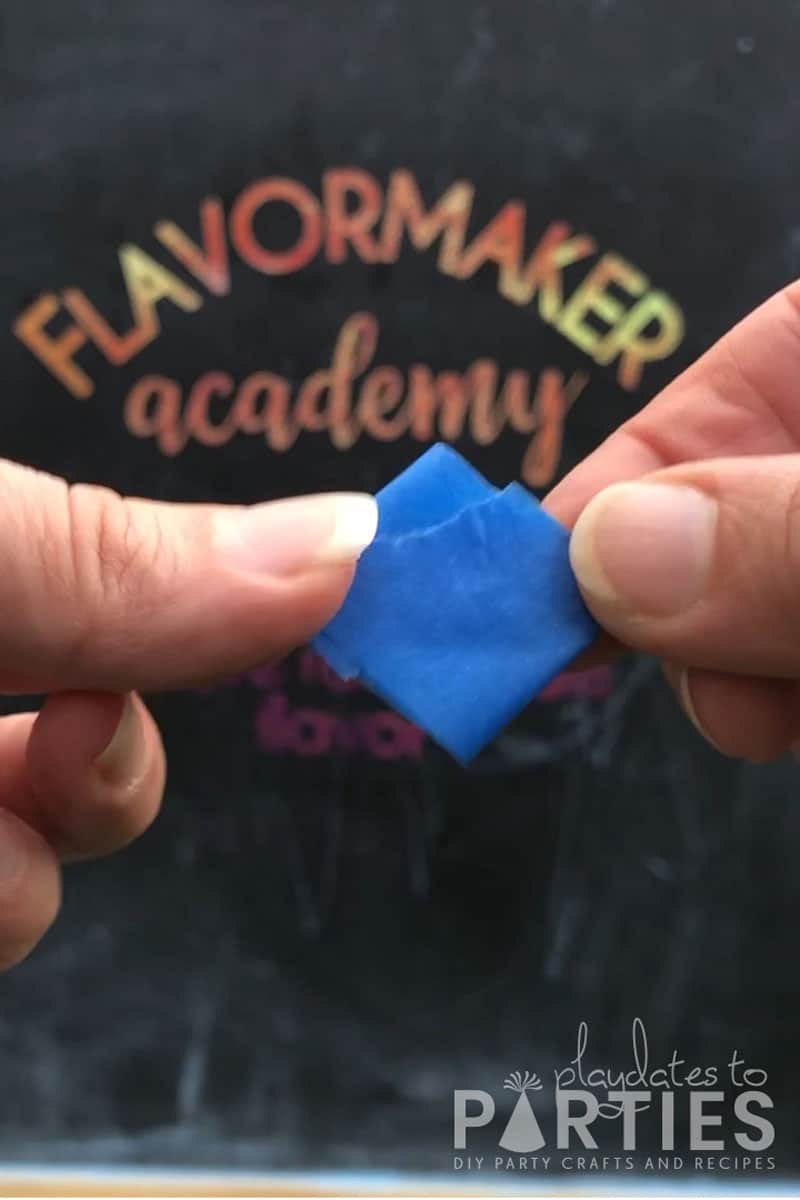
- Take a piece of masking tape or painters tape and double the tape over on itself to create a loop.
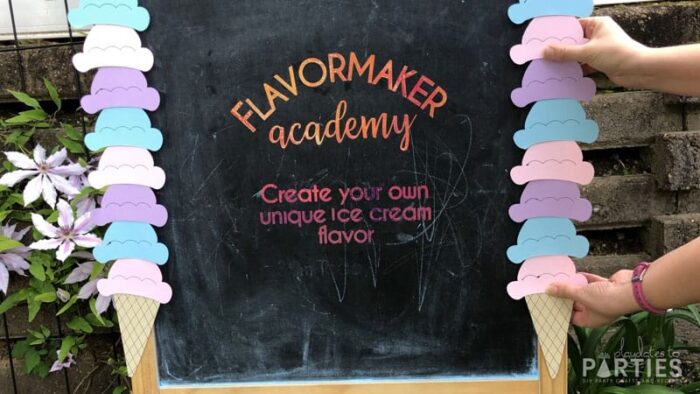
- Next, stick several tape loops to the back of your ice cream scoops. Then press it to the sides of your sign to attach.
- Repeat with any other accents you have to add to your sign, and you’re done!