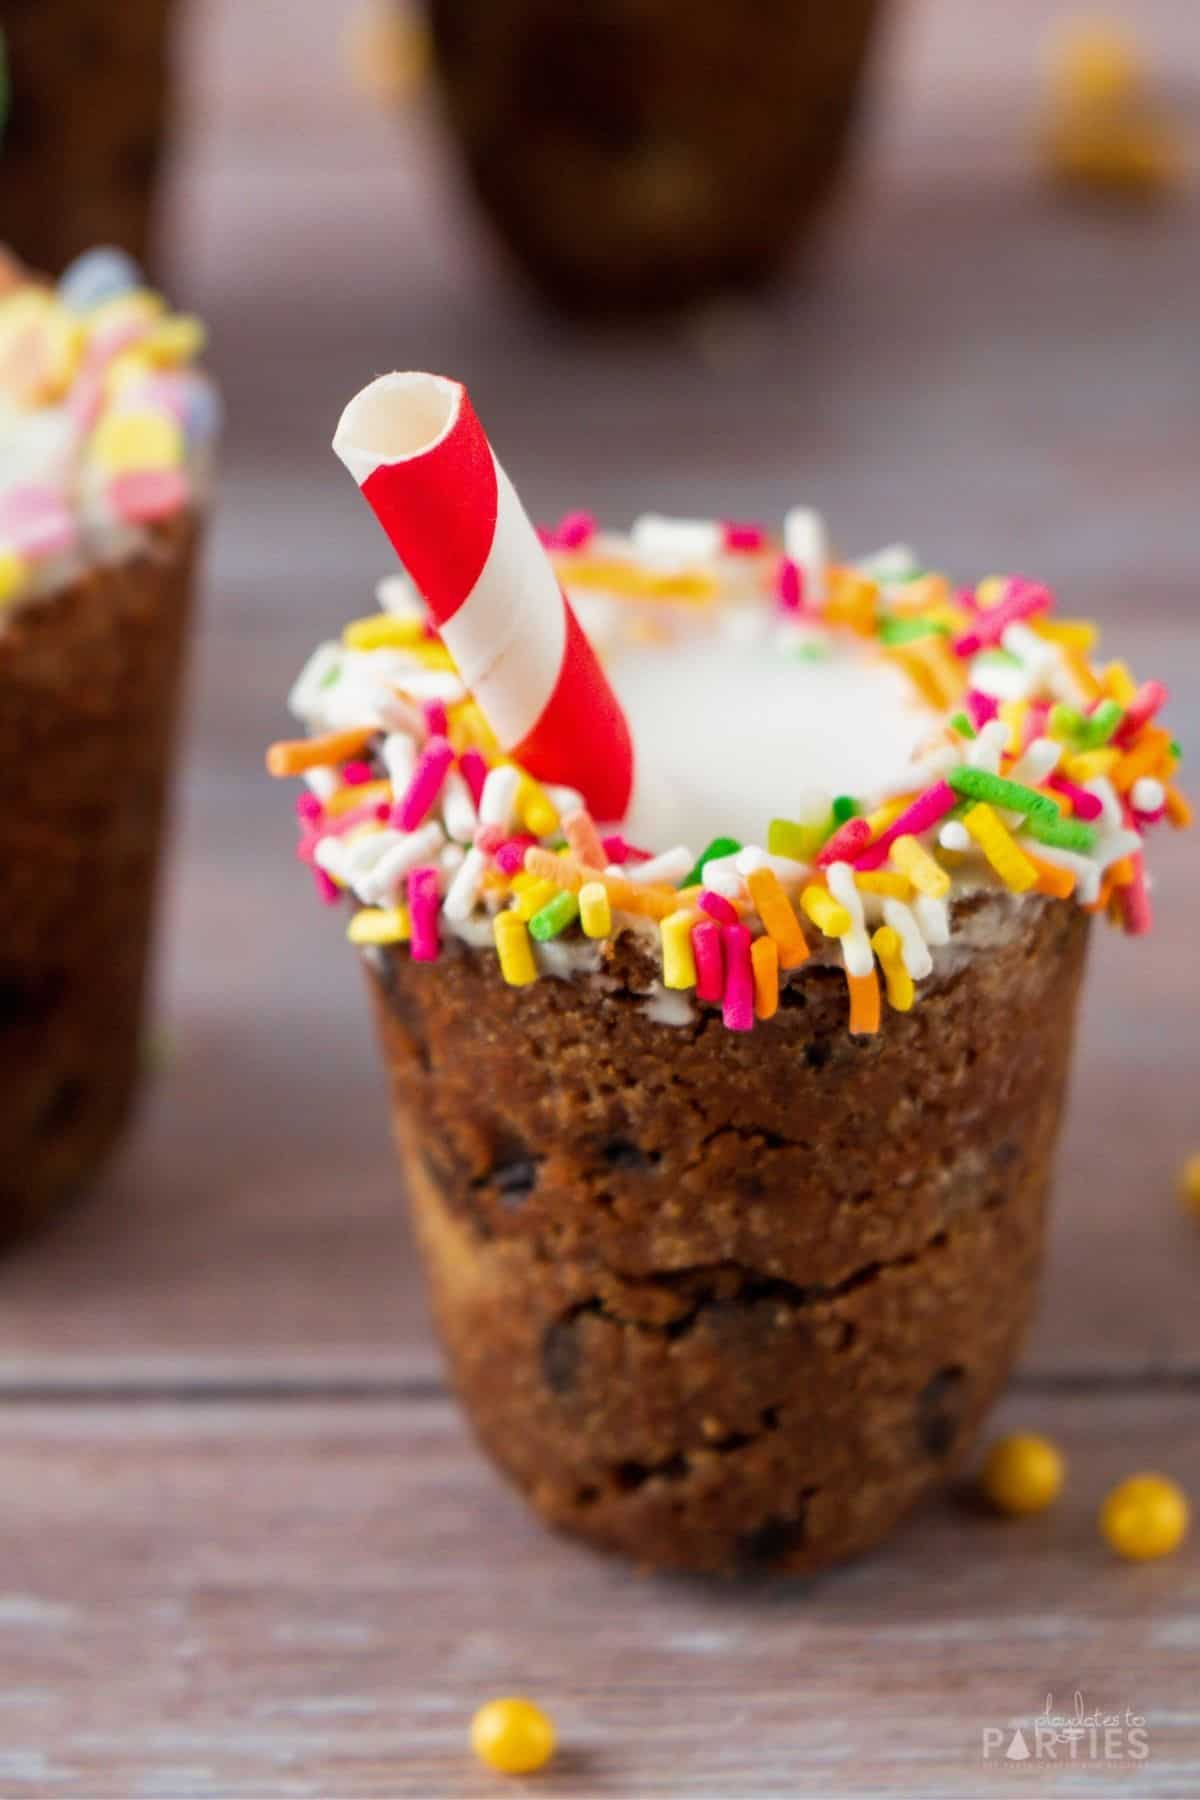
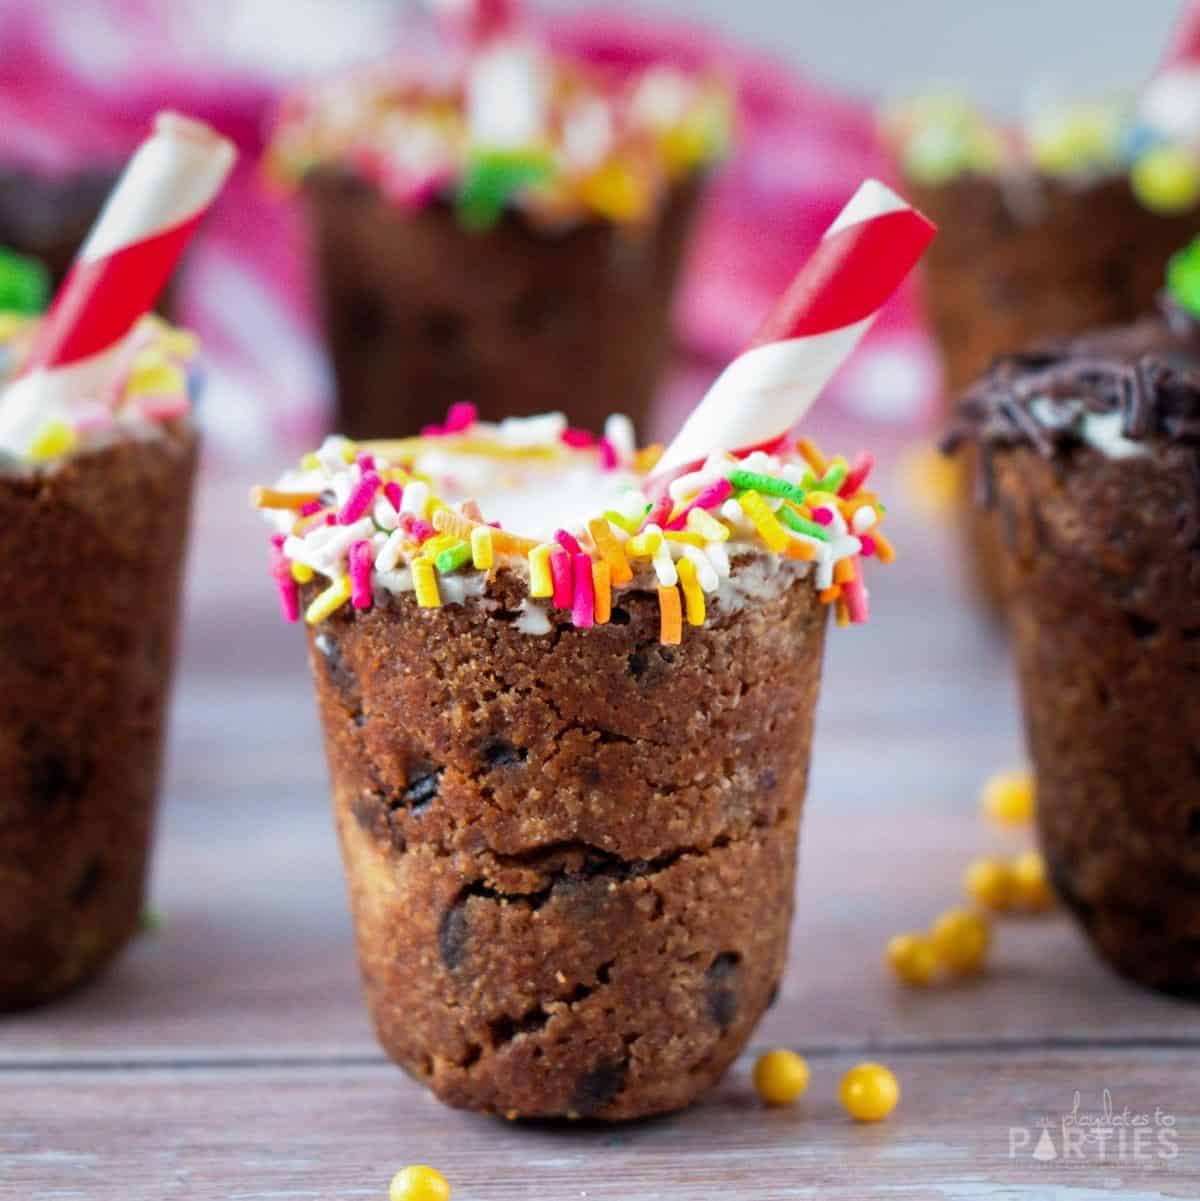
Enjoying your cookies and milk gets a creative update with edible chocolate chip cookie shots! We’re sharing a chocolate chip cookie dough made specifically for this purpose, as well as all the tips and tricks you need to know to make your own miniature cookie cups.
Fill them with milk or hot chocolate for a kids party, or add some liquor inside for an adults only treat – either way, these chocolate chip cookie shots are sure to be a hit!
What Makes these So Great
- Fun! Kids and adults light up when they see these fun treats.
- Taste: The rich chocolate chip cookie pairs perfectly with a cold splash of milk inside
- Sturdy: We tested this recipe to make sure you can set out filled shot glasses that won’t leak all over your party table.
- Adaptable: Change up the fillings, chocolate coating, and sprinkles to match a variety of party themes.
What You’ll Need:
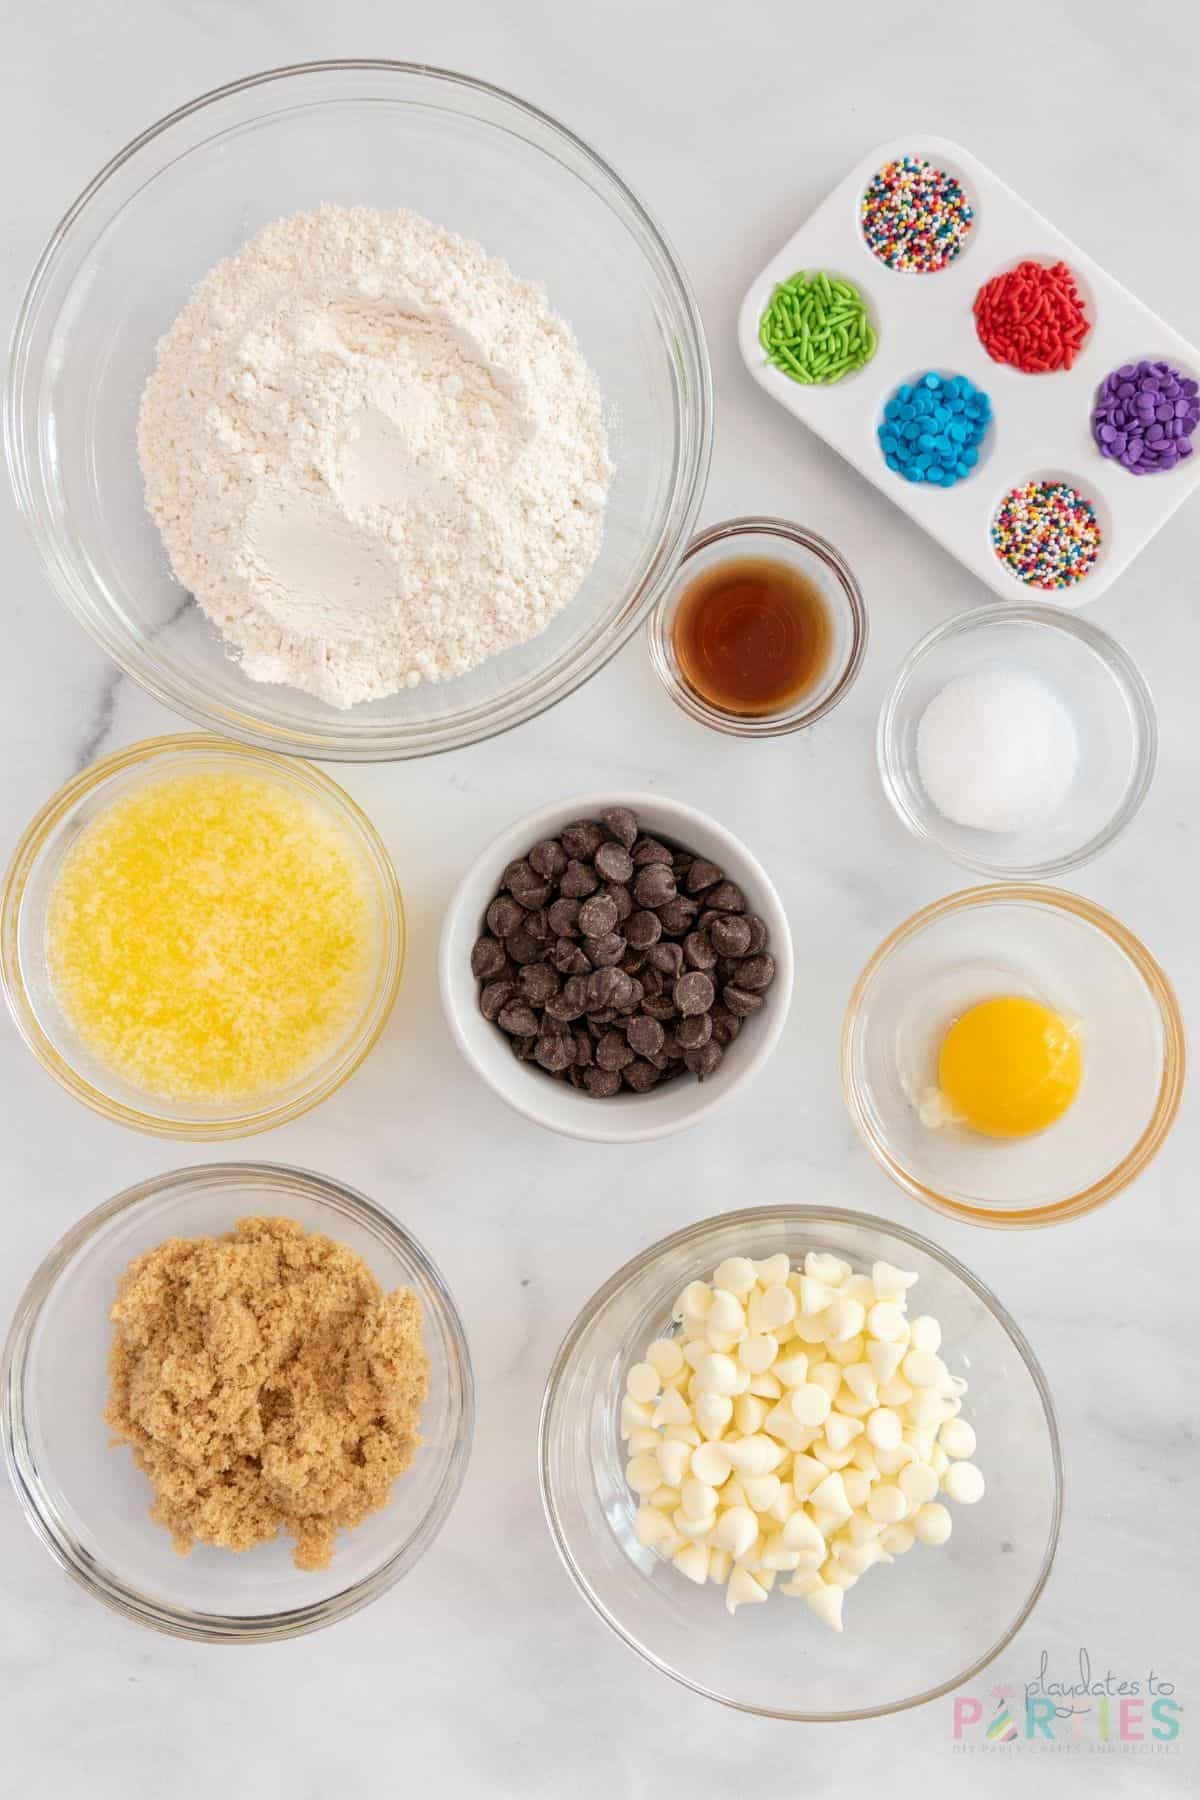
Ingredients:
- Butter, melted
- Light brown sugar
- All-purpose flour
- Chocolate chips
- Egg yolk
- Vanilla extract
- Table salt
- Sprinkles of your choice
Supplies & Equipment:
- Large mixing bowl
- Hand mixer or stand mixer with whisk attachment
- Measuring cups & spoons
- Table knife or narrow spoon (this is what we use)
- Small, microwave safe bowl
- Clean paintbrush or a teaspoon
- Small plate for sprinkles
How to Make Chocolate Chip Cookie Shots:
To make things even easier for you, I created a simple photo guide below. For all measurements and a more detailed guide, check out the recipe card at the bottom of this page.
Make the Dough:
Grease the inside molds of a popover pan with butter or shortening.
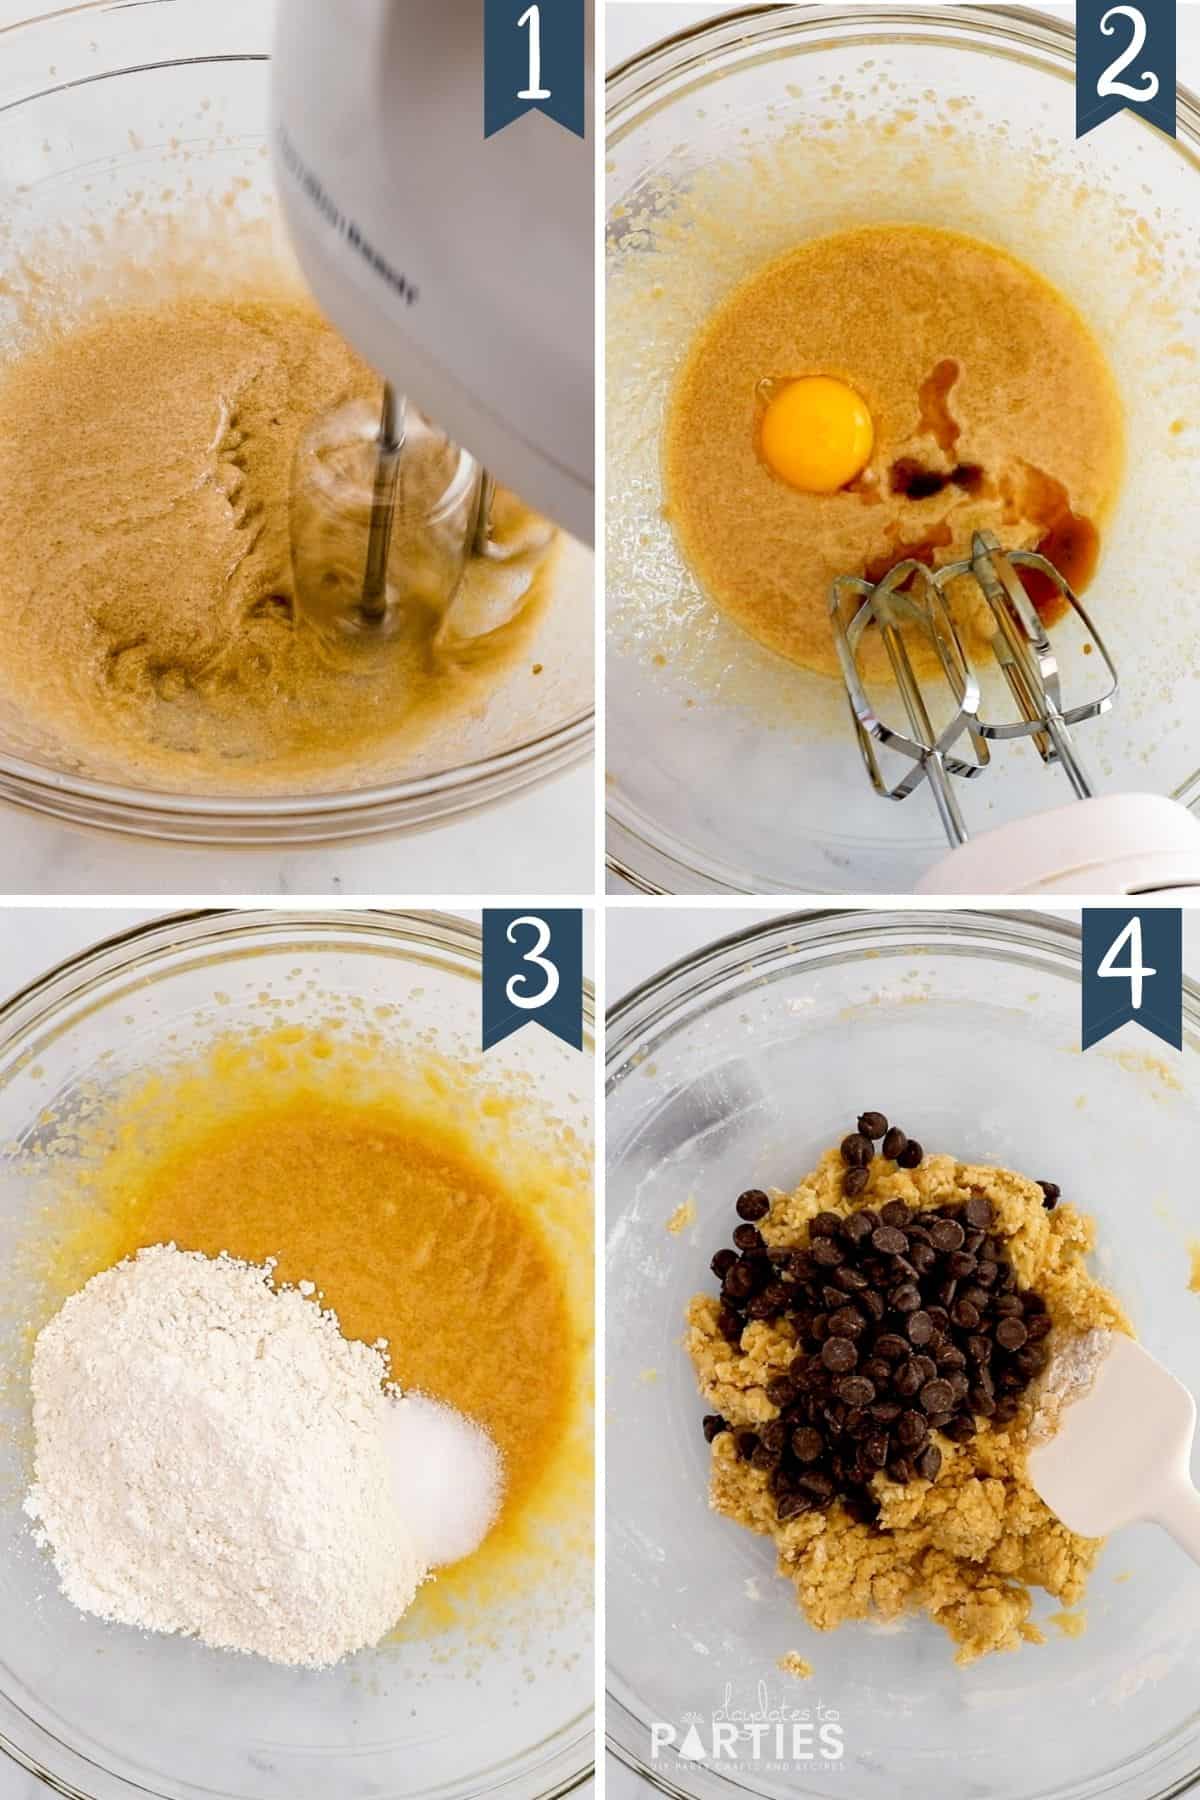
Cream together 1/3 cup melted butter and 1/3 cup light brown sugar.
Add 1 egg yolk and 1 teaspoon vanilla extract and mix to combine.
Add 1 cup all purpose flour and 1 teaspoon salt. Use a spatula to combine.
Mix in 1/2 cup chocolate chips. The dough will be stiff.
Add the dough to your popover pan
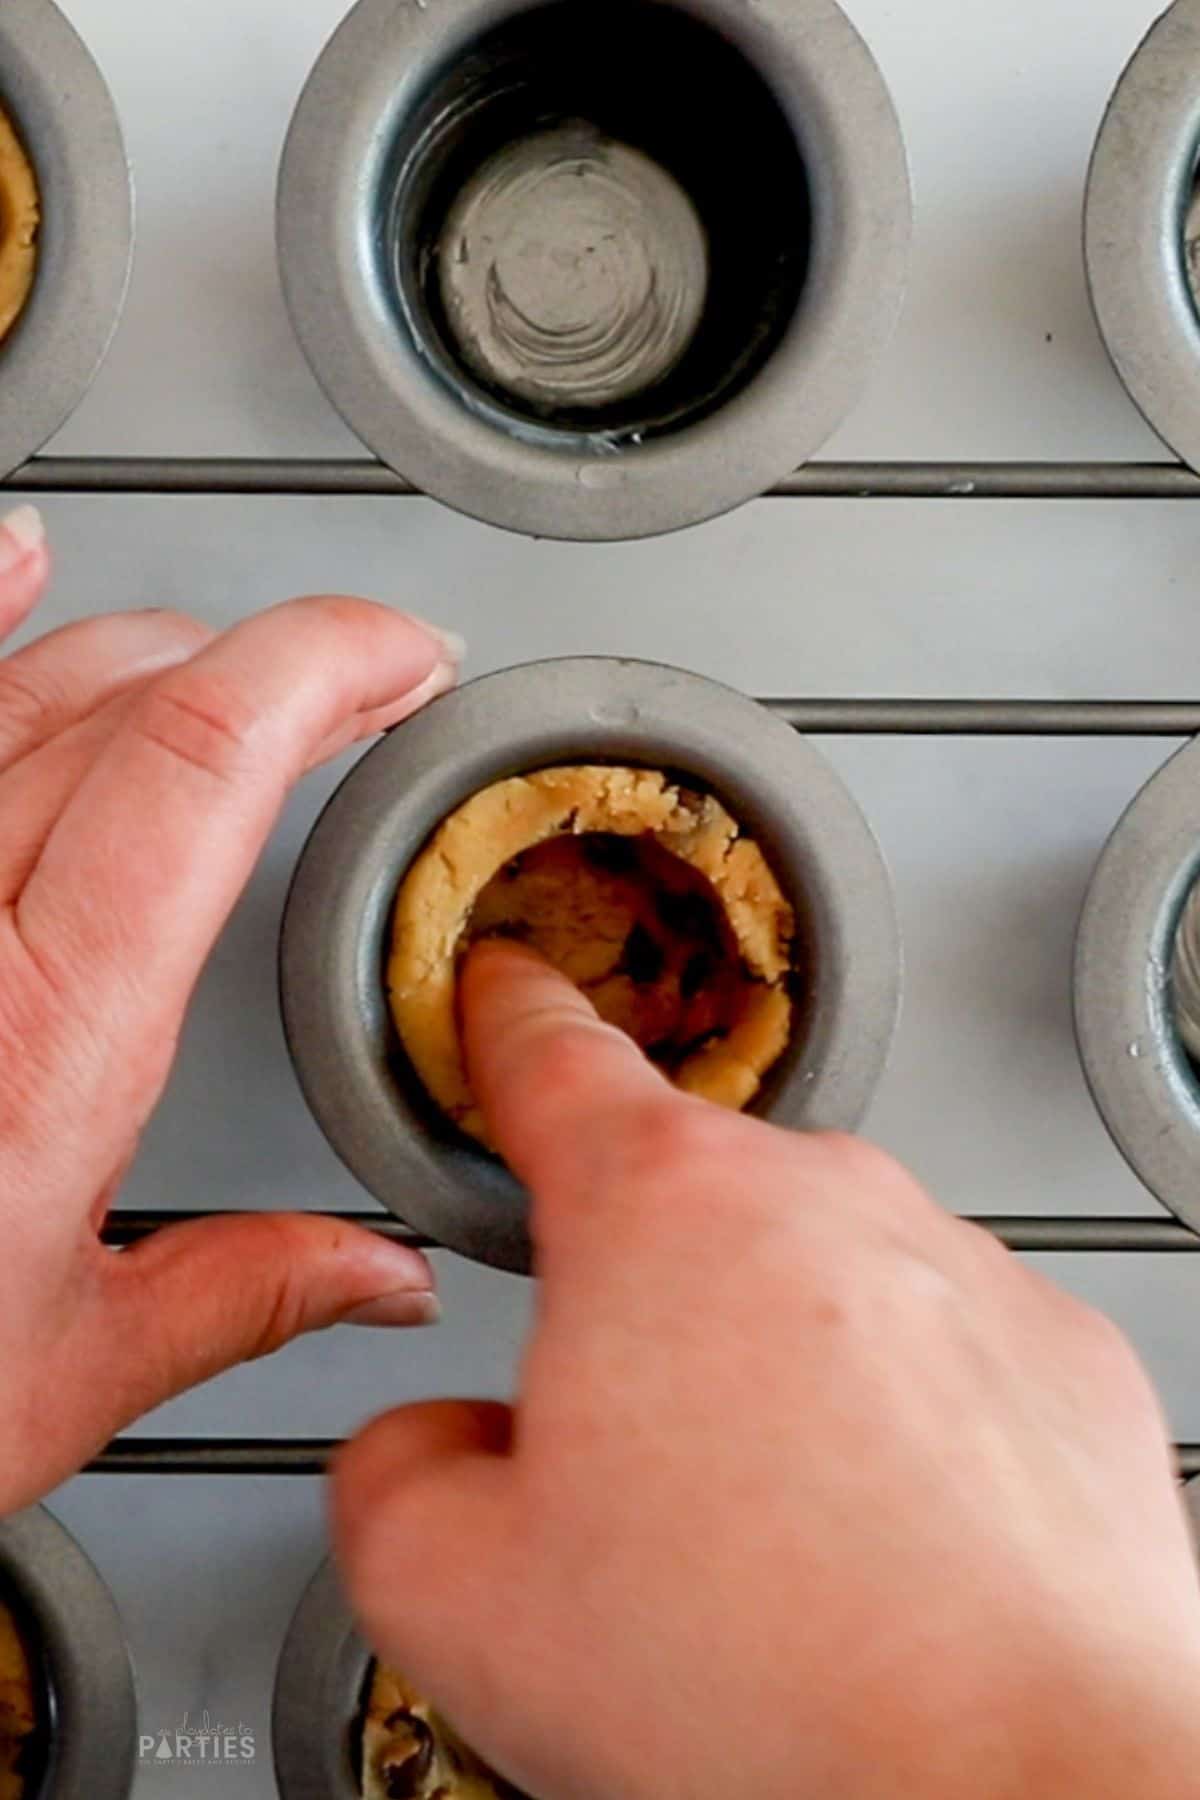
Form the cookie shots inside the wells of the prepared popover pan. Press the dough against the sides of the pan, making sure sides of the cookie dough is about 1/4 inch thick around all edges.
Place the uncooked cookie shots in the freezer for 20 to 30 minutes.
While the dough is in the freezer, preheat your oven to 350˚F. When the cookie dough is well chilled, bake for 20 to 25 minutes.
Remove the Cookie Shots from the Pan
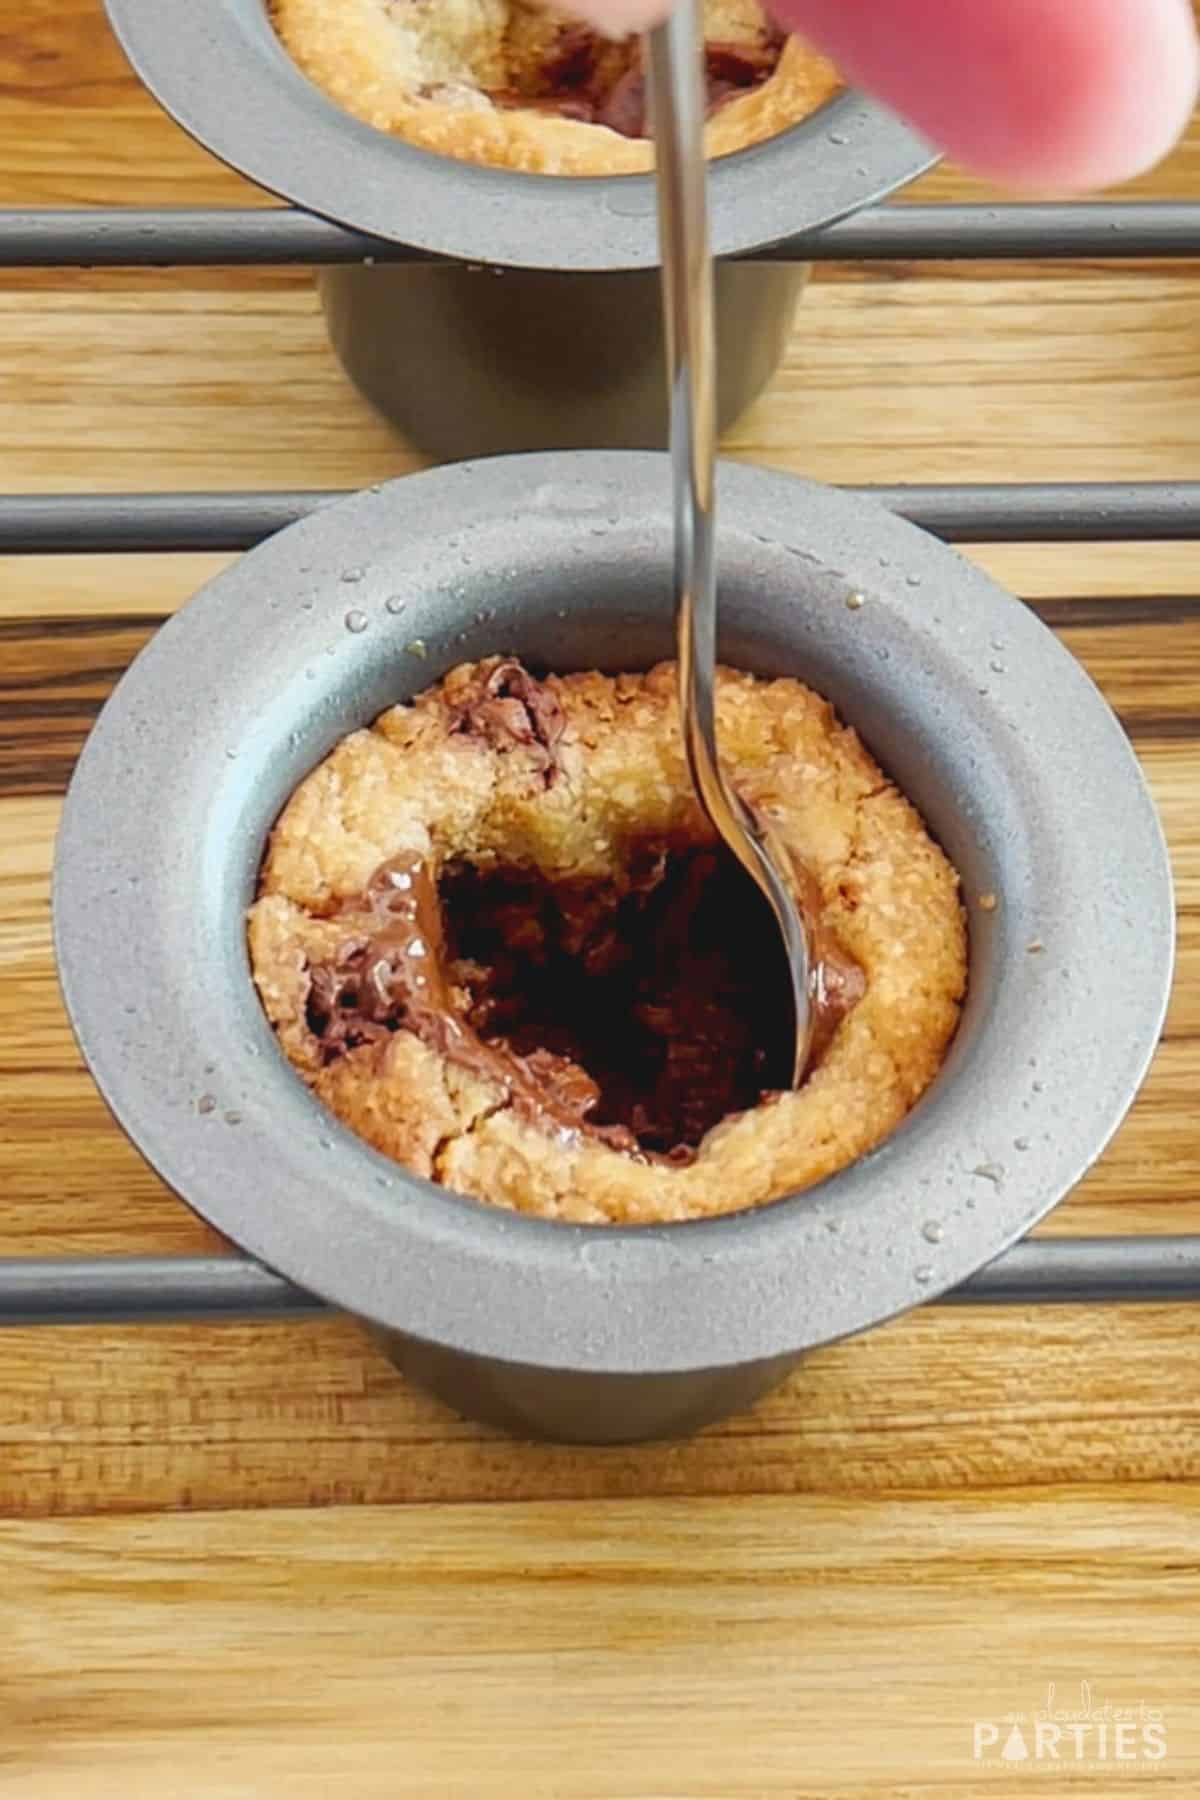
Once the cookie cups are finished baking, use a small spoon or a table knife to press the cookies back into the pan and create the inside area of the cup. Cool for an additional 10-15 minutes.
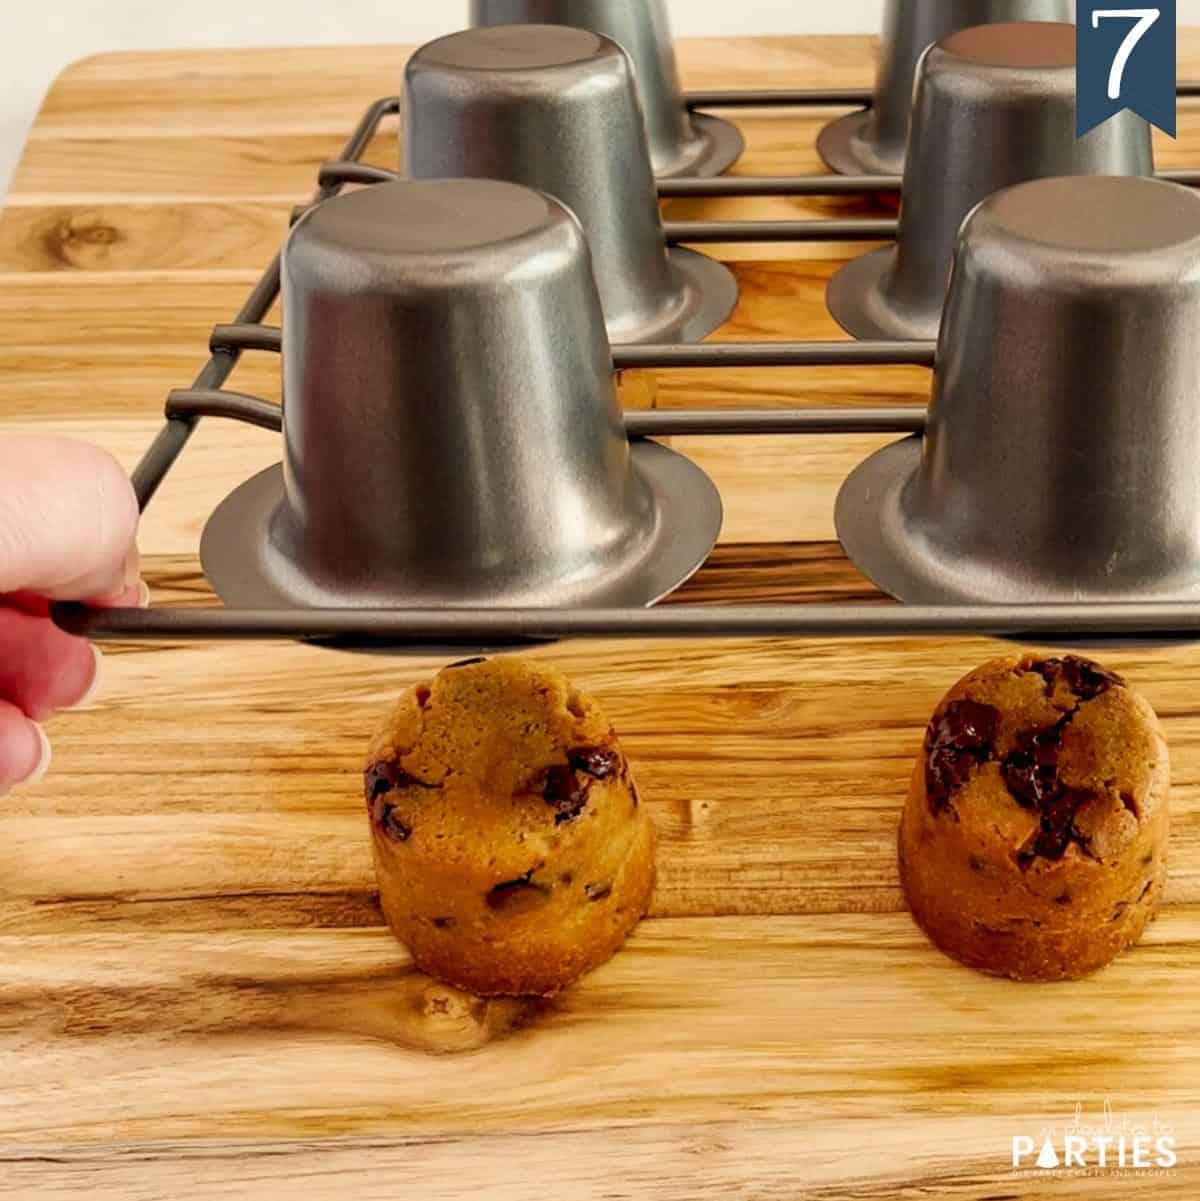
Carefully flip over the popover pan to release the cookie shots. You may need to tap the bottom of the pan with a spoon if the cookie cups don’t come out at first. Allow the cookies to cool completely, about 30 – 40 minutes.
Coat the Cookie Shots with Chocolate
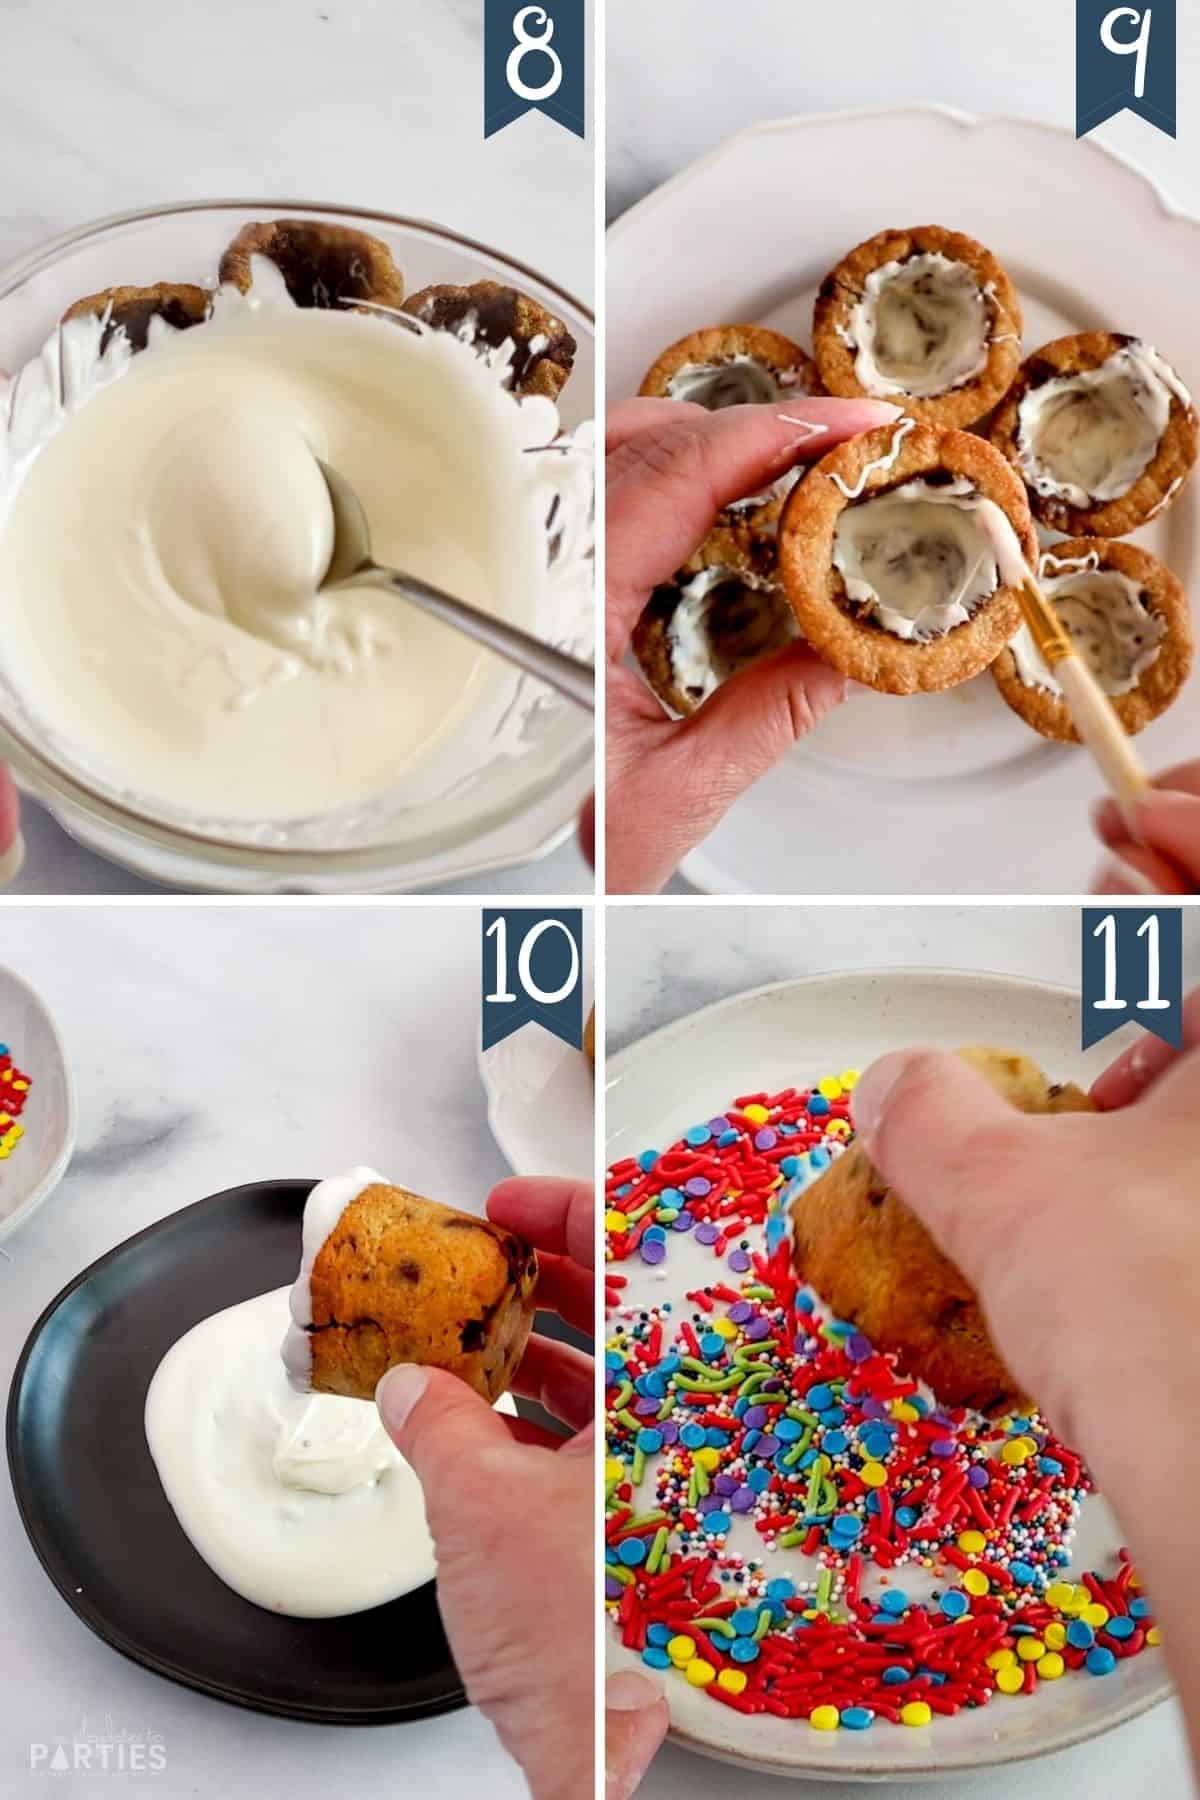
Place 1/2 cup white chocolate chips in a microwave safe bowl. Heat in 10 second intervals, stirring between each interval, until the chocolate is melted and smooth.
Use a food safe paint brush or small spoon to coat the inside of the cookie shots with the melted chocolate.
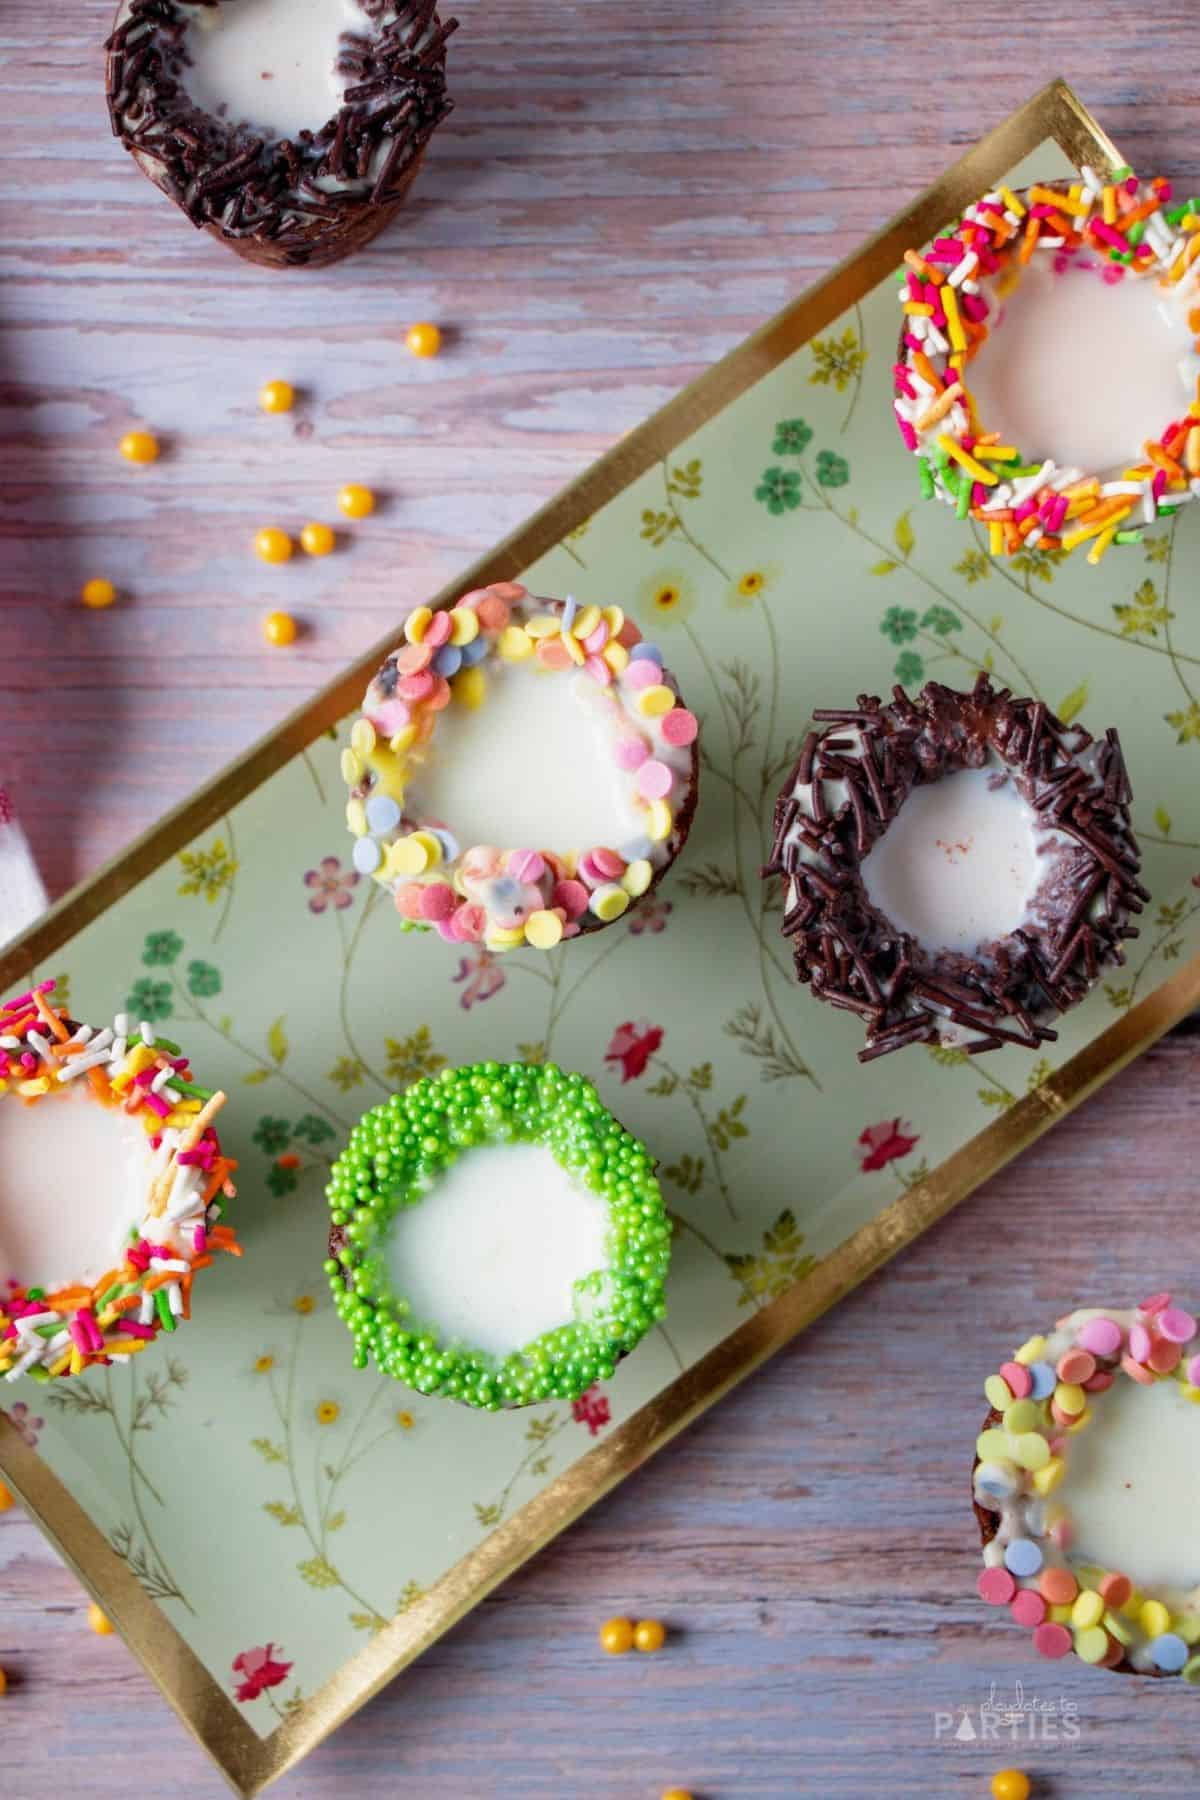
To decorate the rim: Place melted chocolate on a shallow plate. Do the same with the sprinkles. Dip the rim of the cookie shot into the chocolate, making sure to coat all the edges.
Immediately dip the chocolate coated rim into the sprinkles. Allow the cookie shots to set for at least 15 more minutes.
Essential Tips:
Don’t skip these tips – read them before baking to avoid any potential mistakes.
- The butter must be melted for this recipe to help limit how much the cookie dough swells while baking.
- Don’t spread your batter too thin. You need shot glasses with a thick bottom and sturdy sides so they won’t fall apart too easily.
- Allow your cookie shots to cool for at least 10 minutes before removing them from the pan. This will help them come out more easily.
- If your cookie shots don’t come out at first, you can tap the bottom of the popover pan molds with the back of a knife or wooden spoon.
- Once the cookie shots are removed from the pan, you can place them in the refrigerator to speed up the cooling process.
- Make sure you completely cover the inside of the chocolate chip cookie shots with chocolate. This layer is essential to ensure your shots don’t fall apart before you’re ready to eat them. (See all my best tips for how to melt chocolate without ruining it!)
Substitutions and Adaptations:
- Chocolate Chips: We used regular sized chocolate chips, but you could also use mini chocolate chips, white chocolate, butterscotch morsels, or peanut butter chips too.
- Add a quarter cup Cocoa Powder to make decadent double chocolate chip cookie shots.
- Melted Chocolate Coating: Semisweet chocolate chips, dark chocolate, white chocolate, or even colorful candy melts will all work to act as a moisture barrier.
- Sprinkles: Feel free to have fun with the decorations. Change up the color of your sprinkles, or to add other extras like crushed candy canes, finely chopped nuts, flaked coconut, or even crushed Oreo bits.
- Kid friendly fillings: Regular milk, chocolate milk, vanilla milk, homemade mousse, or even fresh whipped cream are all delicious kid-friendly ways to fill your cookie shots.
- Adults only: Fill your cookie shot glasses with grown up favorites like coffee, Bailey’s Irish cream, and chocolate liqueur. You could also spike some milk or heavy cream with Frangelico, Amaretto, or flavored vodkas.
FAQs:
How can I keep my cookies from expanding into the center?
This recipe uses nearly all the tricks that reduce spread in cookies: melted butter, no baking powder/soda, no egg whites, and freezing before baking.
Still, in order to have a dough sturdy enough to be a shot glass, it will also be a dough that rises while baking.
I don’t have a popover pan. Can I use something else?
This recipe works best when made in a popover pan. I’ve seen many people make them in muffin tins, but they’re not exactly the same shape and size, so they will likely bake up differently.
You can also try using a mold specially made for making edible shots. Just please remember to double check that it’s made for baking (instead of candy making) and know that we haven’t yet tested any of them in our kitchen.
How much milk does each shot glass hold?
Each shot glass will be a little bit different, based on how tall and how thick you make it, but on average they hold about 1 ounce of liquid.
Do I have to coat my shooter with chocolate?
Yes, you must make sure you completely cover the inside of the chocolate chip cookie shots with a coating of chocolate.
This layer is essential to ensuring your shots don’t fall apart before you’re ready to eat them.
How long can the cookie shots sit with milk in them?
When we were testing these cookie shots, we filled up a cup with some cold milk and let it sit as long as possible to see when it would get soggy.
It turns out these cups hold out longer than our willpower…after an hour, the cup was fine, but we couldn’t resist snacking on it.
Just remember, if you choose to add warm drinks like hot chocolate or coffee, they may dissolve the chocolate layer and cause the cookie shots to soften sooner.
How to Store Cookie Shooters
Allow your cookie shooters to cool down completely before storing, then place in an airtight container like this for 5-7 days.
Remember, once the cookie shots are filled with milk or any other beverage, they cannot be stored and should be enjoyed within 2 hours.
If you liked my chocolate chip cookie shots, you’re going to love these other party recipes:
- Best Ever Chocolate Chip Cookies
- Oreo Cupcakes with Cookies and Cream Frosting
- Triple Infused Chocolate Beer Cake
Or you can check out my other desserts recipes here.
Chocolate Chip Cookie Shots
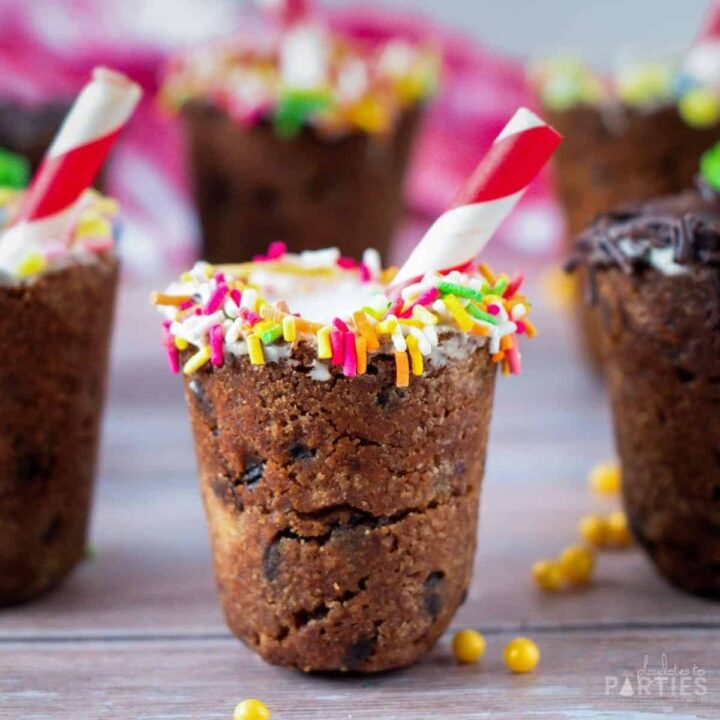
Cookies and milk gets a creative update with these fun edible chocolate chip cookie shots for cute little desserts that are perfect for a party or any special occasion.
Ingredients
For the cookie cups:
- 1/3 cup butter, melted
- 1/3 cup light brown sugar
- 1 cup all-purpose flour
- ½ cup chocolate chips
- 1 egg yolk
- 1 teaspoon vanilla extract
- 1 teaspoon table salt
Coating inside:
- ½ cup white chocolate chips
- Sprinkles of your choice
Instructions
- Grease the inside molds of a popover pan with butter or shortening
- Cream together 1/3 cup melted butter and 1/3 cup light brown sugar.
- Add 1 egg yolk and 1 teaspoon vanilla extract and mix to combine.
- Add 1 cup all purpose flour and 1 teaspoon salt. Use a spatula to combine.
- Mix in 1/2 cup chocolate chips. The dough will be stiff.
- Form the cookie shots inside the wells of the prepared popover pan. Press the dough against the sides of the pan, making sure sides of the cookie dough is about 1/4 inch thick around all edges.
- Place the uncooked cookie shots in the freezer for 20 to 30 minutes.
- While the dough is in the freezer, preheat your oven to 350˚F. When the cookie dough is well chilled, bake for 20 to 25 minutes.
- Once the cookie cups are finished baking, use a small spoon or a table knife to press the cookies back into the pan and create the inside area of the cup. Cool for an additional 10-15 minutes.
- Carefully flip over the popover pan to release the cookie shots. You may need to tap the bottom of the pan with a spoon if the cookie cups don't come out at first. Allow the cookies to cool completely, about 30 - 40 minutes.
- Place 1/2 cup white chocolate chips in a microwave safe bowl. Heat in 10 second intervals, stirring between each interval, until the chocolate is melted and smooth.
- Use a clean paint brush or small spoon to coat the inside of the cookie shots with the melted chocolate.
- To decorate the rim: Place melted chocolate on a shallow plate. Do the same with the sprinkles. Dip the rim of the cookie shot into the chocolate, making sure to coat all the edges.
- Immediately dip the chocolate coated rim into the sprinkles. Allow the cookie shots to set for at least 15 more minutes.
Notes
Remember, the step-by-step photos and FAQ in the recipe post are there to help you if you feel stuck at any point.
- The butter must be melted for this recipe to help limit how much the cookie dough swells while baking.
- Don't spread your batter too thin. You need shot glasses with a thick bottom and sturdy sides so they won't fall apart too easily.
- Allow your cookie shots to cool for at least 10 minutes before removing them from the pan. This will help them come out more easily.
- If your cookie shots don't come out at first, you can tap the bottom of the popover pan molds with the back of a knife or wooden spoon.
- Once the cookie shots are removed from the pan, you can place them in the refrigerator to speed up the cooling process.
- Make sure you completely cover the inside of the chocolate chip cookie shots with chocolate. This layer is essential to ensure your shots don't fall apart before you're ready to eat them.
Recommended Products
As an Amazon Associate and member of other affiliate programs, I earn from qualifying purchases.






Tanya @ Mom's Small Victories says
thanks for sharing (and hosting) at the happy now party! pinned this to my party time board!