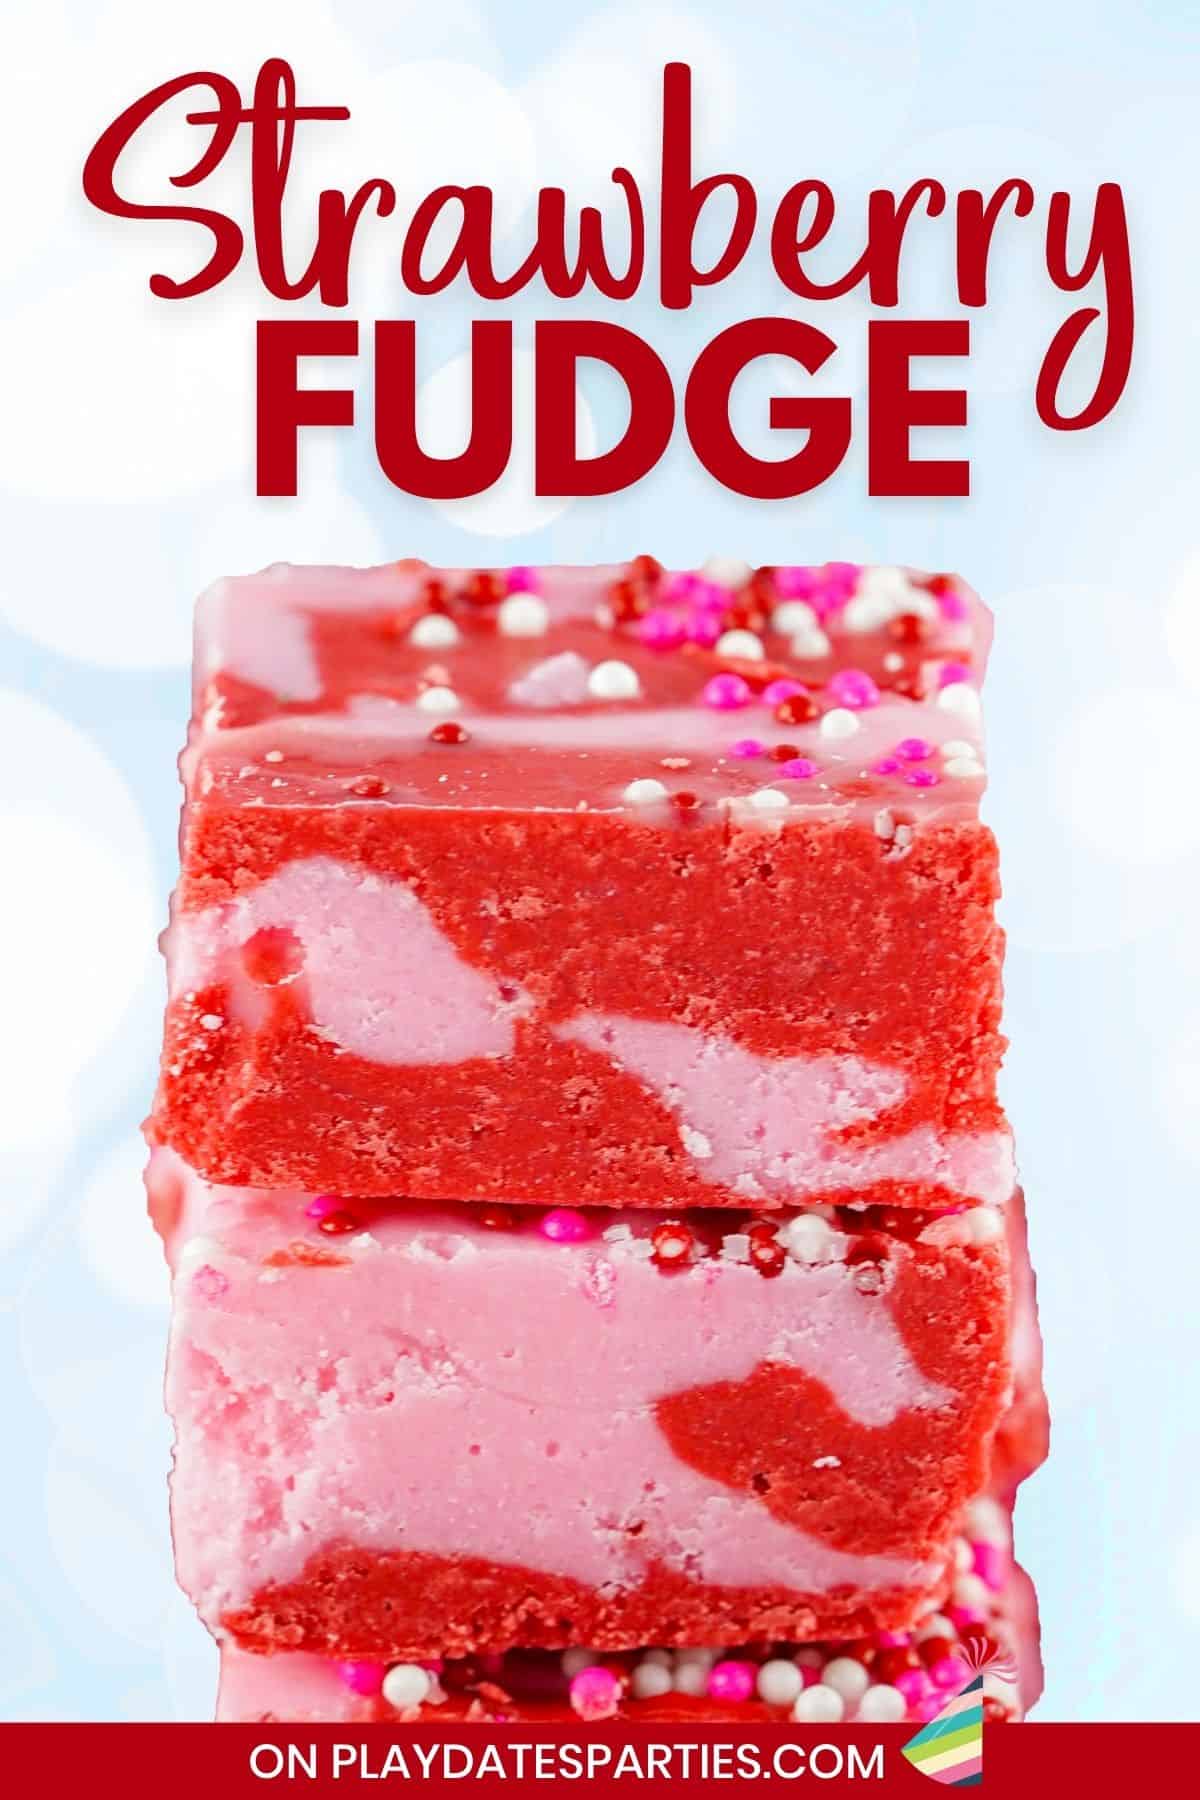
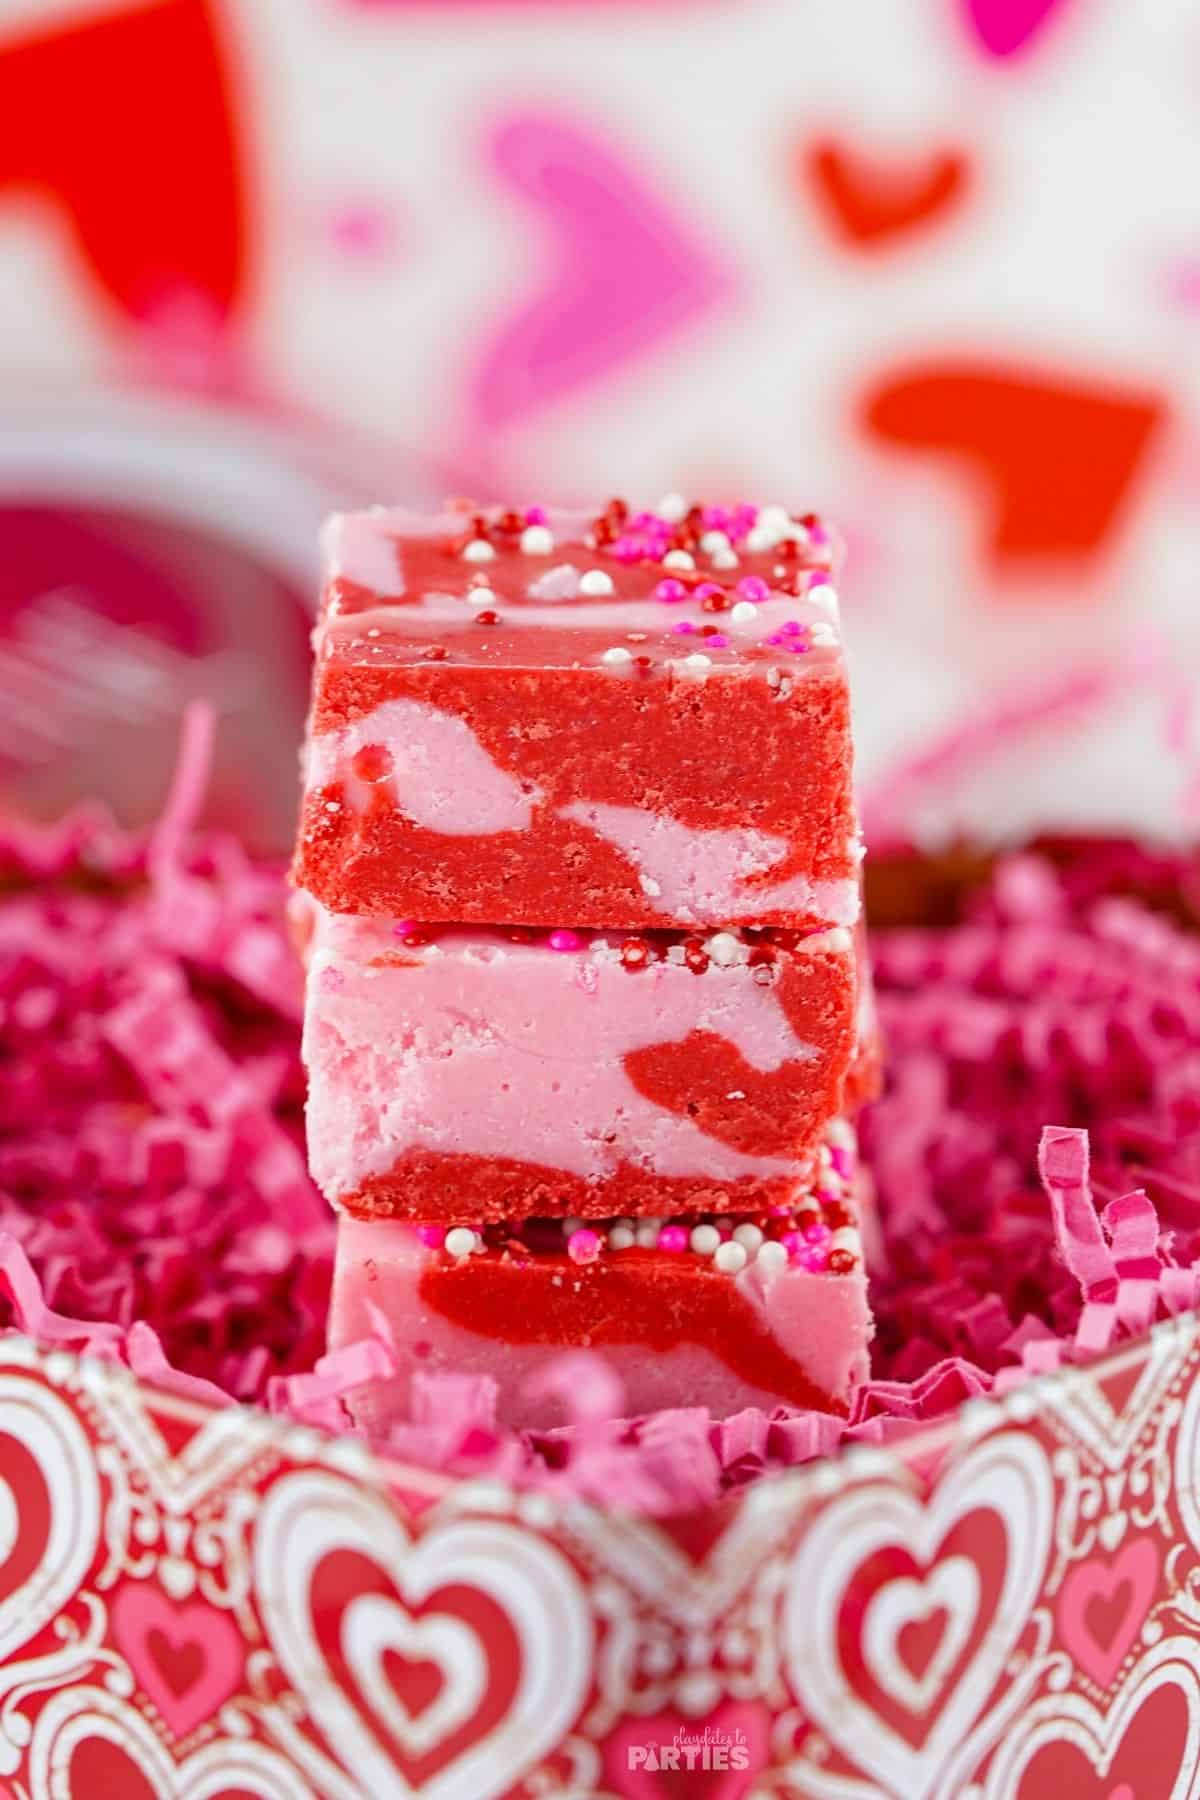
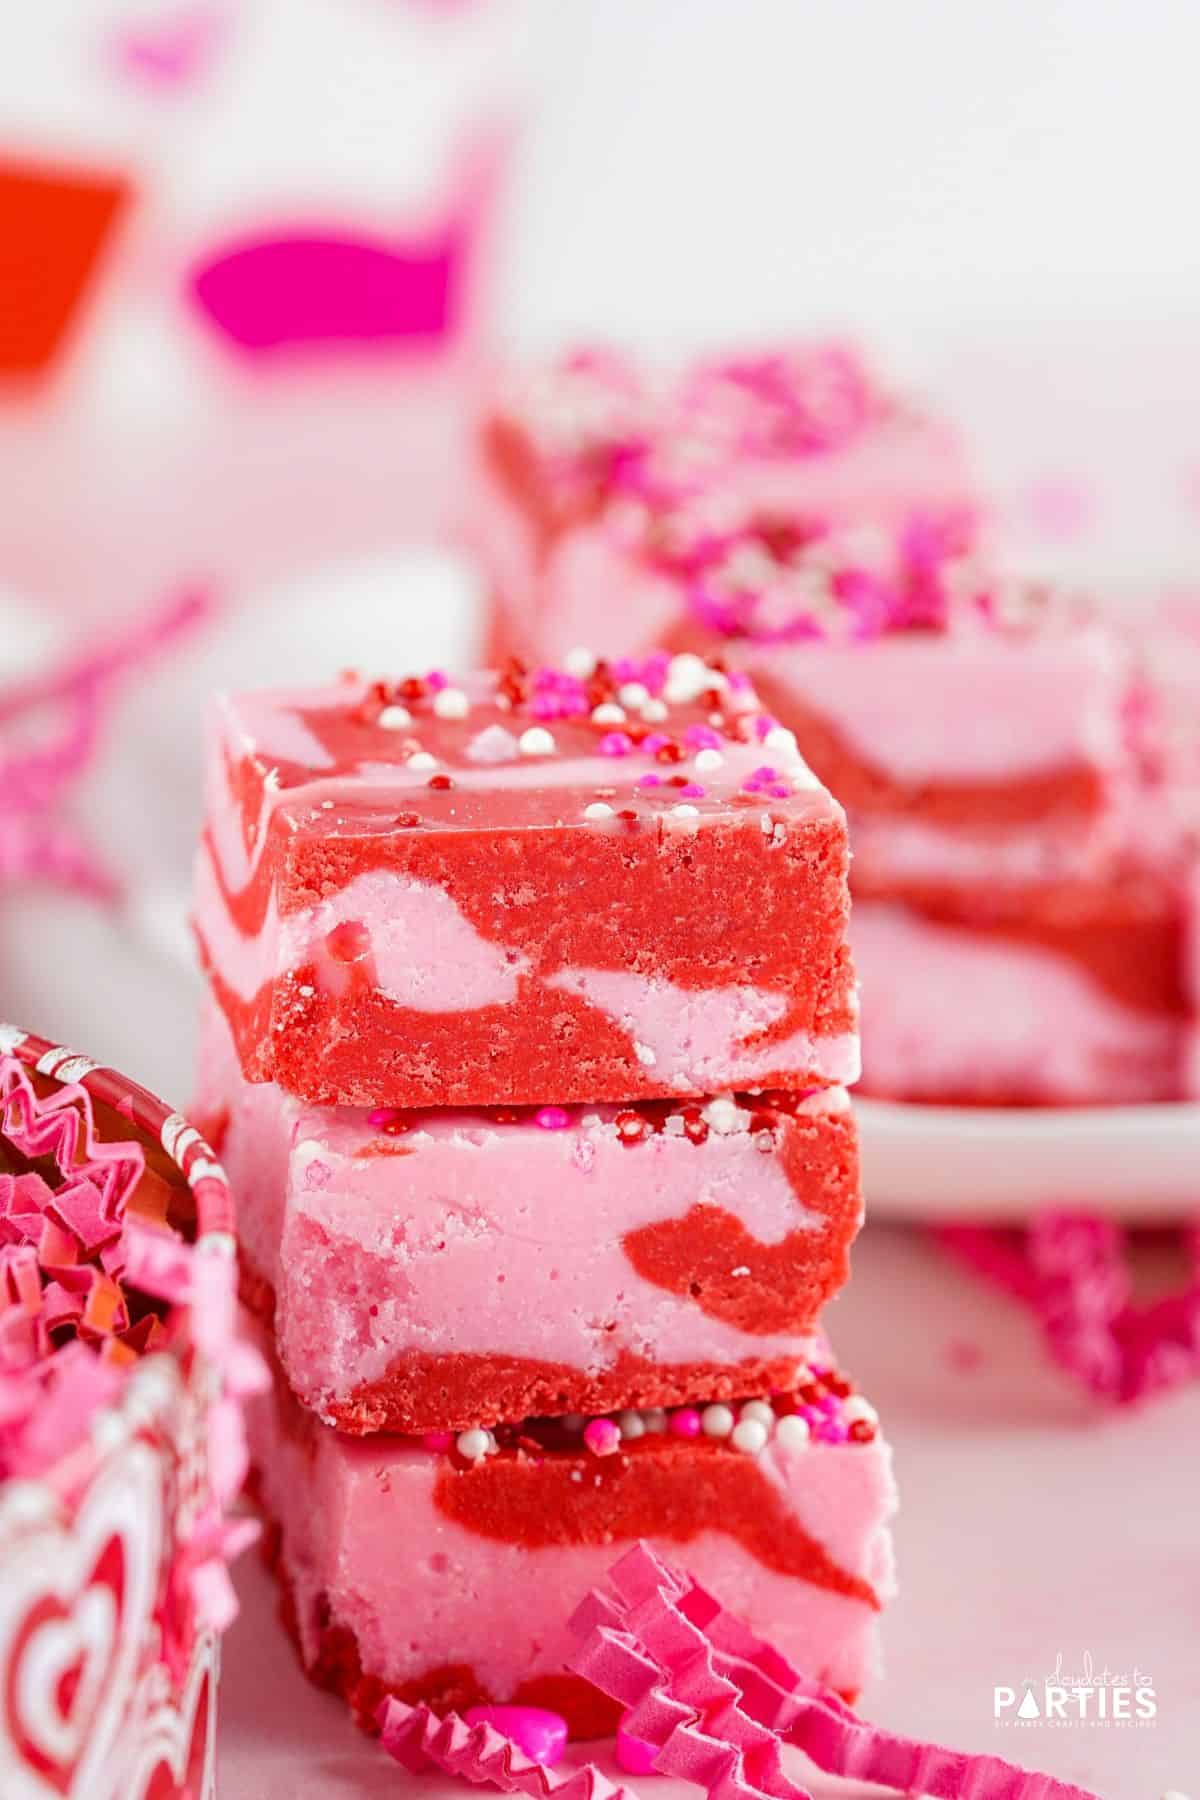
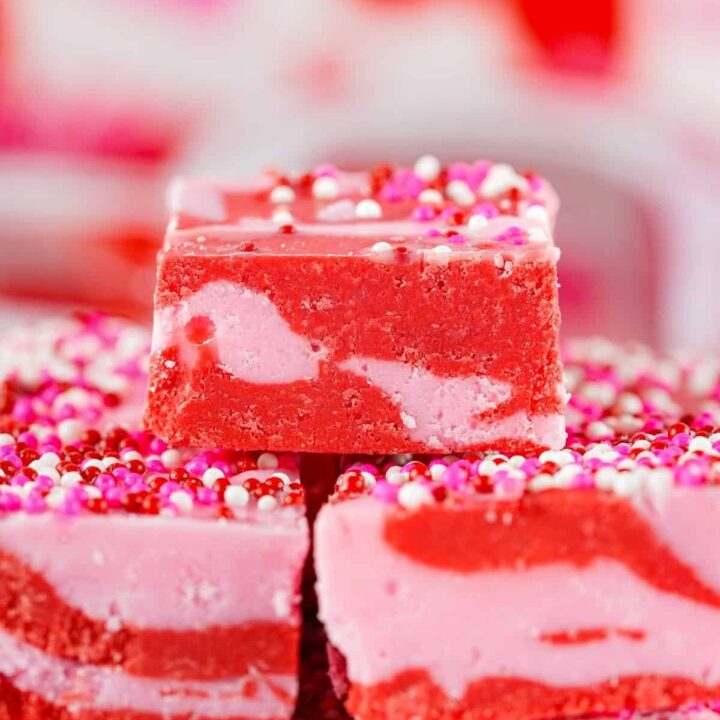
Looking for a unique, easy, and delicious recipe to wow your guests this Valentine’s Day? You’re going to love this gorgeous layered strawberry fudge!
Not only is it simple to make, but its vibrant colors will bring a festive flair to any party. Plus, the creamy texture and subtle taste of sweet strawberries will have everyone asking for seconds.
Why You’ll Love Layered Strawberry Fudge
- Fast: You can have this fudge in the pan and ready to set in as little as 20 minutes.
- Easy: No complicated chocolate melting techniques or tools. All you need are a few bowls, a pan, and a knife to make this tasty sweet treat.
- Delicious: It’s got that perfect melt-in-your-mouth fudge texture with plenty of sweetness and a hint of strawberry.
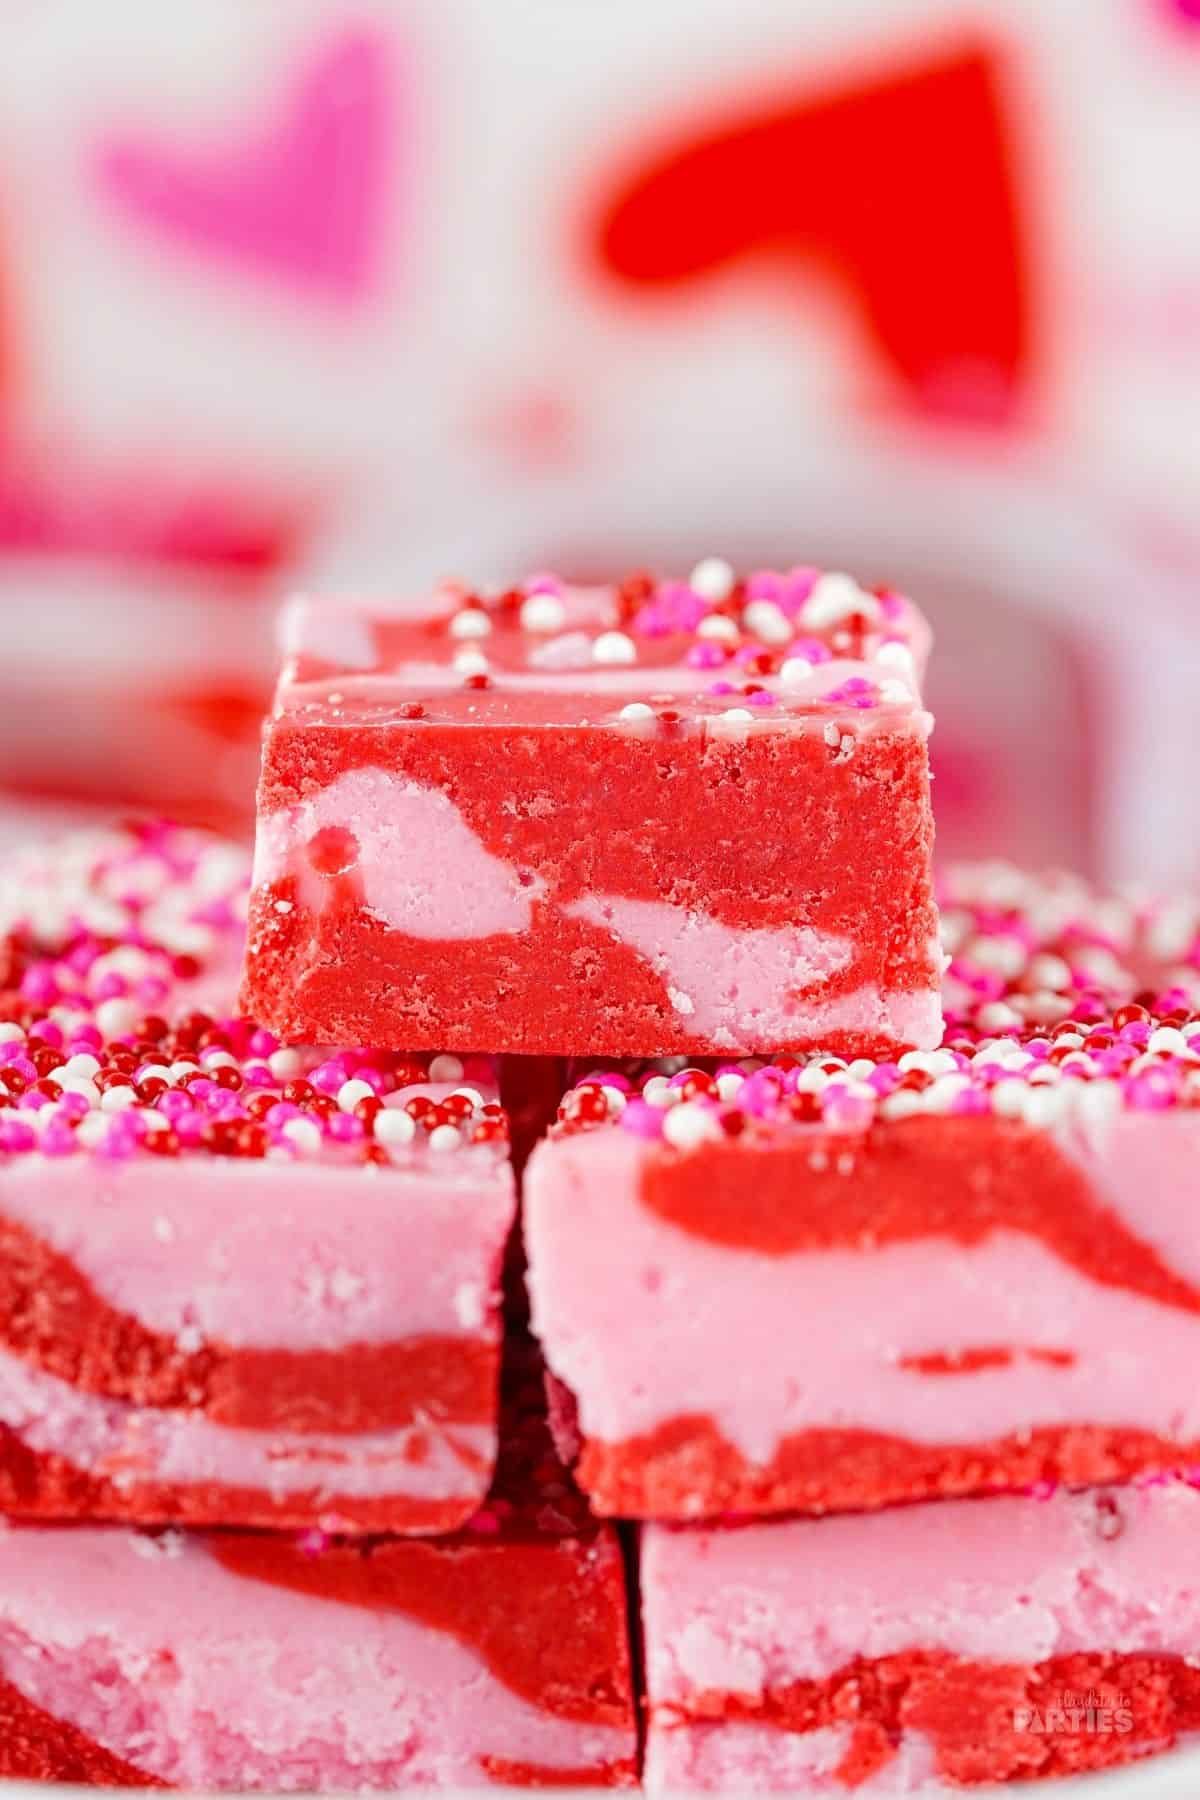
- Unique: The red and pink layers are stunning, but you can also easily customize this recipe for any occasion or holiday.
What You’ll Need:
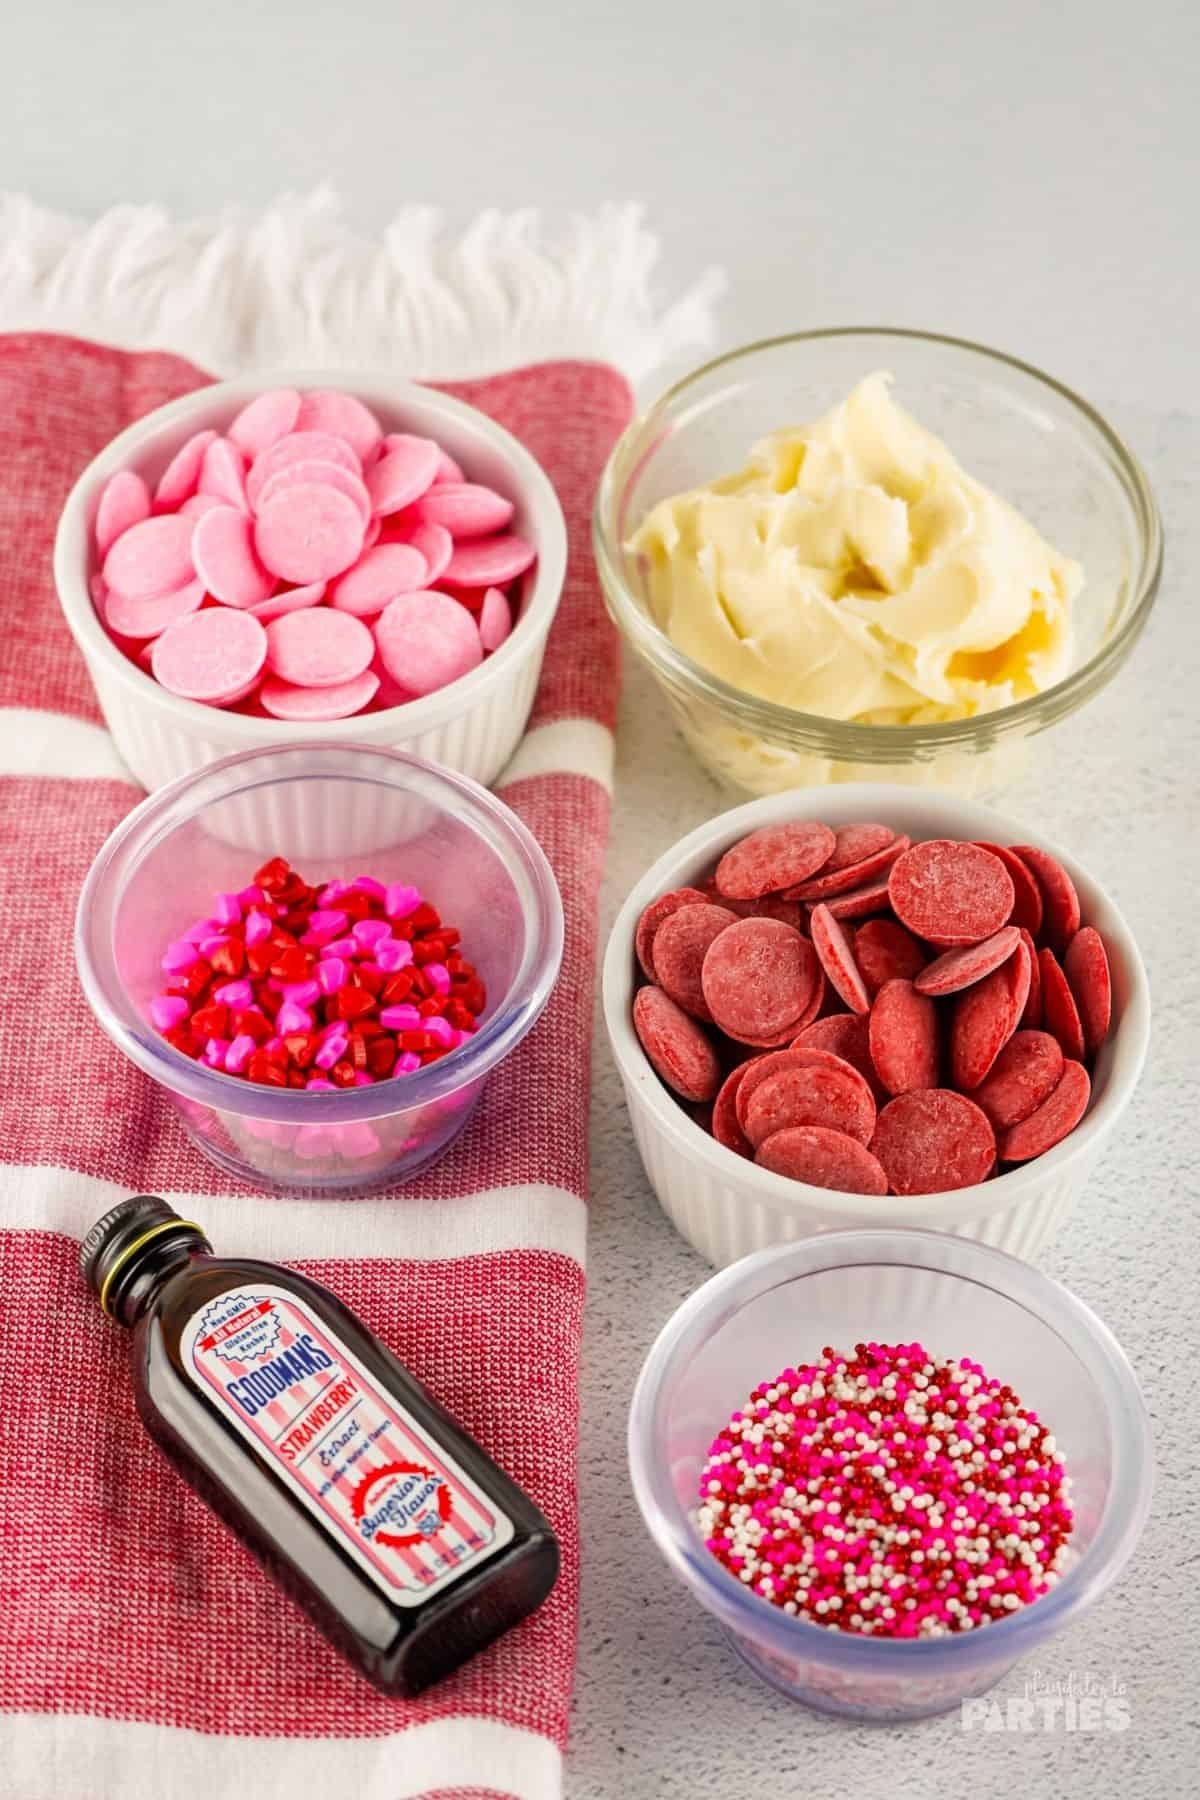
Ingredients:
- Buttercream Frosting (I used store-bought, but you can also use homemade frosting)
- Red Candy Melts
- Strawberry Flavored Pink Candy Melts (available here and here)
- Strawberry Extract
- Valentine’s Day Non-Pareils Mix or other Sprinkles
Supplies:
- 8×8 Square Pan
- Parchment Paper
- 2 medium size microwave safe mixing bowls
- Spoons or whisks
- cutting board
Step-by-Step Directions:
To make things even easier for you, I created a simple photo guide below. For all measurements and a more detailed guide, check out the recipe card at the bottom of this page.
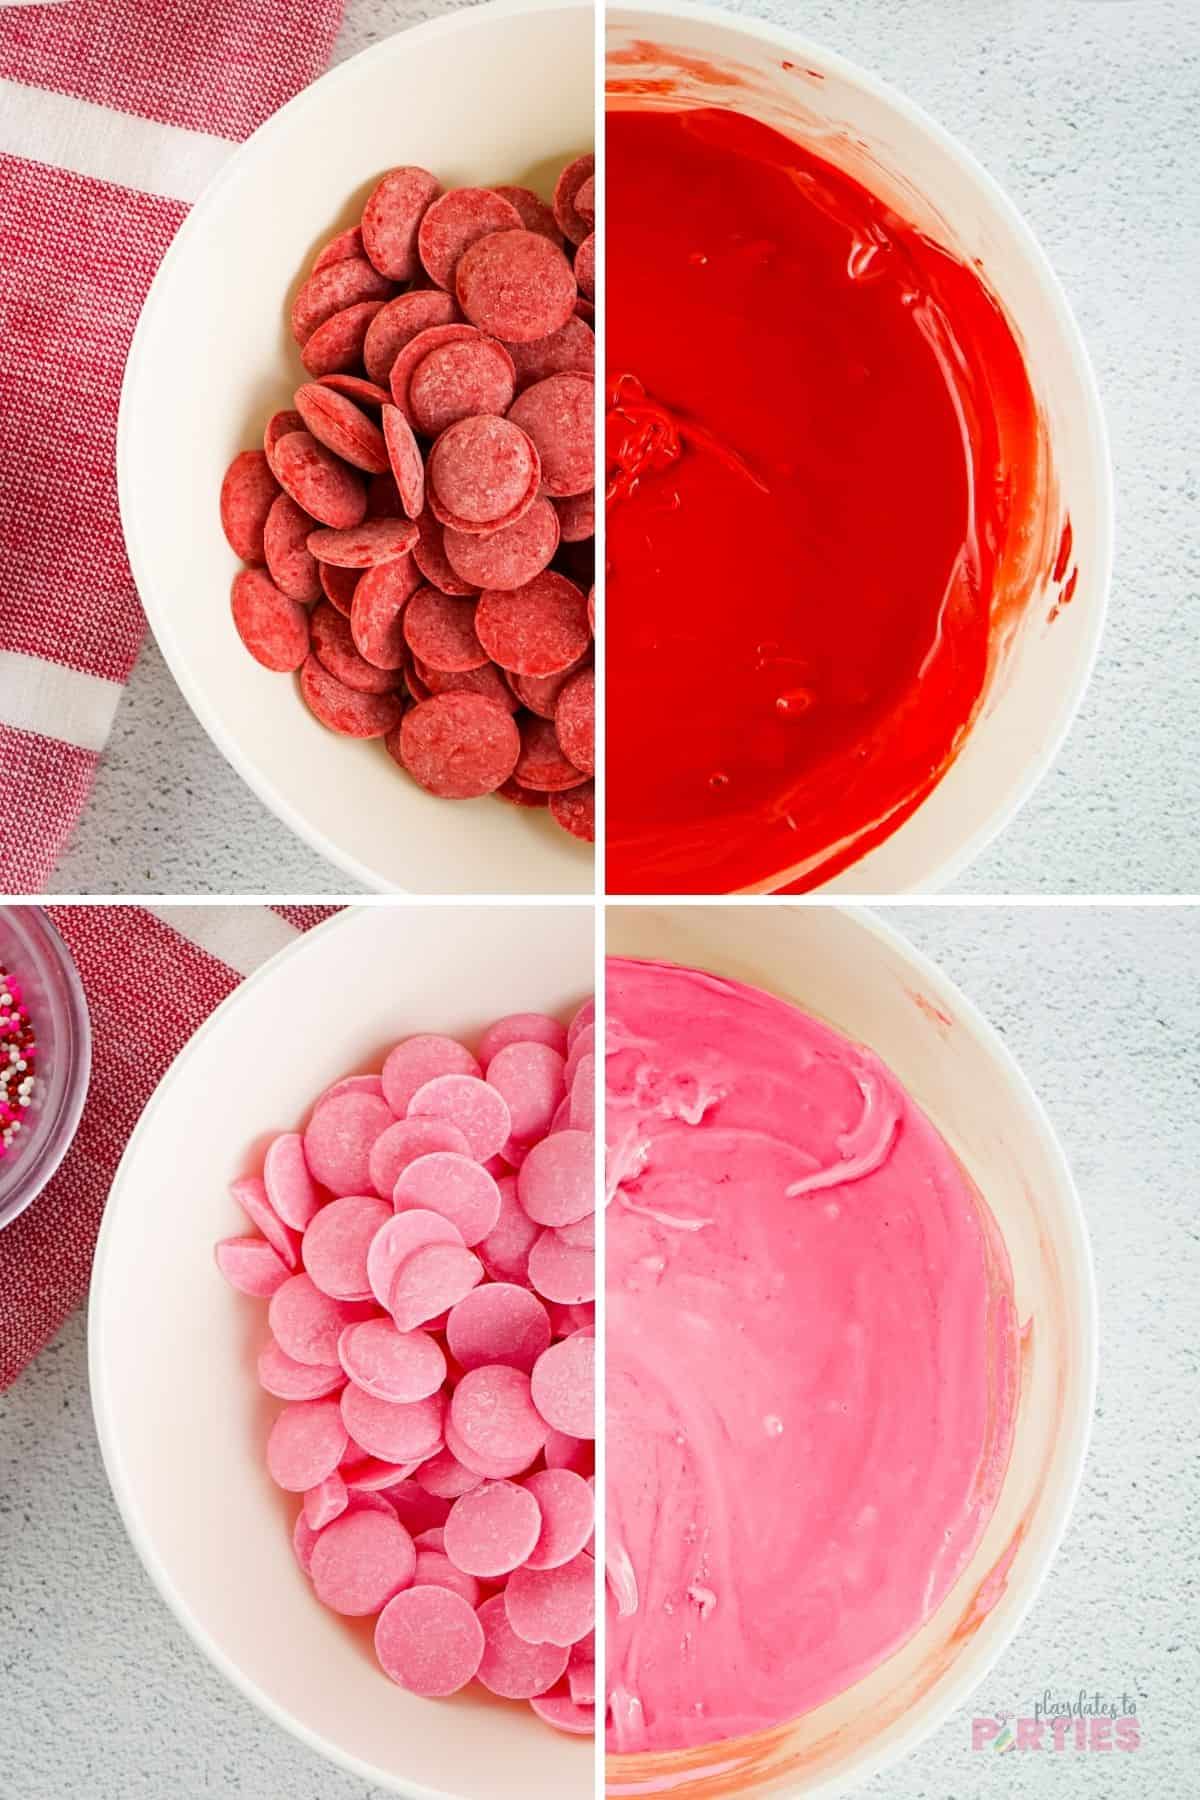
Step 1 – Place red candy melts in a medium sized microwave-safe bowl. Microwave on high heat for 15-30 seconds. Stir, then repeat until the the candy is smooth when stirred, about 2-3 minutes. Be careful not to over cook the candy.
Step 2 – Place pink candy melts in a separate medium sized microwave safe bowl. Repeat the same melting process as with the red candy melts. Keep the two colors separate.
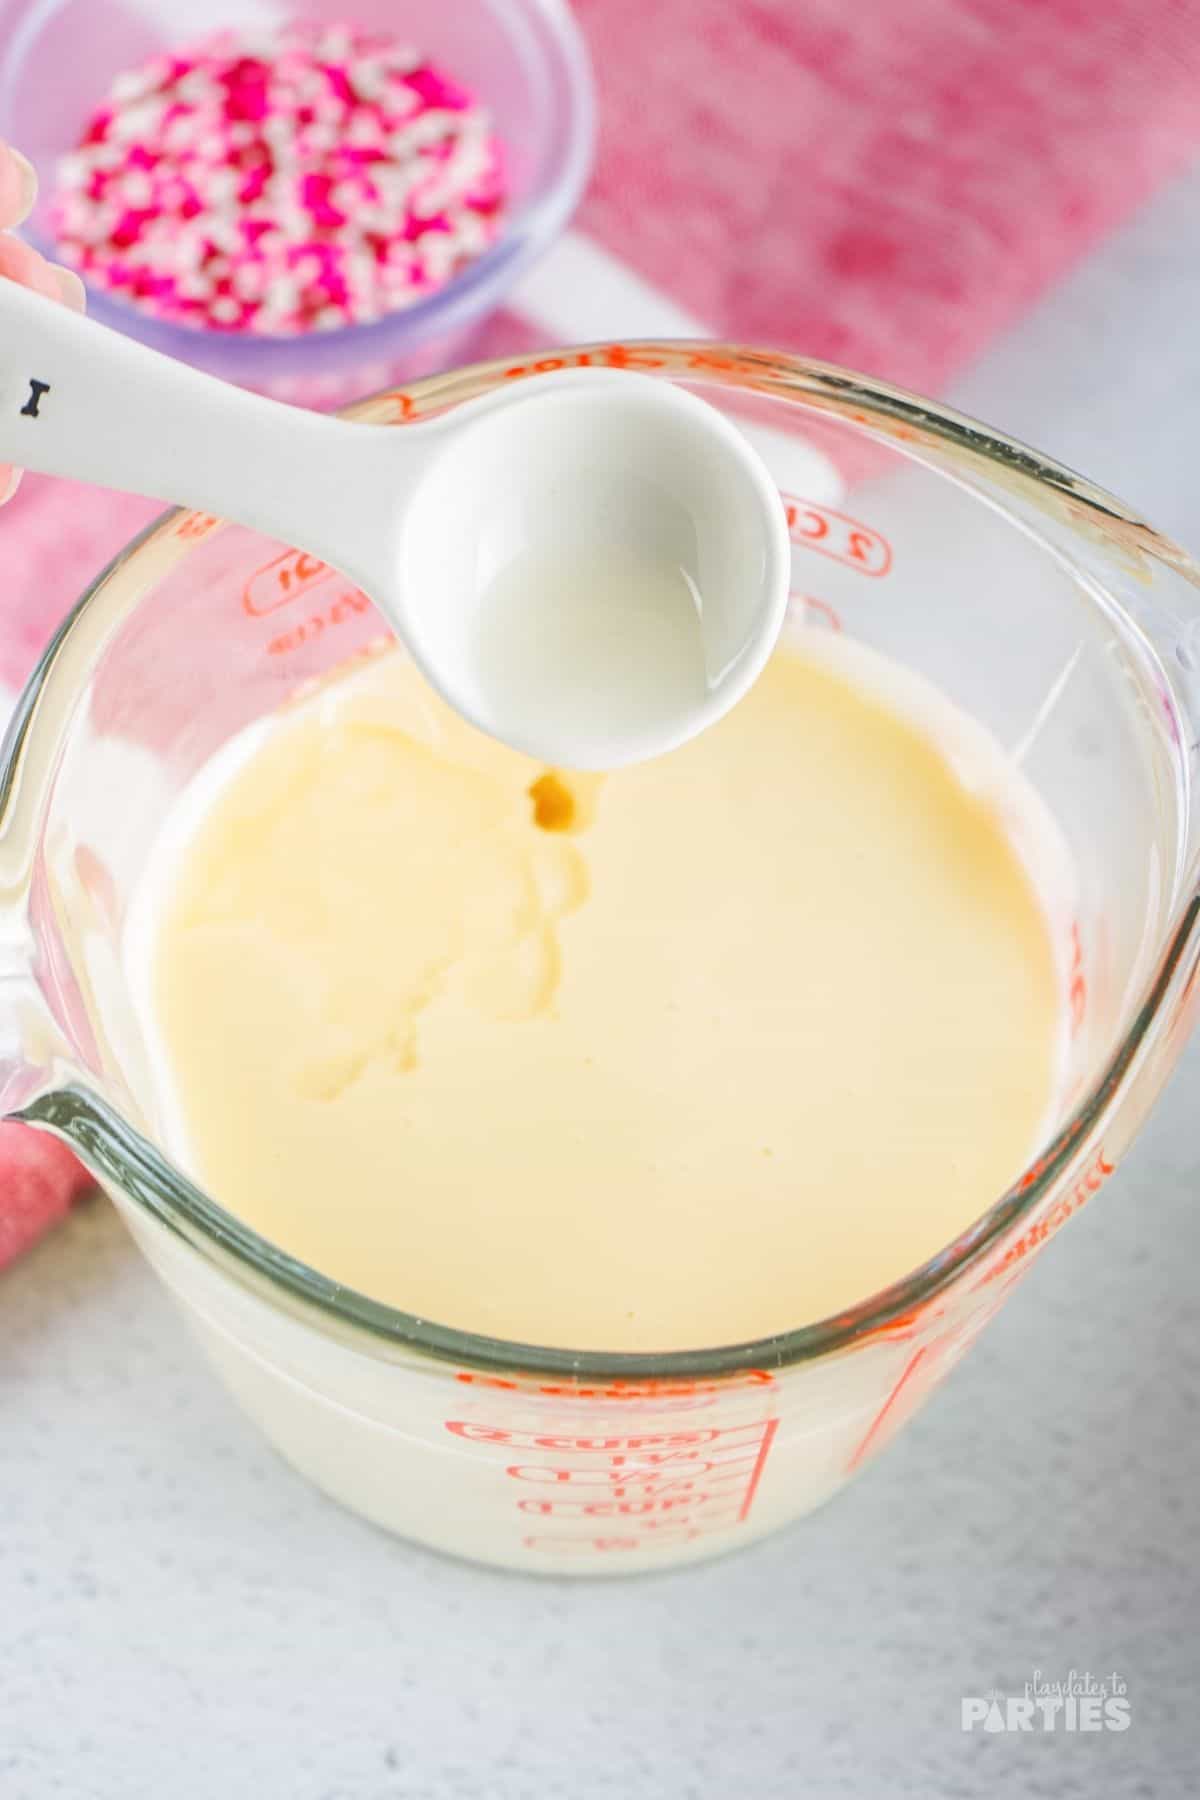
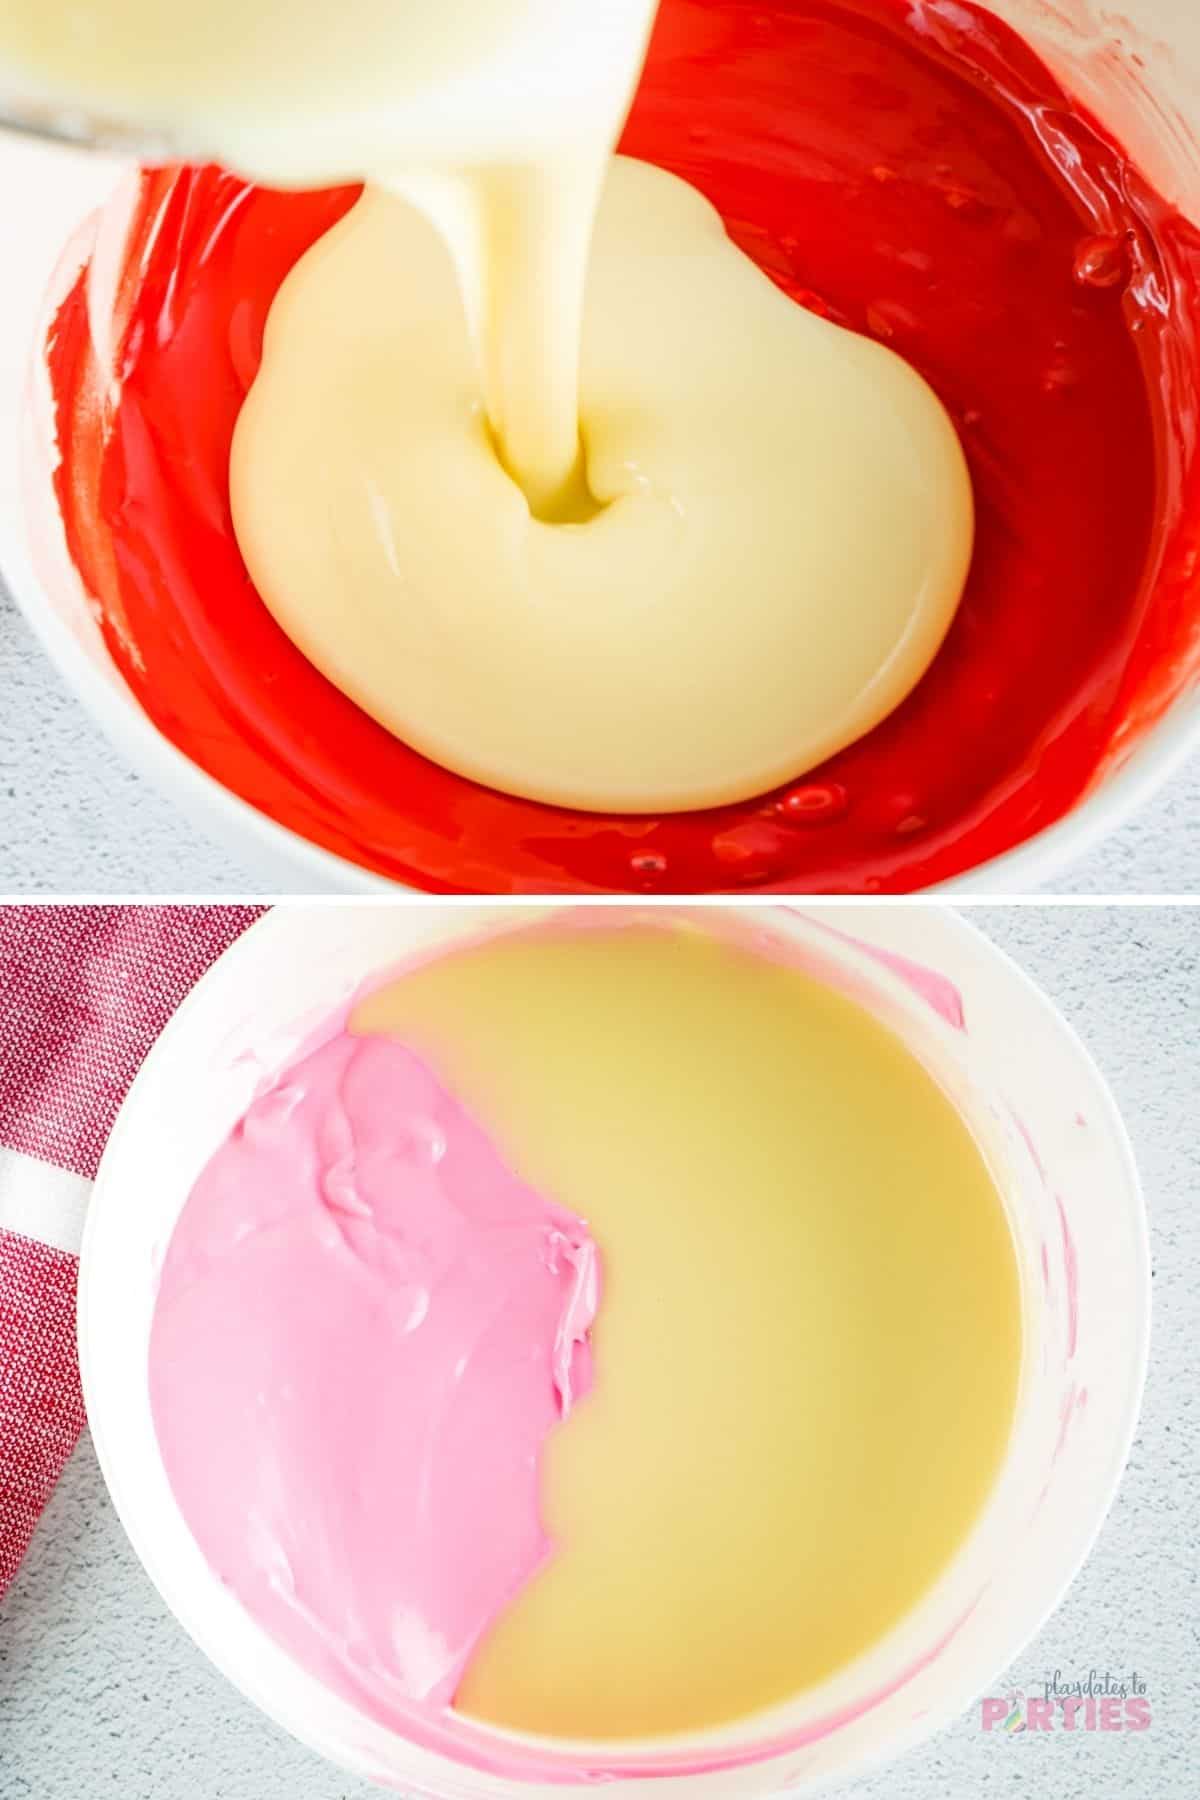
Step 3 – Remove the frosting lid and foil film from the canister. Microwave the frosting in the plastic container for 45 seconds to 1 minute, until fully melted and smooth.
Step 4 – Add 1 teaspoon strawberry extract to the frosting and stir well.
Step 5 – Pour half of the frosting in with the red candy melts and the other half with the pink candy melts.
Step 6 – Stir each color vigorously until fully combined.
Step 7 – Take turns pouring in the red and pink candy mixtures, randomly in the pan. Make sure to give the pan a tap between each pour to remove the bubbles and even out the chocolate.
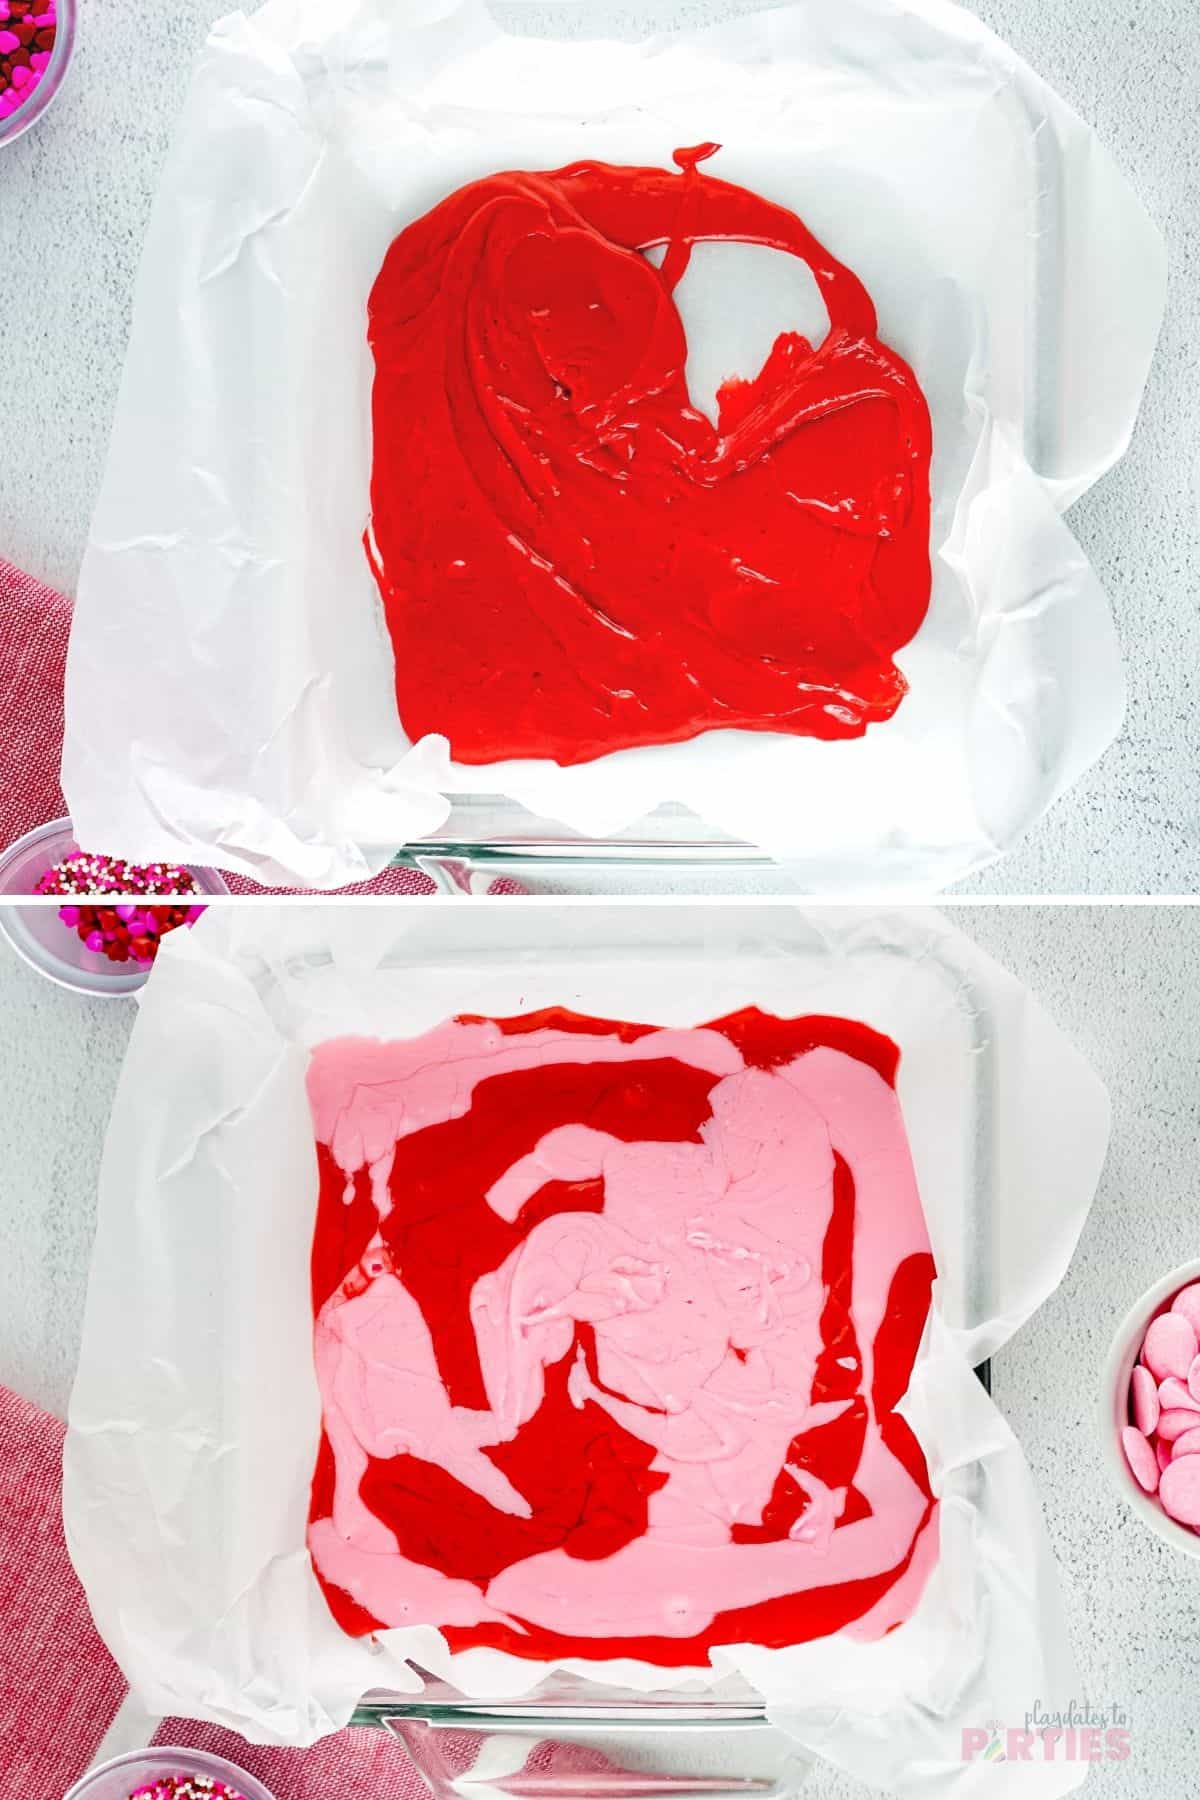
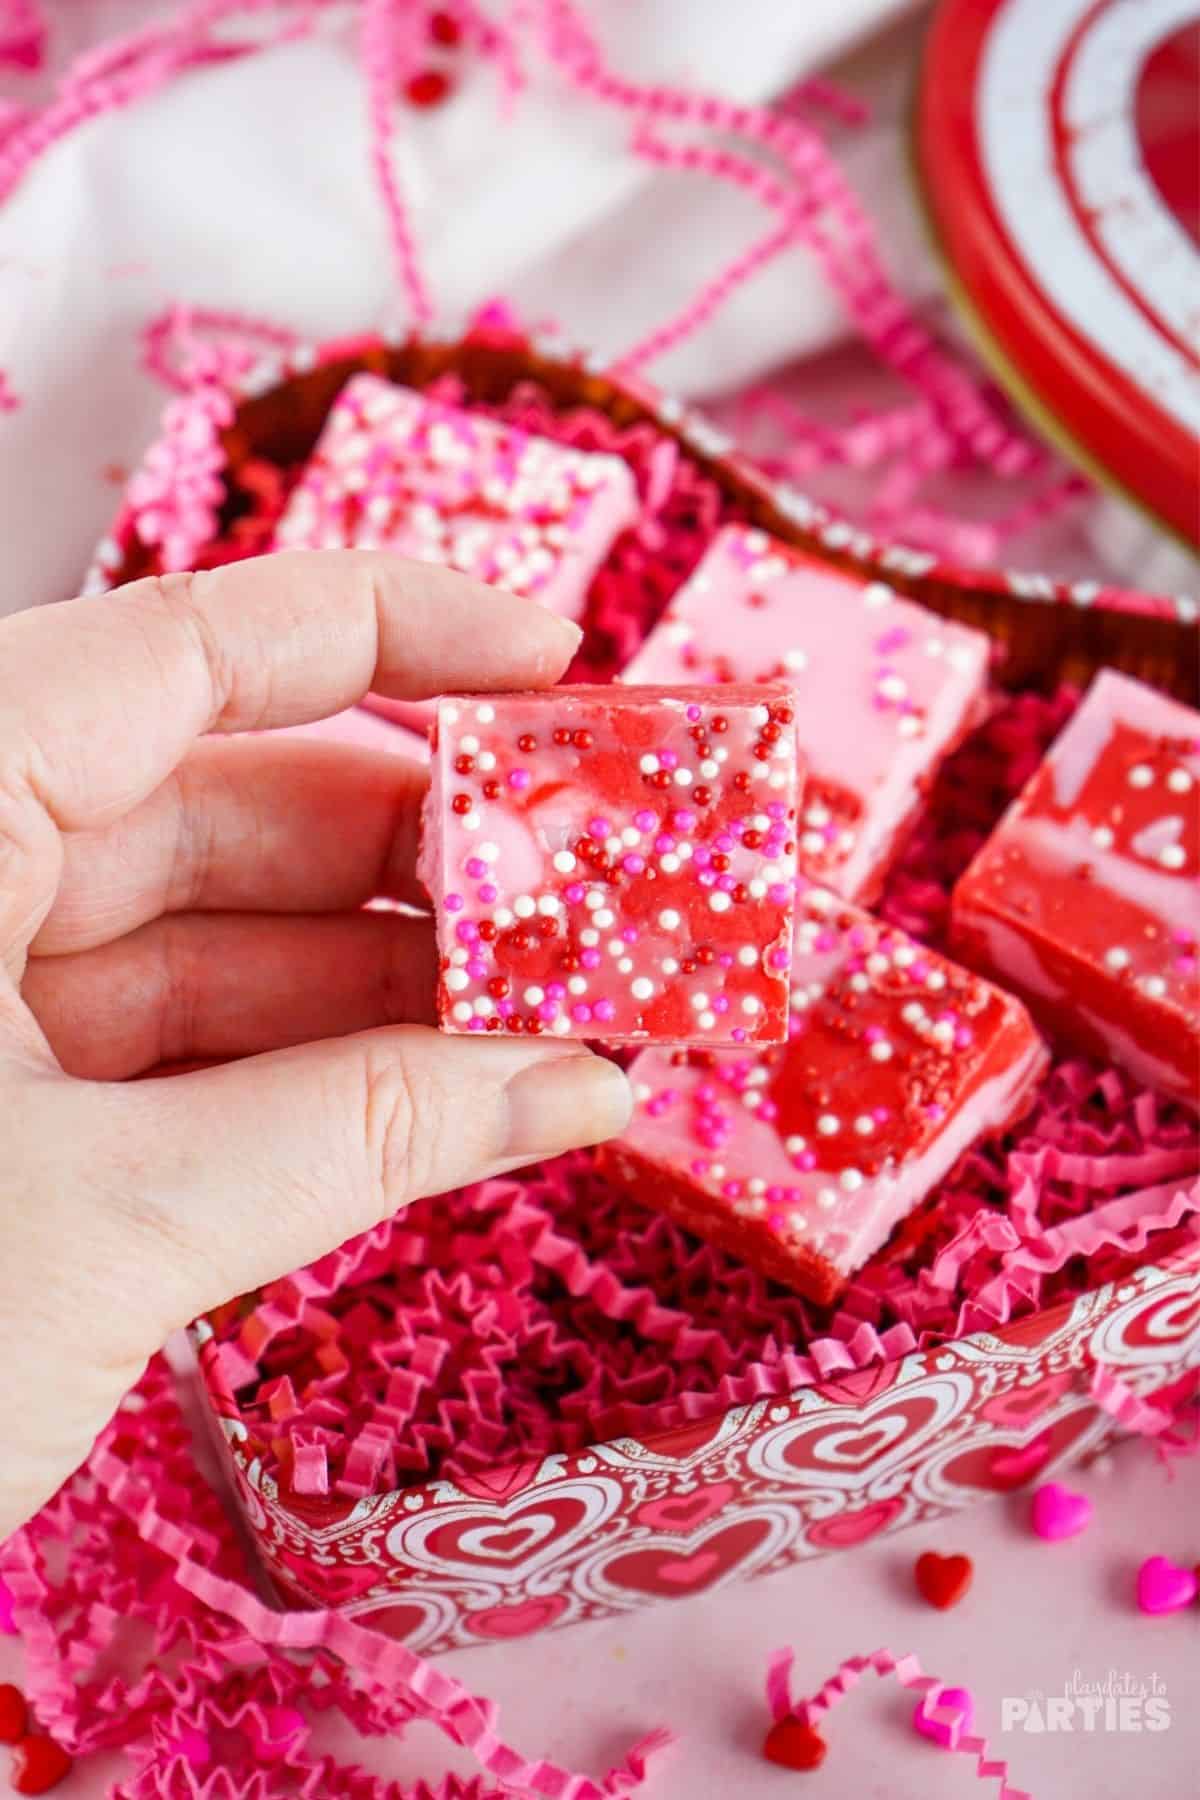
Step 8 – After you’ve poured all your chocolate mixtures into the pan, and they’re evened out, sprinkle the top of the fudge with non-pareils and Valentine’s Day sprinkles.
Step 9 – Place in the fridge to chill for at least 2 hours or until hardened. Cut into 16 squares before serving.
Essential Tips:
Don’t skip these tips – read them before baking to avoid any potential mistakes.
- Watch your room temperature. If you tend to keep the thermostat down in the winter, it may cause your first batch of candy melts to harden slightly while you get everything else ready. Try to work quickly and keep your room temperature above 65˚F.
- Because brands of buttercream vary somewhat in texture and consistency, there can be some pitfalls. If your fudge is too hard or crumbly, you’ll need to use less chocolate next time. If your fudge is too soft or doesn’t set up, you’ll need to use more chocolate or less buttercream next time. The fudge will still be tasty, but it wont look quite like the pictures.
- Only add the extract to the buttercream. If you add it to the candy melts, it will ruin them, and that would be terribly sad.(See my guide for how to melt chocolate for more details)
- Sometimes the chocolate may get grainy or lumpy when you add the frosting. Don’t worry – it will be all right! Keep stirring until the mixture is pourable.
FAQs:
I can’t find pink strawberry candy melts. Will this still be good?
I’ve been able to find strawberry candy melts here and here, but if you still can’t get your hands on any, don’t worry. You’ll get plenty of strawberry flavor using just the extract and regular pink candy melts. You can also try using strawberry frosting to really amp up the flavor.
Help! I can’t find any candy melts at all!
No worries. White chocolate chips or vanilla almond bark will work, too. Just make sure you use oil based food coloring. Water based food coloring will ruin your fudge.
What does the fudge taste like?
Like most fudge, this recipe is super duper sweet. But the creamy strawberry flavor is definitely there and it tastes amazing! It’s definitely one of those recipes that is best shared with a crowd so you don’t end up in a sugar coma.
Can I skip using the sprinkles?
Sure. The sprinkles are 100% optional. We like them because they make it look even prettier and add a bit of bite to the fudge as well. You can feel free to skip the sprinkles altogether or use different sprinkles instead.
Adaptations and Variations:
Like the ease of this recipe, but want to make it for another occasion instead? Here are some ideas:
- Easter Fudge: Layer pink and purple candy melts, and keep the strawberry extract.
- Christmas Fudge: Use mint extract and any combination of green, red, and white candy melts for a festive Christmas dessert,
- July 4th/Memorial Day Fudge: Use vanilla extract and split the frosting into even thirds of red, white, and blue candy melts.
- St. Patrick’s Day: Add a splash of Bailey’s to the frosting instead of extract, and use any combination of green, orange, and white candy melts.
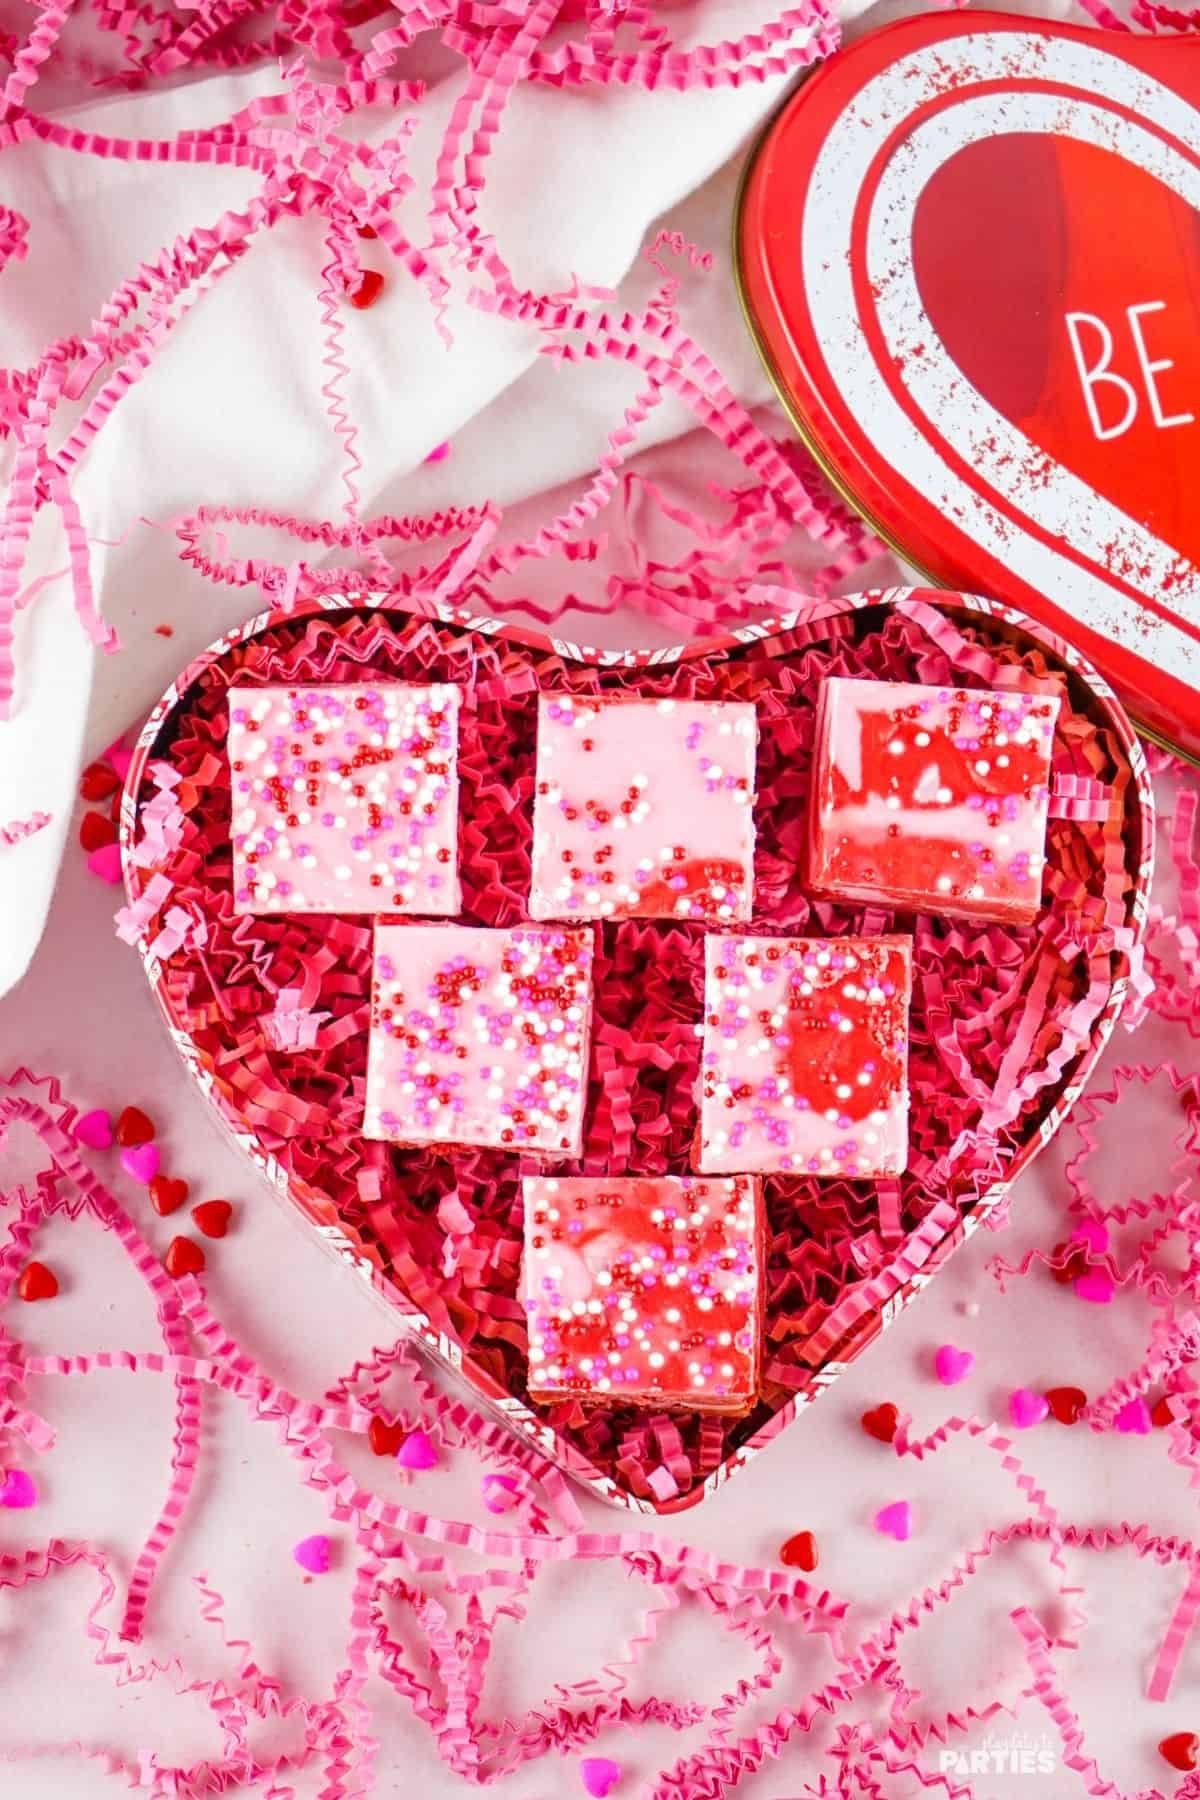
Giving this away as Valentine’s Day gifts?
Package it up in cute little treat bags or Valentine’s Day boxes. Add a pretty ribbon and a cute printable tag, and you’re all set!
Storing Your Layered Strawberry Fudge
The key to storing the fudge is to make sure it’s in an airtight container. This will keep it from getting hard and grainy. From there, you’ve got a few options:
Room Temperature: Fudge will last at room temperature for 3-5 days.
Refrigerator: Refrigerate leftover fudge for up to 2 weeks.
Freezer: Store fudge between layers of wax paper in freezer bags for up to 3 months. When you’re ready to enjoy it, remove your desired amount and thaw at room temperature for at least
If you liked my Strawberry Fudge recipe, you’re going to love my Strawberry Fruit Dip with Cream cheese.
Or you can check out my other desserts recipes here.
Layered Strawberry Fudge
Layered pink and red Strawberry fudge is the perfect easy sweet treat to enjoy this Valentine's Day. Perfect as gifts, snacks, or on a party tray this gorgeous dessert is sure to be the star of the show.
Ingredients
- 16 ounces Buttercream Frosting (I used store-bought)
- ¾ Cup Red Candy Melts
- ¾ Cup Strawberry Flavored Pink Candy Melts
- 1 Teaspoon Strawberry Extract
- Valentine’s Mix Non-Pareils Sprinkles
- Pink and Red Heart Sprinkles (optional)
Instructions
- Prepare an 8x8 inch baking pan with parchment paper. Make sure to let the parchment hang over the sides of the pan for easy removal.
- Place 3/4 cup red candy melts in a medium sized microwave-safe bowl. Microwave on high heat for 15-30 seconds. Stir, then repeat until the the candy is smooth when stirred, about 2-3 minutes. Be careful not to over cook the candy.
- Place 3/4 cup pink candy melts in a separate medium sized microwave safe bowl. Repeat the same melting process as with the red candy melts. Keep the two colors separate.
- Remove the frosting lid and foil film from the canister. Microwave the frosting in the plastic container for 45 seconds to 1 minute, until fully melted and smooth.
- Add 1 teaspoon strawberry extract to the frosting and stir well.
- Pour half of the frosting in with the red candy melts and the other half with the pink candy melts.
- Stir each color vigorously until fully combined.
- Take turns pouring in the red and pink candy mixtures, randomly in the pan. Make sure to give the pan a tap between each pour to remove the bubbles and even out the chocolate.
- After you've poured all your chocolate mixtures into the pan, and they're evened out, sprinkle the top of the fudge with non-pareils and Valentine's Day sprinkles.
- Place in the fridge to chill for at least 2 hours or until hardened. Cut into 16 squares before serving.
Notes
Remember, the step-by-step photos and FAQ in the recipe post are there to help you if you feel stuck at any point.
- Watch your room temperature. If you tend to keep the thermostat down in the winter, it may cause your first batch of candy melts to harden slightly while you get everything else ready. Try to work quickly and keep your room temperature above 65˚F.
- Because brands of buttercream vary somewhat in texture and consistency, there can be some pitfalls. If your fudge is too hard or crumbly, you'll need to use less chocolate next time. If your fudge is too soft or doesn't set up, you'll need to use more chocolate or less buttercream next time. The fudge will still be tasty, but it wont look quite like the pictures.
- Only add the extract to the buttercream. If you add it to the candy melts, it will ruin them, and that would be terribly sad.(See my guide for how to melt chocolate for more details)
- Sometimes the chocolate may get grainy or lumpy when you add the frosting. Don't worry - it will be all right! Keep stirring until the mixture is pourable.
Recommended Products
As an Amazon Associate and member of other affiliate programs, I earn from qualifying purchases.


Leave a Reply