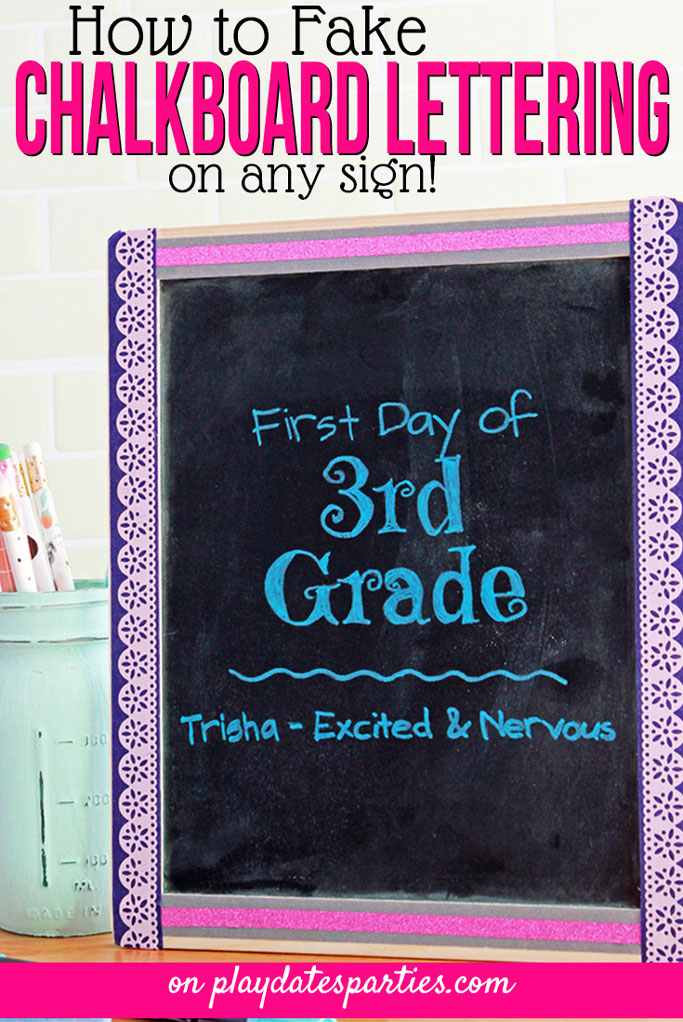
You don’t need gorgeous handwriting to make pretty chalkboard lettering. With this easy DIY, learn how to create pretty chalkboard signs for any reason.
Do you love chalkboard lettering, with it’s gorgeous mix of swirly script and block fonts?
It’s all over the place right now, and that’s no surprise. Signs with chalkboard lettering add loads of personality to whatever project they’re in.
Whether you want to incorporate chalkboard lettering on giant farmhouse chalkboards, cheese trays, chalkboard contact paper party table runners, chalked wine glass labels, or even a back-to-school sign, I’ve got the perfect cheat for you.
Especially if you’re like me and have terrible handwriting.
I love the idea of having a personalized sign for my kids on the first day of school or as a creative party buffet menu.
But I always hesitate because my handwriting is just awful. It’s total chicken scratch.
Sure, I could spend hours upon hours practicing my handwriting and trying to master hand lettering techniques, but who really has time for that? Instead, I need to fast and easy way to fake chalkboard lettering!
And that’s exactly what I’m sharing with you today. With this easy cheat, you can fill your chalkboards with beautiful writing and designs – instead of chicken scratch.
How to Fake Gorgeous Chalkboard Lettering
Materials & Supplies:
- Small chalkboard, already decorated
- Inkjet printer & paper
- Photo or text editing program loaded with fonts you love (I use Canva – it’s free and very easy to use!)
- Ruler
- Large piece of sidewalk chalk
- Retractable ball point pen
- Chalk pens
Directions:
- Measure the dimensions of your chalkboard area. Open a document in your preferred photo or text editing software and create a template that is the size of your chalkboard. (see notes below)
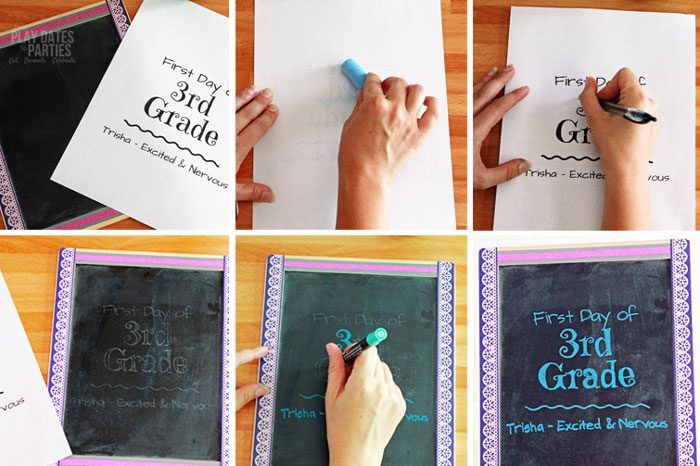
- Create your design using whatever fonts, layouts and graphics you like and print it out on a piece of printer paper.
- Flip your paper over so the design is facing the table, and rub the long side of your sidewalk chalk over the area where your design is.
- Place your paper right side up on top of your chalkboard where you want it to show up.
- Using a ball point pen with the tip retracted (up in the pen, instead of clicked down), trace your design onto the chalkboard, checking often to ensure the design shows up on your chalkboard.
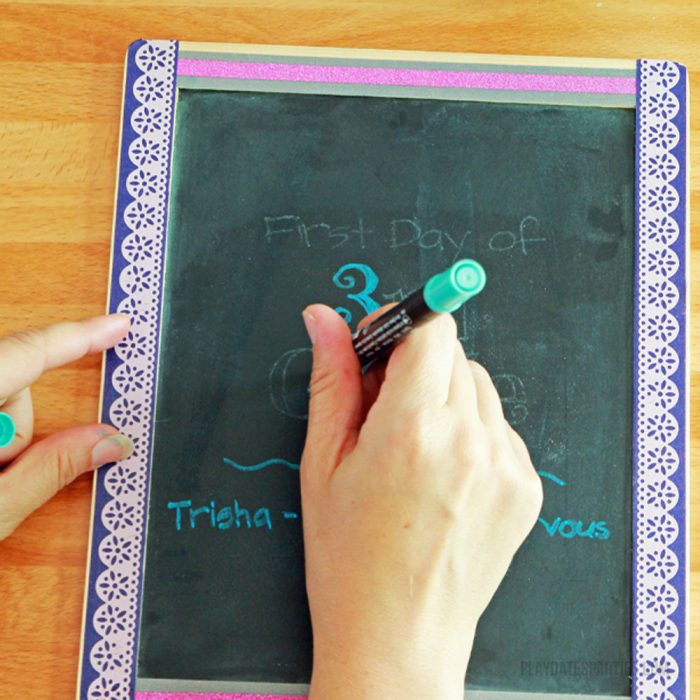
- Working from the bottom to the top, write over your traced design with a chalk marker, taking short breaks to allow the chalk to dry before moving to the next line until you’re done.
Notes:
- Many people love to use PicMonkey, but I prefer Canva. Not only is it free, but you can easily create a template in the dimensions of your choice by adjusting size based on pixels, mm, or inches. Canva also has dozens of pre-made text templates in font combinations and layouts that you know will look good from the start.
- You can also download fonts from Dafont.com or Fontsquirrel.com and then make your designs in MS Word or photoshop.
- Be careful! Playing with fonts is addictive. I spent a half hour creating my design just because I love to try all the different fonts and layouts, and I would have easily spent longer if I had time!
- If you’re just starting out, try not to use fonts that are too small or intricate. Start simple and then work on creating more detailed designs.
- Not all chalk works well for this, I found that my kids’ cheap sidewalk chalk was soft enough to leave a residue on the paper, while some smaller pieces of chalk were just too hard.
- I find it best to work from the bottom up so that the transferred chalk design doesn’t smudge. Make sure you rotate the board while using the chalk marker to ensure you don’t smudge letters on the same line.
- Chalk markers usually have two tips: a thin and a thick. Unless you are doing very detailed work, the thick tip will show up better for most hand lettering transfers. Thinner lines can be accomplished by holding the pen straight up and down and just using the very tip.
- To remove the design: I’ve tested many different methods for erasing chalk pen. Window and all-purpose cleaners work well, but I found that the Magic Eraser works best. Just don’t leave the design on for more than a couple weeks, or it will be nearly impossible to erase.
How long did it take?
- Making the chalkboard: 20 minutes…and only because I can be a picky perfectionist!
- Creating the design: 30 minutes, but using pre-made templates could make this much faster
- Transferring the design: 20 minutes
Total time: 1 hr 10 minutes
Now it’s your turn
It doesn’t matter if your chalkboard is large or small, this cheat is a great way to add some personality to your kids’ back-to-school sign or to a party buffet.
With the quick trick above, you can now have fun creating the most beautiful signs for your projects, no matter what your regular handwriting looks like!

Subscribe via
Bloglovin, Facebook, and Twitter
to get more updates!


Gentle Joy Photography says
Good idea. 🙂
Leslie says
Thanks, so glad you like it!
Katy says
It’s cute and kudos to you, mom! I confess it’ll be too time consuming for me, LOL. I’ll just stick with being a bad mom who doesn’t use chalkboard signs on the first day of school–ha ha!
#happynowlinkup
Leslie says
We don’t normally use chalkboard signs for the first day of school, but I do love them for home decor or for a party menu. Thanks so much for stopping by!
Elle, Tuned In Parents says
Okay, this pretty cool. And until now, I never thought about it. Here’s to working smarter, not harder!
Leslie says
Definitely smarter, not harder. If only I could control myself with creating the designs….
Mother of 3 says
SO simple and cute!
Leslie says
Thanks!
Caryn says
I LOVE Canva, too. I’m so used to it by now it is much easier than picmonkey for me. Great tutorial. Very cute. I can’t wait to try it.
Leslie says
Agreed. PicMonkey constantly freezes on me, but I know that many people swear by it. Though, I’m still a Photoshop girl at heart.
Carol says
Great idea – you’re so smart!
Leslie says
Thanks!
Elizabeth @ Guilty Chocoholic Mama says
Brilliant! My handwriting is terrible. I also love Canva. And I definitely need more ways to fake life. 😉 Thanks for the inspiration…stopping by from #ThisIsHowWeRoll!
Leslie says
Ugh, my handwriting is AWFUL. Thanks so much for stopping by!
Becky says
Combining two of my favourite things – chalkboard and photo props =D I might try Canva one day, but I’ve been using PicMonkey for around 10 years now, I’m so used to it I don’t imagine myself using anything else =/
Visiting from Sincerely, Paula’s Weekend Blog Party =)
Leslie says
I didn’t even know PicMonkey was 10 years old! I totally understand being used to a certain program. That’s the way I am with PSE. I can’t wait to have the budget to buy the monthly plan.
Debrashoppeno5 says
Great idea because I also have terrible handwriting. I guess the chalkboard I made years ago and left the saying on it is permanent. I am glad I like the saying 🙂
Leslie says
Haha! Who knows, maybe it can be changed! ?
Victoria at DazzleWhileFrazzled says
Great tips! I have a chalkboard that is devoid of a saying because I don’t know how to make it look pretty. Visiting from Saturday Shuffle party.
Leslie says
Oh, no! I know you’ve got the creativity in you to make something gorgeous!
Sandra L Garth says
This is really cute and I will share with my daughter. Thank you for sharing with us at Celebrate Your Story.
Leslie says
Thanks so much for stopping by!
Karen Del Tatto says
I always admire people with neat handwriting let alone those who can do handlettering. lol.
Thanks so much for sharing these great tips! 🙂
Leslie says
Yes, I definitely admire anyone who can make those gorgeous signs without having to cheat like this.
Carol ("Mimi") says
When I’m sitting in a restaurant or coffee shop, I sometimes marvel at the beautiful lettering on the chalkboard where someone has written the menu. Thanks for this very detailed tutorial. I never would have thought of using a stencil on a chalkboard. Thank you for linking up at The Blogger’s Pit Stop Link Party. I’m sharing your link on social media.
Carol (“Mimi”) from Home with Mimi
Leslie says
Thank you so much for stopping by and for sharing!
Mary says
I’m always a mess when it comes to chalkboard writing. So I try to avoid it as much as possible. Your tutorial now gives me a reason to want to write something clever. Thanks!!
Donna Reidland says
What a great ides and a lot more durable!
Calleen Petersen says
Thanks for the tip!
Shirley Wood says
Chalk marker? Where have I been? Just put that on my craft supply list. Thanks for sharing with us at Merry Monday. Be sure to come back next week! We’ll be watching for ya!
Sara @ Magical Mama Blog says
Oh you have just saved my life! I have very dull all caps handwriting and always hate how my chalkboards turn out but this is beyond brilliant! Thanks for sharing!
#HappyNowLinkUp
Jeremy@ThirstyDaddy says
I think the thing that I like best about Canva is that even somebody as clueless as me can sometimes make something that looks OK. These look great #happynow
Jennifer Wise says
Okay, that is totally impressive! What an AWESOME hack! Pinning! 🙂
#SYClinky
Jann Olson says
Great idea! I always do mine freehand and it’s not perfect! Thanks for sharing with SYC.
hugs,
Jann