↑

Playdates to Parties

DIY Party Crafts and Recipes

  • Home
  • Recipes
    • Appetizers, Sides, and Finger Foods
    • Drinks
    • Main Dishes
    • Desserts
    • Cooking Tips & Tricks
  • Crafts
    • Printables
    • Cricut Crafts
    • Kid Crafts and Activities
    • Organization
    • DIY Projects
  • Parties
    • Kids Parties
    • Baby Showers and Gender Reveals
    • Party Games
    • Party Music
    • Grown Up Parties
    • Gift Ideas
    • Party Planning Tips
  • Holidays
    • New Year’s Eve
    • Valentines Day
    • St. Patricks Day
    • Easter
    • Mother’s Day
    • Father’s Day
    • July 4th
    • Halloween
    • Thanksgiving
    • Christmas
  • About
    • Contact
    • Disclosure and Privacy Policy
  • Hostess Toolkit
  • Shop

‘Seamless’ Ruffle Garland Tutorial

January 13, 2011 by Leslie

This post may contain affiliate links for your convenience. To learn more, please read our disclosure and privacy policy

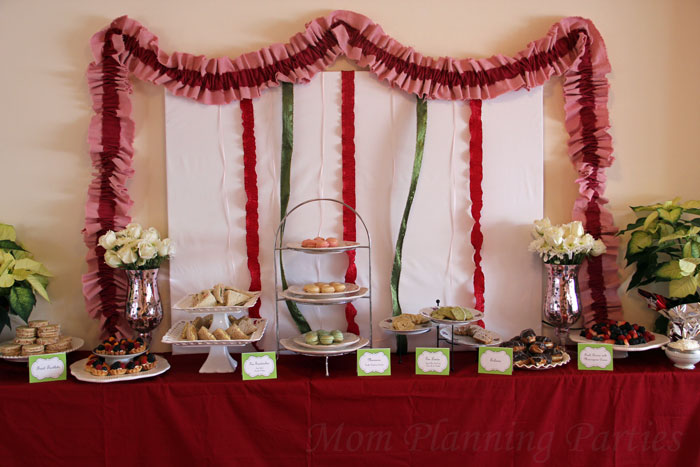
One of my favorite elements from the Tea party last month was the ruffle garland I made by hand.  I have been crushing on the Hank and Hunt garlands for a while now (Etsy shop, Blog), but being the kind of person I am, I just had to try to DIY a variation of it for myself. I just knew that the burlap would work well, and it really was perfect!

(Clarification:  I didn’t have time to take pictures as I was making the actual garland for the party, so I used fabric scraps I have lying around the house to make a mini version for this tutorial)

Here’s how you do it:

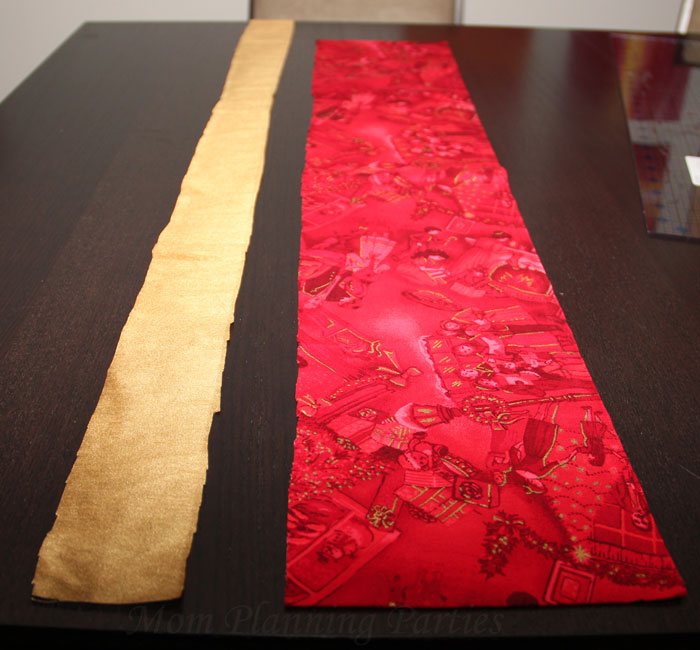
1) Get yourself some awesome fabric.   (I used a soft natural burlap that I bucket-dyed to match the color scheme of the party.  The pink was RIT Petal Pink, and the red was a combination of RIT Scarlet and Wine.) Please excuse the scrap fabric used for the tutorial.  The burlap was much softer and the natural fraying of the edges made it perfect for this project.

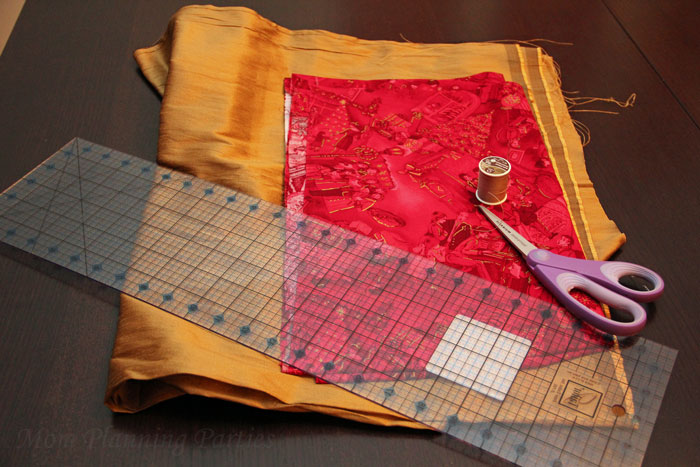
Shown: Two coordinating fabrics, heavy duty thread & needle, six inch wide clear ruler & a pair of really good scissors!

 2)  Measure out the length of your garland.  Because I used such a generous stitch, I found that I needed about 60% more length than the finished product needed to be.  Seriously, these things take a lot of fabric!  Fabric saving tip: Get your fabric half the total length and sew the two pieces together once ruffled.  (Can you tell that the garland above the buffet is actually 6 pieces sewn together, and the garland on the hutch is actually 4 separate pieces?)

3) Cut your strips.  Don’t worry about making perfect cuts.  In order to keep the width fairly consistent, I found it good to have a ruler lined up to help keep things somewhat straight.  I aimed for the wide strip to be about 6 inches wide and the layered strip to be about 2 inches wide.
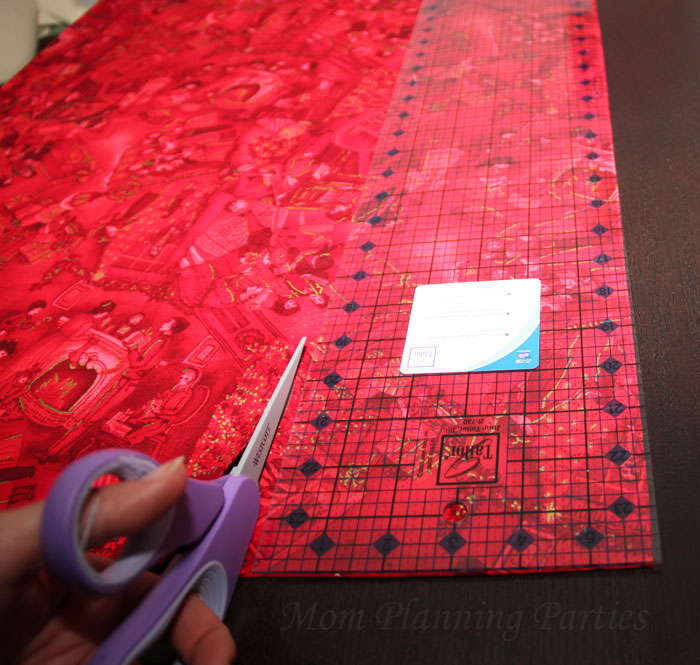
Cutting the fabric
Finished cuts – notice the jagged edges!

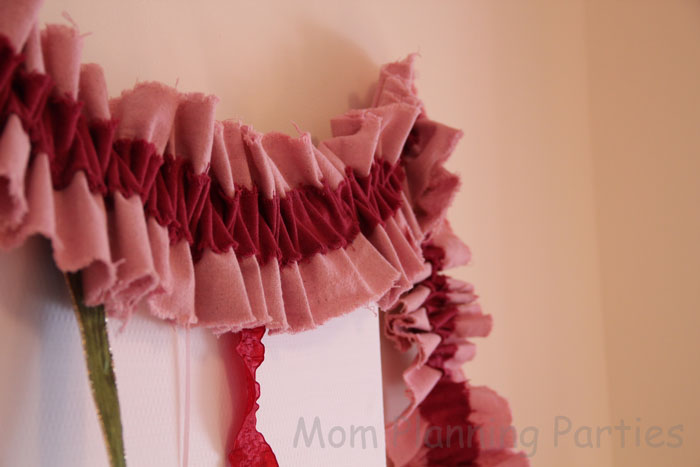
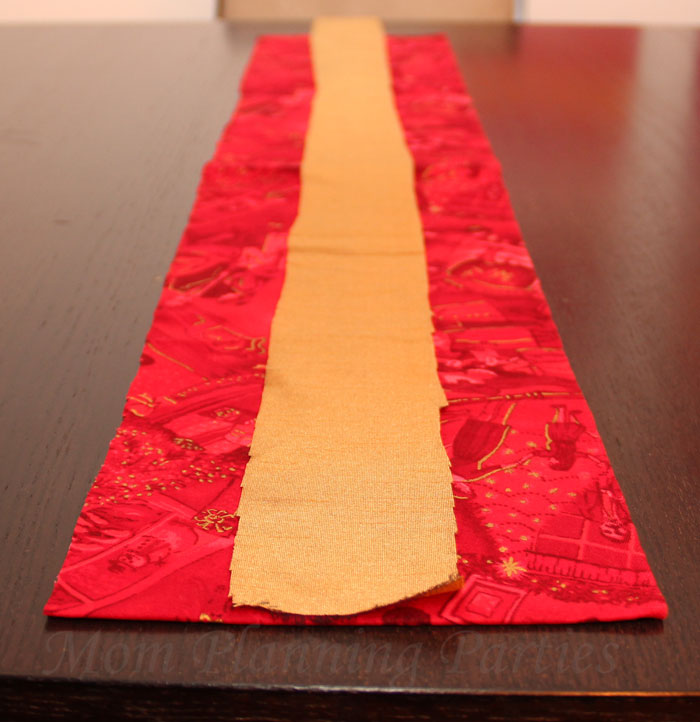
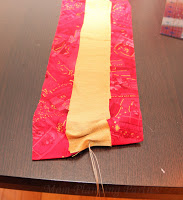
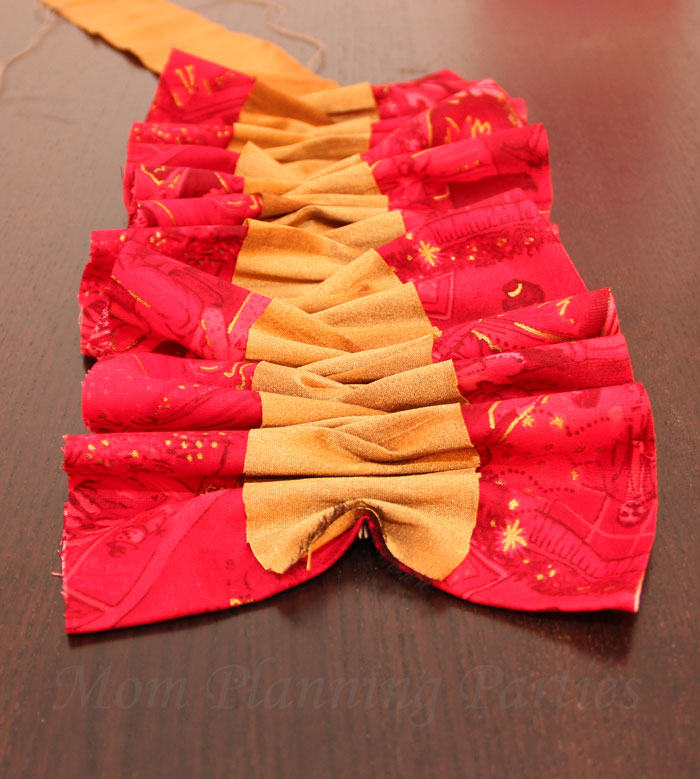
4: Layer and sew.  Layer the narrow fabric strip on top of the wide fabric strip; aligning one of the short ends together.  Sewing by hand, sew a single stitch all the way down the center of the fabric.  Keep the stitches small on the top side and wide on the bottom side.  Again, don’t worry about keeping things perfect.  Some of the uneven stitches will help create more character and dimension.  Also, don’t be surprised if the top layer ends up being shorter than the bottom layer.  It will naturally bunch a little higher, so make sure you have quite a bit extra length.

Line up the fabric pieces
Start sewing.
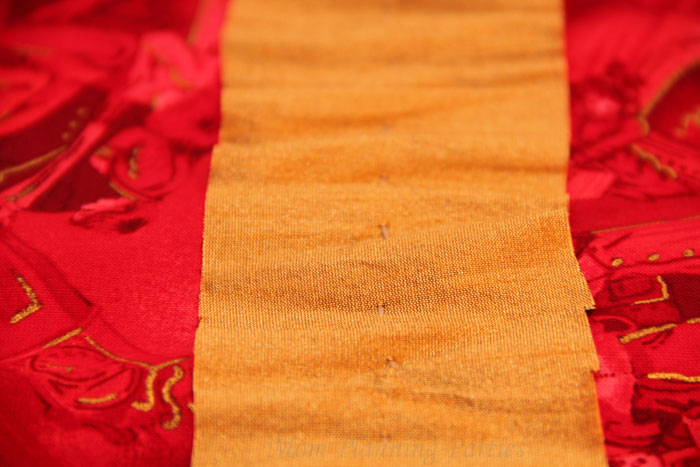
Close-up of the stitches from the top.

5)  Scrunch and finish.  Gently push your fabric down the thread line until you get your desired ruffle effect.  Now you can go back and tie off your thread at the end of the ruffle.

Fabric scrunched down the thread.
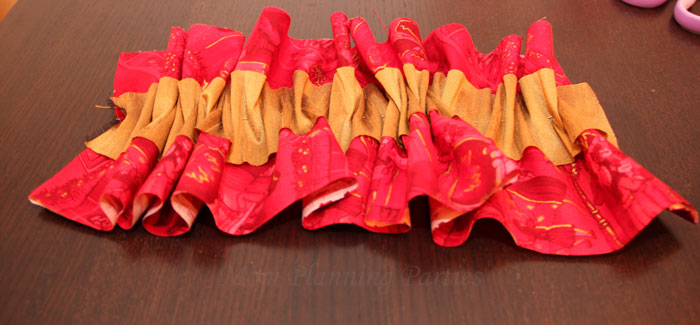
Finished garland

And now you have your own ‘seamless’ ruffle garland!

  • Share
  • Tweet

Filed Under: Christmas, Decorations, DIY Projects, Holidays, Mother's Day, Valentines Day Tagged With: garland, pink, red

About Leslie

Leslie is the passionate party planner in her family. Living with metastatic breast cancer since 2022, she is determined to find a way to continue making amazing parties for her kids that don't leave you exhausted. To do that Leslie combines the experience she learned working for a professional event planner with the reality of a busy family life to create party inspiration that the average mom can reproduce and be proud of.

Comments

  1. JC's Loft says

    January 13, 2011 at 12:16 pm

    That seems pretty simple yet made a huge impact!! Thanks for sharing how you did that…I'm impressed you bucket died them! OMG I can't remember the last time I used RID, they turned out great though.

    Paula

  2. PEACHES says

    January 13, 2011 at 2:01 pm

    Love it! It lends such a festive touch, too!

  3. PunkRizz says

    January 13, 2011 at 4:45 pm

    Note to self: make this as soon as possible!

  4. Christine says

    January 14, 2011 at 3:55 am

    I really like this idea, it could be used in so many ways! Great job
    Christine
    greatoakcircle.com

  5. The Autocrat: Haley says

    January 15, 2011 at 6:14 am

    OOOo Never thought of this! Great idea!

  6. Amanda says

    January 15, 2011 at 2:24 pm

    Thanks so much for the tutorial, I've wanted to try these for while! Looks great

  7. Trisha @ The Sweet Survival says

    January 15, 2011 at 2:38 pm

    This is great! THe garland turned out beautiful!

  8. April says

    January 16, 2011 at 2:45 pm

    This is so pretty! I am the same way. Everytime I see something I like instead of thinking I want to buy that I think I have to make that! I would love for you to link up to my Sew Crafty Party & Giveaway!

    https://wildflowersandwhimsy.blogspot.com/2011/01/sew-crafty-saturday-adventure-date.html

  9. G and H says

    September 22, 2011 at 7:28 pm

    Very cute!! It looks so easy but has such a great look! I can't wait to give it a try.

I love helping busy moms create DIY parties that aren’t overwhelming. Here you'll find crafts, recipes, and fun printables you can use to create a celebration you’re proud of that you get to enjoy too! Read More
See My Latest Stories

Find out where I link up here.

Looking for a little more creativity in your life? From Play Dates to Parties is the place for you!

Hi there! I’m Leslie! I love helping busy moms create DIY parties that aren’t overwhelming. At Playdates to Parties, you'll find crafts, ready-to-use cut files, recipes, and fun printables you can use to create a celebration you’re proud of that you get to enjoy too!  {Read More}

  • Email
  • Facebook
  • Instagram
  • Pinterest
  • Twitter
  • YouTube

© Play Dates to Parties 2009-2023

All images original to this website are the property of From Play Dates to Parties. Use of a single watermarked image is only authorized with a link and reference to the original source. Republishing posts in their entirety or removing/editing watermarks is prohibited without permission. Pinning is always welcome and appreciated. Thank you!

Reader’s Favorites

The Happy Now Blog Link Up #531

The Best Gender Reveal Party Games to Keep Them Guessing

40+ Kids Birthday Party Songs That Won’t Drive You Crazy

5 Birthday Traditions That Aren’t a Party (Plus a Free Printable)

The Best Party Games for Toddlers | 20 Easy Ideas

Review our disclosure and privacy policy here.

Must-HaveParty Supplies

BrowseParty Themes

Submit a Party &Get Featured!

See all thePrintables


Copyright ©2026, Playdates to Parties. All Rights Reserved. // Design by Pixel Me Designs. // Privacy Policy.
All images original to this website are the property of From Play Dates to Parties. Use of a single watermarked image is only authorized with a link and reference to the original source. Republishing posts in their entirety or removing/editing watermarks is prohibited without permission. Pinning is always welcome and appreciated. Thank you!
22 shares
We use cookies to ensure that we give you the best experience on our website. By continuing to use this site, you agree to the use of those cookies.