Make the cutest ice cream cone topper for your ice cream themed birthday cake with this Cricut ice cream pattern and PDF printable file.

A few days ago I shared with you the story of how I turned a cake disaster into a stunning jelly bean cake with pink and white candy stripes. But with an ice cream themed party, the cake wasn’t complete without an ice cream cone topper.
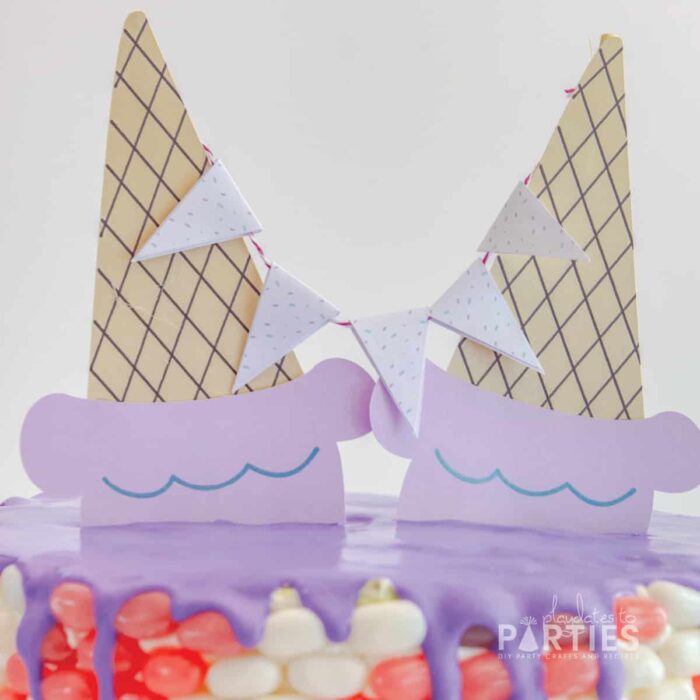
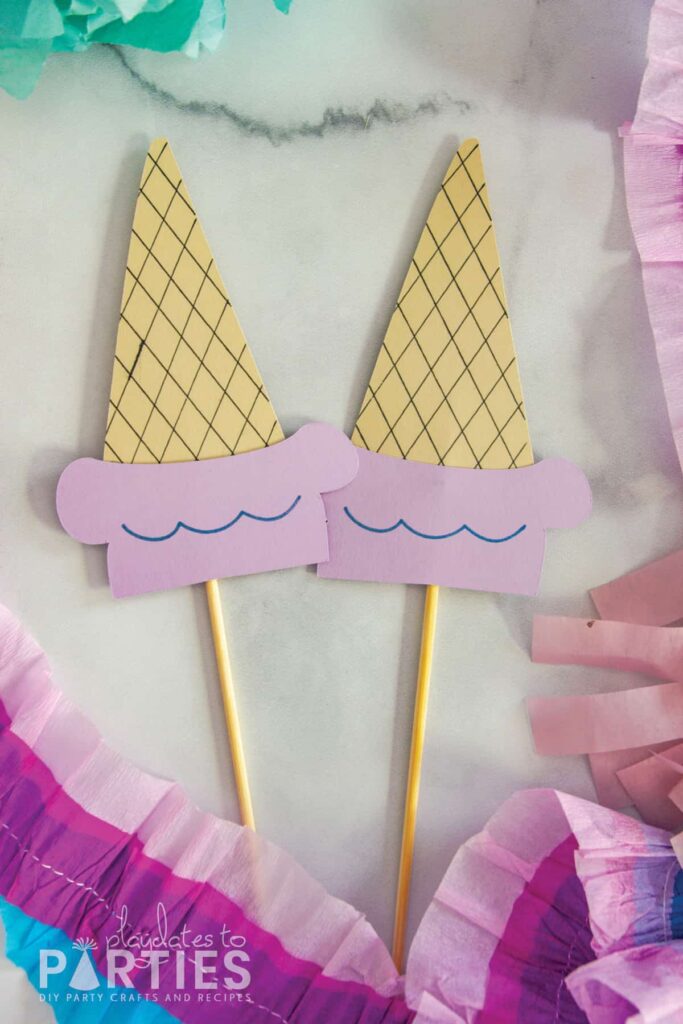
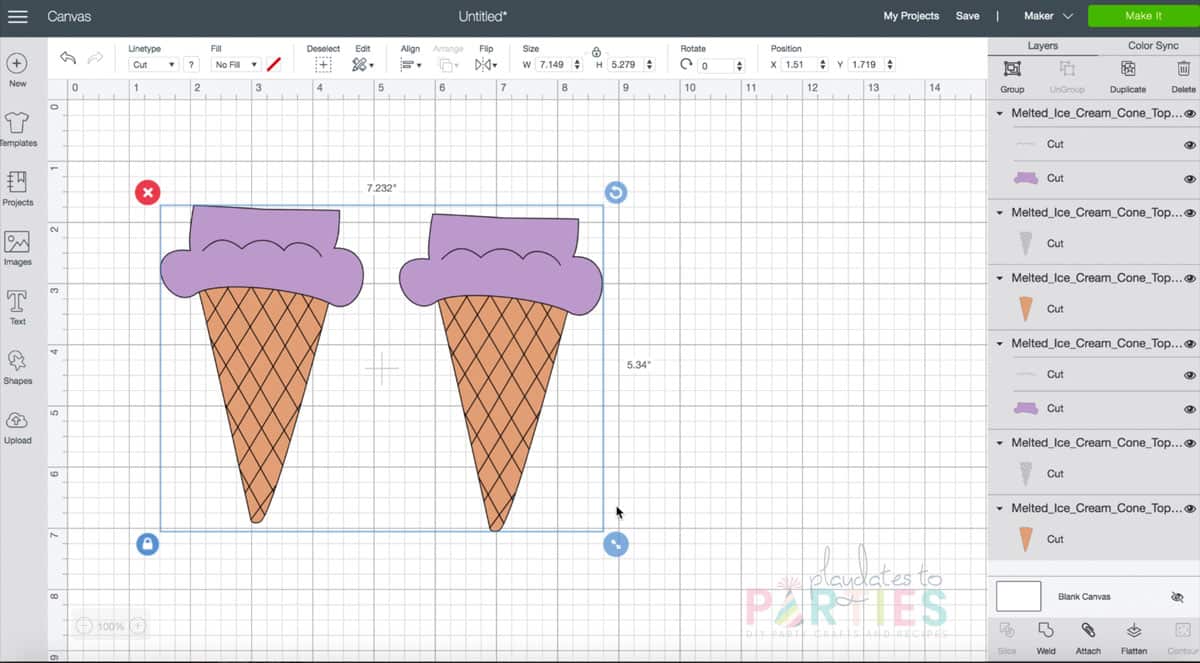
You can make this ice cream cake topper for your party as big as your cake can handle it, or small enough for cupcakes. The ones shown here are about 7 inches tall by 3 inches wide.
All you need to make these cake toppers is this SVG file card stock, bamboo skewers, and a little bit of hot glue. There’s even a PDF print and cut version if you don’t have a cutting machine.
How Long Does It Take?
From start to finish, it took less than 30 minutes to make the melted ice cream topper. Which is perfect if you’re crunched for time in the last few days before your party.
Get Creative! Ways to Make this Your Own
- Make more than two ice cream cones so your cake looks like a load of upside down ice cream cones. (Maybe even one cone per year)
- Resize one of the ice cream cones in Design Space to create an asymmetrical topper.
- Use only one ice cream cone
Tips to Remember:
- If your marker skips a section, you can easily add in the missing section by hand
- Give the marker plenty of time to try. It can smudge and smear easily if you handle it too soon.
- Double check how much you need to trim off the skewers by holding them up against the cake.
- Trim about ½ inch more of the bamboo skewer than you think you should, just to make sure the skewers don’t stick out of the top of your cake.
More Ice Cream Themed Party Ideas:
Ready to make your own ice cream cone topper? This step-by-step tutorial shows you how to do it.
What You’ll Need:
- This pattern *
- Kitchen shears or clippers
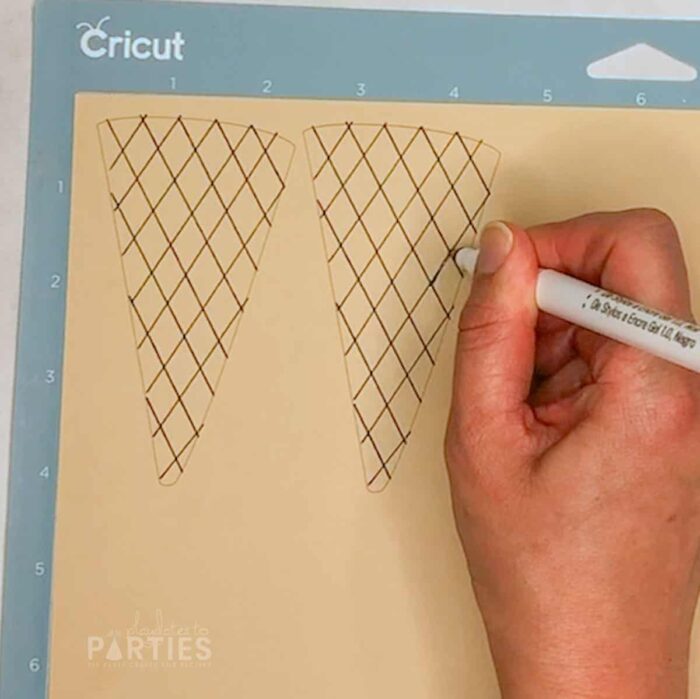
- Black Cricut 1.0mm marker
- Blue Cricut 1.0mm marker
- 1 piece of tan card stock
- 1 piece of purple card stock
- Cricut cutting machine*
- 2 Bamboo skewers
- Glue gun and glue sticks
- Optional: White Card Stock
- Optional: Baker’s Twine
*The pattern includes a printable PDF version if you don’t have a cutting machine.
Watch the complete video tutorial for the cake topper right here:
How to Make an Ice Cream Cake Topper

Make the cutest ice cream cone topper for your ice cream themed birthday cake with this Cricut ice cream pattern and PDF printable file.
Materials
- SVG Pattern
- Bamboo skewers
- Black Cricut 1.0mm marker
- Blue Cricut 1.0mm marker
- 1 piece of tan card stock
- 1 piece of purple card stock
- Optional: White Card Stock
- Optional: Baker's Twine
Tools
- Cricut Cutting Machine
- Hot Glue Gun & glue sticks
- Kitchen shears or clippers
Instructions
- Open up a new document in Cricut design space
- Click on uploads and import the ice cream cake topper SVG file.
- Insert the file into your new design.
- Ungroup the file and resize the topper (if desired).

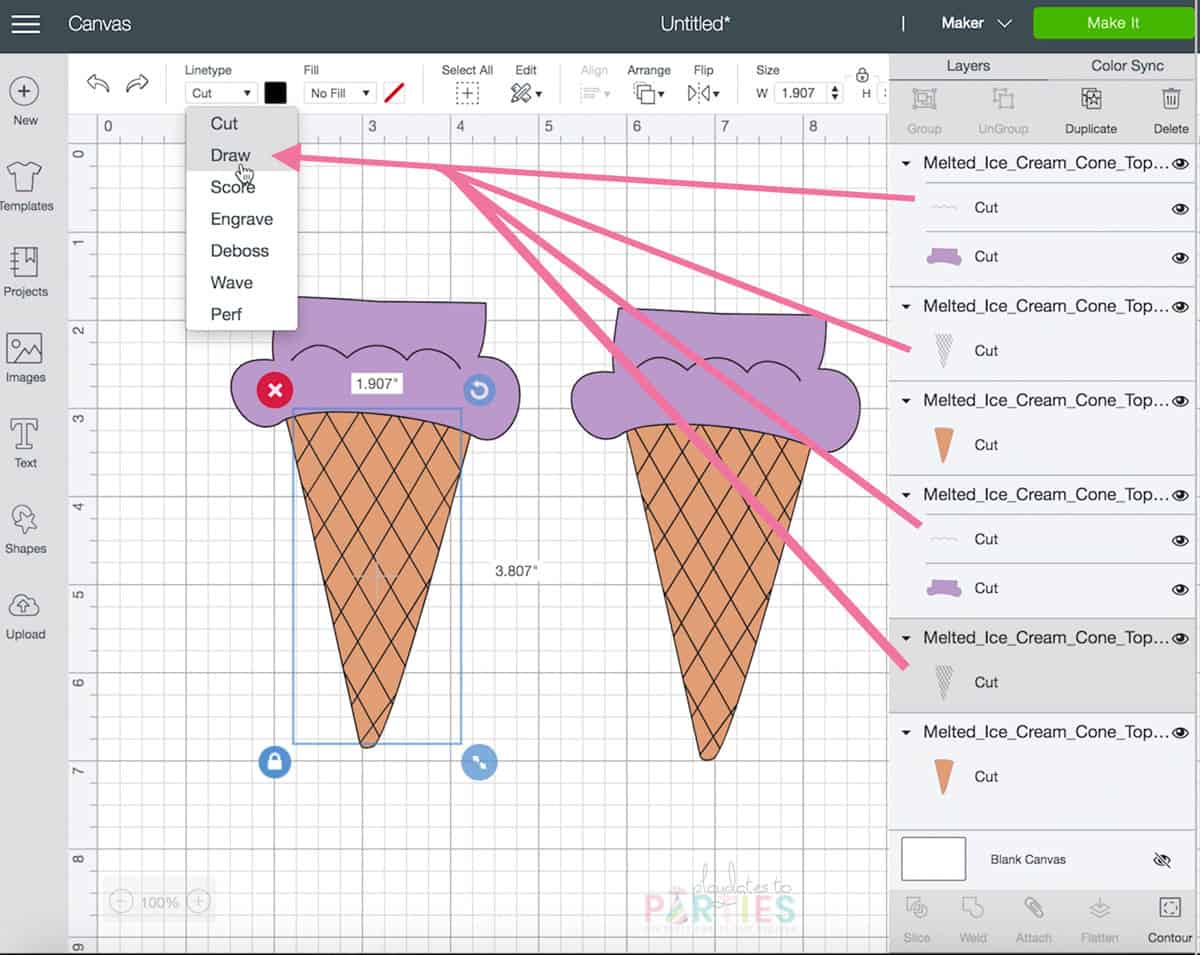
- Select the hash marks in your design layers and change them to ‘draw’
- Repeat with the other set of hash marks.
- Select the squiggly line in the ice cream scoop and change it to draw. If desired, you can also change the color to coordinate with your card stock. In this case, I used a blue marker for the ice cream scoop.

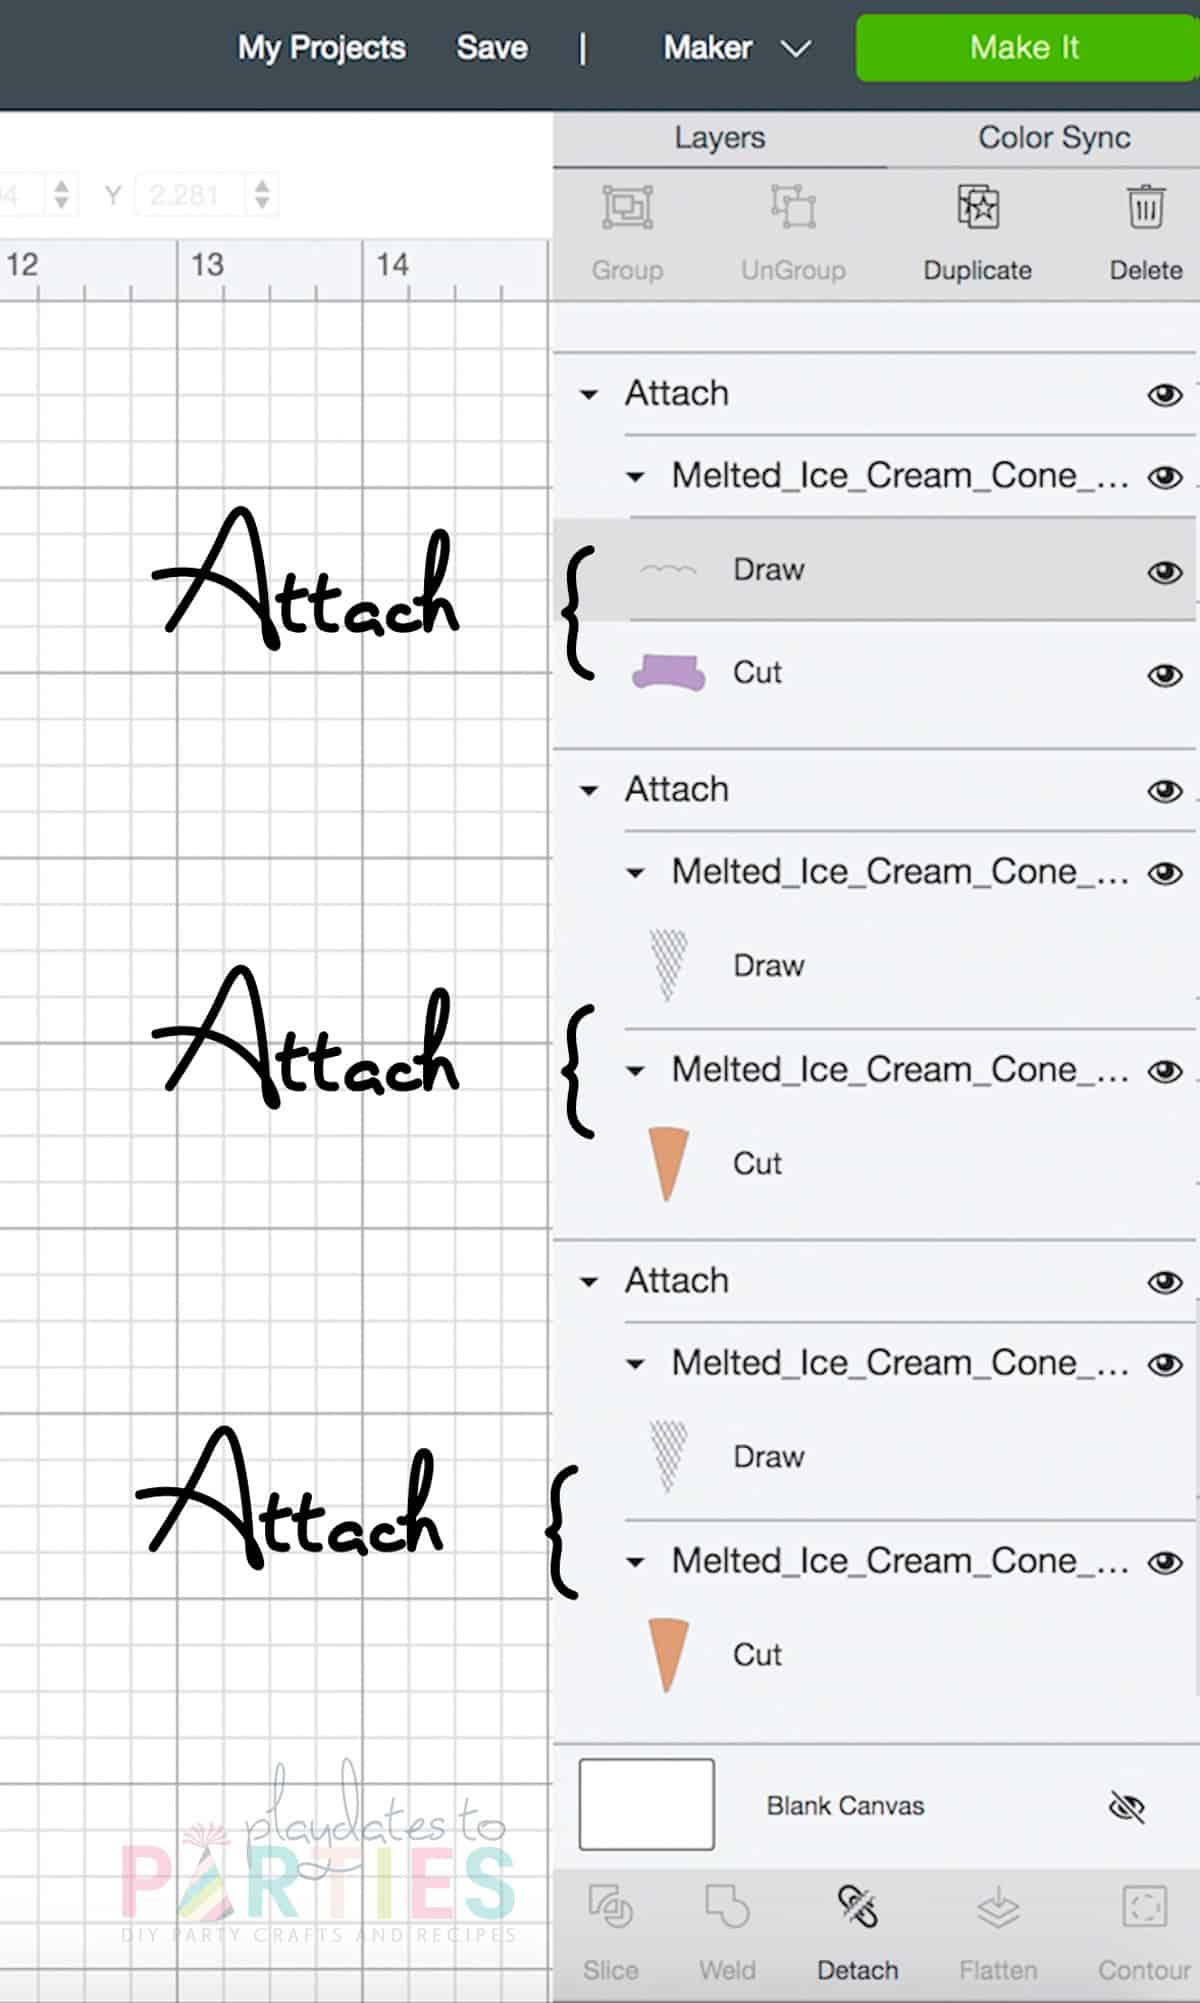
- Attach the hash marks to the corresponding ice cream cone base and the squiggly lines to the corresponding ice cream scoop.
- Click on Make it. Double check your mats and adjust your paper size if necessary
- Prepare two light grip mats with your card stock, making sure the card stock is pressed firmly into place.

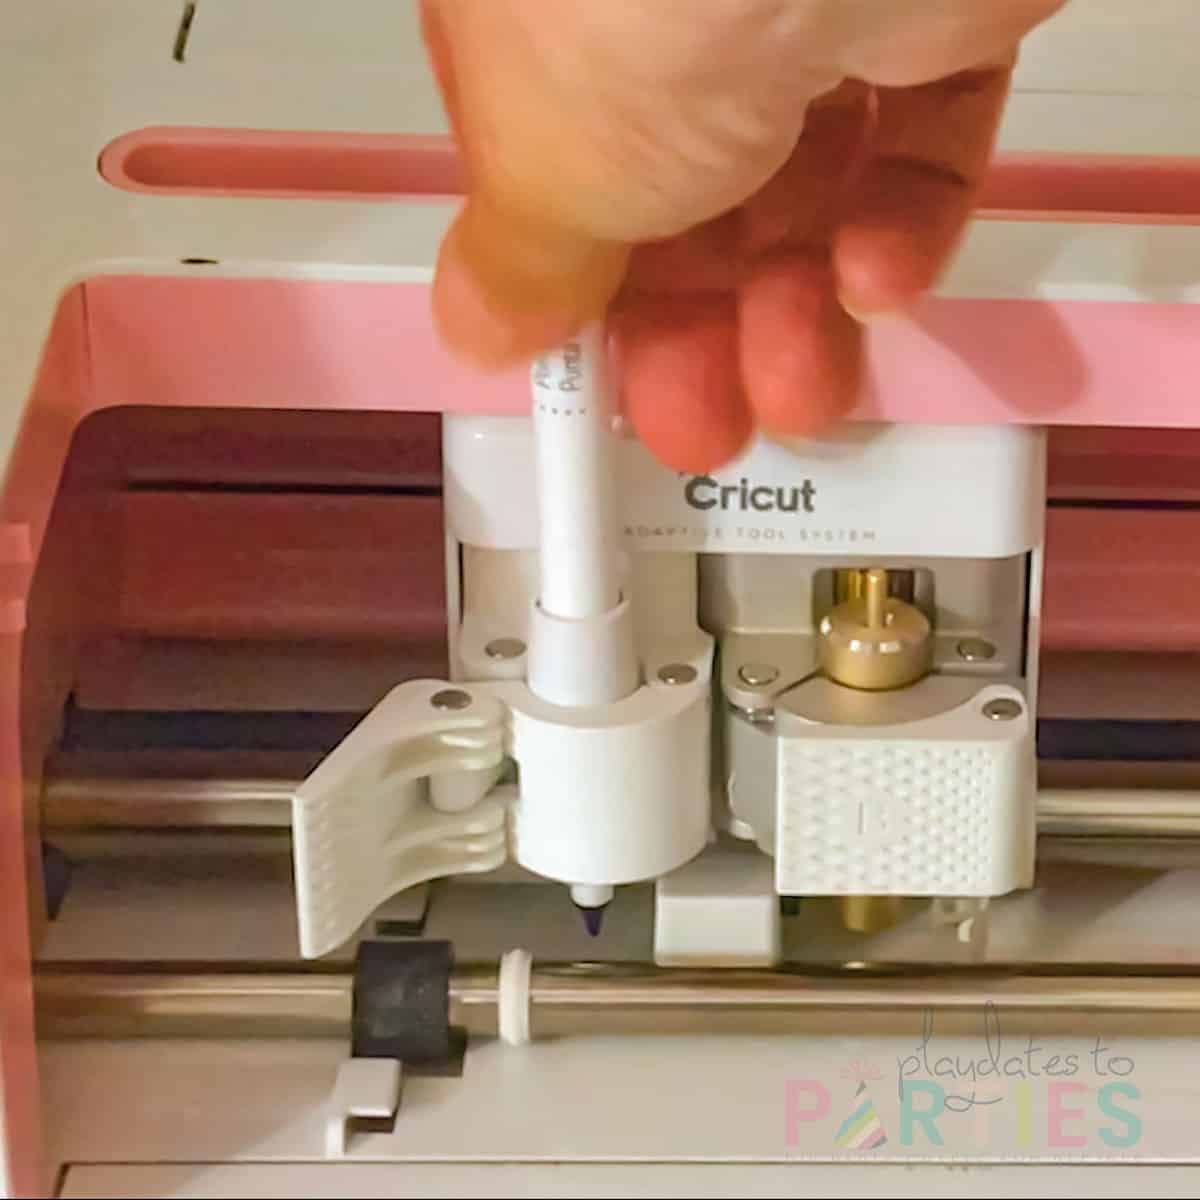
- Set the material in Cricut Design space to light card stock, and load your first pen and mat into the cutting machine.
- Press go and let the machine complete the first cut. Repeat with the second mat.
- When the mats are finished allow the marker ink to dry for a few minutes, otherwise it might smear when you unload your paper.
- Remove your pieces from the mats and double check the size and alignment of the pieces.
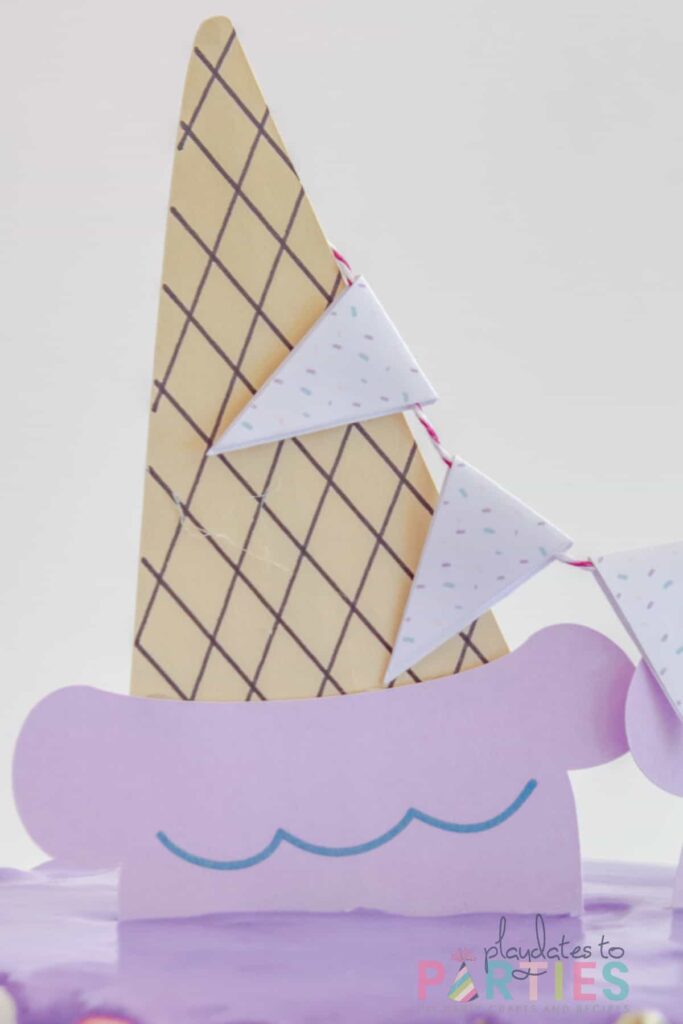
- Flip over one ice cream scoop and cone so the drawings are facing the surface of the table.
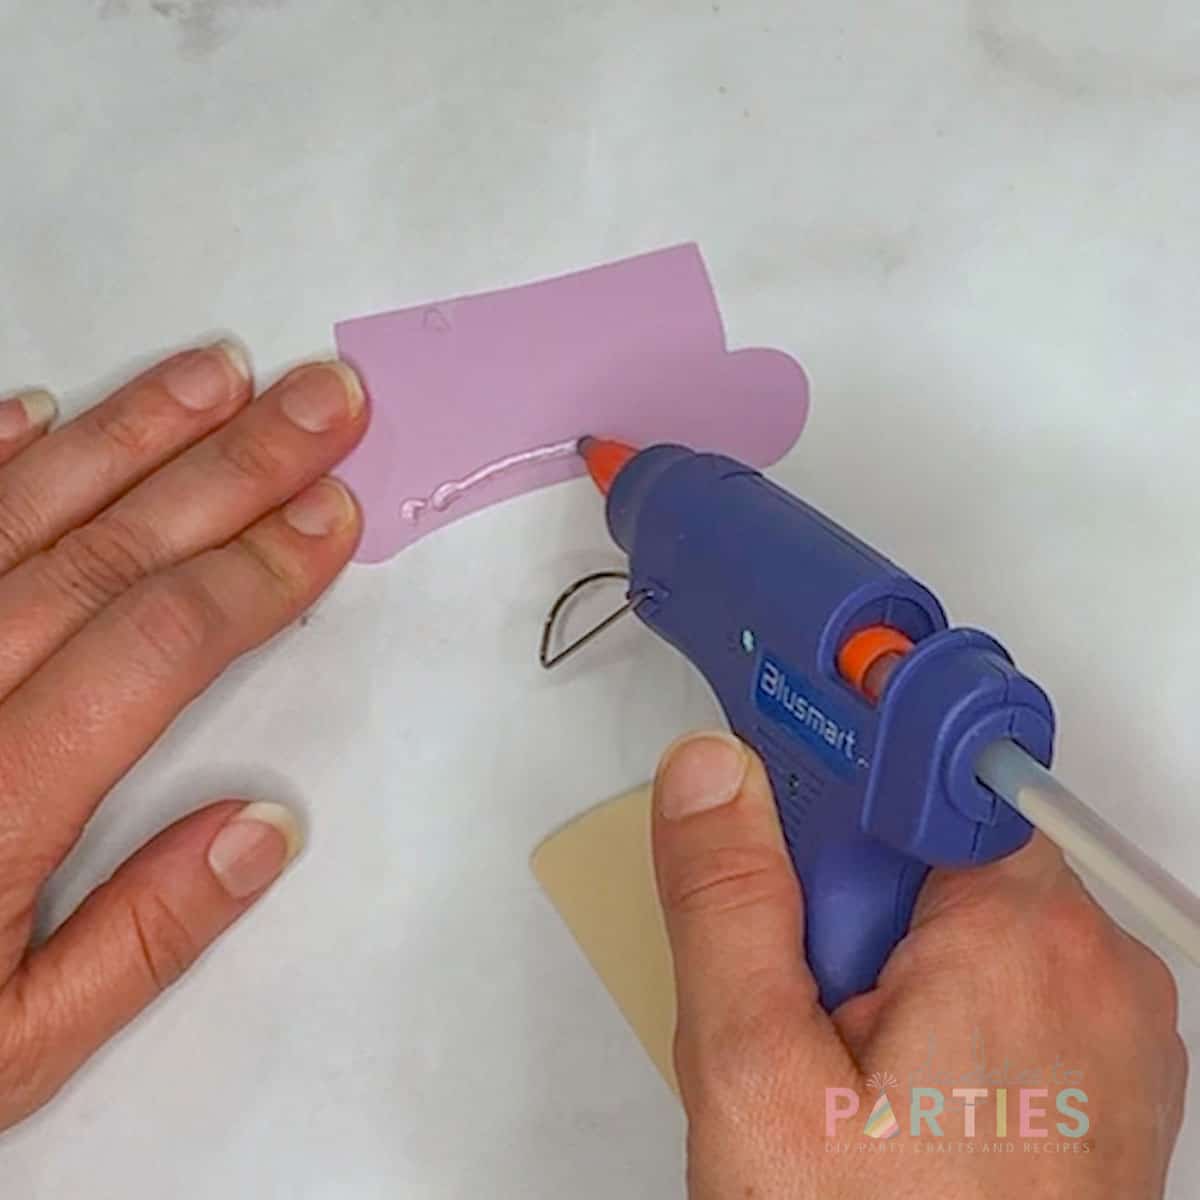
- Apply a thin bead of hot glue to the spot where the cone and scoop meet. Quickly press the ice cream cone to the scoop and allow to dry.
- Repeat with the other ice cream scoop and cone.

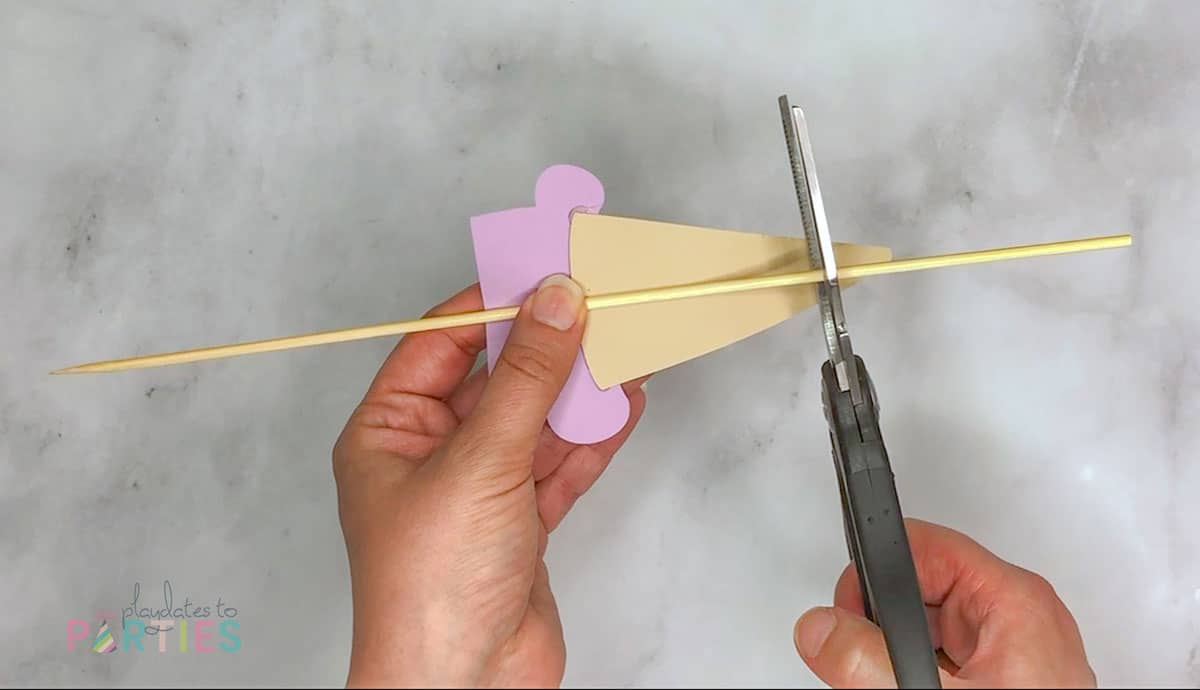
- Cut two bamboo skewers by 4-8 inches, leaving enough length to provide support along the back side of the topper and to poke far enough into your cake to hold your topper up.

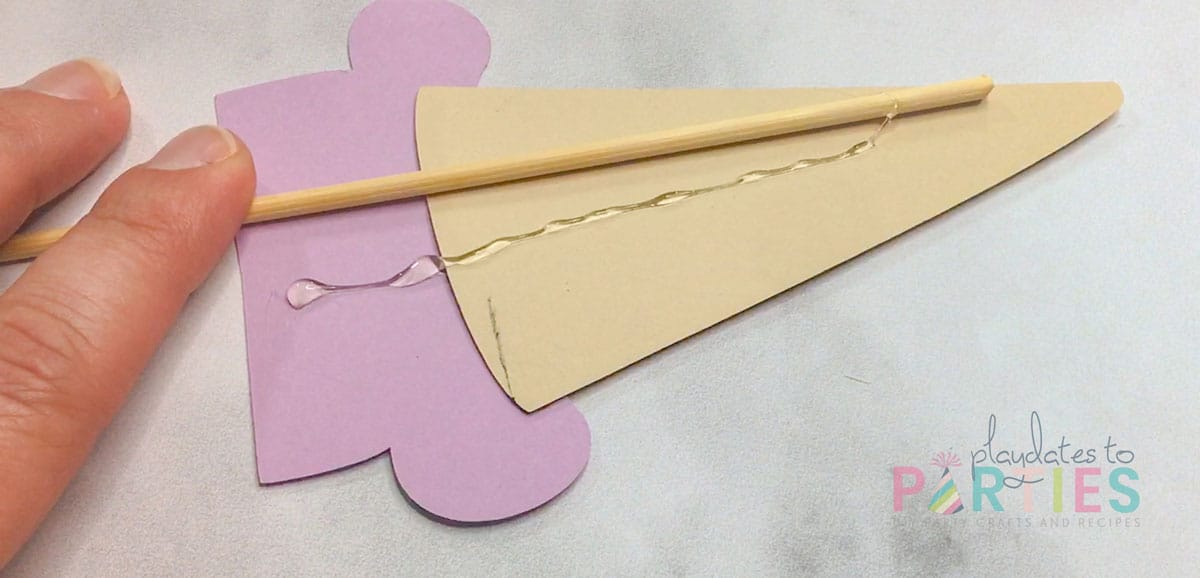
- Hot glue the bamboo skewers all the way up the back of the ice cream cones to provide support..
- Optional: Print and cut the mini bunting, and glue the bunting pieces to a 6 to 8-inch piece of baker’s twine. Glue the ends of the mini bunting between the tips of the ice cream cones.
- Insert your topper into your cake
Notes
- If your marker skips a section, you can easily add in the missing section by hand
- Give the marker plenty of time to try. It can smudge and smear easily if you handle it too soon.
- Double check how much you need to trim off the skewers by holding them up against the cake.
- Trim about ½ inch more of the bamboo skewer than you think you should, just to make sure the skewers don’t stick out of the top of your cake


Leave a Reply