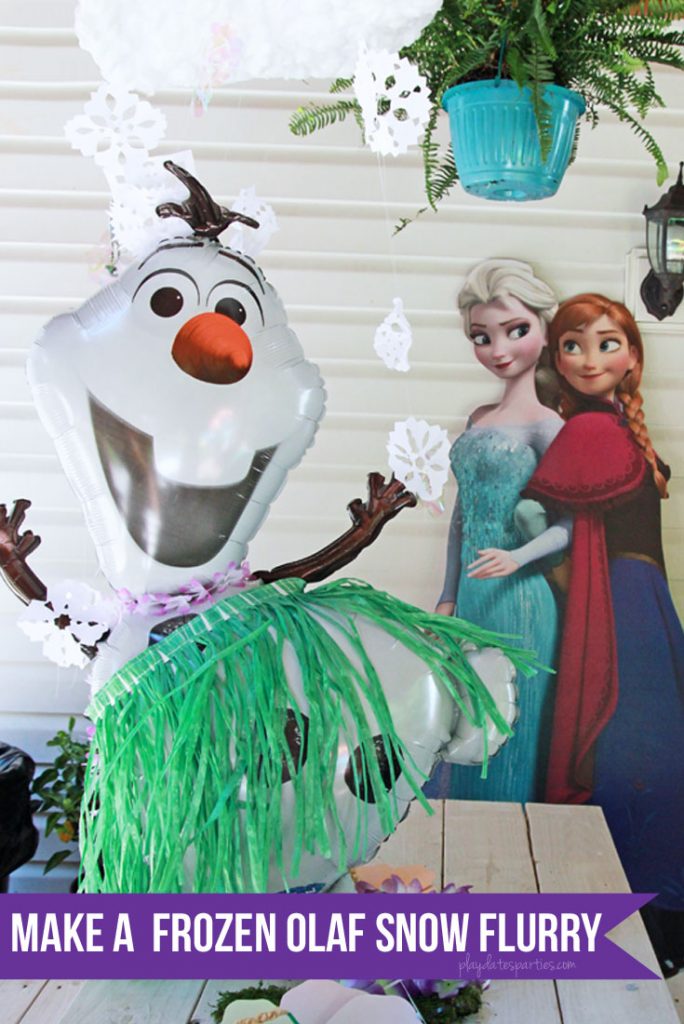
Learn how to make your very own Frozen-Inspired Olaf Snow Flurry, including what worked, what didn’t, and ideas for making it even better!
Elsa is everybody’s favorite Frozen character. It’s no surprise. She has magical powers, can change the weather on a whim, and has an awesome sister.
But, as always, our middle child surprised us when she first saw the movie Frozen. Instead of fawning all over Elsa or Anna, she couldn’t stop talking about Olaf.
Now that I think about it, that’s not too much of a surprise. Our middle child always had an incredible sense of humor. She started joining in on family jokes at the ripe age of 2 and hasn’t stopped since. So, of course, she fell in love with the silly singing snowman first. That’s why I just knew Olaf needed to come to life for her Frozen-themed birthday luau last summer.
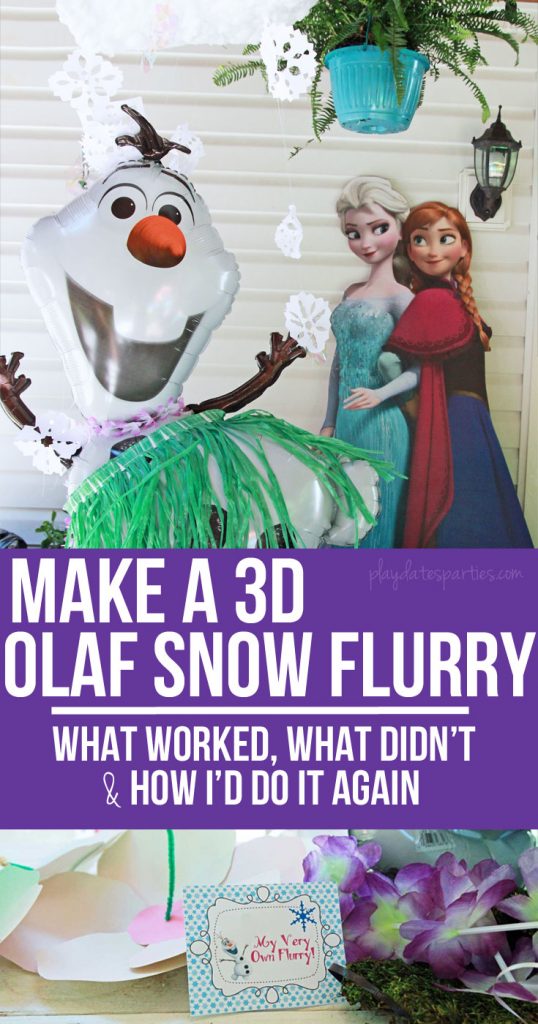
Our solution was to recreate Olaf’s very own flurry on our picnic table. Once I saw that large mylar balloons of Olaf are readily available, I knew exactly what we needed to do. Next up, we needed to figure out how to make the cloud and snow flurry!
How to Make an Olaf Snow Flurry
Materials & Supplies
- Poster board
- 12-lb Fishing line (monofilament)
- Needle or straight pin
- Tape
- Clear-drying glue (we used Elmer’s)
- Between 300 and 400 cotton balls
- Helium Filled Mylar Olaf Balloon
- Heavy washers no bigger than 1.5 inches in diameter.
- Craft moss
- Command hooks or other hooks for hanging.
- Clear tape
Optional:
- Lightweight plastic grass skirt
- Lightweight Flower Lei
Make the Cloud:
- Cut 5 pieces of fishing line into 5-foot lengths and two pieces of fishing line into lengths slightly more than twice as long as you want the cloud to hang (from the ceiling to the top of the cloud)
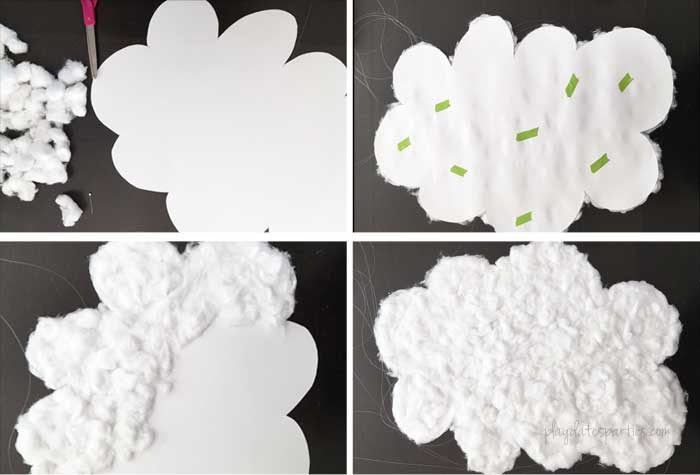
- Draw a rough cloud shape on a piece of poster board about 1 foot wide by 2 feet long & cut out the cloud shape.
- Using a needle or straight pin, poke holes in the poster board wide enough for your fishing line lengths to poke through. Note: Do not hang fishing line through the center, as that is where the Olaf balloon will be sitting.
- Thread the 5-foot fishing line lengths through and tie knots at the ends of the fishing line to keep them from slipping through the holes. Tape the knotted ends to the poster board as extra reinforcement.
- Making the hanger: Attach the two remaining pieces of fishing line in the same manner as above, knotting and taping both ends on opposite sides of the cloud. Remember that these knots and taped sections should also be on the opposite side of the knots and tape from the 5-foot sections. Make sure the two sides criss-cross.
- Working in small sections (about 6-inches wide), spread glue on the poster board and attach the cotton balls in a random pattern.
- When the whole side is completed, flip the board over and repeat on the opposite side. Make sure that the long sides of the fishing line are able to hang through the cotton balls freely.
Assemble the Olaf Snow Flurry
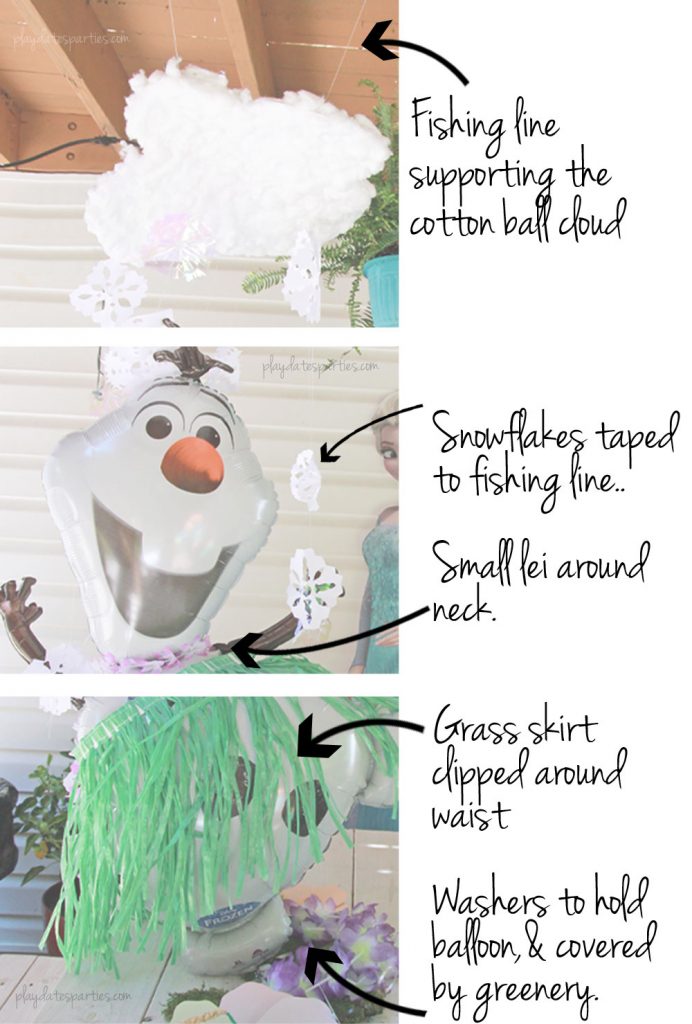
- Use the crisscrossed pieces of fishing line to hang the cloud from hooks on the ceiling so that the long pieces of fishing line hang freely.
- Attach the paper snowflakes to the hanging fishing line with clear tape in a random pattern.
- Tie the washers to the foot of the Olaf Mylar balloon to keep it from floating away. Place the Olaf balloon underneath the center of the snow cloud.
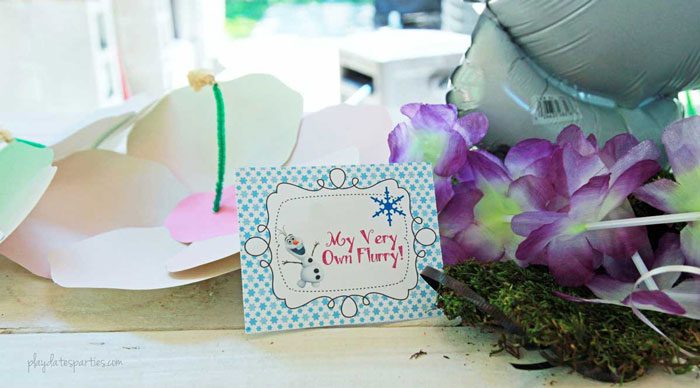
- Put the craft moss on the table underneath the balloon to hide the washers.
- Optional: Add a child-size grass skirt and flower lei. You may need to cut down the grass skirt and hold it together with a paperclip if it’s too wide and heavy.
How Long Did It Take?
I wish I had timed myself while making this, but I estimate that my 6-year-old and I spend a good 2 hours on making the cloud.
My oldest cut all the snowflakes for the party, so I can’t give you an estimate on time for that. But assembling the whole display only took about 30 minutes on the day of the party.
How Much Did it cost?
We already had most of the supplies on hand (including the ridiculous number of cotton balls), but here’s my best estimate for how much it would cost for most people to make an Olaf Snow Flurry:
- Poster board: $1
- 12-lb Fishing Line: $5
- Clear-drying glue: $2
- Cotton balls: $6
- Helium Filled Mylar Olaf Balloon: $6
- Large, heavy washers: $5
- Craft moss: $5
Total Cost: $30
What Would I Do Differently:
First, gluing on all those cotton balls took looooooong time. My daughter and I worked together, her fluffing and straightening cotton balls while I glued. Eventually, we just started cramming whole cotton balls on and fluffed them after they were attached. That worked just as well. Even still, we were both ready for that step to be over long before we finished.
Second, while the poster board was inexpensive and easy to cut, it turned out to be a little too floppy for hanging. We made it work in the end, but I was worried for a few minutes that we weren’t going to actually have an Olaf Snow Flurry for the party. As a result, there are a couple modifications I might make if I were to do this again:
Alternative Option 1:
Use foam core board instead of poster board. This would provide more structure so the cloud would hang straight. But, it would be more difficult to thread the fishing line through the layers and might require using a needle threaded with the fishing line.
Alternative Option 2:
A large oval embroidery hoop and small white balloons would be a great alternative for the cloud. While it wouldn’t be as fluffy looking as the cotton balls, it would definitely take less time.
To create the cloud, crisscross the fishing line around a large white oval embroidery hoop, creating something like a web. Attach several small white balloons to the web and to the embroidery hoop. Then attach the fishing line to the embroidery hoop for the snowflakes and for the hanger.
Would I Do It Again?
Yes! Anna and Elsa may still be the stars of the movie but was so much fun to see Olaf ‘come to life’ for my daughter’s party. The guests all loved seeing him hanging out on the picnic table, and the snowflakes looked incredible blowing around him in the summer breeze.
You could almost hear him singing “In Summer!” right along with the kids.
Would your kid love an Olaf Snow Flurry at their birthday party?
Which of the three cloud alternatives do you like best?
(Hint: I might actually try to make it!)
Subscribe via
Bloglovin, Facebook, and Twitter
to get more updates!





Janine Huldie says
My kids do love Elsa, but they also have a special place in their hearts for Olaf. Therefore, I would totally do something like this, too as Olaf is still a hit with them even after all this time. Thanks for sharing and again totally keeping this in mind for our upcoming kids’ birthday parties!! 🙂
anne says
Very cute. My gals love ALL things Frozen!
Jen says
This is the coolest! My newly minted 4 year old is enamored with all things Frozen, so this is definitely a need to pin item!
Katy @ Experienced Bad Mom says
Aw, good job mom! Great instructions and tips for the other crafters out there (not me — ha!)
#happynow
Carolina Twin Mom / Mary Peterson says
Oh please start a YouTube account! I would love to see these flurries in action!
#happynowlinkup
ShootingStarsMag says
I love Olaf! My nephew went as him for Halloween one year. Your snow flurry turned out well, and thanks for the tips on what to do different!