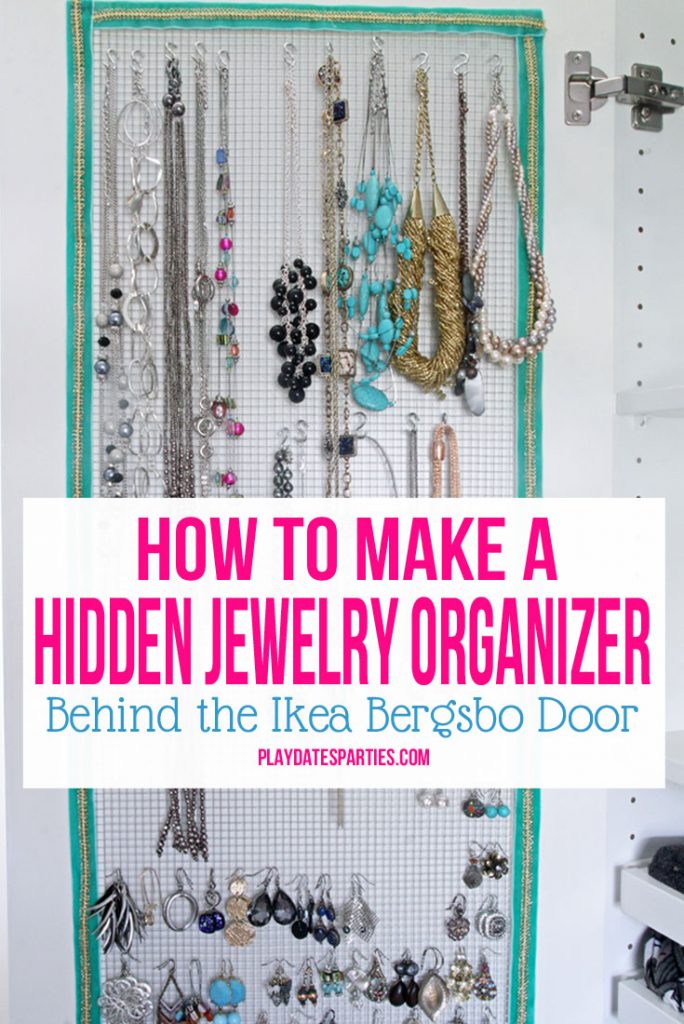
Ditch the picture frame version & make this awesome hidden jewelry organizer that lets you see all your jewelry without cluttering your walls.
I fell for it, just like 15.7 thousand other pinners before me, I fell for that adorable DIY jewelry organizer made with a picture frame and a radiator cover. Seriously, what’s not to like? It gets your jewelry out of the cluttered jewelry box, and right where you can see it. It’s just like functional art!
So I made my own version.

But then I had to live with it, and reality wasn’t as pretty as that original picture.
The Reality:
It’s been a couple years since that fateful day when I decided to give the project a try, and I’m officially over it.
Yes, I loved being able to see the jewelry I have. It makes getting ready so much easier in the mornings. BUT, it came with big drawbacks:
- The Husband hated it. He prefers minimal and modern design, so he just sees it as additional clutter. At first, I blew off that concern. But after a few months, I realized he was right.
- Even with the largest piece of punched sheet metal I could find (pre-cut), my jewelry still hangs outside the frame, making the whole display look messy.
- I still have to rummage through my old jewelry box. And that jewlelry box is on the other side of the room. Frankly, that kind of defeats the purpose of having a jewelry organizer.
- I couldn’t find that pretty quatrefoil pattern when I was at the hardware store. So I settled for a piece with lots of tiny little holes and small s-hooks. Let me tell you, it’s a pain to get earrings into those itty bitty holes. Plus, opening up the s-hooks was one of the most difficult things I’ve ever done.
- Finding the right size frame is difficult and expensive. I purchased a cheap goodwill frame when I made the original jewelry organizer. But it didn’t fit the sheet metal properly. This means that the sheet metal isn’t properly supported. Even though I added 1/4-inch wood to fill in the space and add support, the metal still wobbles and bows when moving jewelry on and off the organizer. That means that earrings are constantly falling to the floor and getting lost. Total fail on that part.
So, when the time came to re-do our master bedroom, I knew that we needed to find a way to keep the function of the framed jewelry organizer, but also to hide it from view and add stability.
[bctt tweet=”How to make a hidden jewelry holder…and never search for your jewelry again! #home #tips” username=”PlayDatesParty”]
Thankfully, I found my answer. When working on customizing our closet wall, it dawned on me that our Ikea Bergsbo doors have 1/4-inch recessed panels in both the front and the back of the door. And at 84 inches tall, the door provides plenty of space for all the jewelry I need to hang.

How to Make an Awesome Hidden Jewelry Organizer Behind Ikea Bergsbo Door:
Materials:
- 1/4-inch wire hardware cloth
- At least 18 1/2-inch screws
- 5 yards 1-inch ribbon (here is what I used)
- 5 yards Narrow trim (here is the gold trim I used)
- Small s-hooks for hanging jewelry
Supplies
- Tin Snips
- Hot Glue Gun & Hot Glue
- Chalk Pen
Note: All measurements are based on the 19” wide Ikea Bergsbo doors. Be sure to double check your measurements for your own space.
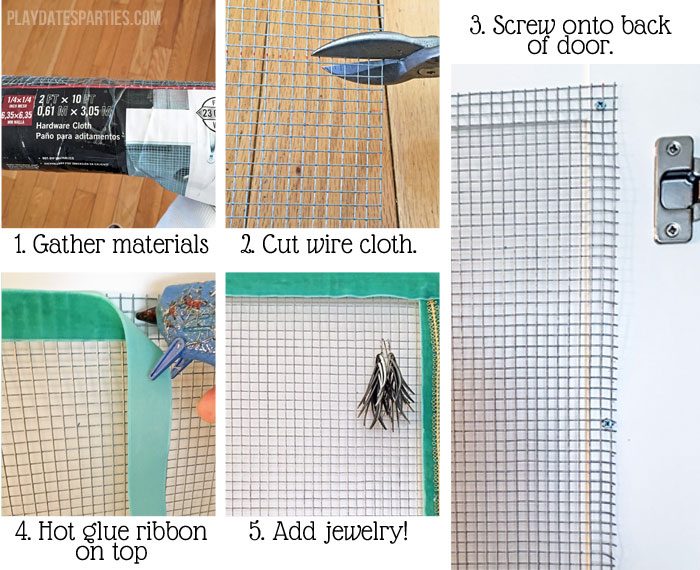
Directions:
- Roll out the hardware cloth, and mark a rectangle that is 71.5 inches tall by 14.5 inches wide using a chalk marker.
- Using the tin snips, cut the hardware cloth along the chalk line. Try to limit the number of sharp ends you have as a result.
- Place the hardware cloth on the inside of the door, just outside the edge of the recessed area.
- Carefully use the screws to attach the hardware cloth to the door. Start at the top left and right corners, and work down, screwing in approximately 8-inch intervals, and ending at the bottom left and right corners. Be sure to press the hardware cloth as flat as possible between screws to minimize bowing.
- Working in short sections, hot glue the 1-inch ribbon to the outside edge of the hardware cloth. Be sure to press firmly and hold down the freshly glued section of ribbon as the hot glue cools. This will help hold the hardware cloth to the cabinet between the screws. Make sure to fold the ends of the ribbon to hide any cut edges.
- Add the trim to the middle of the 1-inch ribbon by using small dots of hot glue every few inches.
How Long Did It Take?
- Cutting the Wire Mesh Cloth: About 20 Minutes
- Attaching the Mesh to the Door: About 1 Hour
- Trimming the Mesh with Ribbon: About 2 Hours
Total time: About 3.5 Hours
How Much Did it cost?
- Mesh Cloth: $14
- Ribbon & Trim: $8
- Screws: $2
Total cost: $24
Notes:
- The hardware cloth will want to roll up on itself. I found it easiest to put it on the floor with a heavy object at the end, and then to unroll it as I walked on top. Place another heavy object at the other end. Make sure also to place heavy objects along the cloth as you cut it.
- While it would be helpful to have a screw in the center top and bottom of the jewelry organizer, the Bergsbo door is thinner at that point than it is on the sides. If you decide to put screws there, please be careful.
- While the top layer of trim isn’t necessary, it helps to cover the bumps in the first layer of ribbon that show up from the hardware cloth underneath.
- Warning #1: Your Bergsbo door will not sit flush against the cabinet after doing this. By the time we were finished with the cabinetry, it wasn’t very noticeable, but just be aware of this fact.
- Warning #2: The jewelry will probably nick and scratch any drawer and shelf fronts you have in your Ikea Pax system. This is a risk I was willing to take. However, to minimize scratching, I placed necklaces up highest so they would be less likely to hit the drawers.
What if you Don’t Have a Door available?
You should also be able to recreate this same hidden jewelry organizer on a wall or on the back of a flat door. Create an outside frame by adding 1/4-inch wood trim (available at most hardware stores) to your space in the dimensions of your choice. If your dimensions are very wide or long, you will want to add a few pieces of wood trim at regular intervals to add support to the
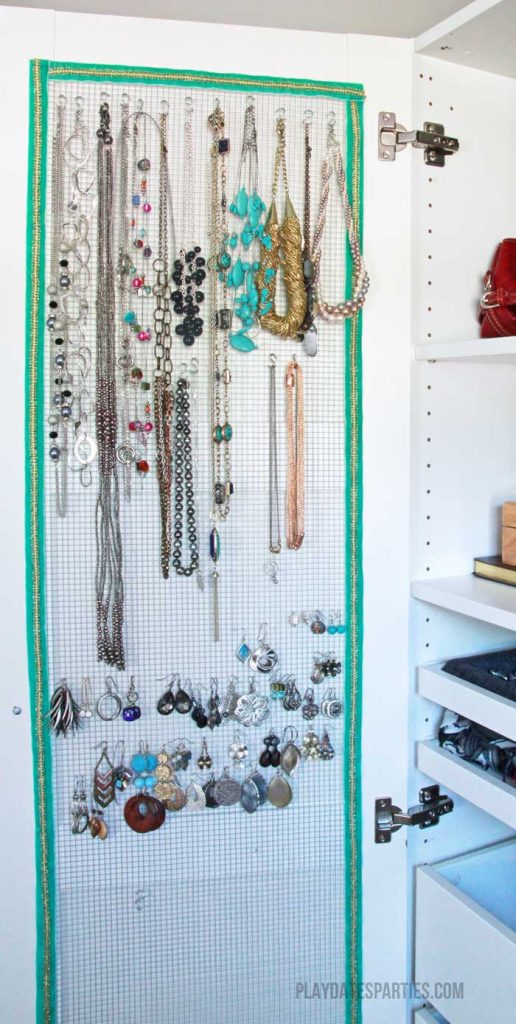
Would I Do It Again?
I’ve been using this new hidden jewelry organizer for a few weeks now, and I’m in love. The husband is thrilled that my jewelry isn’t out in the open, and I still get to see pretty much all the jewelry I own. Total win-win
It’s also much easier to pull out the jewelry from the 1/4-inch hardware cloth, and my earrings hardly ever fall to the floor anymore. Even better, when combined with the Ikea Pax jewelry tray organizer, everything is all in one place! There’s no more running back-and-forth between jewelry organizers, and I no longer forget about jewelry I own!
Now, it’s Your Turn…
Get rid of that jumbled jewelry box, or the mess of jewelry clutter out in the open. Add a hidden jewelry organizer to the back of your closet door, or in another hidden spot in your bedroom. You won’t regret it!
Have you ever wanted to learn how to make a jewelry organizer?
What do you do to keep your jewelry straight?

Subscribe via
Bloglovin, Facebook, and Twitter
to get more updates!
Keep Up with all the Renovation Goodness, Right Here:
[pt_view id=”38c69d9v1p”]


Laura - The No Pressure Life says
I’m a little in love with your jewelry collection – I love big necklaces, too! 🙂 Several years ago I wrapped a cork board in fabric and added a bit of nailhead trim. I used regular thumbtacks to hang the jewelry. It’s about 18×18″, so not too big, and it’s mounted right outside my closet.
I’m curious why adding ribbon took so long?
Leslie says
Thanks! I love having the neckalaces, too, but the funny thing is that I rarely ever wear those necklaces these days since the little one still pulls on them. The ribbon took a long time because I glued only a few inches at a time, and waited for the glue to cool before moving on. That way the glue helps hold the wire to the door. Also, it was a large area (almost 15 linear feet!) and I glued two layers of ribbon. So, one layer would be significantly less time.
Lauren says
What a great idea! I’m pinning this because I’m about to get started making over our bedroom and getting rid of the low dresser that now holds all of my jewelry containers and swapping for a taller one SO I need to find a new way to store my jewelry!
Ann says
What a great way to use that space – and it gives you a ton of room for jewelry!
Love it!
Victoria at DazzleWhileFrazzled says
Great idea! I currently have two large jewelry boxes and they are still overflowing and cluttered. (And I stay home with the kids so most rarely gets worn enough!) I like the idea of hiding it and having it all organized and visible. Visiting from Happy Now party.
Jess says
Very pretty! 🙂
I would love for you to share this with my Facebook Group for recipes, crafts, tips, and tricks: https://www.facebook.com/groups/pluckyrecipescraftstips/
Thanks for joining Cooking and Crafting with J & J!
Laurie says
Leslie, this is a wonderful solution to the “cluttered” look. I too like the clean lines minimal clutter and your solution certainly fits the bill for out of site, but still easy to access. Thanks so much for sharing with us this week at Brag About It!
michele says
Brilliant idea and DIY! Sometimes seeing all that stuff is distracting, and this is a smart solution. Found you via the link party and would love to have you visit my blog and post here: https://www.hellolovelystudio.com/2017/06/come-enjoy-cupcakes-and-cocktails-in-my.html. PEACE TO YOU RIGHT WHERE YOU ARE.
Helen at Pleasures of the NW says
Great idea – thanks for sharing at the DIY Party!
Michelle Leslie says
Oh dear Leslie, our hubbies sound the same, although I must be honest I tend to take my jewelry off in his man cave and forget about it. I’m going to have to steal your idea to keep peace. It’s great
Angela boone says
This is such a great idea! Thanks for sharing it with us!
Cathy Lawdanski says
Great idea! I have been looking for something like this.
Kate Hollingsworth says
Great job Leslie! I love it. xx
Kathryn Griffin says
What a great project! Thank you for sharing. You are one of the fan favorites at The Showcase from the Make it Pretty Monday party at The Dedicated House. Here is the link to The Showcase so you can check out your feature. https://www.thededicatedhouse.com/2017/06/sunday-showcase-make-pretty-monday-8-12.html Make it Pretty Monday goes live tonight at 8:00PM. Hope to see you at the bash! Happy week to you. Toodles, Kathryn @TheDedicatedHouse
Kathleen - Bloggers Lifestyle says
As this post was among the most clicked on The Blogger’s Pit Stop we will feature it on Friday. Congratulations on a popular post. I see my last comment did not get published. I hope there was no problem.
Kathleen
The Blogger’s Pit Stop