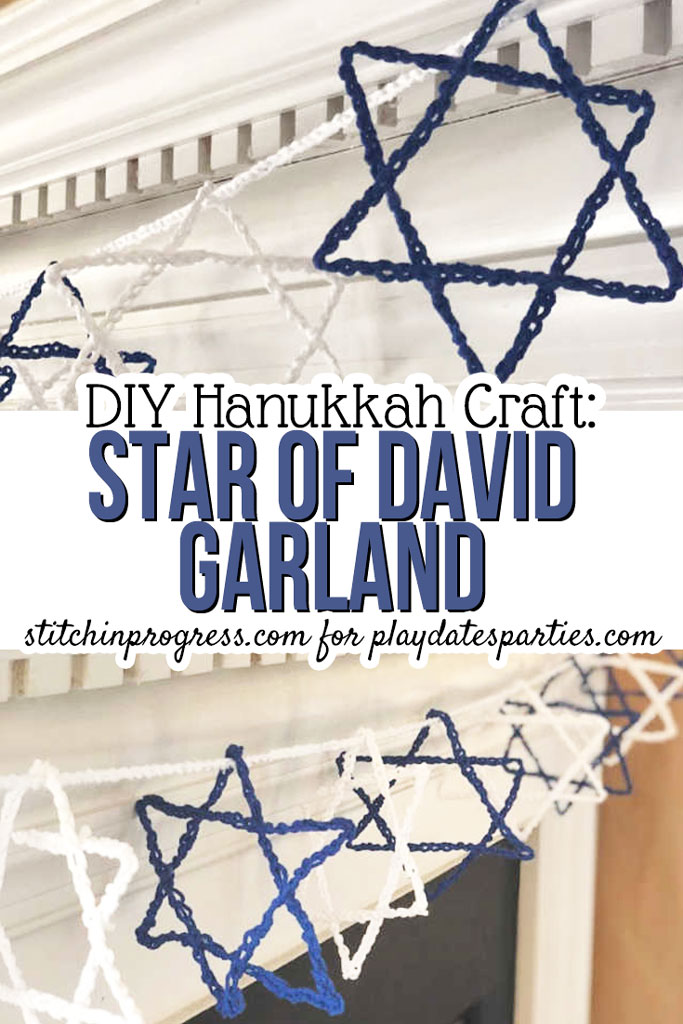
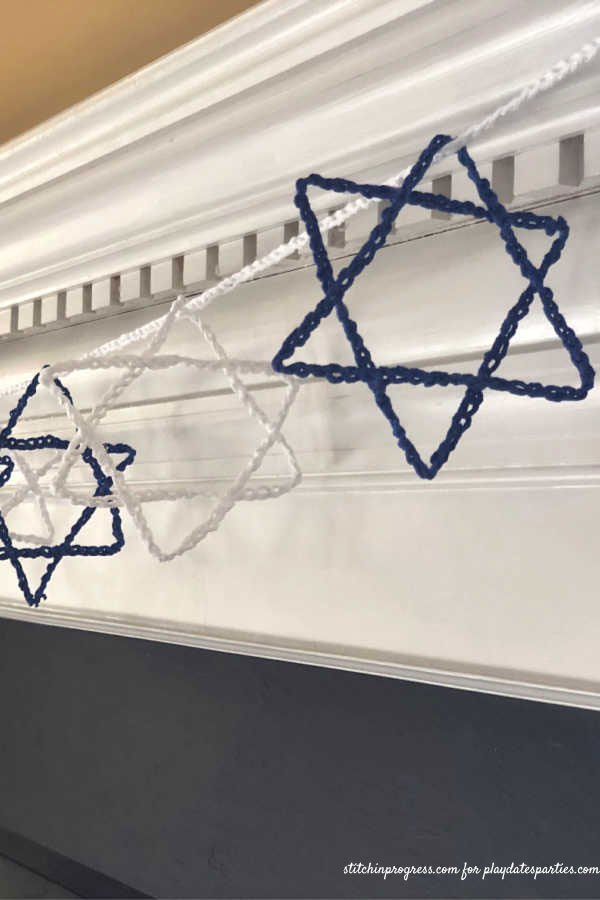
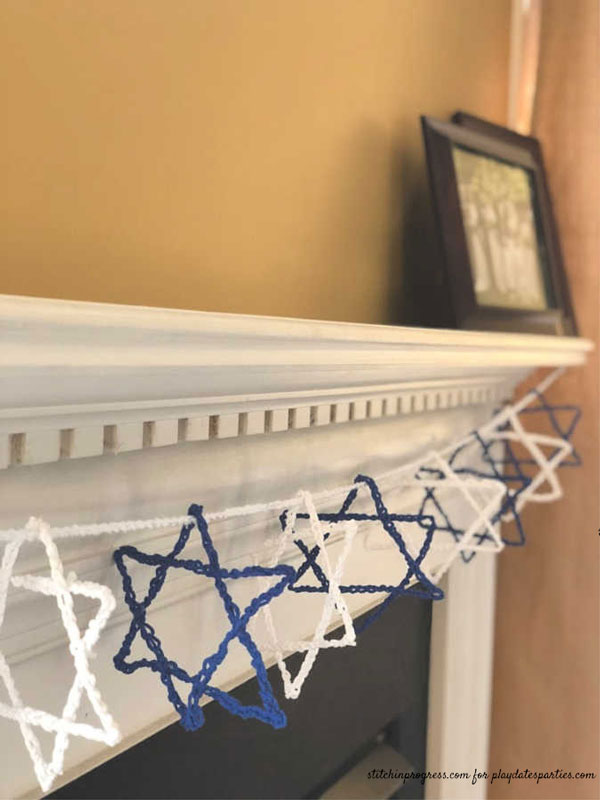
Give your decorations some warmth and learn how to make a simple DIY Hanukkah garland with crochet, glue, and a little bit of creativity!
Hello Friends! Today I’m sharing with you a very special post that is a little different from what we normally have going on. My friend Lisa from Stitch in Progress is sharing her project for a crochet Star of David DIY Hanukkah garland. And since Hanukkah starts in just a few days, I figured no time was better than today. So let’s get started!
~~~~~~~
Looking for a simple Hanukkah craft for kids to make? This crochet Star of David Garland is great for beginners and regardless of skill level, it looks stunning as part of your decor.
Hi, I’m Lisa and I blog about crochet and knitting at Stitch In Progress. I love to teach about crochet and I especially love to share the art of crochet with children.
As I was out looking for some holiday yarn, I saw this beautiful blue and immediately knew that I should design something to crochet for Hanukkah. I wanted to create something for beginners, yet beautiful to show off the yarn.
I designed this Star of David garland to be easy and fun for kids and parents to make together. The materials are very simple and the results are gorgeous. You can make as few or as many Stars as you like for your own garland.
You only need to be able to crochet a basic chain, so this is a perfect introduction to crochet for kids. If you would like for your child to learn crochet, we do offer a Kids Crochet Camp at Stitch In Progress. It is a wonderful skill to pass down to your children.
DIY Hanukkah Garland | Star of David Crochet
Materials
- Cotton yarn in colors of choice:
I used Lily Sugar’n Cream yarn in White and Dazzle Blue - Crochet hook – size H – 5.00 mm
- ¼ cup white glue – I used traditional Elmer’s glue
- craft glue – I used Aleene’s Craft Glue
Crochet Star of David Garland Instructions
The crochet in this craft only uses the basic slip knot and chain stitch to make chains.
How to Make a Slip Knot:
How to Make a Foundation Chain:
- To begin, create a slip knot in your yarn, and then chain 50 stitches.
- Cut off end and tie knot ends together to form a chain ring.
- Cut off ends of yarn at knot.
- Make two chain rings for each star you want. I chose to make 10 stars for my garland, so I crocheted 20 chains.
Making the triangles:
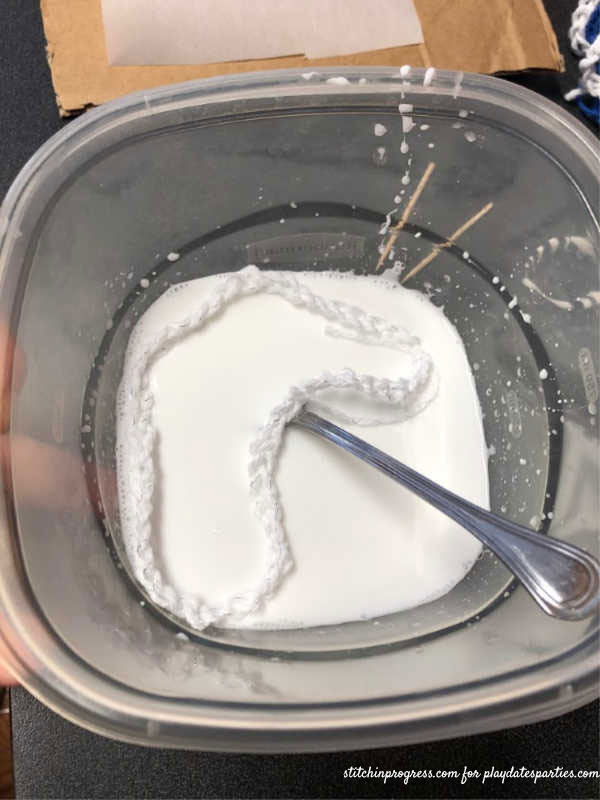
Crochet is easy to stiffen if you use a cotton yarn or thread and liquid starch or glue. You just get it saturated with glue/starch and then let it dry in the shape that you want it to stiffen to. So, in this case, we need to make sure that we create sharp triangle shapes with our chains.
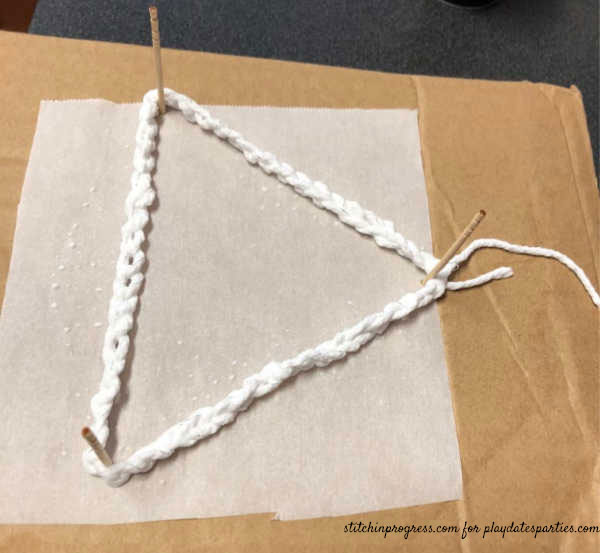
- Use a piece of foam or cardboard and place one toothpick or rust-resistant safety pin near the top through a piece of parchment paper.
- Mix 1 part glue to 2 parts water in a bowl. I used ¼ cup Elmer’s white glue and ½ cup water.
- Place each chain ring into the glue mixture and thoroughly soak.
4. Remove the first chain ring and put the top taut against the first toothpick, then stretch the chain ring into the shape of a triangle and put another toothpick into each of the two remaining corners. Make sure it is stretched tight to all three corners. You can even squeeze the corners to make them more pointed.

5. Lay down a piece of parchment paper over the first triangle and then repeat with your other triangles, stacking them on top of each other.
Tip – If you are using two colors, do your white yarn first and then the other color. This way there is no chance of color bleeding.
6. Let dry thoroughly. This will take a while – I let mine dry for a whole 24 hours. The longer it dries, the better!
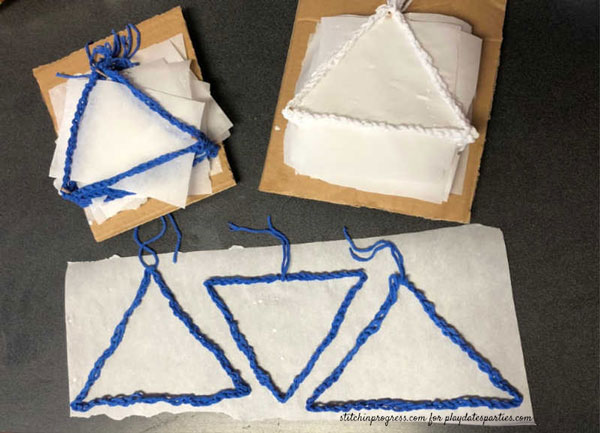
7. Once dry, match up your triangles to check their shapes and sizes and then put one on top of the other and attach where they touch with craft glue.
8. Let dry.
Creating the Garland
- Crochet a long chain the length you want your garland to be and then knot the end.
- You can either string the garland through the triangle top of each star, or you can use an ornament hook or piece of yarn to tie each one to the garland.
- If you string them through, they will move and look more 3-D. If you need them stay flat, then use the ornament hook or yarn to keep them flatter against the wall or surface where you are hanging them.
Tips and Other Ideas
- Mix up the colors…make a Star half blue and half white or use some silver yarn instead. The options are endless.
- Use the Stars individually elsewhere and not as part of a garland. You could put hangers on your windows and hang them or on doors. Or even lay them out on your table runner as a pretty addition to your table or arrange them in a basket.
- Use a ribbon or some other trim as a garland string rather than a crochet chain.
~~~~~
Thank you so much Lisa for sharing your project with us! I think this is even something I can do with my 6 year old! So now I want to know from everyone else…
Do you crochet with your kids?
What would you do with this DIY Hanukkah Garland?


Don’t forget to subscribe via
Bloglovin, Facebook, and Twitter,
to get more updates!


Christina says
Hi,
Pinned this because I am always looking for good Hannukah ideas!
Best,
Christina
Debra says
This turned out so great. It is good to see a craft for Hannukah. Thanks for sharing at the Snickerdoodle Create Bake Make Party.