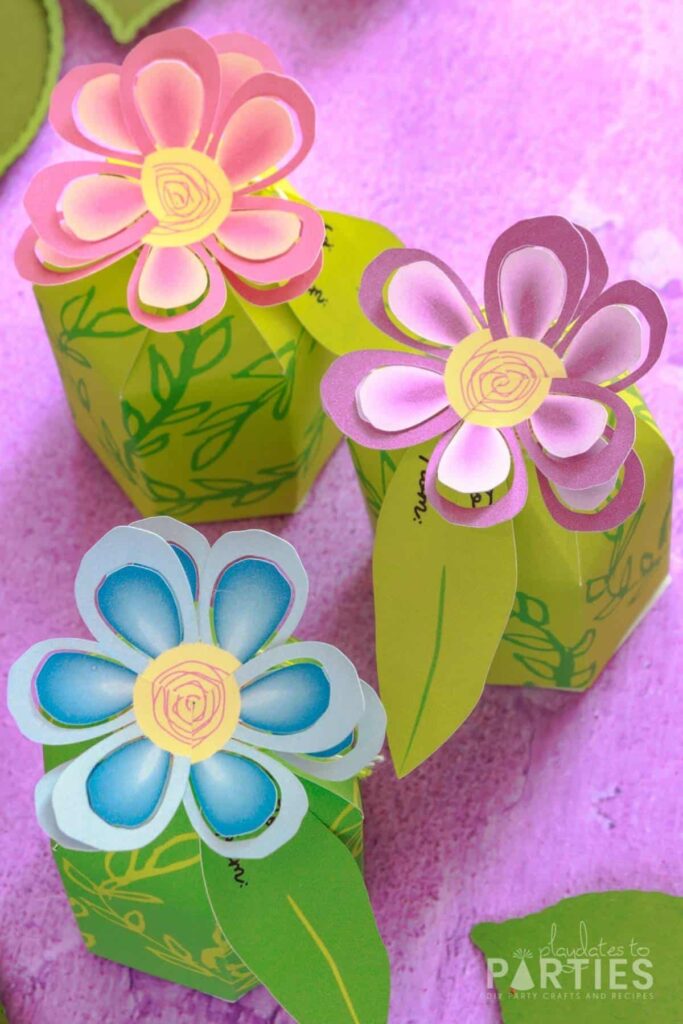
Your guests will be abuzz with excitement when they see these DIY flower favor boxes at your next party.
This charming design is perfect for all sorts of parties, including bridal showers, baby showers, baptisms, Mother’s Day, first birthday parties, and any other flower or garden party you can think of.
Today we’re sharing the full step-by-step tutorial for using this favor box pattern with Cricut’s Print and Cut feature, but the file also comes with a PDF for those who prefer to cut by hand.

When my daughter asked for a flower themed birthday party last year, we knew it was going to look different than our normal parties.
Of course, the biggest difference was that we couldn’t bring out a big birthday cake and sing happy birthday with her friends. 😢
But I was determined that my daughter was going to have her day and her cake…and so were her friends!
So I came up with a plan.
Instead of a big cake, her friends would get to take home mini cupcakes in three dimensional flower favor boxes. It would fit the party theme and do double duty as decorations too.
And now you can make these pretty boxes for your parties, too!

What You’ll Need:
- White Card Stock (see my favorite here)
- Printer
- Light Grip Cutting Mat
- Scoring stylus or scoring wheel
- Cricut cutting machine* with a fine point blade
- Hot glue gun & glue sticks
- Scraper
- This file
*If you don’t have a Cricut, see the FAQ section below.
A Few Notes about the supplies:
White Card Stock: Subscribers know that I usually prefer matte photo paper for my printed party decor. But it’s honestly too stiff for this project. A nice lightweight bright white cardstock is the perfect choice for these favor boxes.
Not part of the insider club? It’s easy to become one. Subscribe to the newsletter, by picking your favorite freebie from this list. And I’ll send you regular party planning tips, tricks, and behind-the-scenes insight…including a side-by-side comparison of how different papers look for party printables.
Light Grip Cutting Mat: I find that even with the standard cutting mat, lightweight card stock is more prone to curling when unloading the final design, so I prefer using a light grip cutting mat for this project.
Scoring Stylus vs. Scoring Wheel: If you prefer deeper grooves for your scoring, you’ll want to use the scoring wheel. However, when I’m crunched for time right before a party, every minute counts.
That’s why I tend to use the scoring stylus alongside the fine point blade with my Cricut Maker. It allows me to get more decorations prepared in the same amount of time instead of stopping to change the scoring wheel and blade.
Step-by-Step Directions:
To make things easy for you, I’ve got a step-by-step tutorial with photos at the bottom of this post. Don’t forget to leave a rating and print out your copy of the instructions, too.
You can also watch the full video tutorial in the video player on this page, or over here on YouTube.
Essential Tips:
Don’t skip these tips – read them before starting to avoid any potential mistakes.
Tip #1: Always double check the alignment of the paper on your mat
Print and cut files depend on everything lining up properly. Please make sure you line up the printed file on your mat in the same direction as it is shown in the Cricut Design Space preview.
Please also ensure that you are cutting the same color flower on the mat as is shown in Cricut Design Space. There are some slight differences that might cause your files to cut incorrectly if you mix and match the pages.
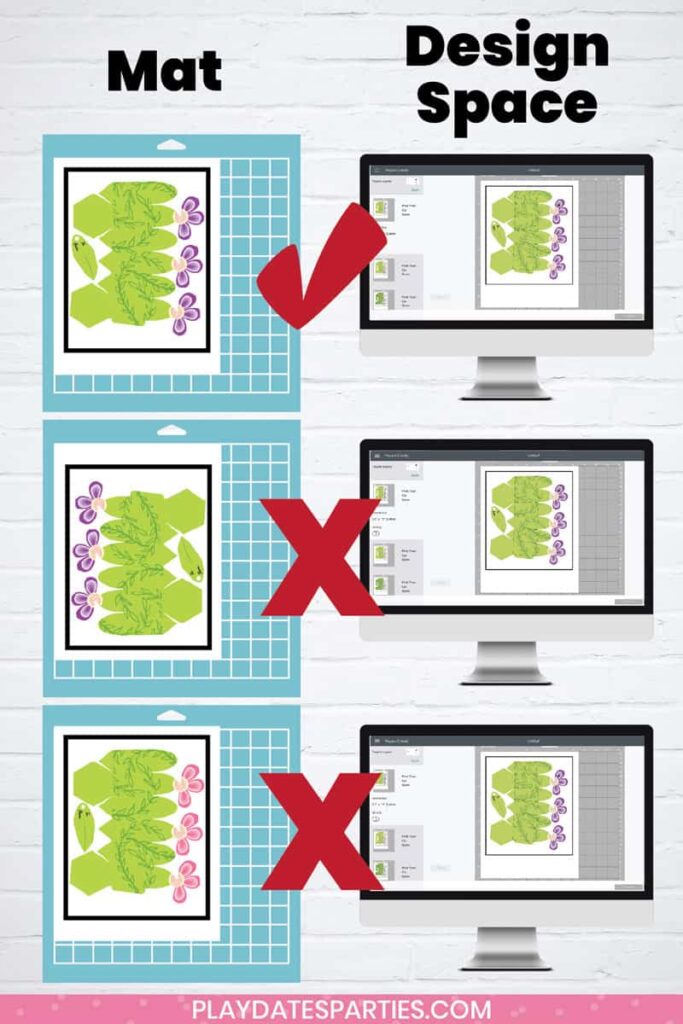
(For example: Don’t put a mat with the pink flowers in the machine when Cricut Design Space thinks you’re cutting the image with the blue or purple flowers)
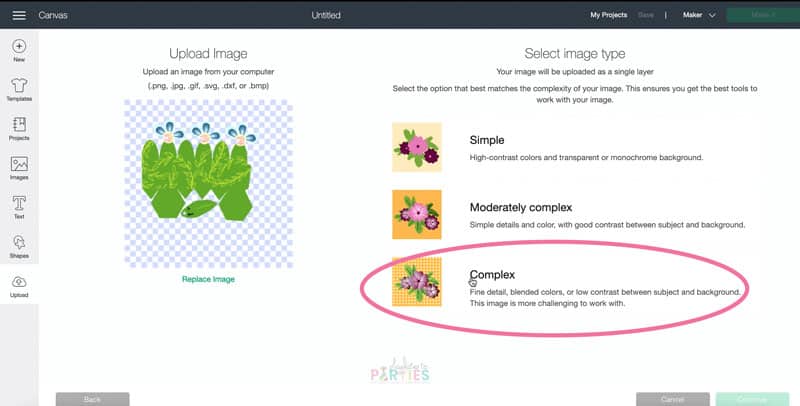
Tip #2: Make Sure to Upload the PNG Files as a Complex Image
As you can see in the video tutorial (check minute 2:55), if you choose Simple Image, most of the design detail gets eliminated. So, it’s important to click Complex Image for this project.
Tip #3: Remove the paper from the mat petals first
The petals are the most delicate area of the box. If you try to remove the paper from the bottom of the box first, the weight could be too much for the petals and cause them to tear. 😢

FAQs:
How big is the box when it’s assembled?
Print and Cut Mini Box:
- Main compartment (where favors go): 2.25” wide x 2” tall
- Total size (Including the flower): 2.25” wide x 3.25” tall
SVG File cut with 12×12 card stock:
- Main compartment (where favors go): 3.25 wide x 3” tall
- Total size (Including the flower): 3.25” wide x 5” tall
What can you fit inside the flower favor boxes?
The print and cut boxes can fit small treats like:
- Mini cupcakes
- Bite sized brownies
- Gumballs
- Hershey’s kisses
- Hard candies
- Small trinkets
What if I Don’t Have a Cutting Machine?
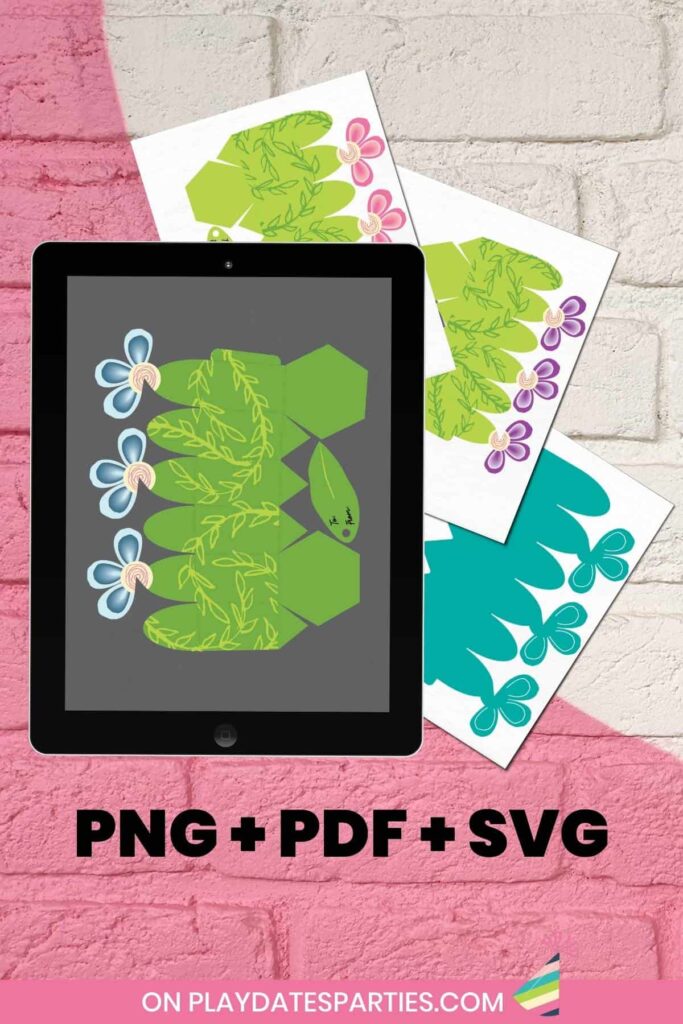
You can just as easily cut this box out by hand. A pdf with the designs is provided that doesn’t have the white area for the Cricut to cut out.
Supplies for cutting by hand:
- White card stock
- Printer
- Scissors
- Scoring tool
- Hot glue gun and glue sticks
- (Optional) Self healing mat and craft knife
If you’d like to create the double layered petal effect without a cutting machine, you can use a craft knife and a self healing mat to cut along the interior of the petal. Just remember too have patience and take your time.
I Have a Cutting Machine, but it’s Not a Cricut
Unfortunately I have not been able to test this with other machines, so I can’t give any guarantee that the print and cut file will work with your machine.
If that changes, I will definitely stop by and update this page.
I Like the Pattern, but Don’t Want to Use up My Printer Ink
No problem! You can also cut the design on patterned or plain cardstock of your choice. To do this you have two options:
- Upload the SVG file that is provided, or
- Upload one of the png files and save it as a cut file only instead of a print and cut
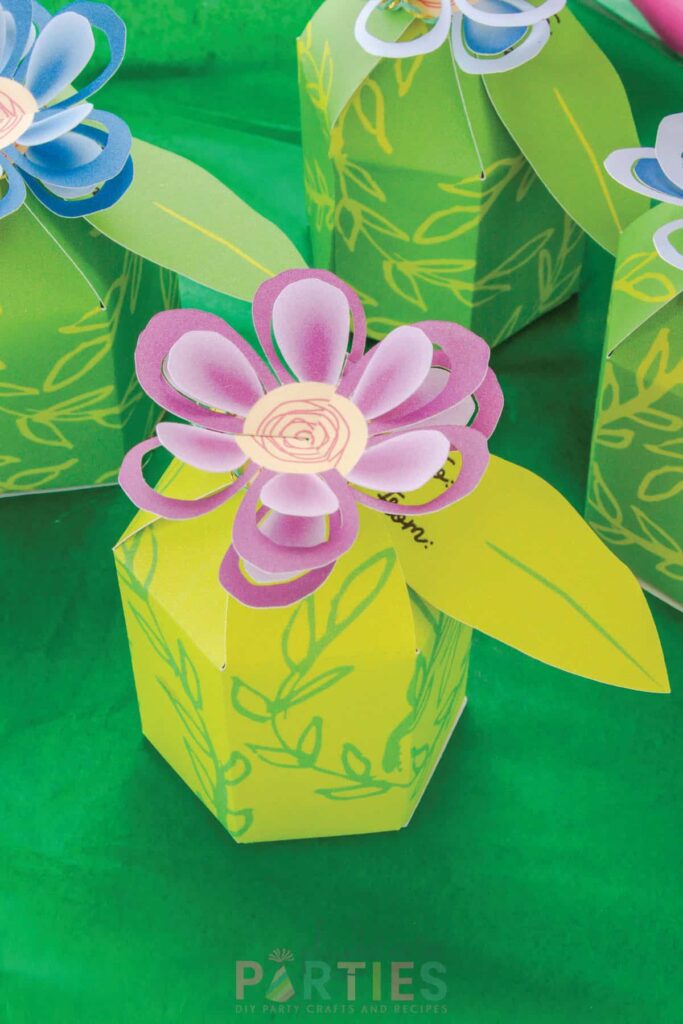
If you liked these flower favor boxes, you’ll also love these 20+ Charming Garden Party Ideas. It’s the perfect place to start planning your garden party from invitations to favors. Or you can check out all my Cricut crafts here, and all my flower and garden party ideas here.
How to Make a Flower Favor Box
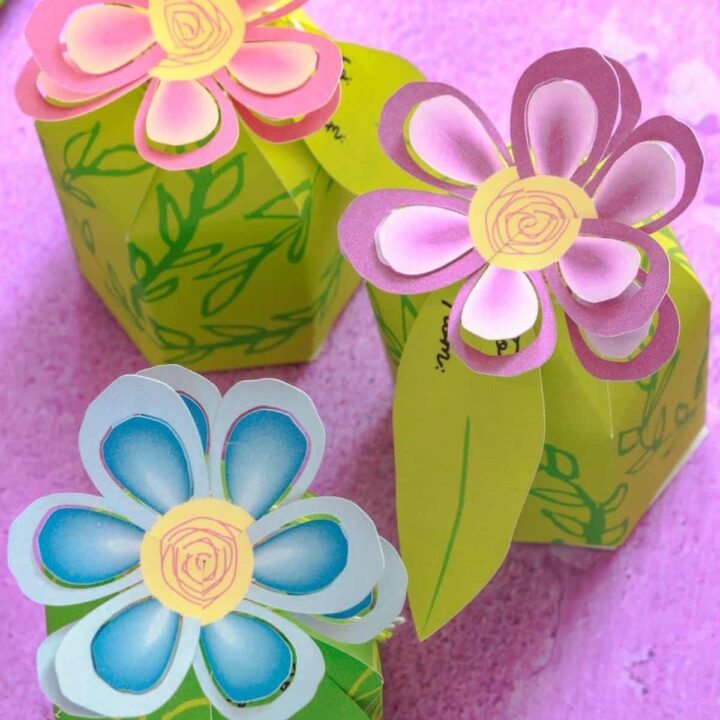
With a 3D design, everyone will love these DIY flower favor boxes at your next party. This charming design is perfect for bridal showers, baby showers, baptisms, Mother’s Day, first birthday parties, and any other flower or garden party you can think of.
Materials
- White Card Stock
- This file
- Twine, ribbon, or string
Tools
- Printer
- Light Grip Cutting Mat
- Scoring stylus or scoring wheel
- Cricut cutting machine* with a fine point blade
- Hot glue gun & glue sticks
- Scraper
Instructions
- Create a new canvas in Cricut Design Space. Click upload, then upload image, then browse. Select one of the PNG files and then Open (or Okay, etc)
- Select Complex Image (This is important. If you choose a Simple image, your design won’t print properly). Then click continue.
- Double Check that everything imported correctly and then click continue.
- Select Print then Cut then click Upload.
- Repeat steps 1-4 with the other PNG files.
- To upload the score lines overlay, select upload image, browse, and then select the score lines SVG file. Cricut Design Space will only allow this as a cut file. Rename and add tags if you like, then click Upload.
- On the upload screen, select the PNG files and click Insert Images.
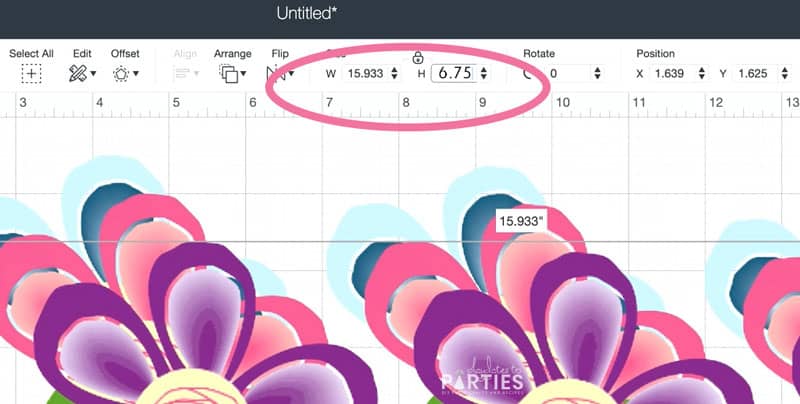
- When the files show up on your canvas, they will be too large. Resize each image to 6.75 inches high. This should make them fit just within Cricut’s Print and Cut sizing.
- You may want to separate each image to a different area of your canvas at this point.
- Go back to uploads. Select the Cut lines file and then click Insert Images.
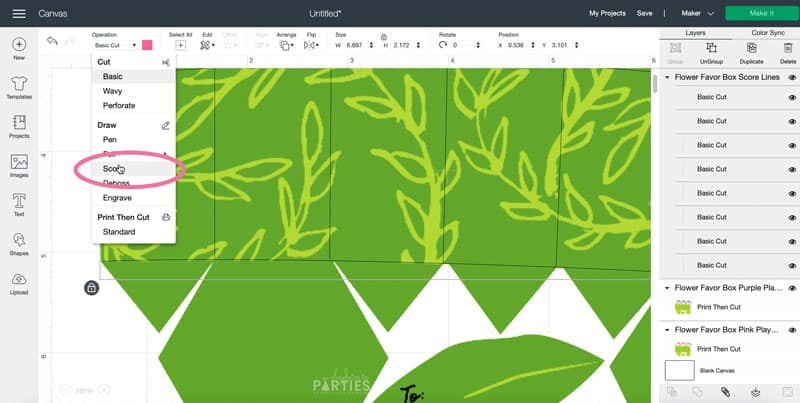
- Move the score lines over the flower box so the vertical lines are between the triangles on the bottom, and the horizontal lines are along the top and bottom edge of the sides of the box. It helps to zoom in closely to make sure the alignment is correct. You may also need to slightly adjust the size of the scoring overlay to fit the width of the box pattern.
- Change the scoring overlay to score lines using the Operation drop down menu.
- Duplicate the scoring overlay twice and align those copies to the other boxes.
- Select one of the print and cut images and its corresponding scoring overlay. Click attach. Repeat with the other two boxes.
- Click Make It.
- Double check the alignment of each page, and make sure everything looks right, and then click Continue.
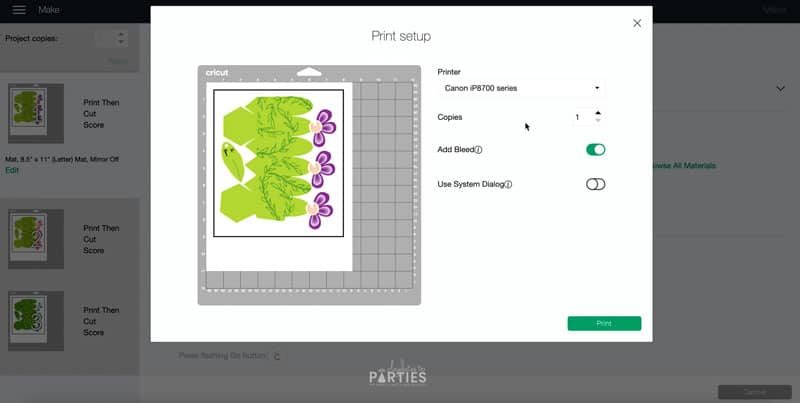
- Click Send to printer and choose the printer you want to use. Make sure bleed is turned on.
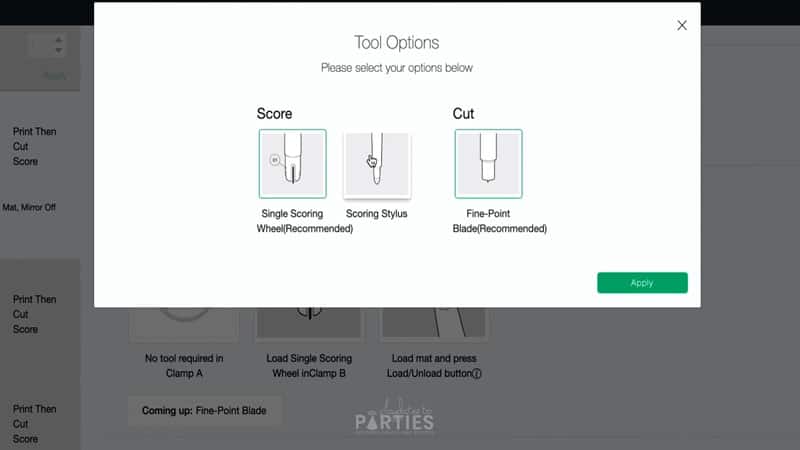
- Choose the material that matches what you printed your project on. In this case, I used light card stock. You can also choose to change your tools to use the stylus if you don’t want to use the scoring wheel.
- Place your printed image onto the mat. Important: Make sure that the image you’re placing on your mat matches the petal color and orientation of the page in Cricut Design Space.
- Load the mat into your machine and click continue. Tip: Start preheating your glue gun now.
- Once the machine is finished, flip your cutting mat upside down and then curl it back to remove the cut pieces. I recommend starting with the petals as they are the most delicate part.
- Once the design is off the mat, fold the bottom and sides of the box along the score lines to get a better crease. For the top portion of the box, slightly bend along the score lines, but don’t worry about making a hard crease.
- Flip up the hexagon that is at the end of the box and fold it in place.
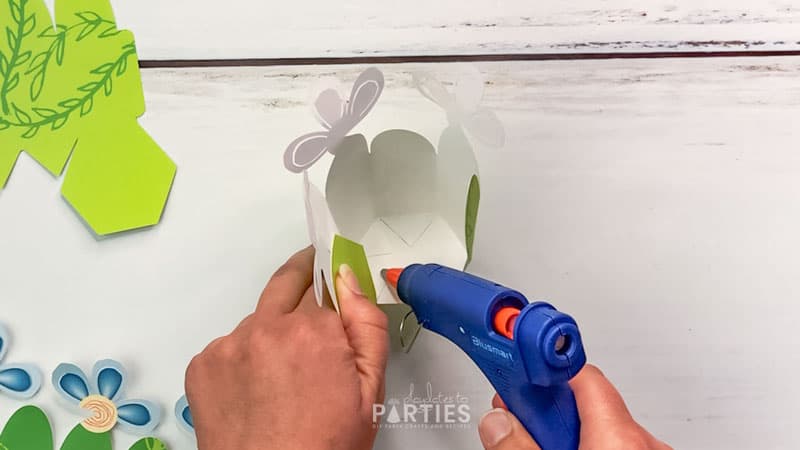
- Use a small dab of hot glue to attach each triangle tab to the unprinted side of the other hexagon.
- When all the small triangles are glued in place, add hot glue to the bottom inside of the box and press the other hexagon on top.
- Finish the box by gluing the side tab to the other open end of the box.
- Fill with your party favors, and close the top by folding the plain green ends in first and then hooking the flower petals together over top.
- Cut a piece of twine about 8-10 inches long and fold it in half.
- Push the ends of the twine through the hole in the leaf and pull through so the leaf is about halfway down the twine.
- Wrap the twine around the base of the flower and push the open ends of the twine through the loop on the other end.
- Gently pull the open ends of the twine to tighten, and trim off any excess.
**See Notes for instructions to use the SVG file or to cut by hand.
Upload the Files to Cricut Design Space
Prepare the File in Your Canvas
Cut the Designs
Assemble the Box
Add the leaf*
Notes
Opening the Files:
You will need to unzip the file after it is downloaded. How to do this varies depending on your device:
- Click here for instructions to unzip on a Mac or PC
- Click here for instructions to unzip on an Android device
- Click here for instructions to unzip on an iOS mobile device.
Scoring Stylus vs. Scoring Wheel:
If you prefer deeper grooves for your scoring, you’ll want to use the scoring wheel. However, I find that when you’re in the time crunch right before a party, every minute counts.
With the scoring stylus, you don’t have to change the tools in the middle of a cut. Which gives you a bit more time to get other things done.
To Cut the Favor Box By Hand
- Print the PDF file on white cardstock.
- Use scissors to cut along the outside edge of the design.
- If you’d like to create the double layered petal effect without a cutting machine, you can use a craft knife and a self healing mat to cut along the interior of the petal. Just remember to have patience and take your time.
- Fold along the dashed lines (You may want to use a scoring tool along the fold lines first).
- Assemble according to the instructions above.
To Use the SVG File
- Upload the SVG file to Cricut Design Space and add the file to your canvas.
- Resize the SVG file to fit your paper and mat (remember, 12x12 mats can only cut up to 11.5 inches wide). Convert the pink cut lines to score as shown above (Preparing Your File Step 5)
- Follow the remainder of the instructions above to cut and assemble your favor box.
 Want more party inspiration? Join me over at
Facebook, and Twitter,
for regular updates and fabulous finds from around the web.









Leave a Reply