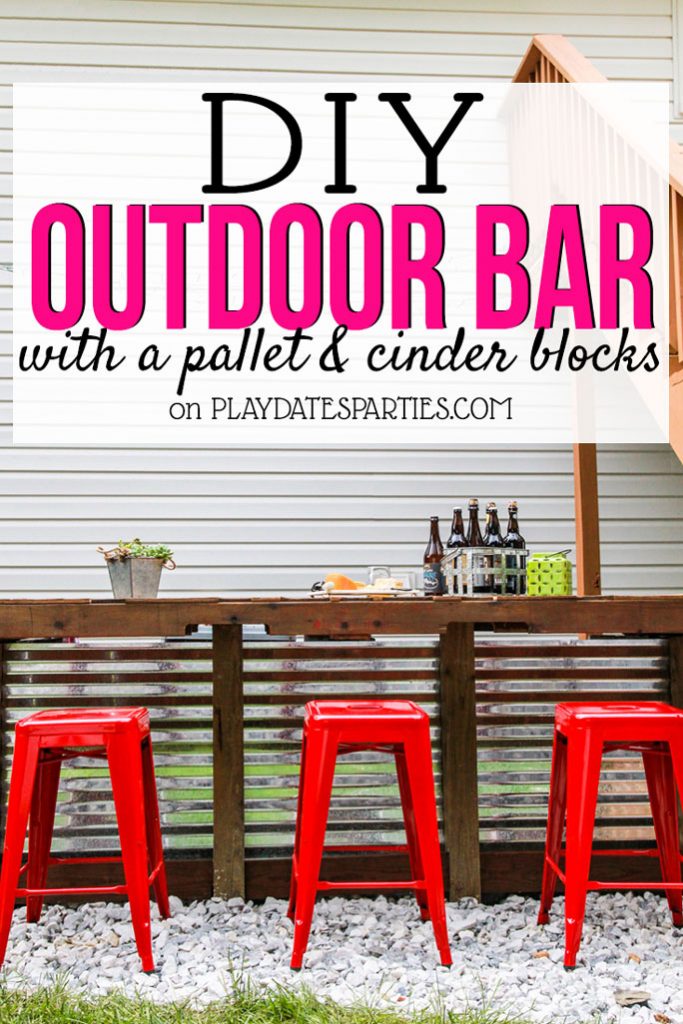
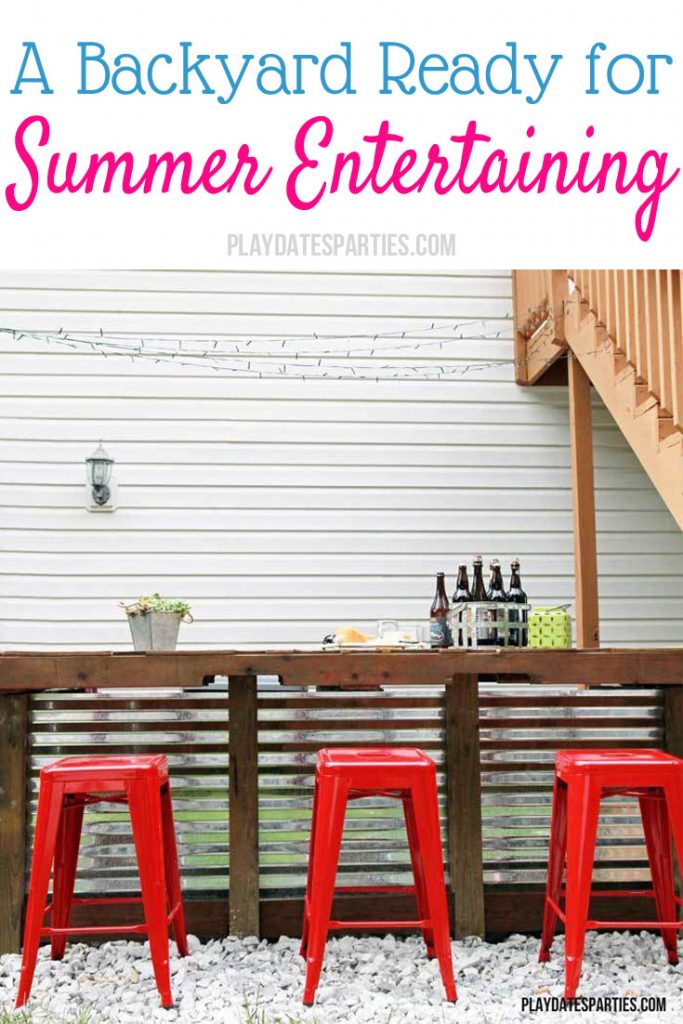
Need a gathering spot while you grill in the backyard this summer? With just some cinder blocks and an outdoor pallet, make this stunning DIY outdoor bar.
Imagine having to cook dinner with your stovetop and oven on the main level, but your refrigerator and countertop upstairs.
That’s exactly what the Husband dealt with for three years any time he grilled.
You see, we live in a split-foyer home, which means that he was running up and down the stairs to get food and utensils. It’s no wonder he finally insisted on getting a prep table for the grill this year!
And if you’ve followed along with our backyard renovation, you can probably tell that we have a tendency to plan small, but end up going big.
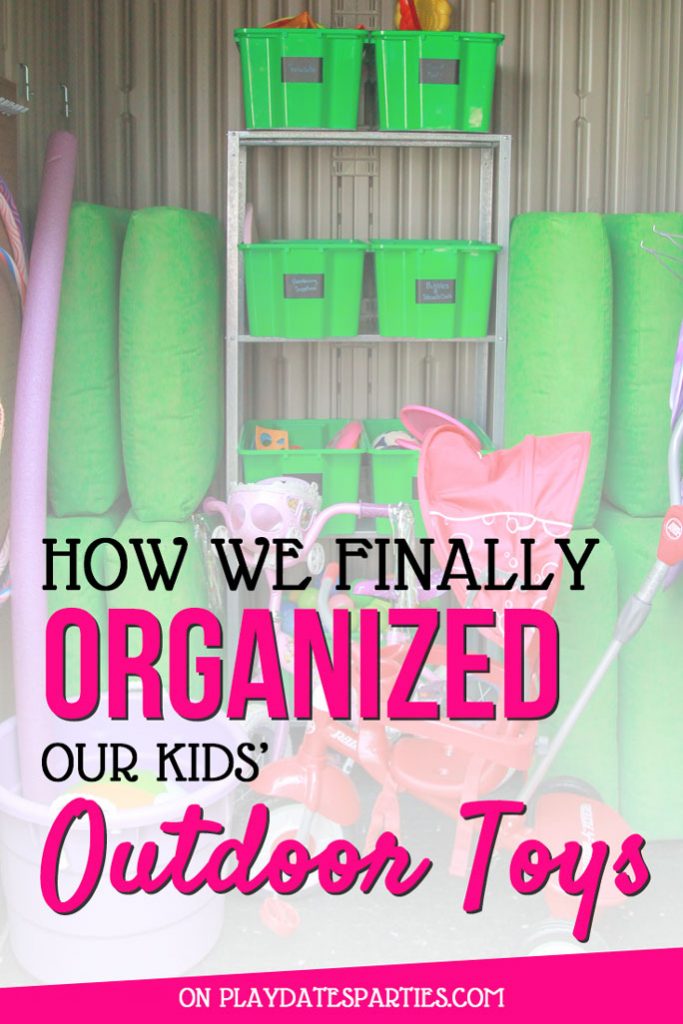
How we ended up organizing the kids outdoor toys is the perfect example. And that big project ended up leaving us with a big bonus:
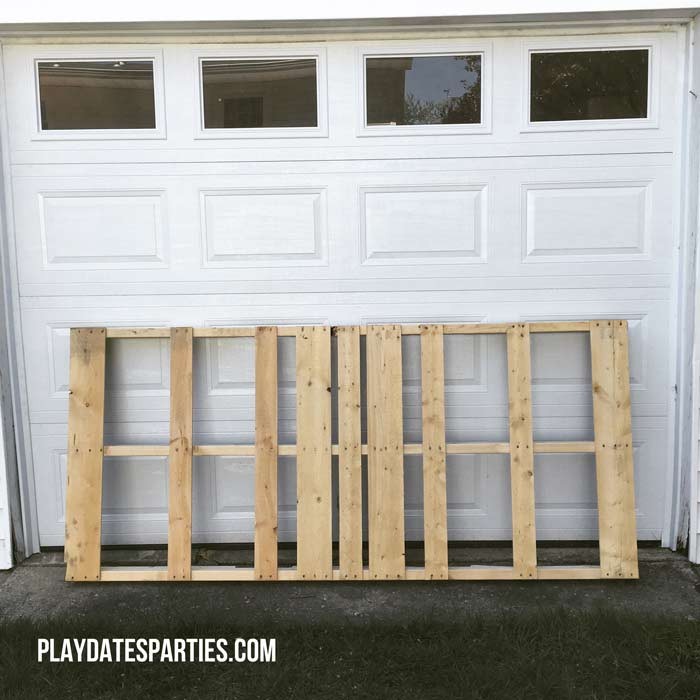
That, my friends is a 7-foot by 3-foot pallet! And once I saw it, I knew it would be the perfect way to give my husband the outdoor prep table of his dreams.
Even better…how about prep table and DIY outdoor bar!
I won’t lie, this gigantic outdoor bar was a lot of work. But we’re both in love with the results.
The most time-consuming parts were actually the preparation of the pallet (filling in the gaps) and leveling the ground underneath. After that, the build was pretty fast.
Seriously, as the husband sat in meetings, I texted him pictures of my progress. By the time he came home, it was completely finished.
I’ll apologize now for the muddy build pictures. That’s just what I was dealing with after the rain we’ve had. So, it was messy, but it was FUN.
DIY Outdoor Bar with Cinder Blocks and a Pallet:
Materials:
- Hand Tamper
- Landscaping Fabric
- Large Pallet, 7′ 3″ x 3′ 3′
- 4 x 4 x 1/2 plywood, cut into appropriate lengths by the hardware store
- 1-5/8″ exterior screws
- Homemade Stain
- Thompson’s Water Seal
- 3 1×4 boards cut to the width of the bar
- Patio Base/Pea Gravel/Sand (I used marble rock)
- 18, 8 x 8 x 16 Cinder Blocks
- 12, 4 x 8 x 16 Cinder Blocks
- 4, 4 x 4 wood posts, cut to 36″ lengths
- 8-foot sheet of corrugated steel roofing
- 3 1×4 boards cut to fit between posts
- 2, 1 x 1/2 x 36 plywood strip
- Exterior Wood Glue
- Optional: Sleeve Anchors and/or Construction Adhesive
Prepare the Pallet
- Carefully measure and note any gaps between the boards in your pallet. Make sure to measure the width of each gap at several points, to ensure they are fairly even.
- Cut 1/2-inch plywood according to the measurements noted. (I had the hardware store do this for me)
- Sand down the plywood to remove any rough edges and stain the plywood and the pallet. Don’t forget to add a water sealant to these as well.
- Screw in each board to the gaps in the pallet using exterior-grade screws.
Prepare Your location:
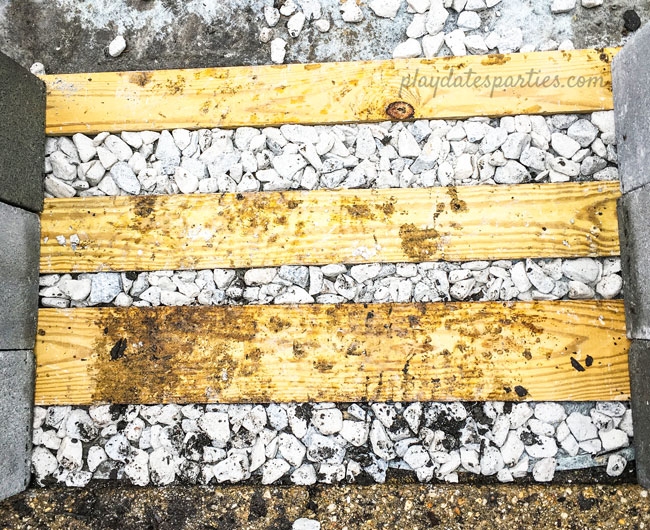
- Do your best to level an area wider than your pallet. You can either rent a tamper, or use a hand tamper as we did.
- Lay down landscaping fabric to help prevent weeds
- Our ground just couldn’t seem to level off, no matter how much we tamped. So here’s what we did: I found 1×4 boards in our garage to act as ‘skids” with marble rock underneath them in the low areas. (FYI, Paver base, sand, or pea gravel would have worked better)
Build the DIY Outdoor Bar:
Now for the fun part!
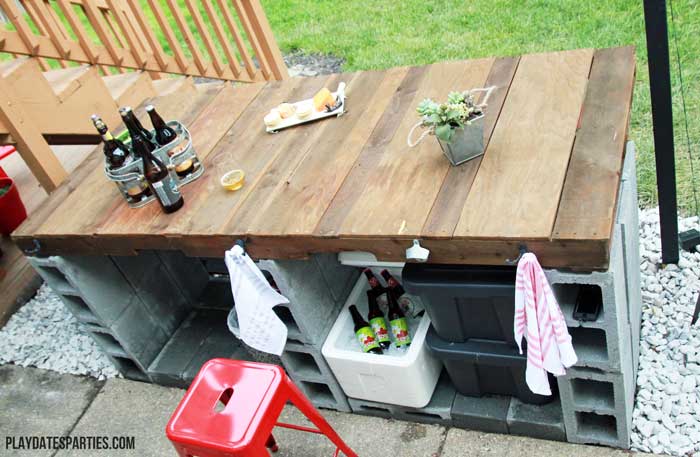
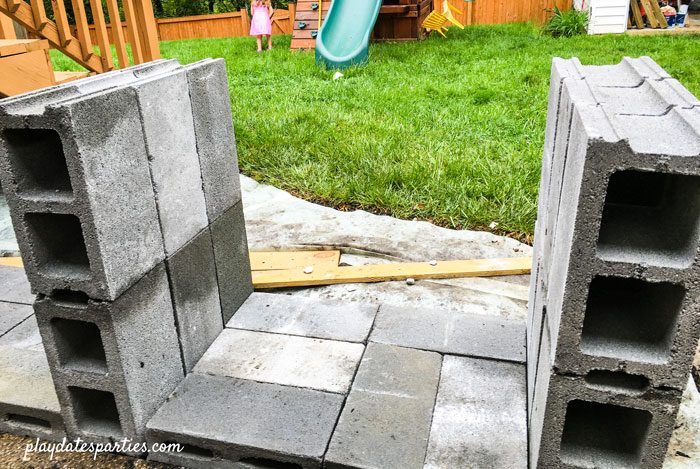
- Arrange the 8x8x16 cinder blocks on the ‘skids’ to create the legs of the table. In this case, we stacked them on their short sides, 3 across and 2 high.
- As you build these table legs, make sure that the cinder blocks are placed directly under a pallet brace. This will add stability. Construction adhesive can be used to bond the cinder blocks together for more stability.
- Arrange the remaining 4x8x16 cinder blocks between the legs to act as a floor for your table. This will make it easy to slide bins and coolers in and out from the underside of the table.
- Carefully place the finished pallet on top of the cinder block legs. Add a heavy weight or an extra cinder block on top while you do the next steps.
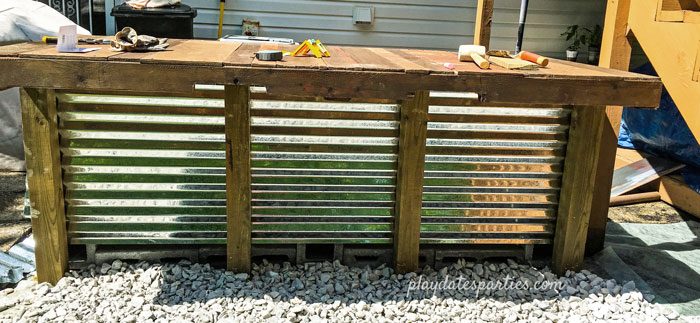
Add the Corrugated Steel Facade:
- Carefully cut corrugated sheet metal to the length of your table. I used tin snips, which was not easy, and left sharp edges. If you have the right power tools, definitely use them here. And always be sure to wear protective gear, no matter how you’re cutting metal.
- Cut four 4×4″ exterior posts approximately 36 inches long.
- Placing the corrugated sheet metal against the cinder blocks and then install the 4×4 posts evenly along the front of the sheet metal. (In our case, that was about 24 inches between posts).
- Attach the corrugated sheet metal to the back of the posts using exterior screws. (I started each hole by hammering a screw in the spot that needed the hole.) Don’t forget to wear ear muffs to protect your ears. This gets very loud!
- Stain and seal three 1×4 boards cut to fit between each post. The should be long enough to be held in place with pressure, but, you can add some wood glue if it makes you feel more comfortable.
- Finally, add a 1-inch furring strip of wood between the post and the cinder blocks to hide the outside edges of the corrugated sheet metal. Again, you can use glue to hold this in place if you like.
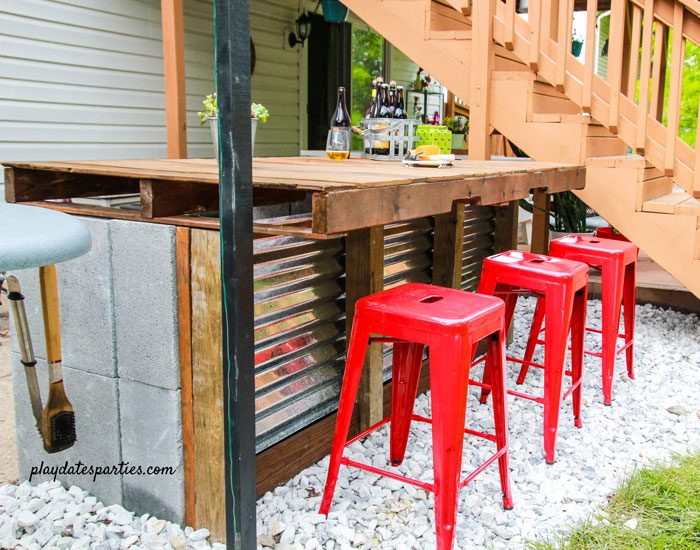
Attaching the Pallet to the Cinder Blocks
Although the weight of the finished pallet should make it pretty secure, there is still a risk of the bar tipping from guests leaning on it.
2018 Update! How we resolved holding the pallet in place.
At the time I originally shared this post, the Husband and I couldn’t agree how to actually attach the pallet to the cinder blocks.
I wanted to use sleeve anchors, which are made to go into masonry, but we couldn’t figure out exactly how to get the drill bits into the tight space that was allotted by the pallet.
We considered using construction adhesive, but were still concerned that it would degrade over time.
So, my husband came up with an interesting, easy, and inexpensive alternative: clamps. He bought a set of clamps, and clamped the bar to each of the concrete pillar legs. I’ll admit it’s not the prettiest solution. And I was concerned about kids running into them. But they’ve worked well.
I’m hoping to do a full video update on the bar soon, and will embed it here when it’s done.
Don’t Forget the Extras:
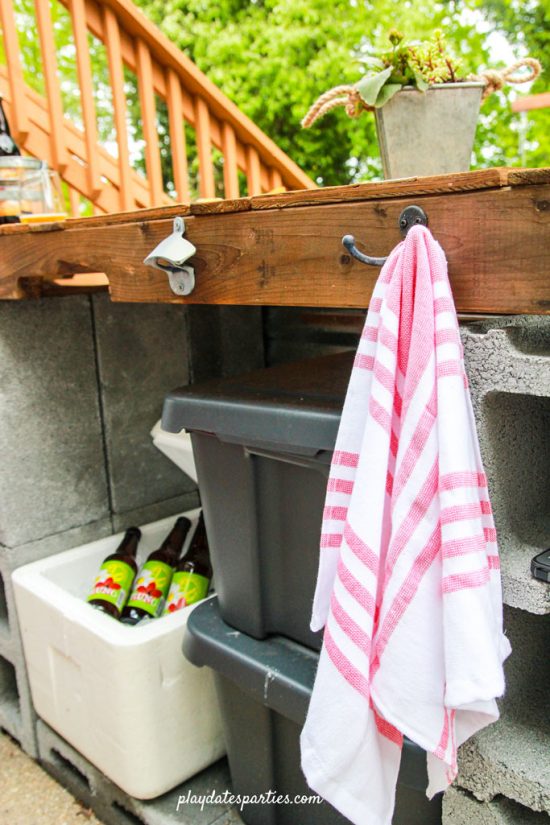
Now, The bar is pretty darn awesome, I have to say. But what makes it even better is that it’s outfitted with some fun extras like:
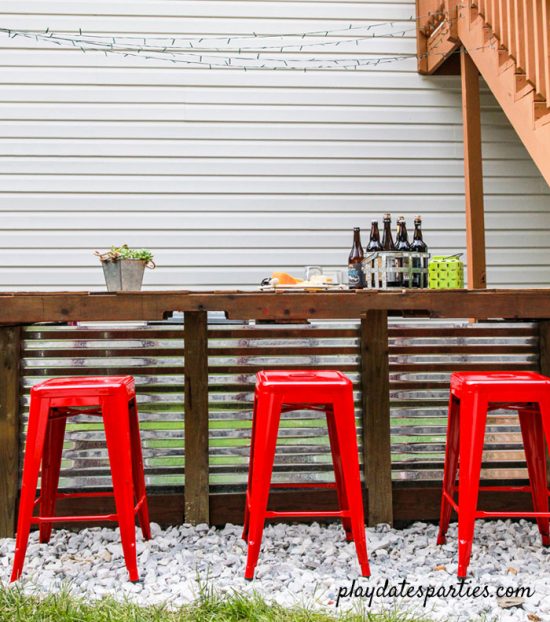
- Bright red counter-height bar stools
- Wall-mounted bottle opener right on the side of the bar
- Hooks for towels and grilling tools
- My Husband wants a Yeti cooler, but until then, we’re using an old styrofoam cooler inside the bar (that way we don’t care if it gets left outside)
Notes about Making a DIY Outdoor Bar:
- Make sure you use plywood rated for exterior use. Even with treatment, cheaper plywood will absorb moisture and will start to fall apart.
- Counter height is 36″. The cinder blocks are listed as 16″ wide, but are actually closer to 15.5″ wide. The pallet has a depth of 3.5 inches. With the skids underneath the cinder blocks, the table is almost perfectly counter height.
- Pallets come in all shapes and sizes. Our pallet was 7’3″ by 3’3″. The length and depth turned out to be the perfect size to create an outdoor bar.
- If you don’t have a pallet the same size, please do all your measurements first. Pull out that graph paper and make diagram after diagram to check your design before you get started.
Now, It’s Your Turn
Even if you don’t have to worry about going up and down stairs constantly while grilling, this DIY outdoor bar is a great addition to any backyard. Once you have the land prepared and the pallet finished off, it shouldn’t take more than a day to complete.
You can enjoy a beer at your new outdoor bar by the end of the evening. Sounds nice, no?
What would you make with a leftover pallet?
Would you use cinder blocks to create furniture?
See the Entire Renovation:

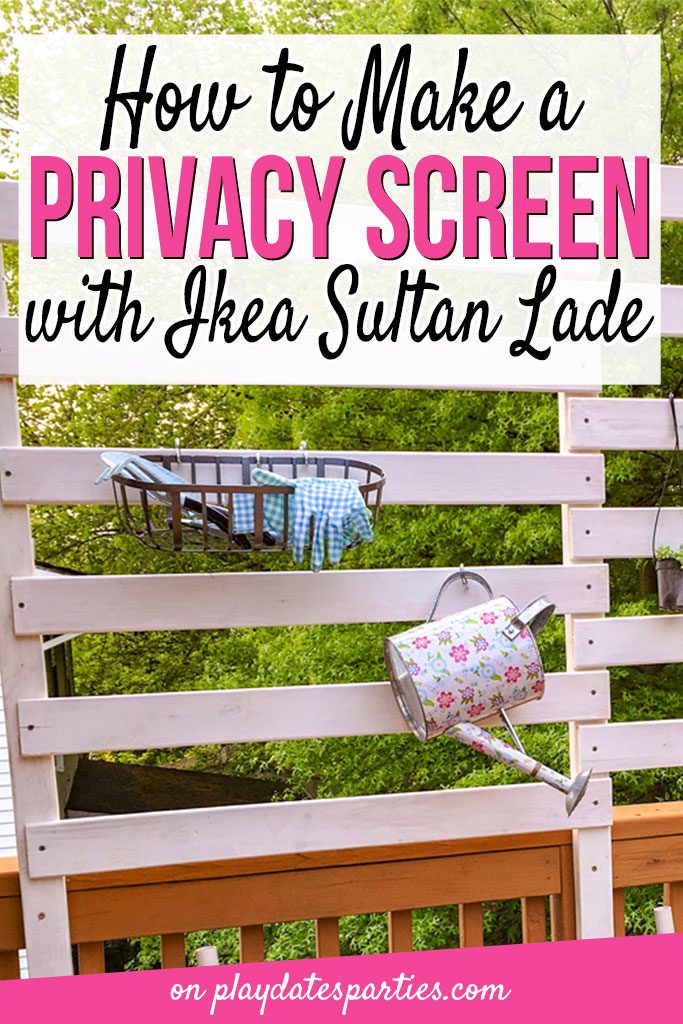
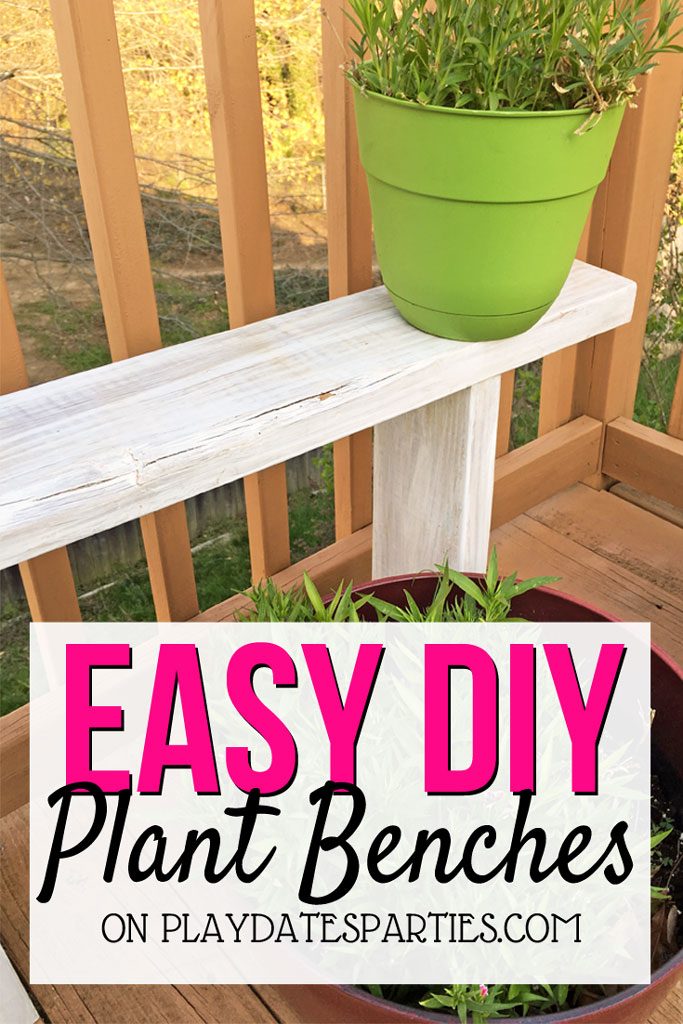
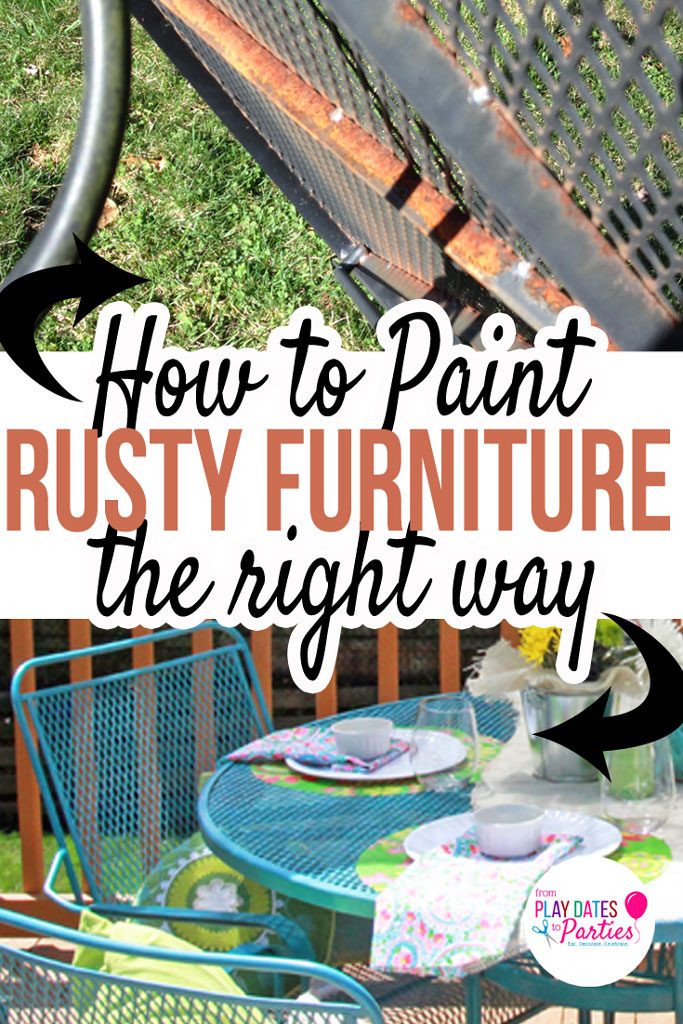
Backyard for Entertaining: Reveal How to Build an Outdoor Bar with a Pallet & Cinder Blocks 4 Quick & Easy Chalk Paint Projects How to Spray Paint Your Patio Cushions Our Extreme Outdoor Toy Organization System How to Make a Privacy Screen with Ikea Sultan Lade Easy DIY Plant Benches How to Paint Rusty Outdoor Furniture How to DIY a Self-Watering Planter Box

I want to extend many thanks to the readers who have enjoyed renovation and home DIY posts over the years. Unfortunately, in January 2018 I was diagnosed with Stage II breast cancer and had to stop doing home renovation posts due to treatment.
Since that time, my focus has been on making this website an amazing resource for the everyday mom’s parties. Due to their popularity, the DIY posts and tutorials will remain on the website, but comments are now closed. Thank you again and I wish you the best in your DIY endeavors!


Tamara says
Wow, this must be the hot place to go this summer! I love it. It takes outdoors entertaining to a whole new and fantastic level.
Leslie says
Thanks Tamara! It’s definitely our happy spot so far this summer!
Nina says
How fun! I’ve been meaning to get a grill. You get so creative with your household items Leslie!
Leslie says
If you get a grill, definitely go charcoal! We kept our gas grill for a few years after buying the charcoal kettle, but it just sat unused until we finally got rid of it this spring.
Nellie says
First of all? You are my shero. You need a reality TV show on hgtv. I soooo wish you lived near so you could show me all of your DIY ways Goddess!!
Leslie says
Ha! I don’t know if I’m HGTV ready…but thank you so much for your sweet words, as always!
Morgane @ Bear, Dolly and Moi says
great idea and great use of material! Let us know how you attach the pallet to the blocks.
The red stools are so fun!
Leslie says
I’m hanging my head in shame that we still haven’t bolted the pallet down. I discussed it with our GC, and he said we probably didn’t need to do more than add posts at the outer corners to keep it sturdy. Of course, I’m a pain, and don’t want the visual of the corrugated steel front to be obscured!
Jen says
I wish I had a quarter of your talent! This is absolutely adorable! What a fabulous entertaining place!
Leslie says
Thanks so much, Jen!
Grandmas House DIY says
Awesome, this is great and i love your red stools with it! Saving it to my Build Projects board and my DIY Inspiration board.
Leslie says
Thanks for saving it! I probably wouldn’t have gone with the red stools…those were totally the Husband’s request, and he was right, they really make a statement!
creativejewishmom/sara says
wow, it is really gorgeous, and those stools are perfect! thanks for sharing on craft schooling Sunday!
Leslie says
Thanks so much for stopping by!
Pamela Smith says
What a great project! You did an amazing job and now you have a great place to spend your summer!
Leslie says
You know , we actually don’t spend as much time on the cushy patio furniture now. It’s just so easy to pull up one of the stools from the bar. I definitely recommend a large outdoor bar for any backyard!
Erlene A says
This is so cool! You did a fabulous job all by yourself and it’s so right on trend too. Thanks for sharing this on Merry Monday. Pinned.
theresa says
We have left over bricks from a neighbor who moved and left them with us, this just might be a perfect use for them. Thanks for sharing at the Inspiration Spotlight party. Have a great week ahead. Pinned & shared.
condo blues says
I like the metal accent!
Jess says
Wow…this is SO amazing!! I love how this turned out! you’re so talented! 🙂
I would love for you to share this with my Facebook Group for Recipes and Crafts: https://www.facebook.com/groups/pluckyrecipescraftstips/
Thanks for joining Cooking and Crafting with J & J!
Chloe Crabtree says
What a great project! It turned out fantastic! You had great vision and skills! I am pinning this one to my Outdoor Spaces board. I would love it if you would stop by and share this at the Celebrate Your Story! link party. If you have a moment to stop by, here is the link: https://celebrateanddecorate.com/celebrate-story-30/
Becky Goerend says
So cute! We’ve used pallets for a wine rack and towel bar, but not a big piece of furniture yet.
Bre says
Whoa, this is impressive! Great work!
Kati says
I so need one of these! I hate cooking on the barbecue cause I have to run inside whenever I need something and there is no room to place things. Brilliant idea using the cinderblocks! Pinned.
Helen at the Pleasures of the NW says
What a great idea! thanks for sharing on the Pleasures of the NW’s DIY Party!
payfirstsolutions.com says
This resulted in people spending most of their life in darkness.
, ownership of one of these fish is completely prohibited under the
Endangered Species Act (except for public zoos and aquariums, which can obtain permits).
This one small idea had managed to transform the lives, not only of his family but to
the entire community.
Marissa | Squirrels of a Feather says
I think that is beyond our level of skill, but it looks amazing! It makes me want a hot dog real bad 🙂
Ellen says
Looks fantastic! Amazing what a simple pallet can inspire. The red stools are the frosting on the cake.
Danielle @ A Sprinkle of Joy says
That is so cool!!! I wish we had a space for something like that!
Teresa says
It looks great, you did a wonderful job. Tank you for sharing at The Really Crafty Link Party. Pinned.
Rhonda says
I’m picturing this in my backyard. It would be perfect for BBQs and the kid’s parties. You did a great job. I’m Pinning your post. Thanks for sharing on Sunday’s Best.
candy says
Looks like a great outdoors project. We have cinder blocks and pallets. Found you on Blogger’s Pit Stop.
Nikki Gwin says
Oops! You did it again! haha I am totally into your projects and am featuring your outdoor bar on next weeks OVER THE MOON LINK PARTY which goes live on Sunday evening at 5 pm central. Please stop by to see your feature and please link up some more fabulous projects!
🙂 gwingal
Jann Olson says
This is so fabulous! Thanks for sharing it with SYC.
hugs,
Jann
Sam - Raggedy Bits says
What a fabulous idea!! Think you have just given us an idea for our outdoor space!
Thank you so much for sharing your project with us over at Waste Not Wednesday!
Michelle Leslie says
Love, love, love how it turned out Leslie. My hubby would be over the moon if I build him something like this and those chairs are so cool. They fit the whole look so perfectly
Emily says
This turned out amazing! What an awesome spot to eat and hang out! Thanks for linking up with Merry Monday – I’ll be featuring your outdoor bar at our upcoming party. Hope you’ll stop by next week!
Hannah Schlachter says
Wow, that turned out great. I would never have thought to do this. Thanks for sharing! My friend Katy and I just started a new link up. We’d love it if you would share your posts!. You can find the link here if you are interested. https://handmadeweekly.com/handmade-otherwise-link-party-week-1