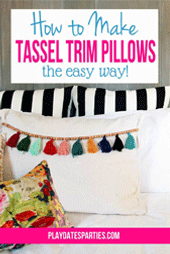
Love the tassel trend, but don’t want to commit too much? Find out how to make tassel trim pillows that pack a punch without breaking the bank.

Tassels, tassels, everywhere!
Have you noticed all the fantastic tassel accents in the design world over the last couple years? It was the blankets with oversized tassels that first caught my eye. But these days, they’re on just about everything you can think of.
But what if you’re not sure you want to go all-in with this trend? Tassels are expensive. And when they’re outdated in a few years, what will you do with all that decor?
Instead of spending loads of money on hyper-trendy tassel decor, why not pack a tassel-filled design punch with a couple pillows? It’s so easy, it only takes a few minutes, and best of all, it doesn’t have to cost an arm and a leg!
How to Make Tassel Trim Pillows…the Easy Way
Materials
- 1 5-ft Tassel Garland from Target
- Hot glue gun & clear hot glue sticks
- Needle
- Heavy-duty Beige thread
- Pillows and pillow covers

Directions
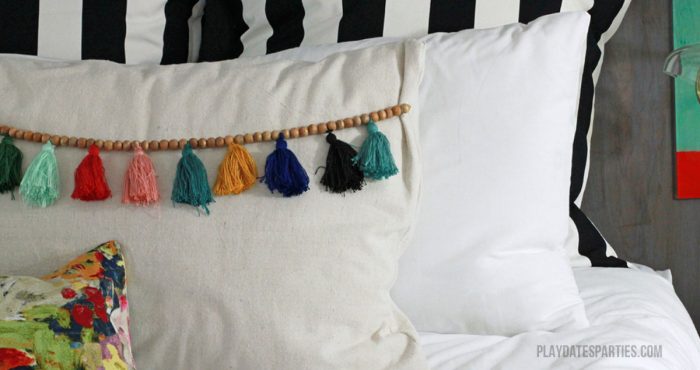
1. Start by measuring out your pillows to find out how long you need your tassel trim to be. Make note of where you will need to cut the garland.
2. Add hot glue to the center of each bead surrounding the cut points you identified and to the beads at the end of the garland. (I went a bit further and added hot glue between four beads on both sides of my cut point)
3. When the hot glue is cooled, carefully cut the garland to your desired length.
4. Thread a needle with heavy-duty beige or invisible thread. Carefully attach the cut tassel trim to one side of your pillow by stitching a loop around the garland, between the first and second beads. (Note: I later found out that I was basically using a blanket stitch, but only in one spot.)
5. Repeat the stitch on the opposite side of the pillow between the last two beads.
That’s it! Fluff your tassels and garland as you like.
Things You Should Know:
1. Don’t be shy with the amount of hot glue you use, it’s vital to keeping everything together! The hot glue keeps the beads from falling off the garland after it is cut and also after the garland is attached to the pillow. Err on the side of too much, if necessary.
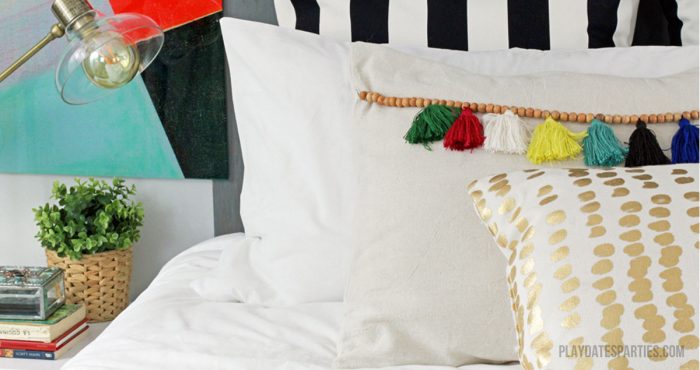
2. Longer pieces of garland will dip lower on your pillow once attached. However, they will also pull more on the sides of your pillowcase, causing it to wrinkle.
3. I chose to only attach the tassel garland to the outside edges of the pillow. The heavy-duty thread is pretty solid, but these pillows won’t be abused by our kids like other pillows are. Be warned that adding this trim to a pillow in a public area might need a few extra stitches for strength.
4. The trim is attached to pillow cases I made out of bleached drop cloth that was leftover from a previous project. They work together beautifully.
5. Our standard size pillowcases used up all but about 4 inches of the 5-foot garland.
6. The distance between the hanging loops of the garland and the first and last tassels is wider than the distance between each of the remaining tassels. I decided to work with it, but you may want to adjust your cutting points based on that knowledge.
How Long Did it Take?
Two pillows took about 45 minutes from the time I started heating up the glue gun, to the time I placed the pillows on my bed.
How Much Did it Cost?
- Tassel garland: $13
- Hot Glue Gun & Hot Glue: On hand
- Needle & Thread: On Hand
Total price: $13
Would I do it again?
Yes! The little bit of trim gives a lot of character to the pillows and to our bed overall. But tassels are hyper trendy. Since these tassels are only attached at the sides of the pillow, I know I can swap the trim out in a couple of years for something new.
Do you love the tassel trend?
Where would you add a tassel trim?
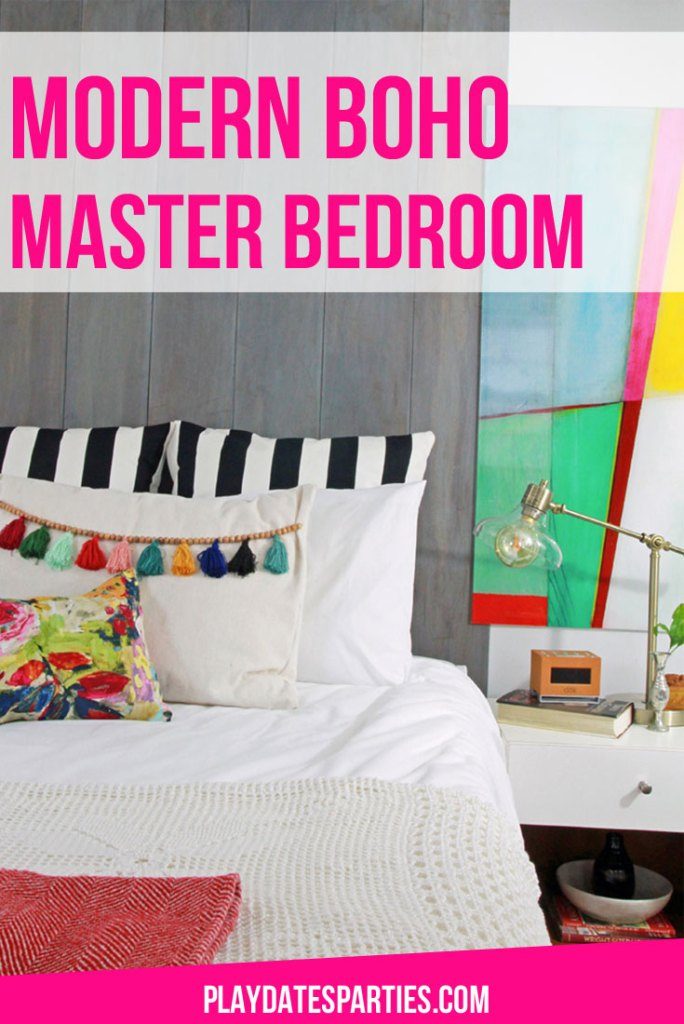
See the Rest of the Renovation:

Modern Boho Master Bedroom Reveal How to Make a Hidden Jewelry Holder 
How to Make Tassel Trim Pillows The Easy way 5 Easy Ways to Make Stunning Throw Pillows How to Make a Vertical Shiplap Headboard Master Bedroom Renovation: Week 5 Update Master Bedroom Renovation: Week 4 Update Master Bedroom Renovation: Week 3 Update 7 Practical and Pretty Storage Beds Painting Tips for People with No Time Modern Boho Master Bedroom Design Plan


I want to extend many thanks to the readers who have enjoyed renovation and home DIY posts over the years. Unfortunately, in January 2018 I was diagnosed with Stage II breast cancer and had to stop doing home renovation posts due to treatment.
Since that time, my focus has been on making this website an amazing resource for the everyday mom’s parties. Due to their popularity, the DIY posts and tutorials will remain on the website, but comments are now closed. Thank you again and I wish you the best in your DIY endeavors!


Victoria at DazzleWhileFrazzled says
Great hack! Much easier than making your own tassels, which would probably require something really good be on TV!!
sHANIA says
Hey there! I found your tutorial at the HomeStories linky party, I’m loving the tassel pillows, so festive and simply made!
-Shania
http://www.shaniamason.com
Becky says
What a cute little addition and so easy to remove when you’re done with it!
moois van mie says
I love them, they are so joydful!
Carol ("Mimi") says
I love that tassel garland from Target . . . must go and check it out. Your pillows look amazing! The trim adds such a great touch of color, texture, and whimsy to the throw pillows for your bed. What a nice addition to our room.
Julie says
I love the tassel trim pillows.
Thanks for sharing this tutorial with us at Cooking and Crafting with J&J!
Enjoy the week.
Julie
Caryn says
This is so awesome. Like you said, I feel like tassels are everywhere the last few years. I just bought a purse and have a few blankets, too. Boy would a pillow be a great accent. Thanks.
Annie says
I was wondering what our master bedroom has been missing… these are darling!
Julie says
I love a good tassel project! This looks super cute, definitely not a pillow to fall asleep leaning on though – I’m imagining waking up with a substantial bead imprint across my face!!
Michelle Leslie says
I must admit I’m really glad tassles have come back into fashion. I’ve always loved them. Thank you for sharing the easy way to trim a pillow with tassles Leslie and all the tips. It fits so beautifully with the boho look we’re trying to achieve in our lounge.
Sandra L Garth says
This is exactly the kind of decor my pillows need! Thank you for the inspiration! Thank you for sharing with us this week at Celebrate Your Story, and have a great weekend.
Jessica says
I love the punch of color that the tassels add! I’m always looking for décor that will last through the trends too, so it’s awesome that the trim can be removed and the pillow used again in a different style.
Angie ~ ambient wares says
Super idea! I’ve never thought to do something like this and it looks wonderful! Thank you for sharing with us at Funtastic Friday, Leslie! Pinned & sharing
Dean @Mrs. AOK, A Work In Progress.com says
Love these pillows!! Pinning this one for sure. Thanks for sharing with us at #MMBH!
xo
Theresa says
I’d love to try this on a few pillows. Thanks for sharing at the #InspirationSpotlight party @DearCreatives Pinned & shared.
STEPHANIE ABBOTT says
I love this pillow! Featuring it tonight at the To Grandmas House We Go link party. And scheduled to Pinterest.
Janice Wald says
Thanks for bringing your craft to last week’s Blogger’s Pit Stop.
Janice, Pit Stop Crew
Jennifer Dawn says
I love the pillow! So fun! I’m featuring this at our weekly link party. https://www.thelifeofjenniferdawn.com/2017/06/makeover-ideas-for-every-room-of-your.html
Carol says
This turned out great! Featuring when my party opens up tonight. Thanks for sharing.
Emily @DomesticDeadline.com says
Very cute and a great alternative to the expensive options on the market! Thanks for linking up to #HomeMattersParty
Kathryn Griffin says
I love a good tassel pillow! Thanks for sharing! You are one of the features at the Make it Pretty Monday party at The Dedicated House. Here’s the link to this week’s bash. https://www.thededicatedhouse.com/2017/06/make-pretty-monday-week-216.html Hope you have a lovely week. Toodles, Kathryn @TheDedicatedHouse