Red Velvet Cookie Sandwiches are pillowy soft with a tangy sweet center. They’re also super easy to make thanks to this red velvet cake mix cookie recipe and pre-made frosting.
They’re perfect for all your cookie trays and celebrations: Christmas, Valentine’s Day, 4th of July, Mother’s Day, barnyard parties, and kids tea parties.

Why We Love Red Velvet Cookie Sandwiches
- They’re gorgeous. With layers of deep red cookies, and a creamy white center, they elevate cookies to a whole new level.
- So easy to make. By adapting a boxed cake mix, you can have these cookies ready in a snap.
- They’re delicious. The combination of red velvet and cream cheese frosting is classic for a reason – it’s irresistible!
What You’ll Need:
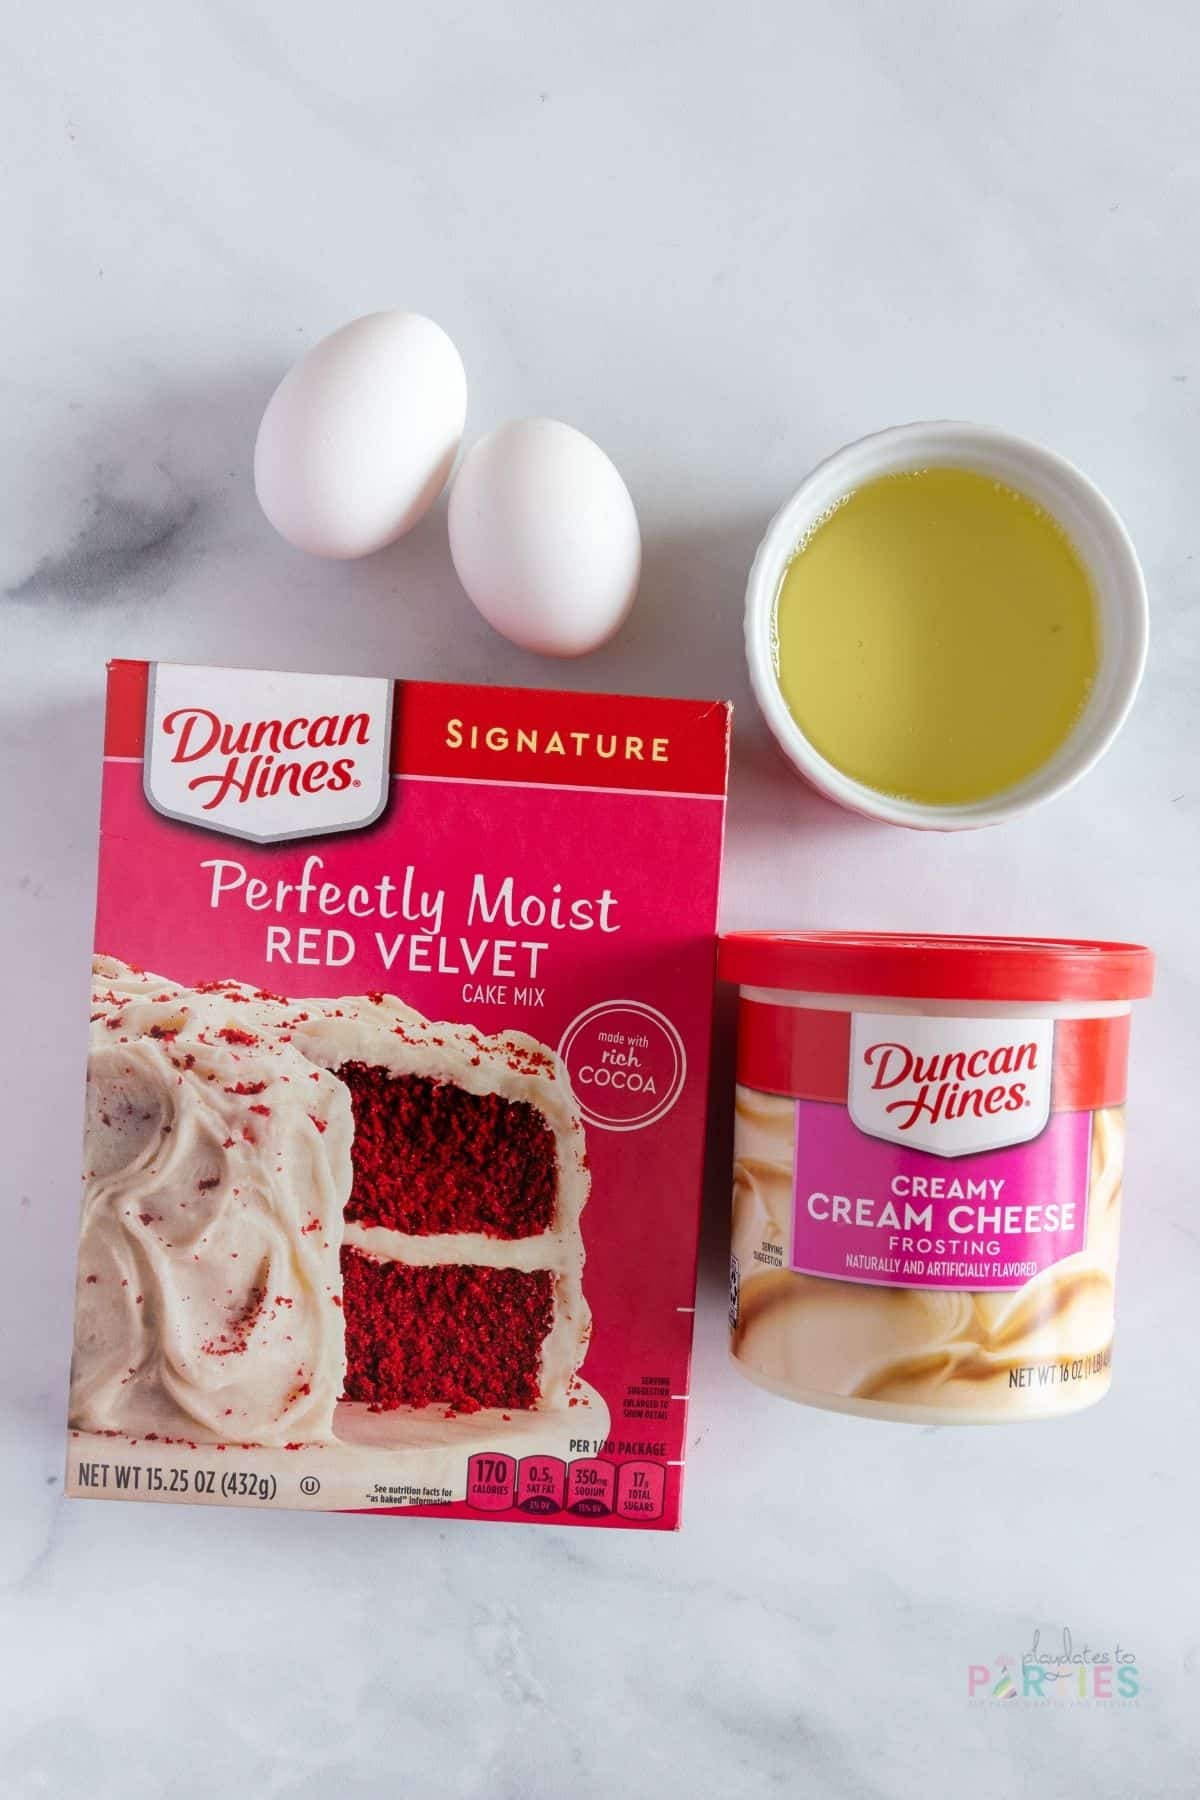
Ingredients:
- Red velvet cake mix
- Eggs
- Vegetable oil
- Cream cheese frosting
Supplies:
- Large mixing bowl
- Mixing spoon or spatula
- Measuring cups and spoons
- Cookie scoop
- Baking pan
- Parchment paper
- Offset Spatula
How To Make Red Velvet Sandwich Cookies:
To make things even easier for you, I created a simple photo guide below. For all measurements and a more detailed guide, check out the recipe card at the bottom of this page.
Make the Cookies:
Step 1 – Preheat your oven to 350˚F and prepare a baking sheet with parchment paper. Set aside.
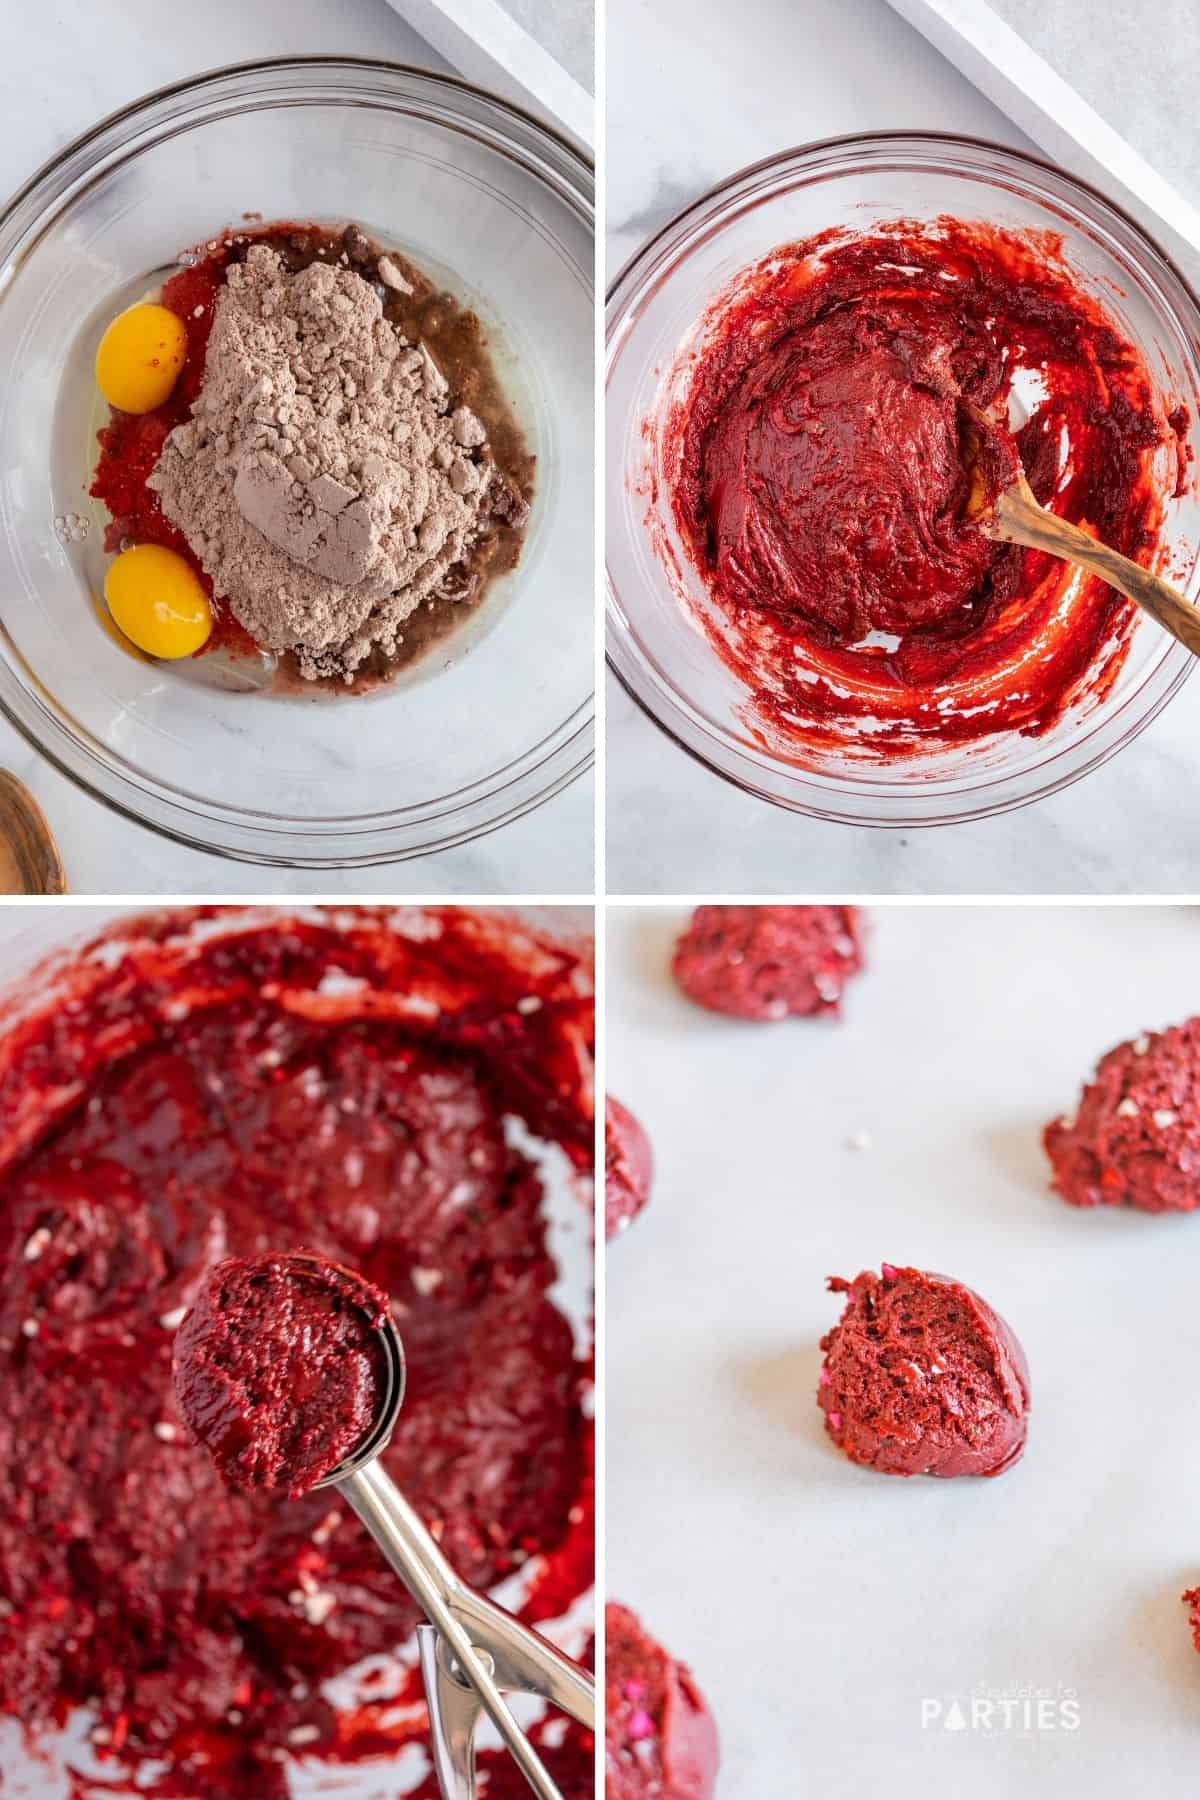
Step 2 – In a large mixing bowl combine 1 box red velvet cake mix, 1/2 cup vegetable oil, and 2 eggs.
Step 3 – Fold together until you see no more pockets of dry cake mix. The batter will be thick.
Step 4 – Use a small cookie scoop (about 1 tablespoon in size) to measure out round dough balls. Place each of the scooped batter balls onto your prepared pan, about 2-3 inches apart.
Step 5 – Bake at 350˚F for 10 minutes. Allow to cool completely on the pan.
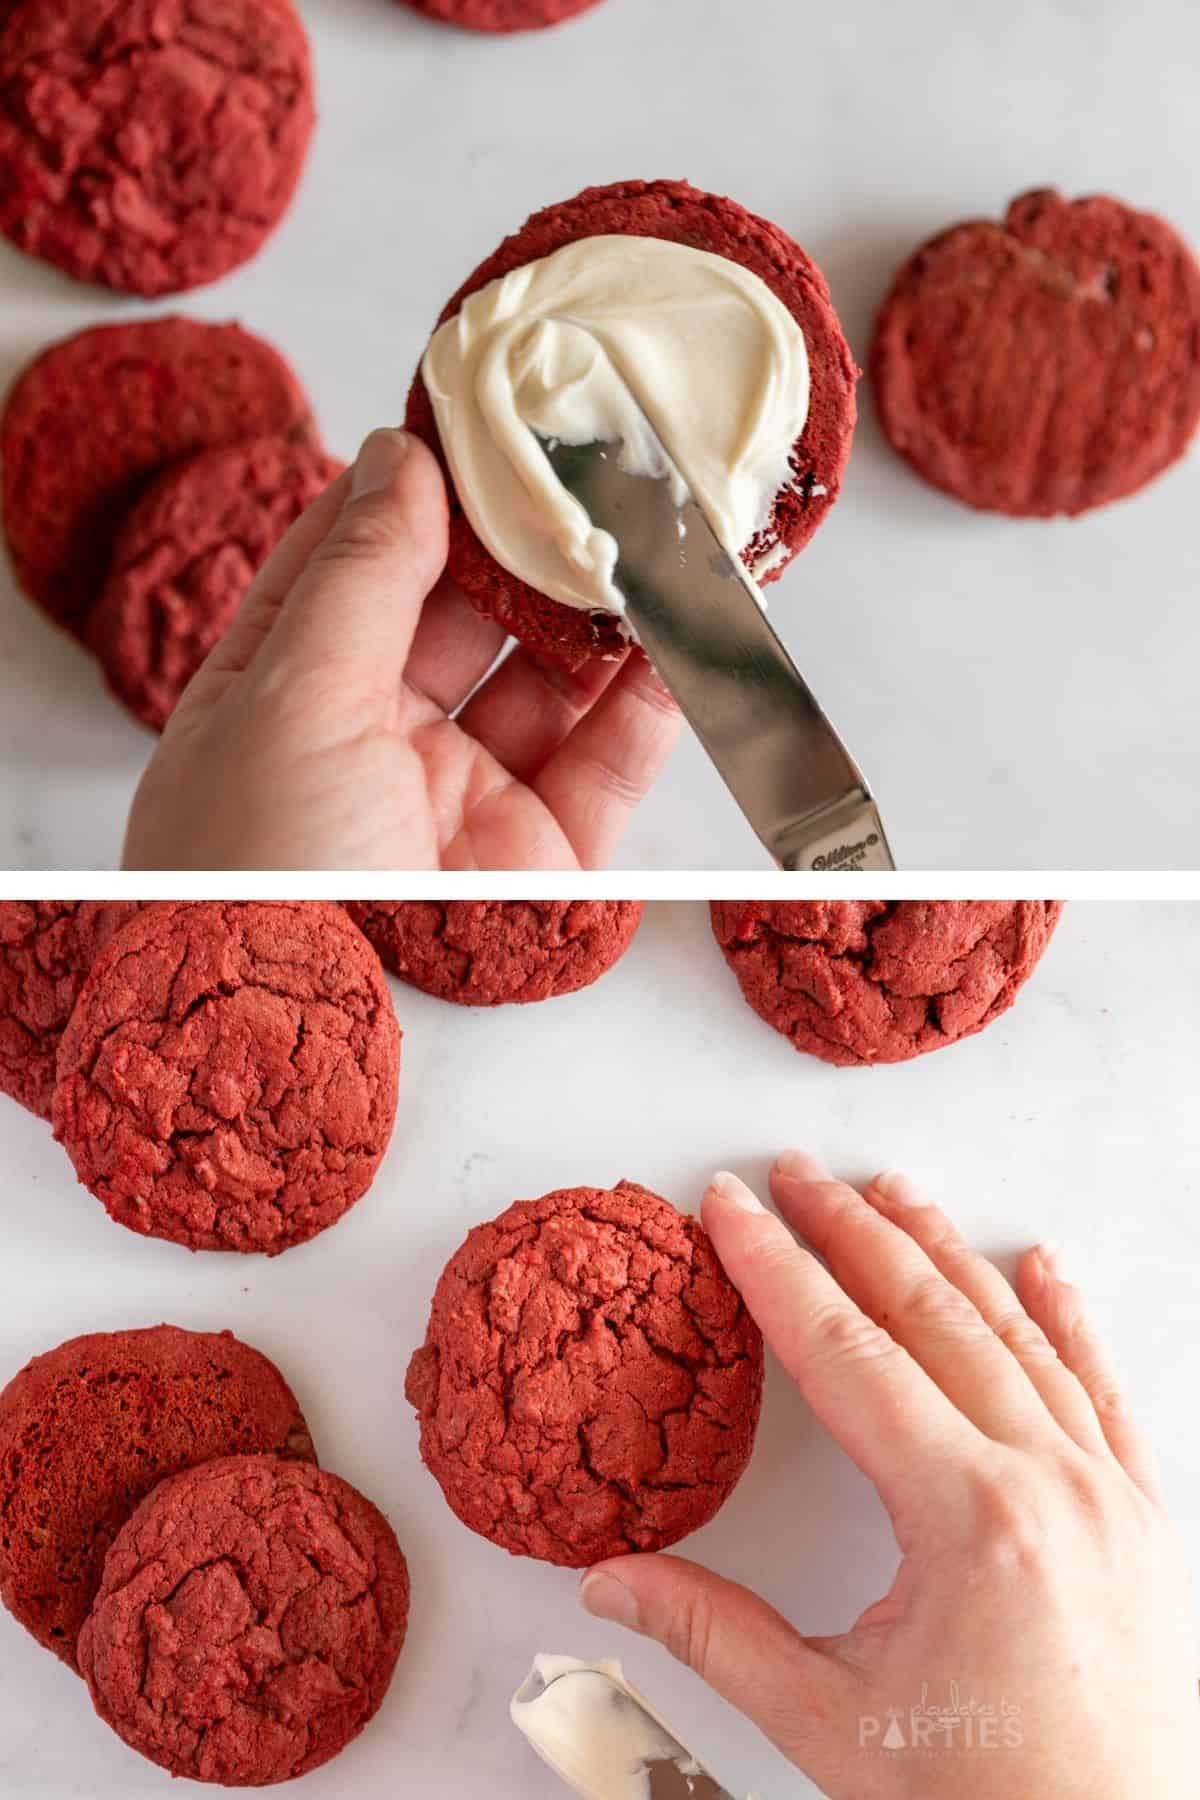
Assemble Cookie Sandwiches:
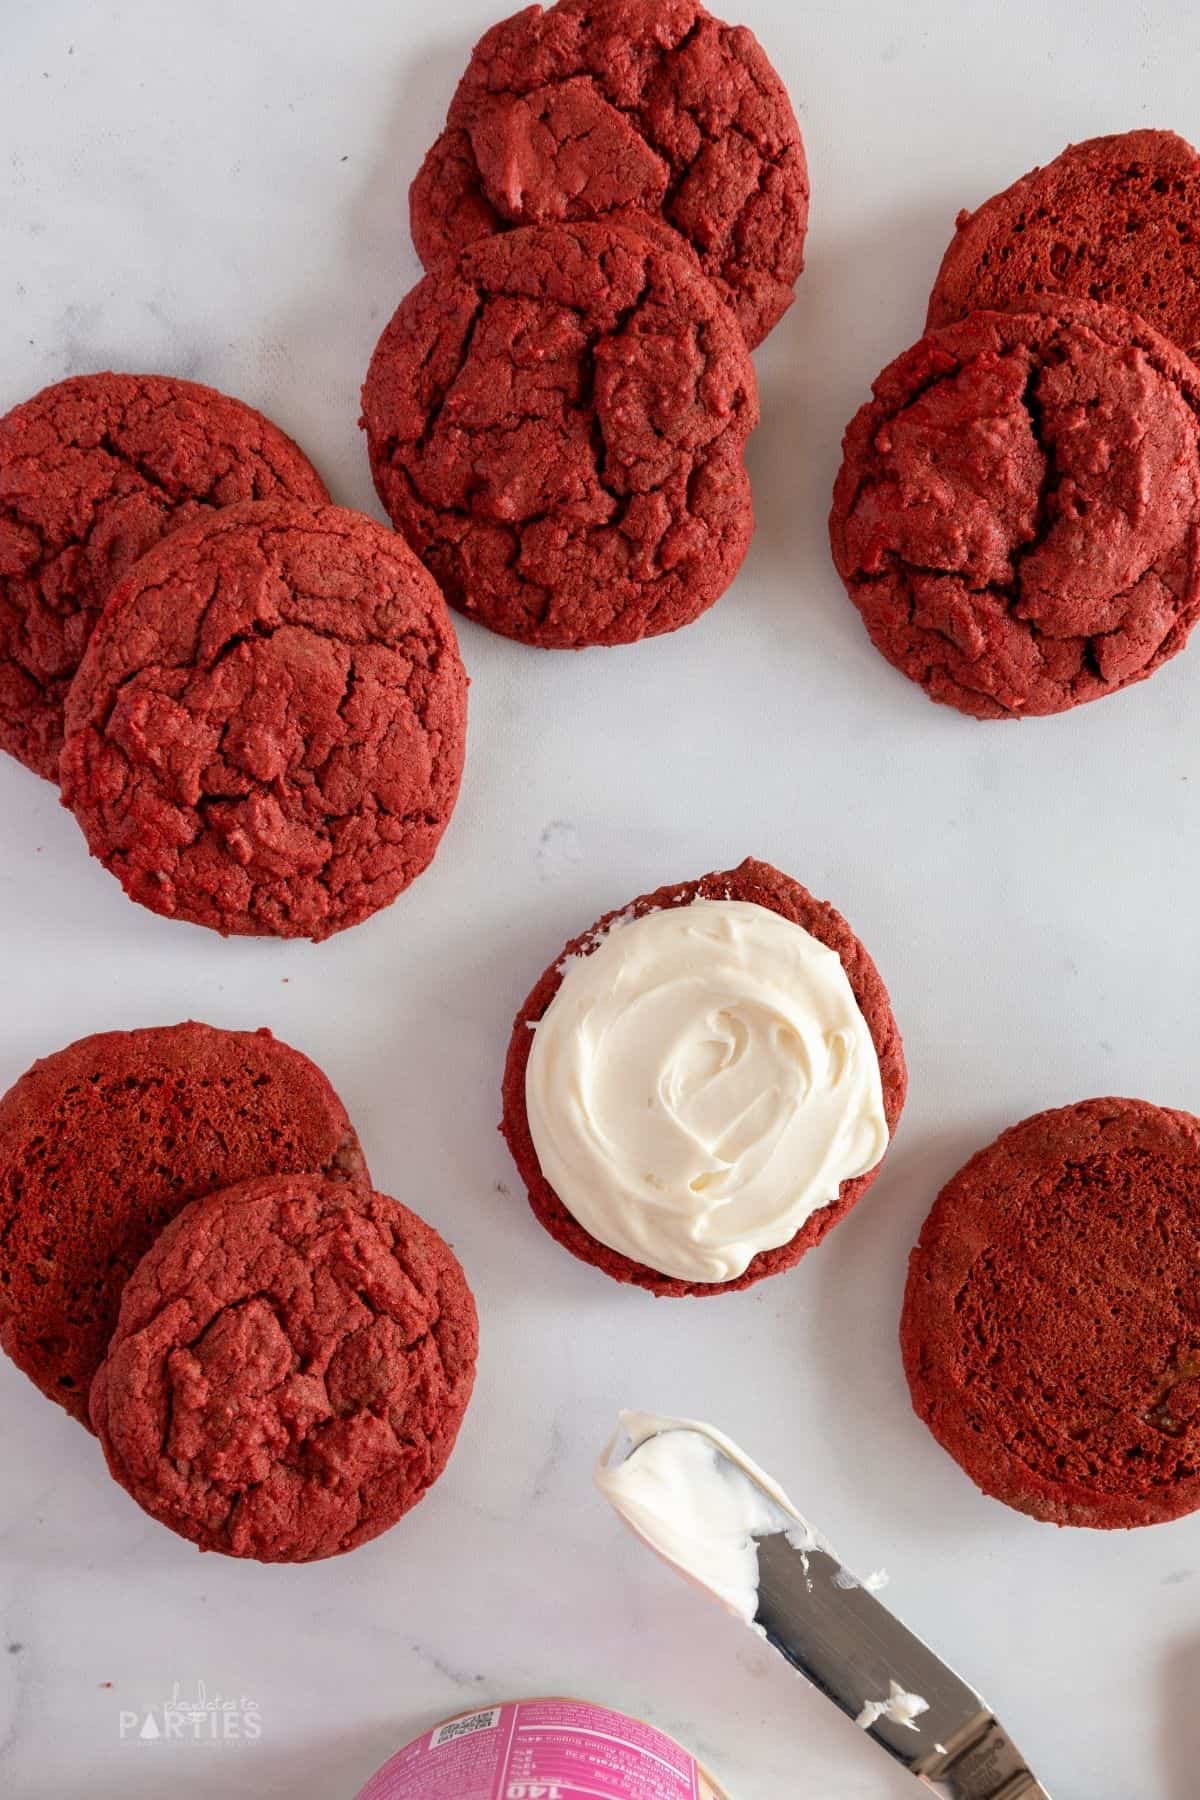
Step 6 – Use an offset spatula, or the back of a spoon to spread about 1 tablespoon cream cheese frosting on the bottom of a cookie.
Step 7 – Then place the bottom of another cookie on top to create a sandwich. Repeat until all cookies are used up.
Substitutions and Variations
- Red velvet cake mix – If you have a favorite from scratch red velvet cookie recipe, feel free to use that.
- Frosting – Cream cheese is the classic combination, but you could also use white frosting, marshmallow fluff, chocolate ganache, or use the frosting from our Oreo cupcakes (without the Oreo bits) for homemade Red Velvet Oreos.
- Add sprinkles – If you’re making these for a holiday, themed sprinkles are a fun addition! Add some to the top of the cookies before baking, or roll the edges in sprinkles for a festive touch.

Essential Tips:
Don’t skip these tips – read them before baking to avoid any potential mistakes.
- Using a cookie scoop makes it so much easier to ensure your cookies are as similar in size as possible, which makes pairing the cookies together so much easier.
- Make sure your cookies are completely cooled before adding the frosting. If they’re warm at all, the frosting will melt into a sticky mess.
- Match up your pairs of cookies before adding the frosting. This way you’ll be able to work quickly and won’t have to worry about lopsided cookie sandwiches.
FAQs:
Do I have to refrigerate red velvet cookie sandwiches?
Yes…and no. If you’ll be serving these within a few hours, they can sit out at room temperature.
However, if it’s hot and humid or if you’ll be storing them for longer than a day, I recommend refrigerating them. Just make sure to bring them back to room temperature before enjoying them.
Can I Freeze Red Velvet Cookie Sandwiches?
They will most likely be fine, honestly, these are usually gone so quickly I haven’t had the chance to test freezing them.
You can definitely freeze the individual cookies and assemble them quickly after defrosting. Just make sure to freeze the cookies between layers of parchment or wax paper, and in a hard sided container like this one. Otherwise, the cookies could stick to each other, or get crushed.

How Many Will I Need for My Party?
Using a cookie scoop, you should get at least 12 cookie sandwiches, but could get more if you make sure to keep the cookies on the small side.
If you want to an easy way to figure out how many cookie sandwiches you need for your next party, you can download our free cheat sheet! It shows exactly how much food you need to for everything from ice and drinks all the way to finding the perfect size birthday cake.
Grab your copy at the end of this post and always be confident that you’ll be prepared.
Great for Gifts!
These are such a delicious gift to make for the holidays. Make sure to put them in a cookie tin or container to protect them, and don’t forget to add a cute printable tag so everyone will know that you made these amazing cookies.

How to Store Red Velvet Cookie Sandwiches
To Store Cookie Sandwiches: Refrigerate your cookie sandwiches in an airtight container for up to 1 week. Allow the cookie sandwiches to come to room temperature for about 30 minutes before enjoying.
To freeze the dough: Scoop the dough into balls. Then freeze on a wax or parchment covered baking sheet. When the dough balls are solid, transfer them to a gallon size freezer bag (or two) for up to 1 month.
To bake from frozen: Preheat your oven to 350˚F. Place frozen cookie dough balls on a baking sheet lined with parchment paper. Bake for 12-15 minutes, or until cookies are just set, but not too firm around the edges.

If you liked my Red Velvet Cookie sandwiches, you’re going to love my double chocolate chip cookies. They’re full of decadent chocolate flavor, and even have adaptations so you can get three different cookies from one batch.
Or you can check out all my desserts recipes here.
Red Velvet Cookie Sandwiches

Red velvet cookie sandwiches are soft, sweet, and the perfect bite sized version of your favorite red velvet cake. Enjoy them for holidays, parties, or even as an afternoon snack.
Ingredients
- 1 box red velvet cake mix (see notes)
- 2 eggs
- ½ cup vegetable oil
- 1 cup cream cheese frosting
Instructions
- Preheat your oven to 350˚F and prepare a baking sheet with parchment paper. Set aside.
- In a large mixing bowl combine 1 box red velvet cake mix, 1/2 cup vegetable oil, and 2 eggs.
- Fold together until you see no more pockets of dry cake mix. The batter will be thick.
- Use a small cookie scoop (about 1 tablespoon in size) to measure out round dough balls. Place each of the scooped batter balls onto your prepared pan, about 2-3 inches apart.
- Bake at 350˚F for 10 minutes. Allow to cool completely on the pan.
- Spread about 1-2 tablespoons of cream cheese frosting on the bottom of a cookie. Then place another, similar sized cookie on top to create a sandwich. Repeat until all cookies are used up.
Notes
Remember, the step-by-step photos and FAQ in the recipe post are there to help you if you feel stuck at any point.
- Using a cookie scoop makes it so much easier to ensure your cookies are as similar in size as possible, which makes pairing the cookies together so much easier.
- Make sure your cookies are completely cooled before adding the frosting. If they're warm at all, the frosting will melt into a sticky mess.
- Match up your pairs of cookies before adding the frosting. This way you'll be able to work quickly and won't have to worry about lopsided cookie sandwiches.
Recommended Products
As an Amazon Associate and member of other affiliate programs, I earn from qualifying purchases.


Nutrition Information:
Yield:
12Serving Size:
1 cookie sandwichAmount Per Serving: Calories: 202Total Fat: 15gSaturated Fat: 3gTrans Fat: 0gUnsaturated Fat: 11gCholesterol: 39mgSodium: 75mgCarbohydrates: 16gFiber: 0gSugar: 14gProtein: 1g
__________________________________ The nutrition information provided above is estimated using an automated calculation system. Actual nutrition will vary depending on brand and measurements used in your recipe. To obtain the most accurate representation of the nutrition information for any given recipe, you should calculate the nutritional information using the actual ingredients you used in your recipe.

This post was originally published on February 25, 2011. It has been updated with a new recipe, new photos, and a detailed step-by-step guide.


Ashley says
So delicious looking!
Krafty Kat says
Yummy! Thanks for linking up!